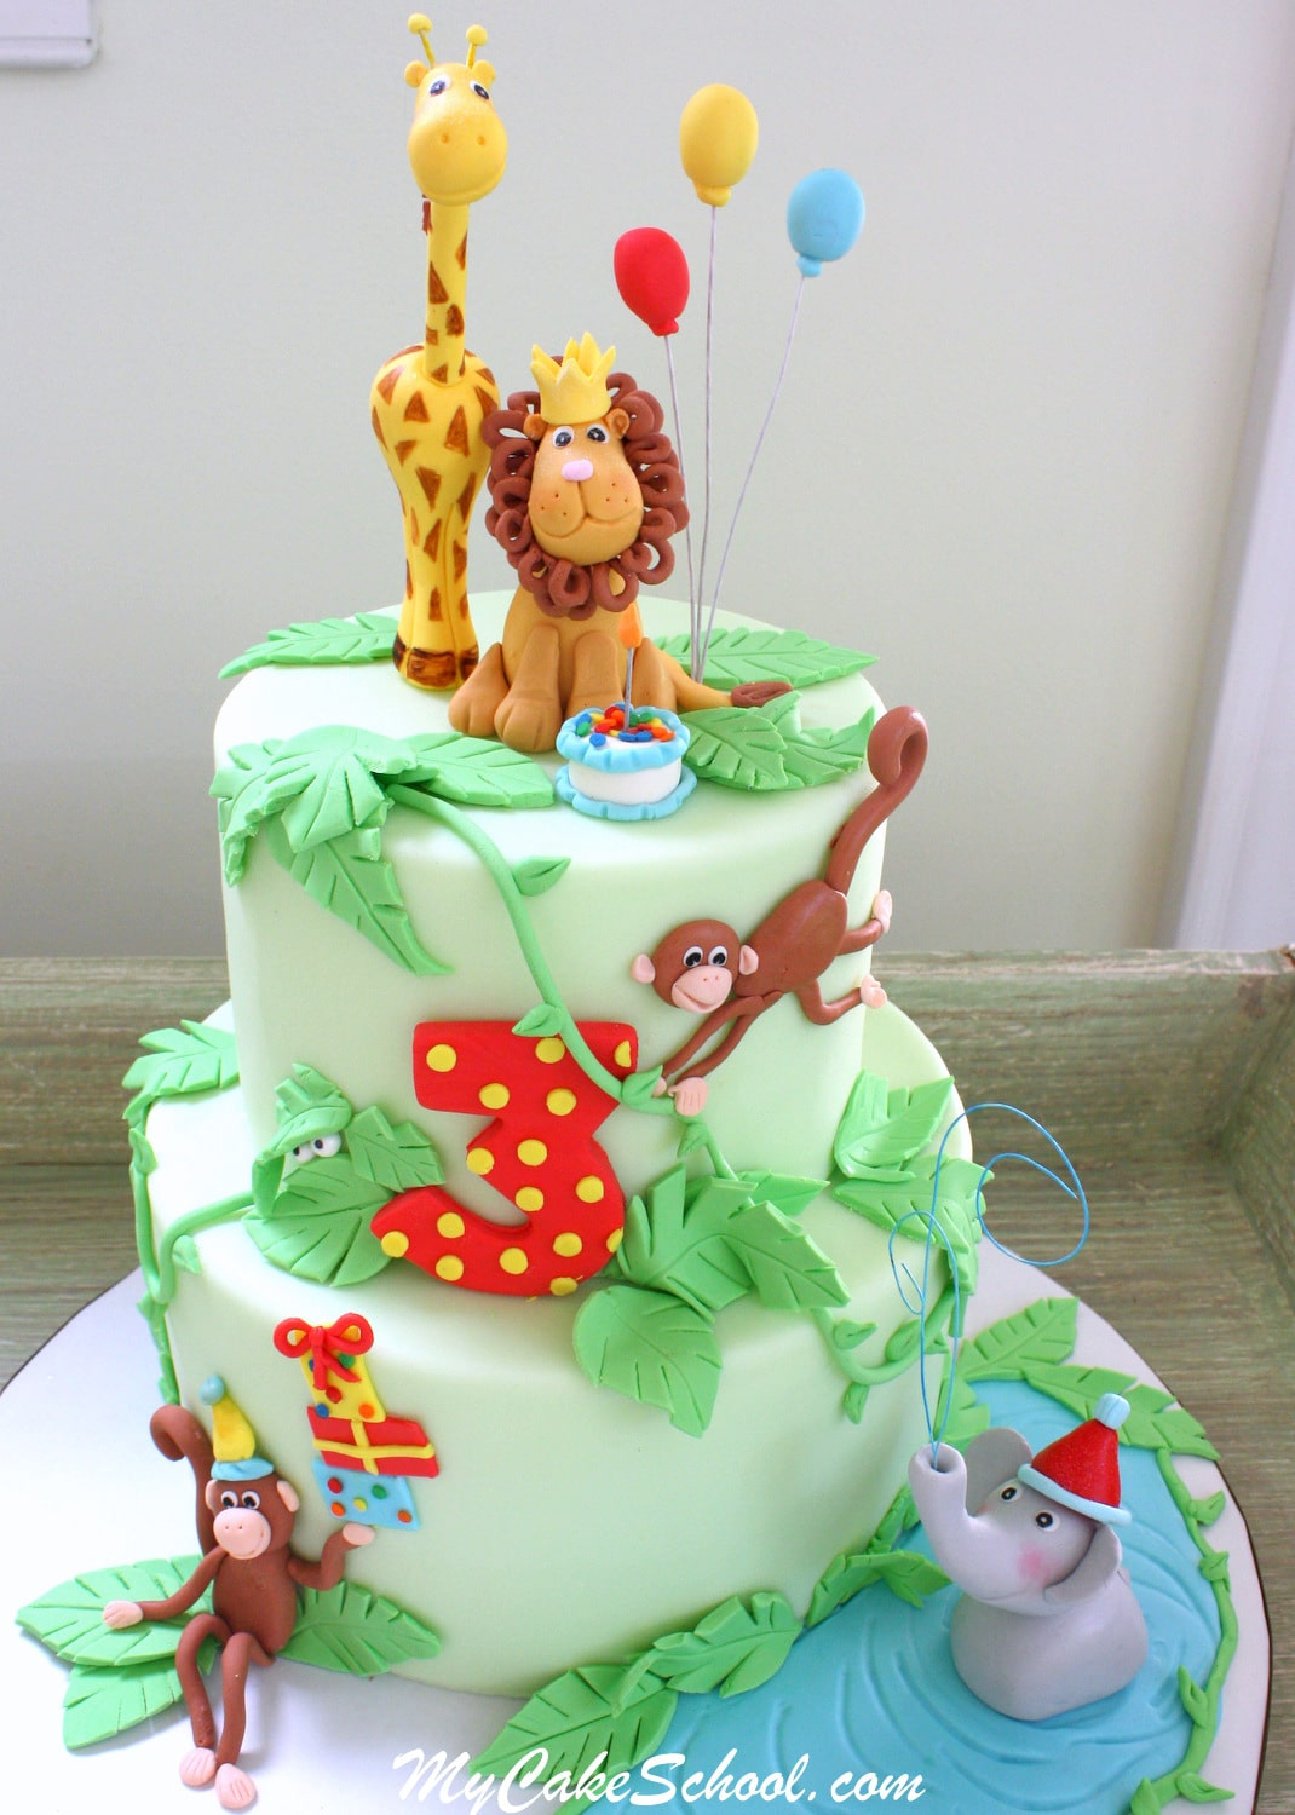
Jungle Cake
Jungle Cake themes never go out of style for little ones. There are so many fun design options to choose from, and today we're going to show you how to make an adorable cake design for a jungle themed birthday party!
If you are looking for birthday cake ideas or even design inspiration for baby shower cakes, this is a great one.
Table of Contents
Why we Love It
There are so many reasons to love this sweet Jungle Cake tutorial! Here are just a few:
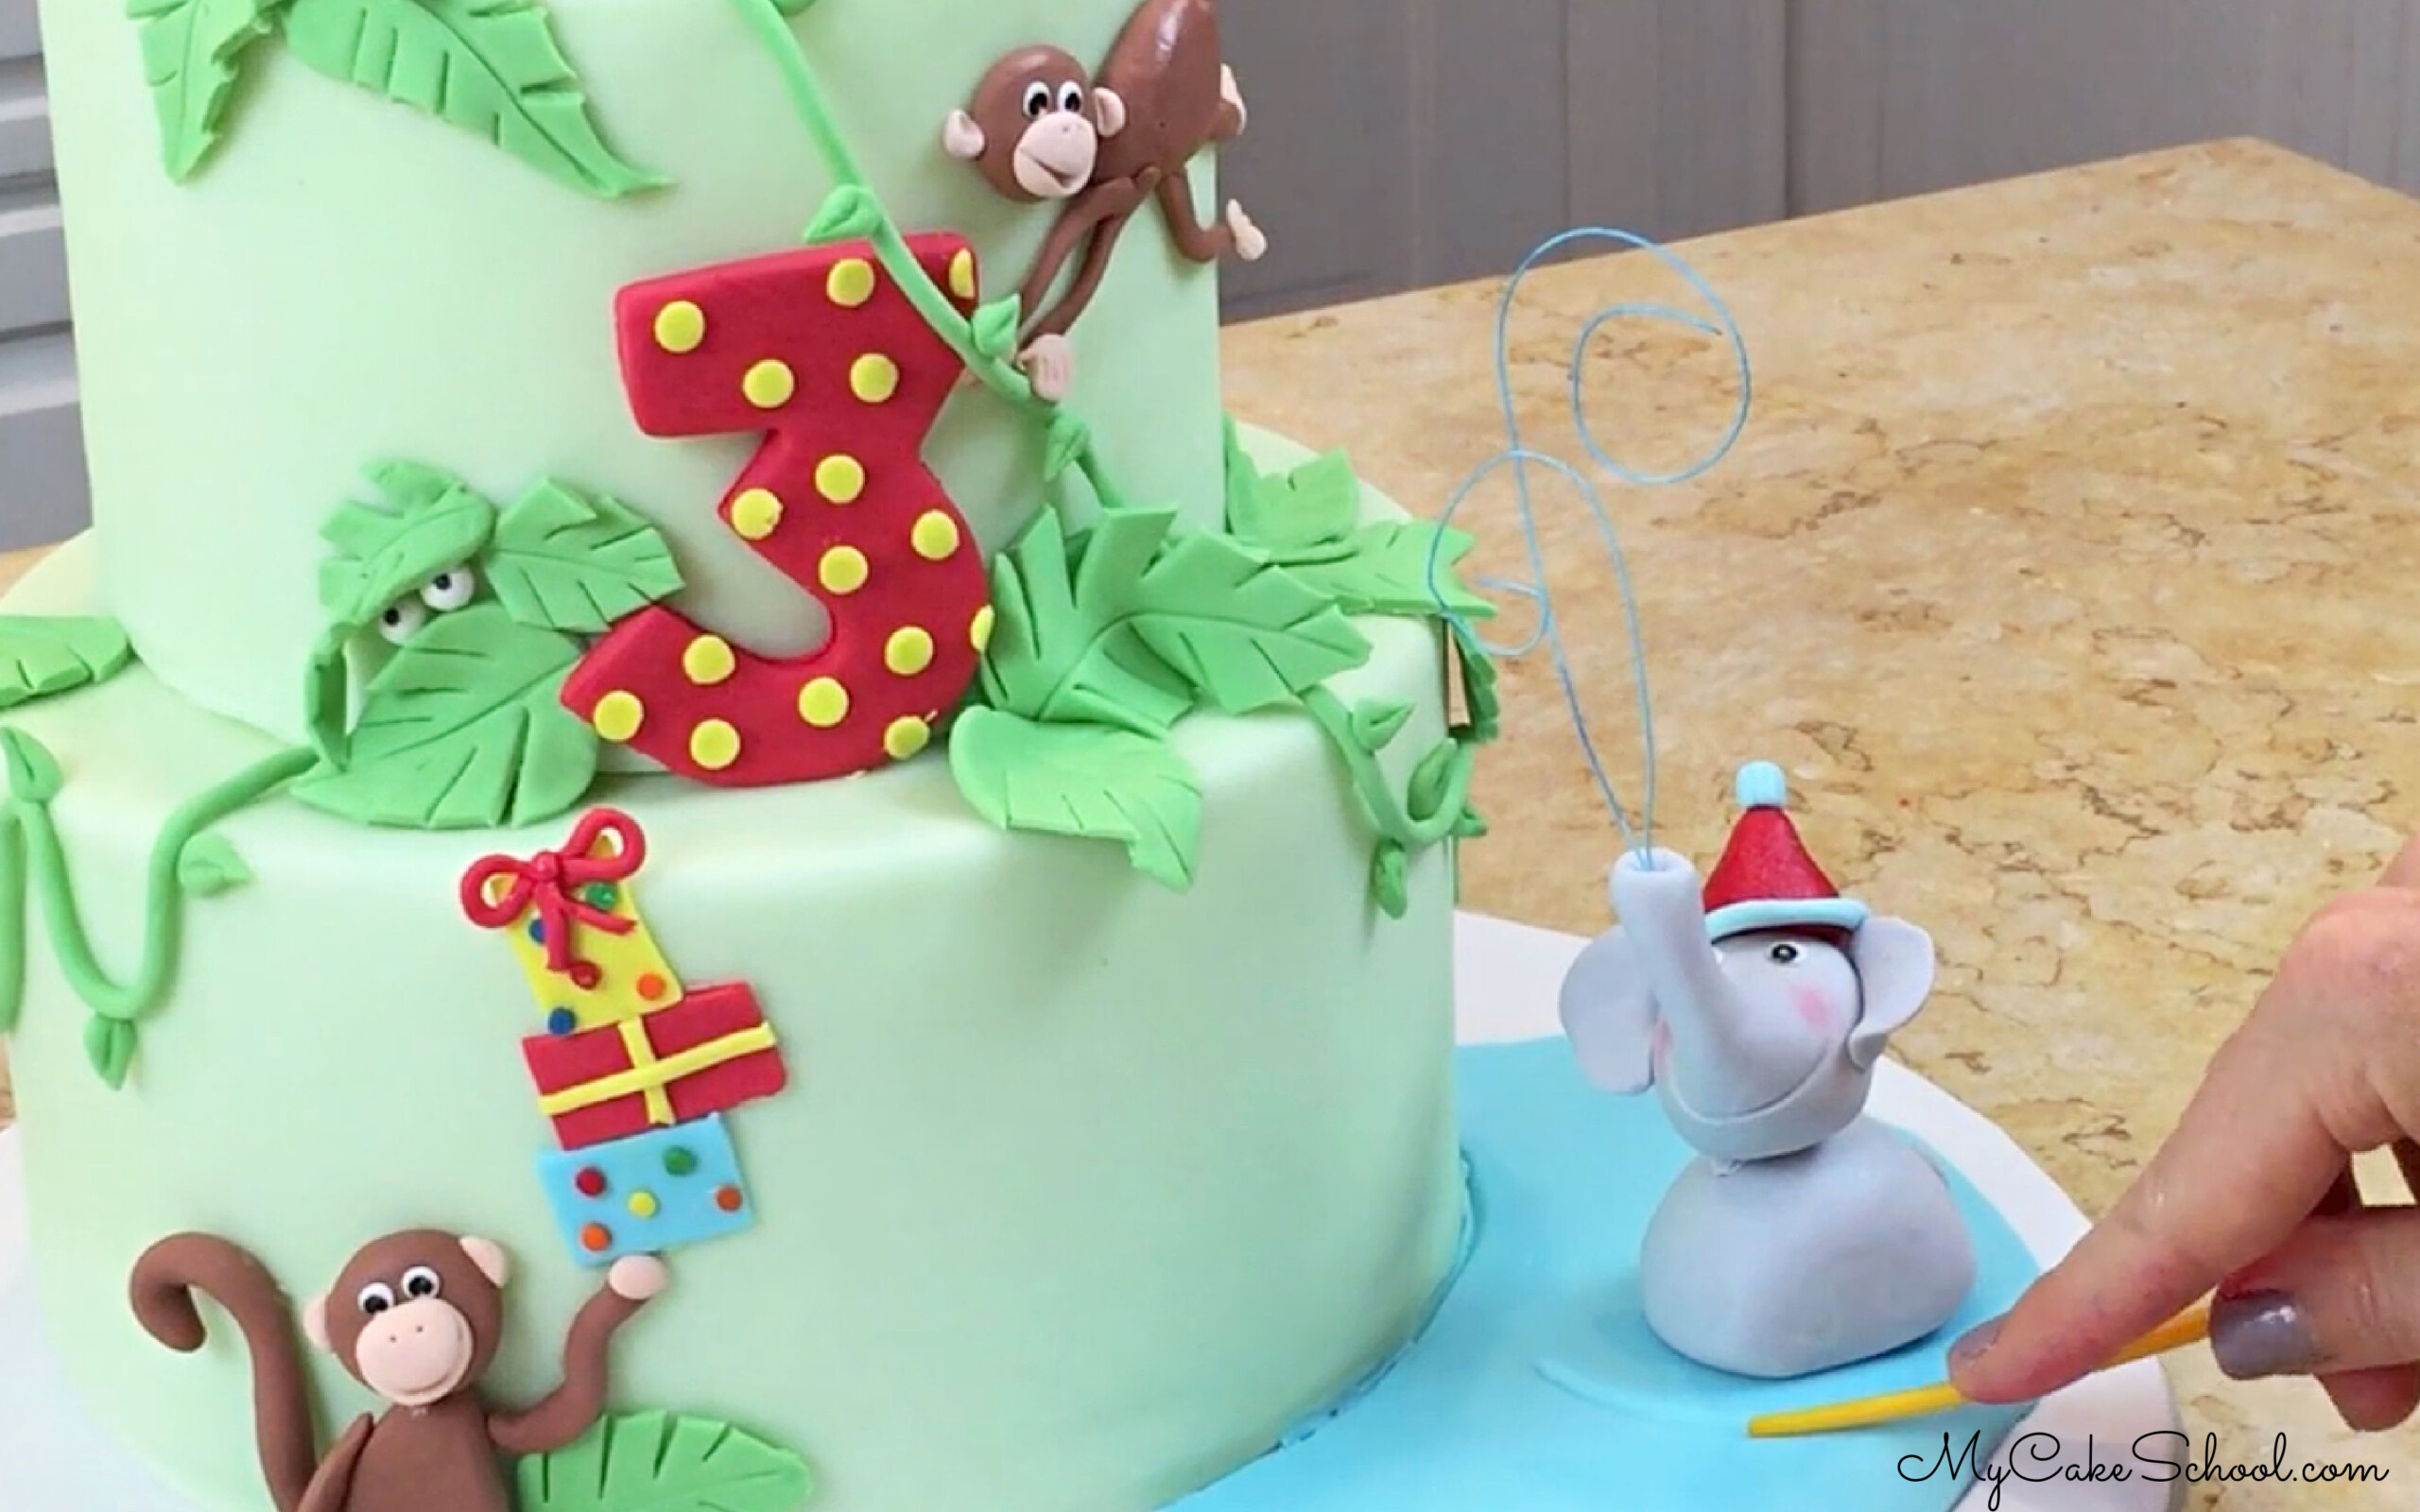
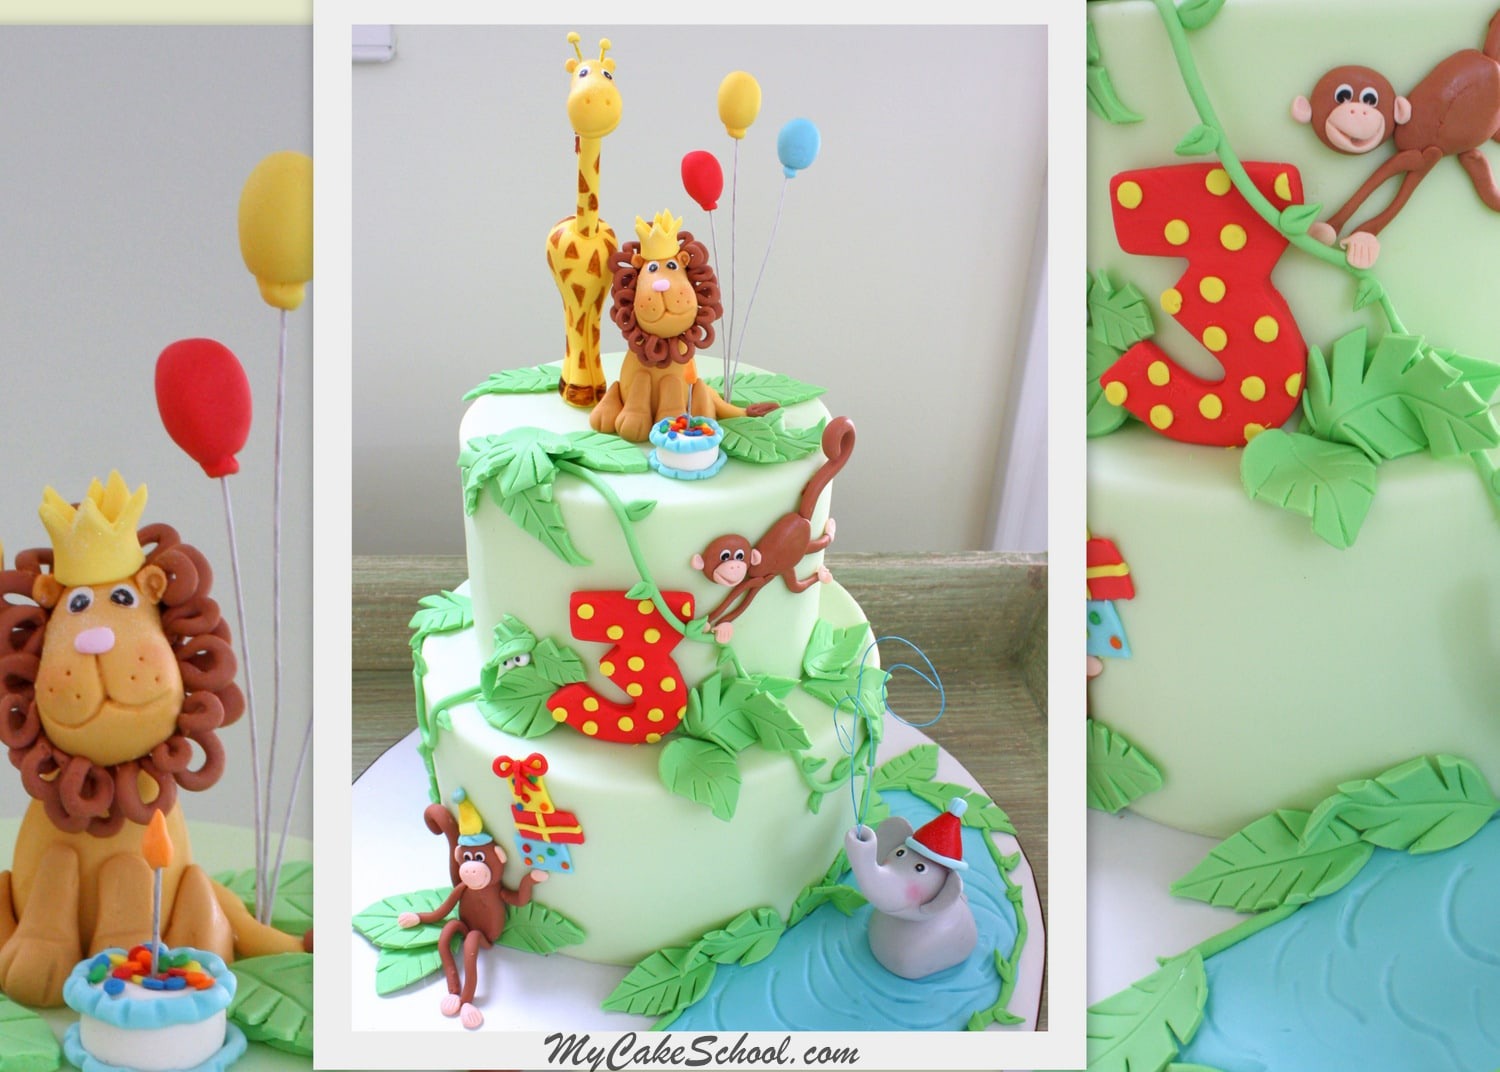
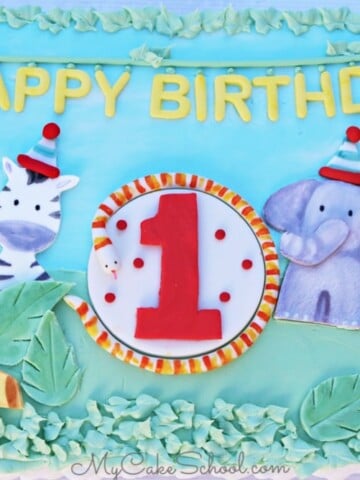
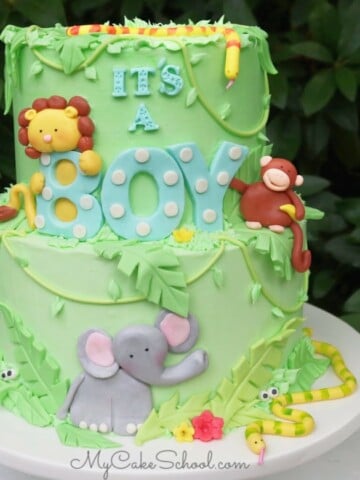
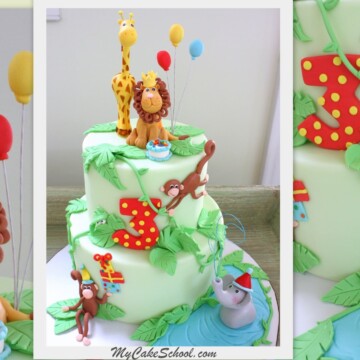
- In this Jungle Cake video, you will learn to model several fondant or gum paste jungle animal cake toppers, as well as how to create simple accents to bring your jungle cake design to life!
- You will learn how to make a lion and giraffe cake topper, as well as sweet fondant monkeys and a 3D fondant elephant!
- Don't be intimidated by this design- we will show you exactly how to make each animal, but you may also like to just choose one or two favorites!
This jungle cake design could be transferred to cakes of any size (including sheet cakes) with just a few adjustments here and there. This jungle cake tutorial is just meant to give you some ideas. Have fun with it!
You may also like to check out our jungle sheet cake!
How to Make a Jungle Theme Cake
You can find the full details in our cake decorating video as well as our recipe card below or how to make a jungle cake. Here is a quick look at our steps!
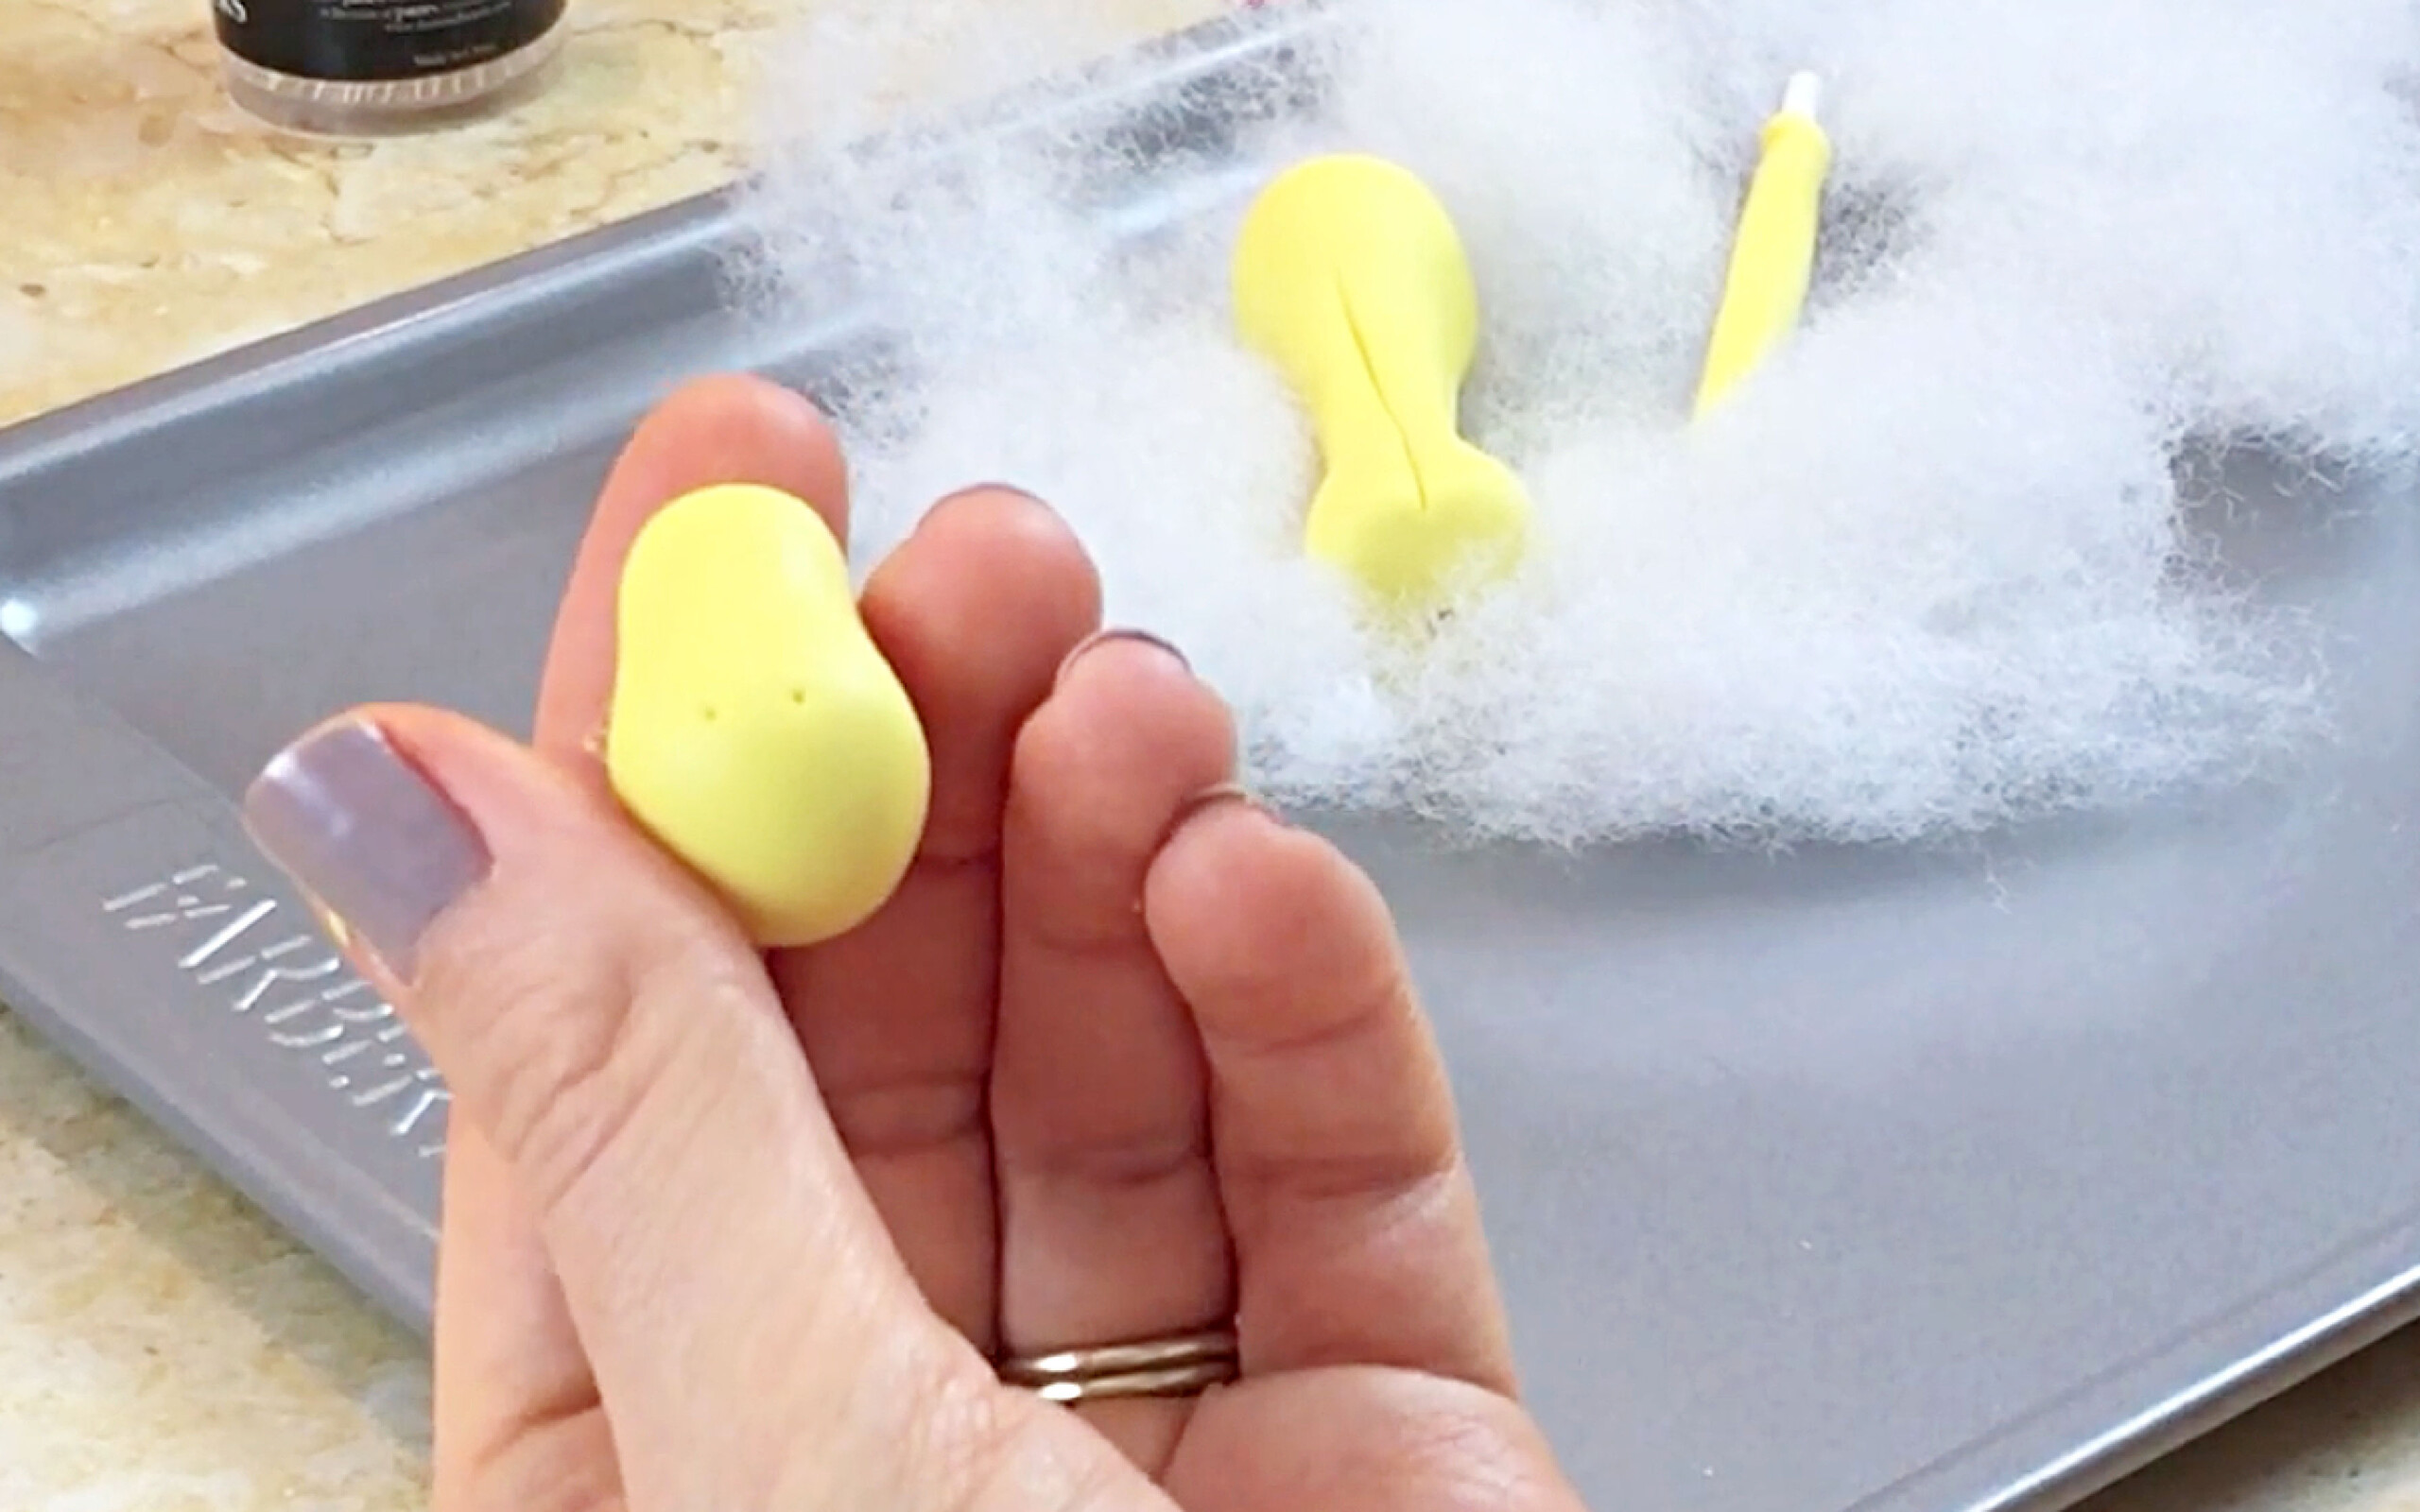
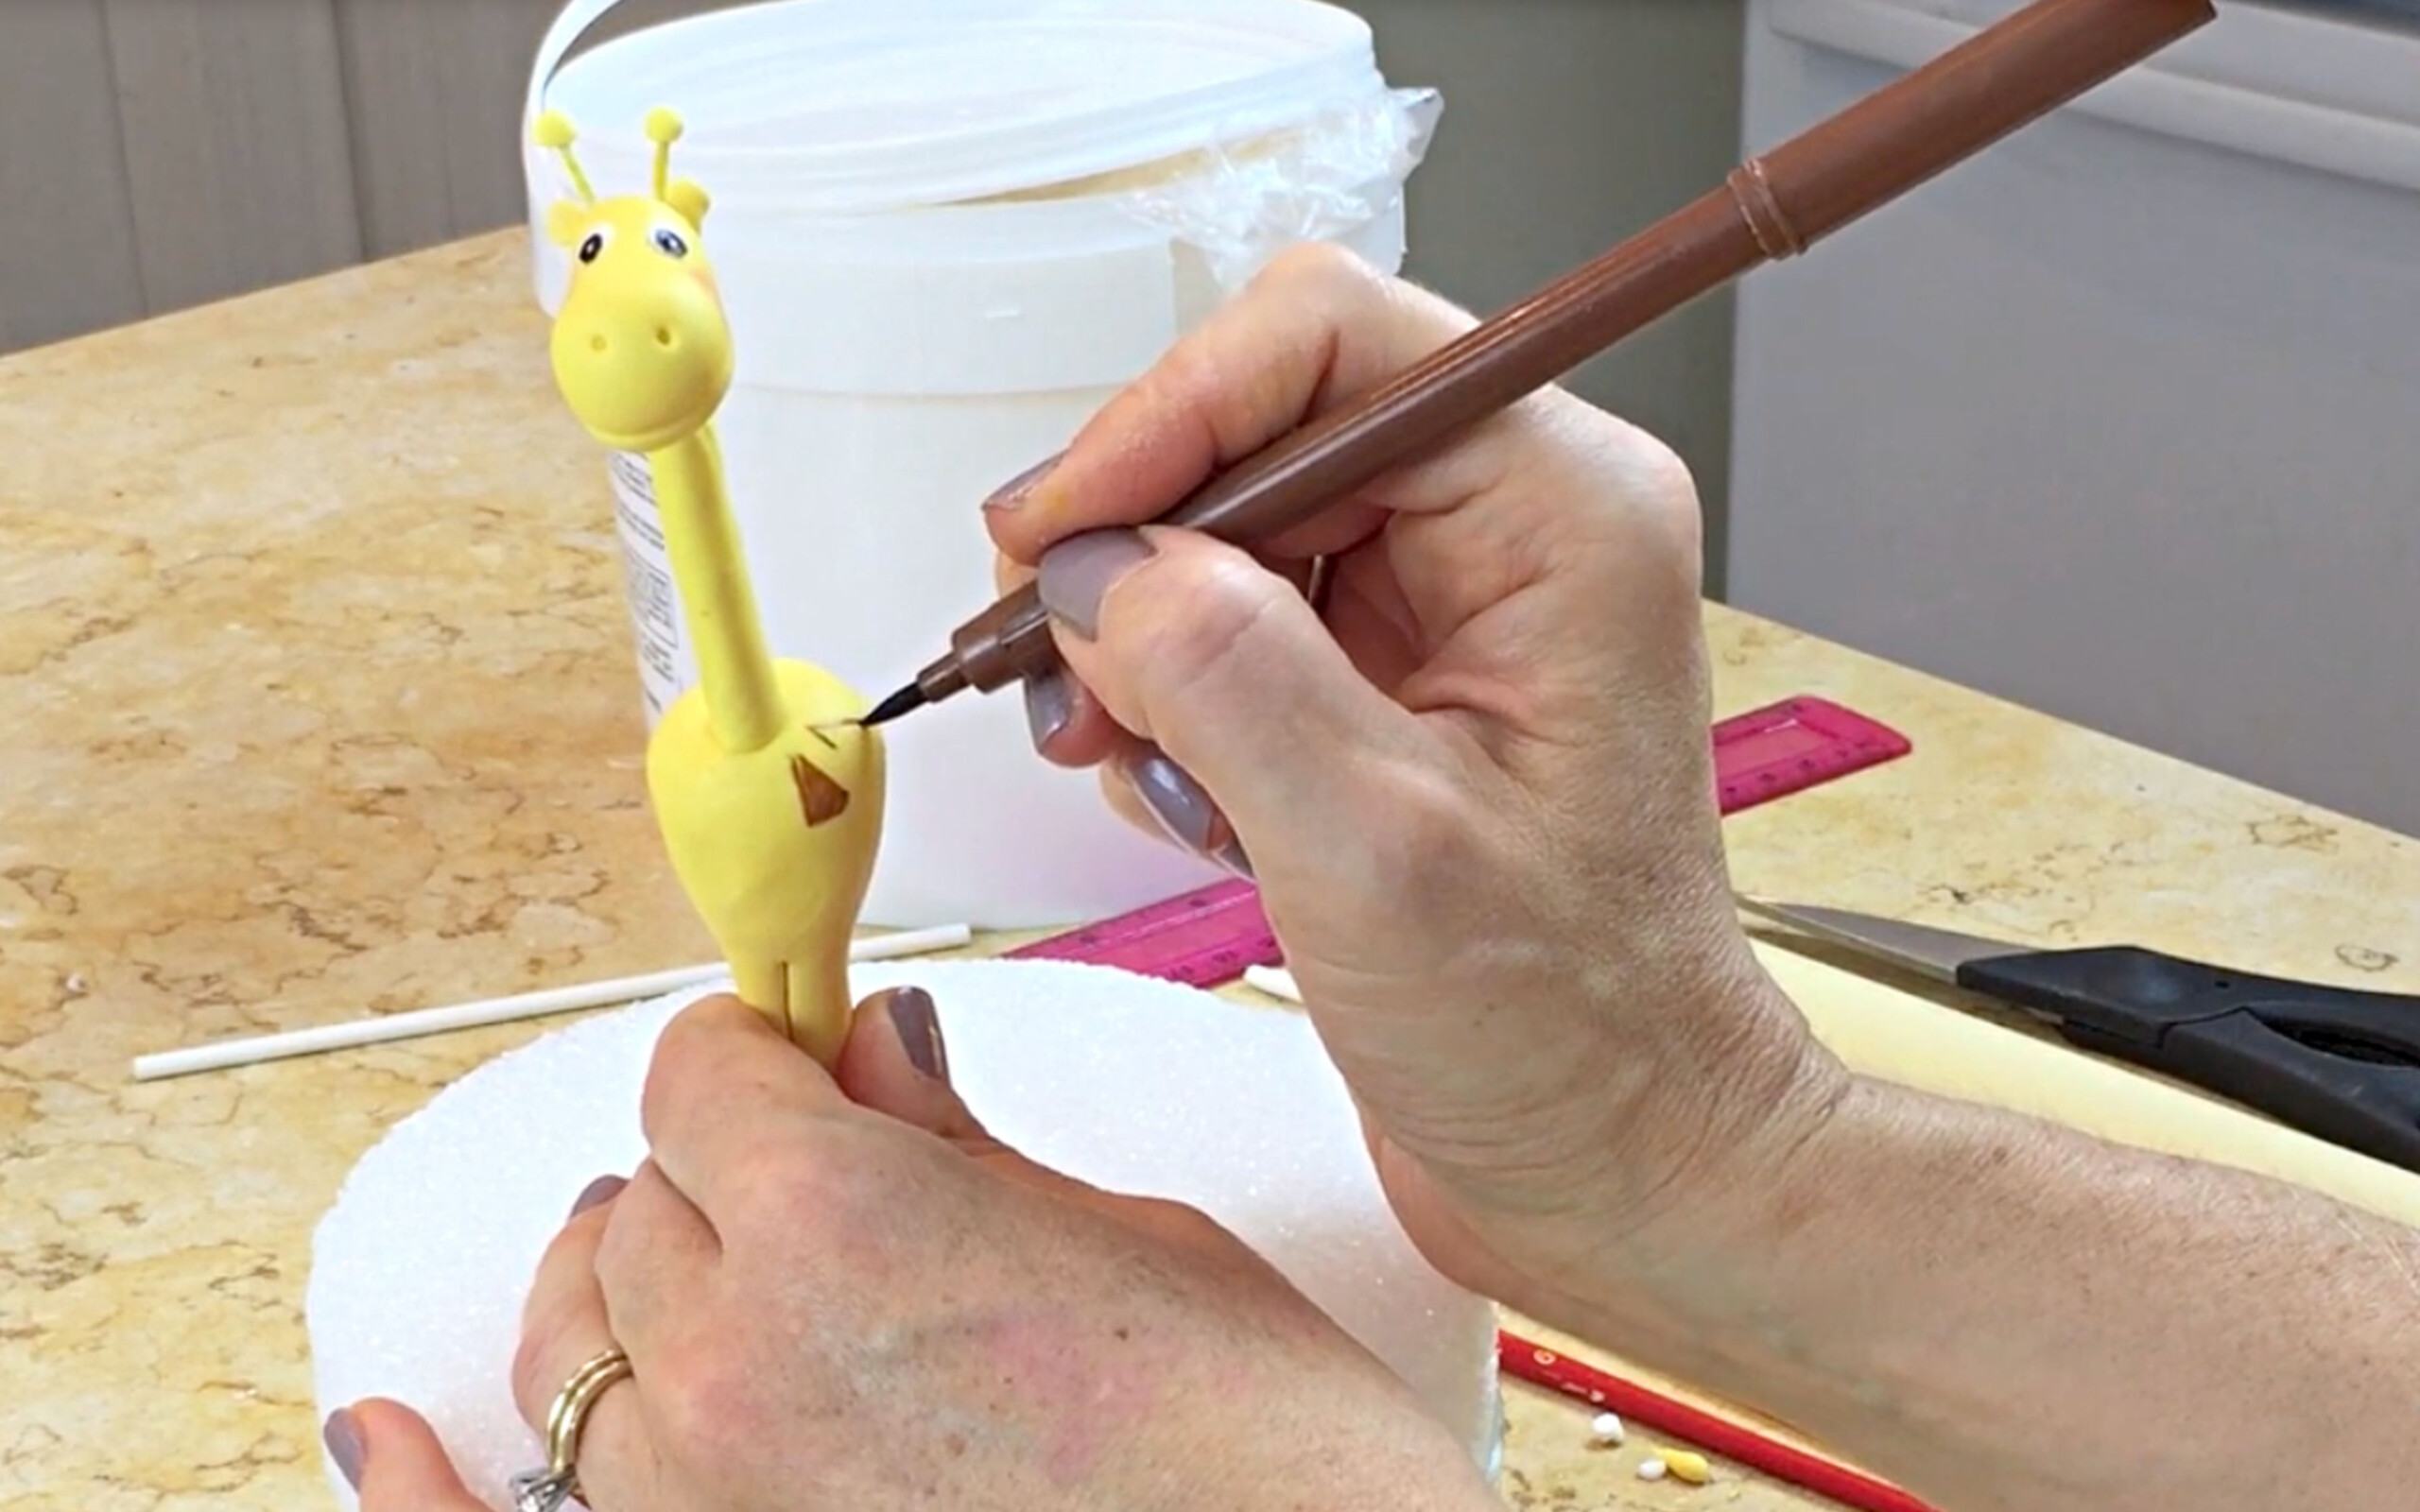
- Prepare the 3D fondant or gum paste lion, elephant, monkeys, and giraffe. (If using fondant, it is helpful to knead in gum paste as it dries more quickly and firmer.) For the 3D, stand-alone animals, we prefer to mold the heads, bodies, etc. separately and allow to dry for at least 24 hours before piecing them together. This prevents sagging.
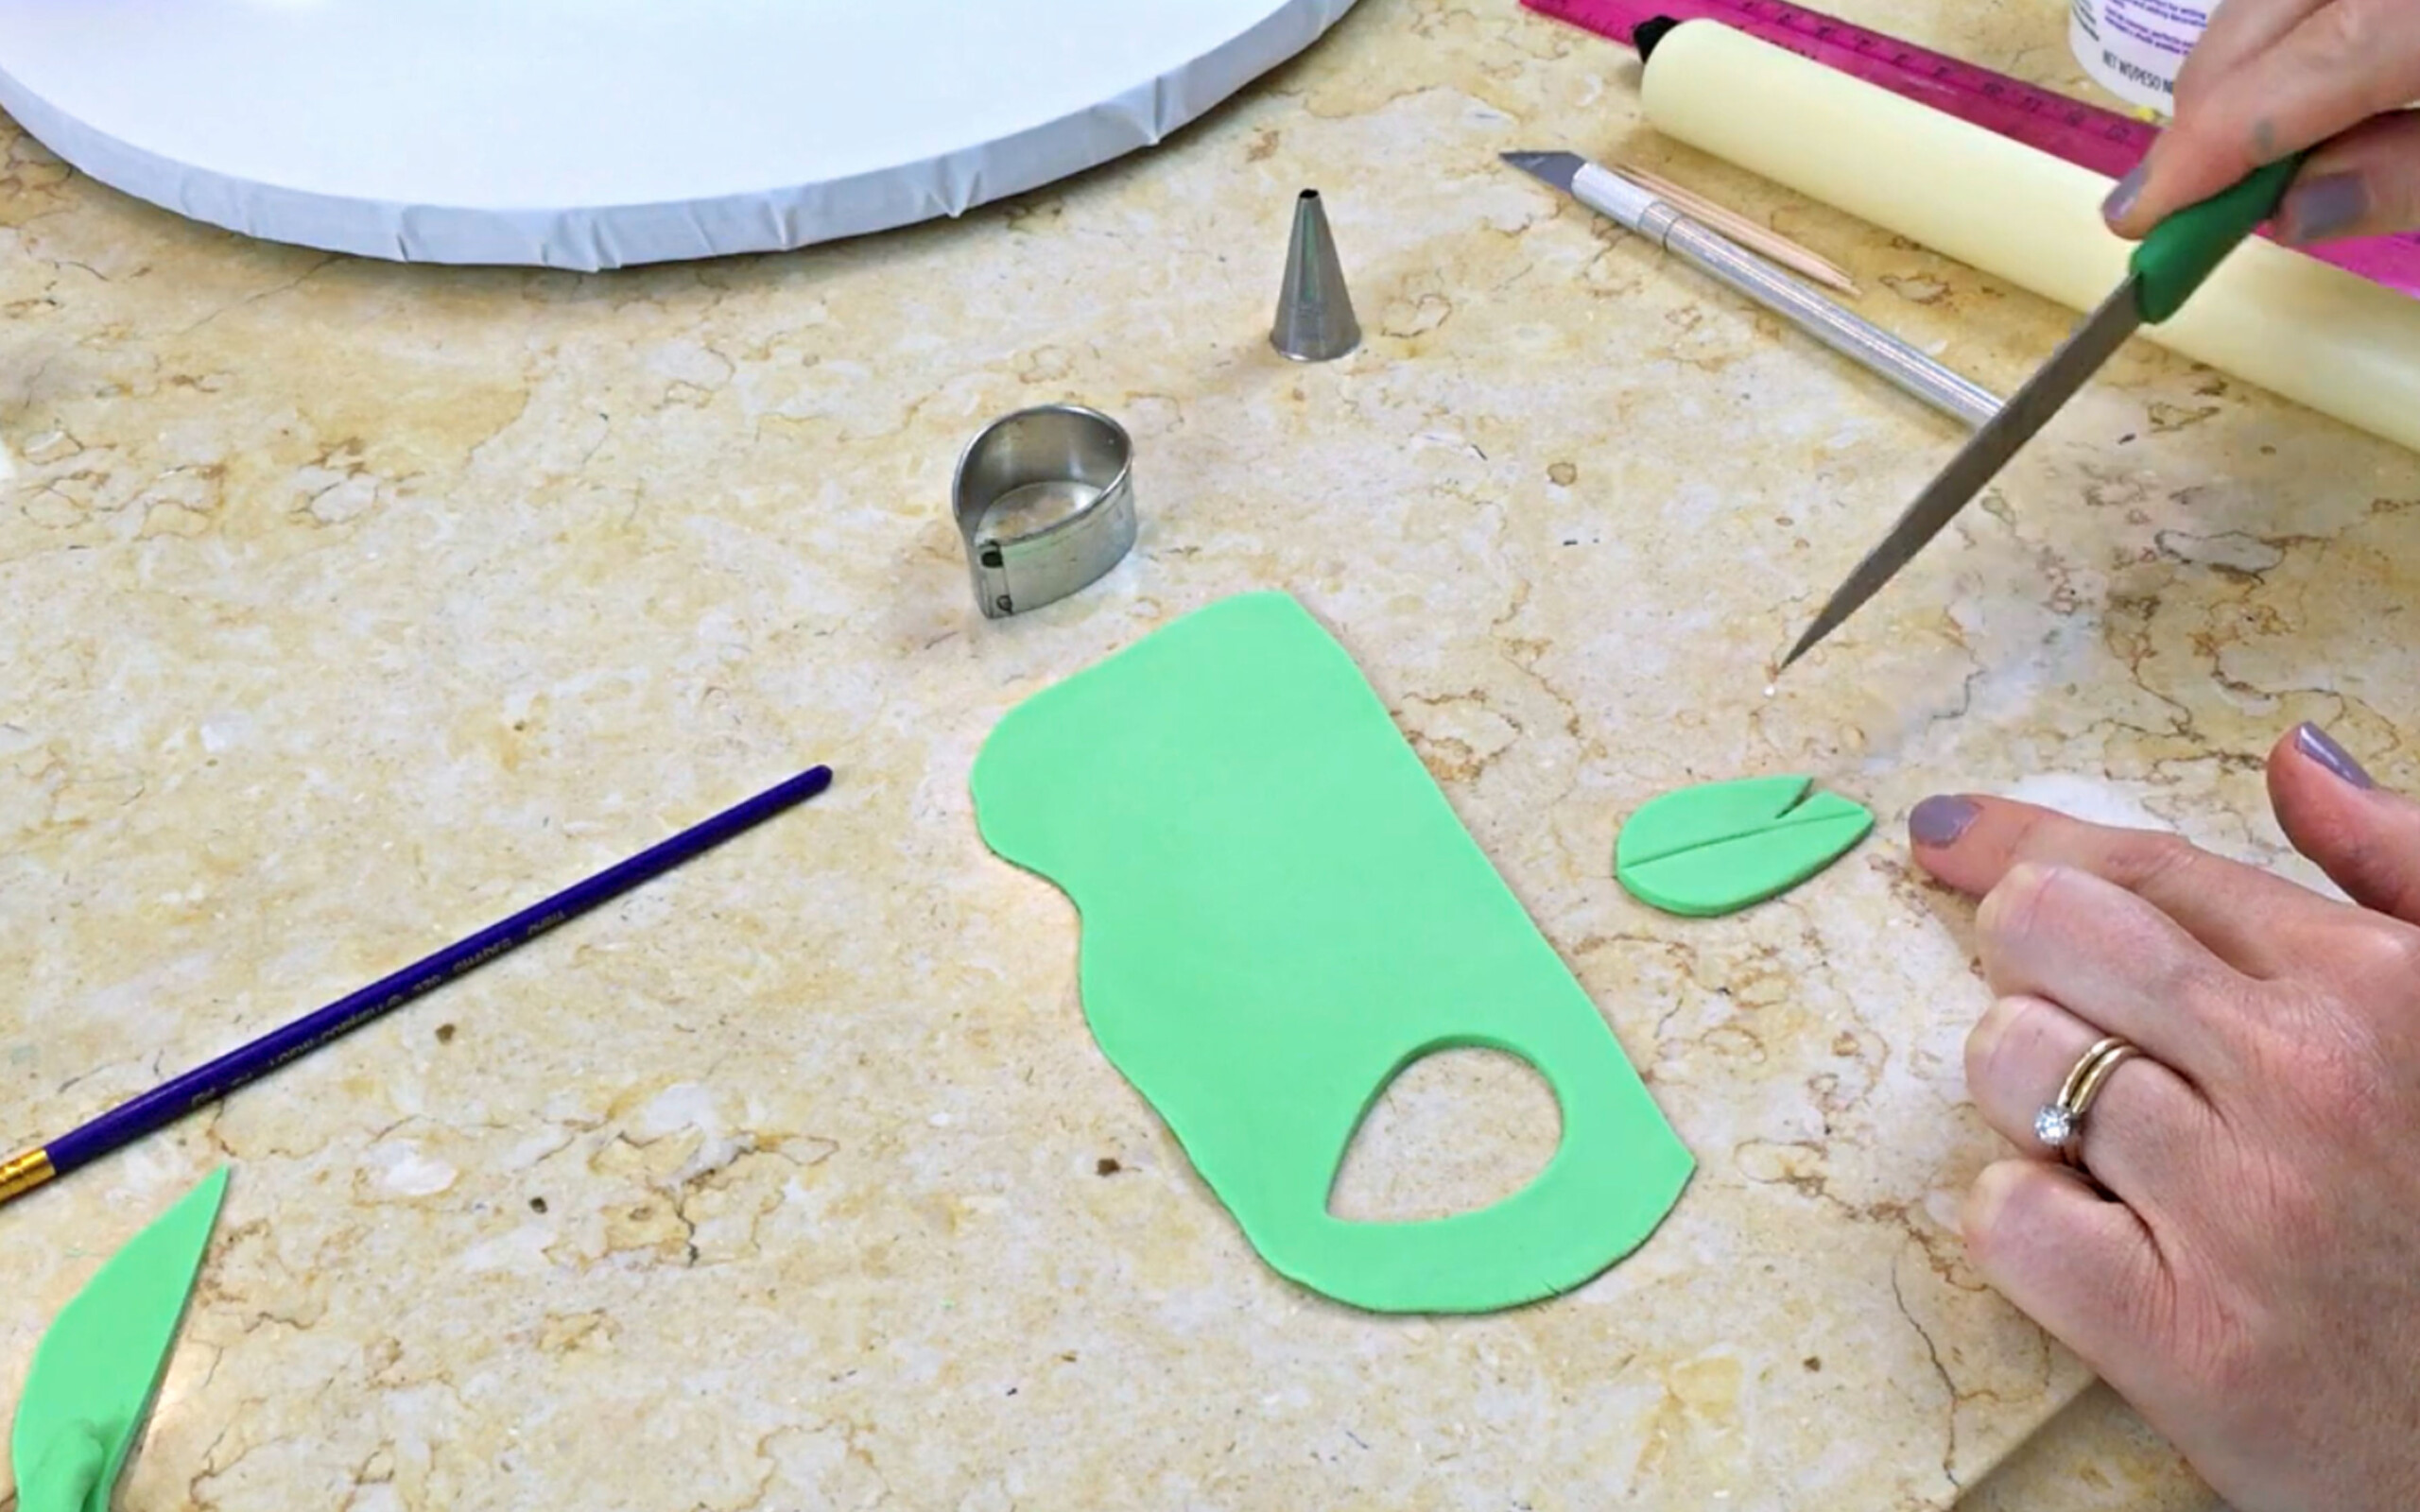
- Create other fondant decorations as well- including the number, leaves, balloons on floral wire, etc.
- Bake 6 inch cake layers and 8 inch cake layers per instructions for your recipe of choice. (See Notes). Allow to cool.
- Next, assemble your 8 inch tier and 6 inch tiers, each on their own cake cardboard cut down to size. Fill and frost with a crumb coat of buttercream or ganache. If using buttercream, we like Classic Vanilla Buttercream because it contains no shortening (only butter), which gets firmer when chilled.
- Chill the filled and crumb coated 8 inch and 6 inch tiers in the freezer for 15 minutes. Remove, and then cover with rolled fondant. *Note that if you prefer not to use fondant to cover the cake tiers, you can use an all-buttercream design with fondant decorative accents.
- Place dowels of choice (we use bubble tea straw supports) into the bottom tier, beneath where the 6 inch tier will sit. The bubble tea straws should be equal in length, cut to the height of the bottom tier. Place 4-5 straws.
- Smear a bit of buttercream on top of the bottom tier and apply the 6 inch, fondant covered tier on top.
- Extrude green fondant vines and place onto the cake. You can adhere it with dots of buttercream, tylose glue, etc.
- Layer on the remaining decorations, applying with buttercream or tylose glue. Add the jungle animals.
We just love how this sweet jungle cake came together!
Cake Recipes for Jungle Cake
Use any cake that you like for this Jungle Cake design! Some of our most popular cakes are our White Velvet Cake, Vanilla Velvet Cake, Cookies and Cream Cake, and Lemon Cake, but there are so many more great options.
You can find them all in our Cake Recipes Section! These include both cake recipes from scratch as well as cake mix recipes!
More Animal Cakes
In addition to today's jungle cake theme, we've made a few more animal print and animals themed cakes! Check these out for more inspiration!
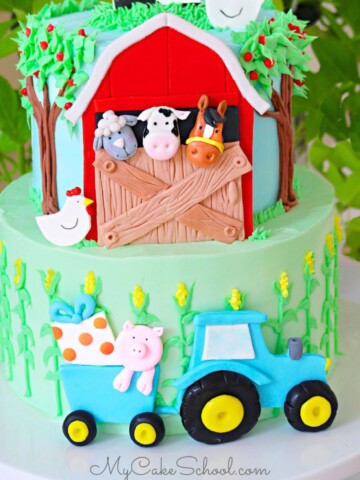
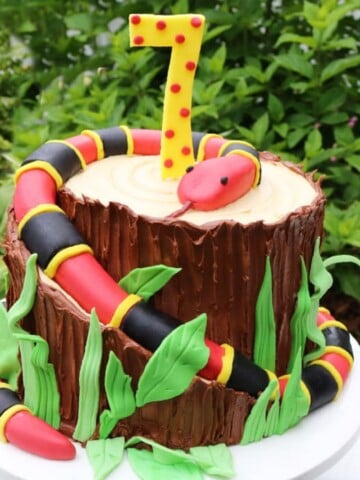
Some of our favorites are our Leopard Print Cake (on the inside), Zebra Cake (on the inside), farm cake, and Safari Cake!
Don't miss our full collection of Cake Decorating Tutorials! We have so many great cake videos to share with you for all skill levels of cake decorating, and to suit any occasion!
We have a great collection of favorite birthday cake designs as well!
Have you made this? We would LOVE for you to leave a ⭐️ rating as well as a comment and photo below! We really appreciate your feedback!
Jungle Cake
Ingredients
- In this video, we are working with 8 inch and 6 inch tiers stacked as usual, and covered with fondant. Each tier is on its own cake board cut down to size.
- Gum Paste (or fondant with tylose kneaded into it.)
- Coloring Gels: Lion: Chocolate Brown Egg Yellow, Lemon Yellow. Giraffe: Egg Yellow Monkey: Chocolate Brown with Copper features. Elephant: Super Black, Sky Blue for water, Red for "3",
- Floral Wire: 26 gauge for spray of water 20 gauge for balloons (doesn't have to be exact)
- Cake & leaves etc.: fondant is tinted Wilton Leaf Green
- Americolor Super Red Fondant and "3" cookie cutter or template for the number "3"
- Food Coloring Pen- I used black for eyes brown for giraffe
- Piping Tips: I used a Wilton 6 to cut out small circle for eyes use any small round tip, or form by hand, Wilton 10 for polka dots on "3". (any medium sized round tip is fine)
- Extruder optional for vines...or roll by hand. We used Makin's Ultimate Clay Extruder
- Lollipop sticks- used as anchors
- Toothpicks or gum paste tools of choice for creating animal's facial features
- Confetti Sprinkles optional Used on Lion's cake.
- Your favorite Pink Petal Dust for rosy cheeks- optional.
Instructions
Instructions
- Prepare the 3D fondant or gum paste lion, elephant, monkeys, and giraffe. (If using fondant, it is helpful to knead in gum paste as it dries more quickly and firmer.)For the 3D, stand-alone animals, we prefer to mold the heads, bodies, etc. separately and allow to dry for at least 24 hours before piecing them together. This prevents sagging.
- Create other fondant decorations as well- including the number, leaves, balloons on floral wire, etc.
- Bake 6 inch cake layers and 8 inch cake layers per instructions for your recipe of choice. (See Notes). Allow to cool.
- Next, assemble your 8 inch tier and 6 inch tiers, each on their own cake cardboard cut down to size. Fill and frost with a crumb coat of buttercream or ganache. If using buttercream, we like Classic Vanilla Buttercream because it contains no shortening (only butter), which gets firmer when chilled.
- Chill the filled and crumb coated 8 inch and 6 inch tiers in the freezer for 15 minutes. Remove, and then cover with rolled fondant. *Note that if you prefer not to use fondant to cover the cake tiers, you can use an all-buttercream design with fondant decorative accents.
- Place dowels of choice (we use bubble tea straw supports) into the bottom tier, beneath where the 6 inch tier will sit. The bubble tea straws should be equal in length, cut to the height of the bottom tier. Place 4-5 straws.
- Smear a bit of buttercream on top of the bottom tier and apply the 6 inch, fondant covered tier on top.
- Extrude green fondant vines and place onto the cake. You can adhere with dots of buttercream, tylose glue, etc. Layer on the other decorations, applying with buttercream or tylose glue. Add the jungle animals.
Hi Martha, Thank you, we are happy you are going to make this cake! Melissa has figures that are many months old and they still look great. After you make the figures you need to keep them out of sunlight or fluorescent lighting or it will fade the colors. Store in a container that is NOT airtight. We often store in a bakery box. Good luck with your cake, I hope all goes well.
Thank you Bebe
This tutorial was amazing! I used your guidance to make the most adorable (almost professional looking) cake for my daughter’s birthday. Thank you!
Yay! Thanks so much Jess, I'm so glad that you made the cake! ;0)