Elegant Chocolate Flowers for Cakes
In this cake video, I'll show you a couple of methods for creating gorgeous yet surprisingly simple chocolate flowers for your cakes!
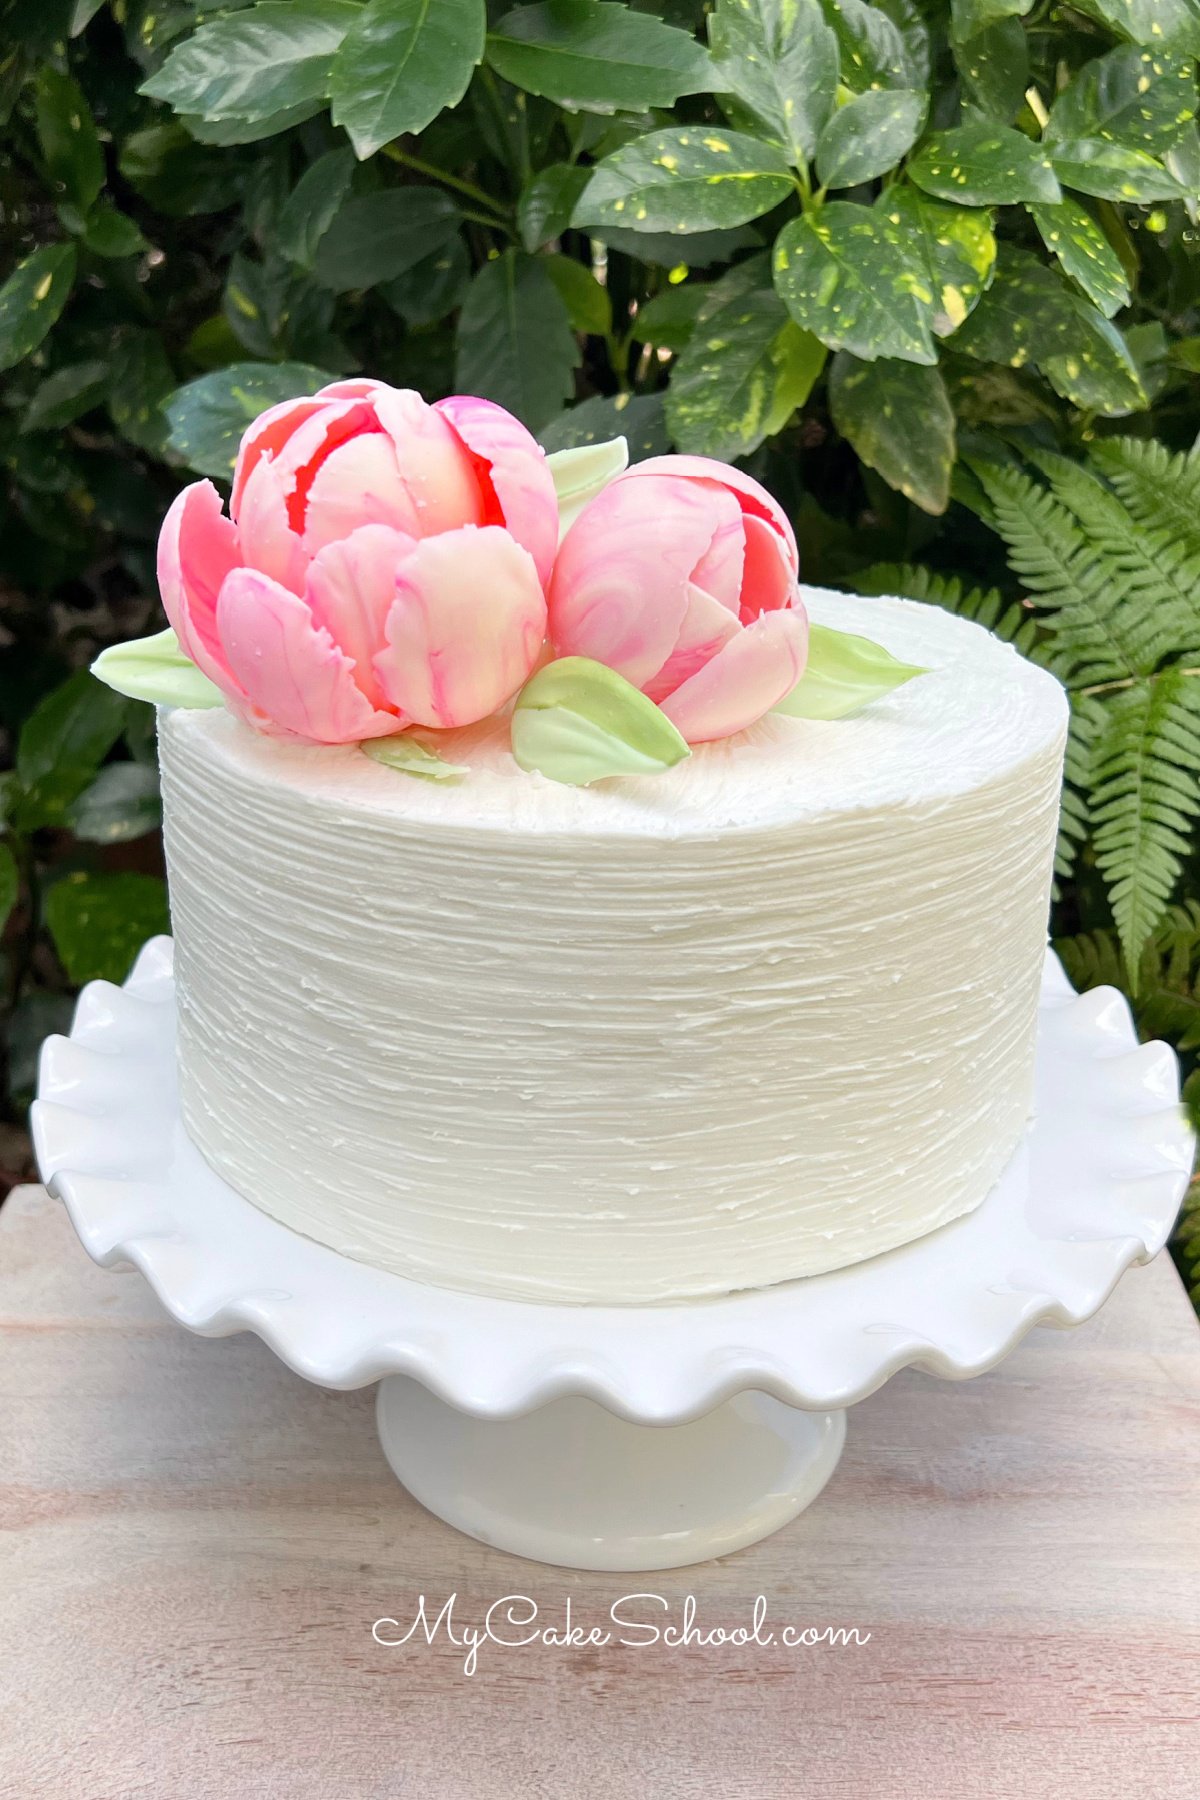
Table of Contents
Working with Candy Coating
For today's "chocolate flowers" we are using candy coating. Candy coating (also known as compound chocolate, almond bark, candy melts, etc.) is one of our favorite mediums for cake decorating.
We find that it is easier to work with than a true chocolate as it does not need to be tempered and has a higher melting point. Simply warm in the microwave, create your decoration, chill, and it can be used immediately.
**If tinting your candy coating, make sure that you use an oil based candy coloring gel rather than the coloring gels used when tinting buttercream or fondant. Colors that are not oil based may thicken the chocolate too much to work with (or cause it to seize).
Elegant Chocolate Flowers for Cakes
We made a chocolate peony cake video several years ago which we still love, but today's technique is simpler and faster, and the results are every bit as beautiful!
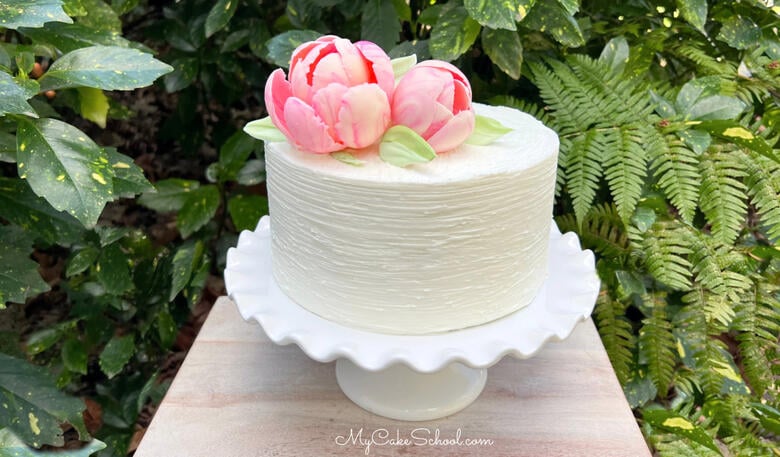
These beautiful pink chocolate flowers are such an impressive way to top off cakes for all sorts of occasions. It would make a beautiful birthday cake design, bridal shower cake, baby shower cake, and more!
We think that these chocolate flowers most resemble peonies, although if they were white rather than pink, they would look like magnolias as well! I hope that you have fun with this technique- the flowers are so much fun to make and the options are endless.
How to Make Chocolate Flowers for Cakes
Our favorite method for making chocolate flower petals is to use eggs!
We were inspired by a YouTube video by Yeners Way which we loved. In our cake video we also demonstrate how to create chocolate petals using a silicone mold. Using real eggs as forms for chocolate petals is still my favorite method though. Here's how we did it!
- Wrap the eggs or Grease the Molds: First, wrap eggs with plastic wrap or grease outside of small round silicone mold(s). I wrapped the cold eggs tightly in plastic wrap.
- Melt the Candy Coating: Next, melt candy coating in the microwave. We like to start with 30 seconds, stir, and repeat in smaller time increments until chocolate is almost completely melted. Then, stir until smooth and completely melted. (Melting it this way helps to prevent burning).
- Tinting the Chocolate: Swirl chocolate with pink candy coloring gel (Make sure to use candy coloring gel which is oil based). You could also use pre-colored candy coating if you'd like.
- Creating the Petals: Dip eggs or molds into the chocolate and place on parchment lined cookie sheet. Refrigerate for 15 minutes or until firm. Unwrap the eggs and remove chocolate petals. Remove from silicone molds also.
- Chill Chocolate Petals: When ready to assemble flowers, chill the petals in the freezer for 5 minutes if needed to firm them up.
- Assemble Flower: Apply freshly melted candy coating to the bottom of a well (formed by placing foil over a mug and small bowl). Arrange the petals to create flowers, adding more candy coating as needed for "glue".
Using Eggs for forming Chocolate Petals for Cakes
As I mentioned above, when I was searching for ideas on chocolate flowers, I came across a great video by Yeners Way that demonstrated using eggs for this process.
I've always just piped or brushed my chocolate onto parchment in the past, or used a mold. I love this idea because most people have eggs in their refrigerator.
Plastic Eggs Option: As I demonstrated in the video, you can also use plastic eggs- I put coins inside of mine so that the chocolate petal side wouldn't be top heavy after dipping. It works well also, although I liked how quickly the chocolate set up against the chilled eggs.
The eggs didn't take long for me to wrap in plastic wrap- just about 5 minutes- and the dipping went quickly also before refrigerating. The chocolate was never hot. So, you can definitely return your eggs back to the refrigerator when finished.
Hard Boiled Option: If you're nervous about cracking the eggs by accident you could always hard boil them first but luckily we had no issues- plus they're wrapped in plastic ;0)
Egg Platter: If you happen to have a deviled eggs platter, that may be a good option for placing the plastic-wrapped-eggs after dipping.
Silicone Molds for Chocolate Petals
I used a silicone mold from a set that I already had just to demonstrate a different option as well as to create a smaller flower. The wells that I used were just under 2 inches wide.
I've used these molds many times for creating chocolate spheres/balloons, etc. (If you don't have a set like this, you don't need it in order to create the smaller flower- just dip less of the egg in the chocolate for smaller petals-- or you could even use plastic spoons as a mold instead!)
How to you Decorate a Cake with Chocolate Flowers?
Chill Chocolate Flowers
Once your flowers are assembled, and you are ready to decorate the cake, it's a good idea to chill the flowers for 10 minutes in the refrigerator, or 5 minutes in the freezer.
The chocolate flowers and petals are much less fragile when chilled, so that you can easily handle them without worry.
Chocolate Leaves
*You can create simple chocolate leaves by piping medium sized dots of tinted green candy coating onto a parchment or wax paper lined cookie sheet. (Use a piping bag with the tip snipped away).
Then, spread the chocolate dots into leaf shapes using a small offset spatula and chill.
Chill the Cake
Also, before adding the flowers, it's a good idea to chill your cake tier to firm up the buttercream. That way, if you need to change the placement of the flowers, you won't have to worry about messing up the frosting.
Add Buttercream Texture with Pastry Brush
The fine lines of texture on our buttercream tier were created by using a silicone pastry brush. I frosted my cake with a fairly smooth finish first, and then went right back in with the pastry brush.
I held the brush lightly against the frosting as I rotated the cake on a turntable. When frosting builds up on the brush, wipe it off as needed to keep your design nice and neat.
We love textured buttercream designs, and this is just one of many options! Whether you go with a smooth design, textured or piped design, or something else, the flowers will be gorgeous on any cake- they are the star of the show! ;0)
We hope that you enjoy the video.
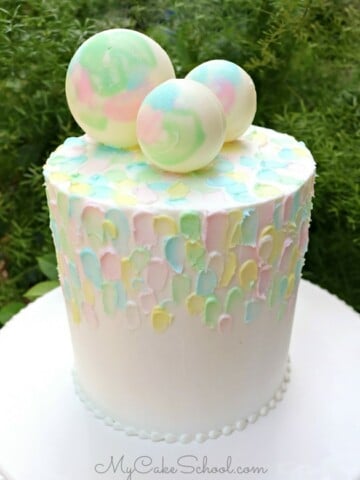
More Chocolate Decorations for Cakes
We love to work with candy coating to create beautiful, simple creations for cakes! Here are just a few tutorials that feature candy coating designs:
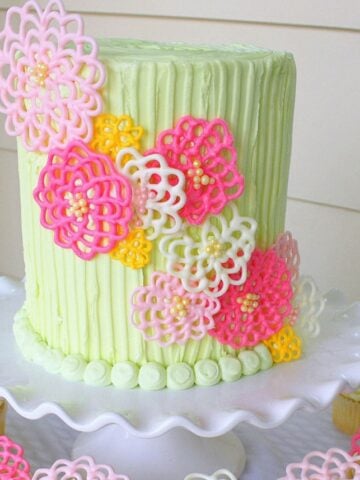
We also have many more floral cake designs to share!
Cake Recipes
We hope that you enjoy the video! This design would work on cakes of any size and shape. If you are looking for cake recipes, don't miss our huge Cake Recipes section, which includes our favorite cake recipes from scratch, cake mix recipes, and more!
Some of our most popular cakes include Almond Cake, White Velvet Cake, Vanilla Buttermilk Cake, Carrot Cake, and Lemon Cake from scratch. But we have hundreds of delicious recipes to share!
Enjoy the Video!
How to Make Chocolate Flowers

These elegant chocolate (candy coating) flowers are not difficult to make and are so uniquely beautiful!
Materials
- The cake that we used in today's tutorial is an 8 inch tier frosted with our classic vanilla buttercream. It is resting on it's own cake cardboard cut to the size of the cake so that I could easily move the chilled cake from the turntable to the cake stand.
- Candy Coating- I used Candiquik brand (I used 4 blocks- approximately 8 oz)
- Candy Color- (oil based) I used Wilton brand in Pink and Green- You could also use pre-colored candy melts/coating
- Silicone Pastry Brush -optional- for texturing the buttercream
- Tapered offset spatula
- Eggs
- plastic wrap
- cookie sheet is helpful
- Silicone mold (optional)
- Silicone Pastry Brush (optional) - I used for texture
- Mugs or small bowls for creating wells for forming flower
- aluminum foil
- Miscellaneous: Turntable (optional), disposable piping bags, small paintbrush, offset spatula, everclear or vodka (for painting leaves-optional), cake cardboard- optional- mine is on it's own cake board for easily transferring cake from turntable to pedestal.),
Instructions
- Wrap eggs with plastic wrap or grease outside of small round silicone mold(s)
- Melt candy coating in the microwave- I like to start with 30 seconds, stir, and repeat in smaller time increments until chocolate is almost completely melted- stir to complete the melting process.
- Swirl chocolate with pink candy coloring gel
- Dip eggs or molds into the chocolate and place on parchment lined cookie sheet. Refrigerate for 15 minutes or until firm. Unwrap the eggs and remove chocolate petals. Remove from silicone molds also.
- When ready to assemble flowers, chill the petals in the freezer for 5 minutes if needed to firm them up. Apply melted candy coating to bottom of well (formed by placing foil over a mug and small bowl). Arrange petals to create flowers, adding more candy coating as needed.
Notes
Make more petals than you think you will need- I made 12 large petals and
Recommended Products
As an Amazon Associate and member of other affiliate programs, I earn from qualifying purchases.


Your cakes are so beautiful! My ability with making gum paste flowers is pretty limited but I’m going to try this method. Thank you for sharing your expertise. I’m happy to be a member of My Cake School.
Thank you! I think you'll enjoy making these. ;0)
Beautiful! Love it! Looks fabulous as always! So clever and simple! :-)
Thanks Teri!! xo Yes- I love simple ;0)
Such a pretty spring cake. Love the chocolate flower idea!
These are beautiful! Very well done tutorial--I now have the confidence to give this kind of cake decoration a shot.
Do you have any recommendations for what shape/object I could use to make smaller blooms? I will be making some using eggs but also wanted a few smaller blooms as well but I'm drawing a blank as to how to get smaller petals sizes.
@MBM - I'm glad that you are making the flowers! I've seen small plastic spoons used a form to make petals-the backside dipped into chocolate, chilled and separated (wrapping the spoon in plastic wrap may make it easier to remove). -
You could even use the egg for smaller petals, just dip a smaller portion. Aside from that, plastic artist palettes also have the little round wells which could be used (I would line with plastic wrap). - In our other chocolate flower tutorial, I made the chocolate petals on parchment , just freehand, and laid them over little rolls of paper towels, etc to give the curved shape. Lots of options ;0)!
You are one very creative lady. Thank you for sharing your methods for creating chocolate flowers. These cakes are so stunning and elegant. I'm grateful that I am a member of My Cake School because I've gotten some excellent recipes and your cakes are so inspiring (if only mine would come out looking like yours. I can try, though, right:)) I'm getting better. I just have to discover an aesthetic that I can create.
I would like to make this, but I can't seem to find your tutorial on your cake website. Can you tell me what it is listed under, or send me the link, via my email? Thanks so much!!
I’ve tried 4 times to watch the video about making peony petals out of chocolate. Every time an add or commercial or other input splashed right over what I was watching!! 😡. It’s so frustrating because I can’t watch it all the way through. PLEASE fix those ads on your page. Thank you.
I made this cake for a bridal shower we gave for a coworker. I used different sized plastic eggs from my Easter supplies and they worked great! This gave my cake an elegant design perfect for the occasion. I used an edible metallic food paint to give the flowers a little sparkle! Thank you for the wonderful recipes and techniques
What a beautiful job!! I know that she loved it!
Can I Use white chocolate as I don't like the taste of candy coating?
Hi Jaqueline! I like to use candy coating as it doesn't need to be tempered. I haven't tried this with white chocolate. Without tempering, they may have more of a matte look and be a bit more fragile.
I think that many people simply remove the flowers and don't necessarily eat them (as you would with fondant or gum paste cake toppers), but I understand wanting to give it a try with white chocolate! Let us know how it goes if you decide to experiment ;0)