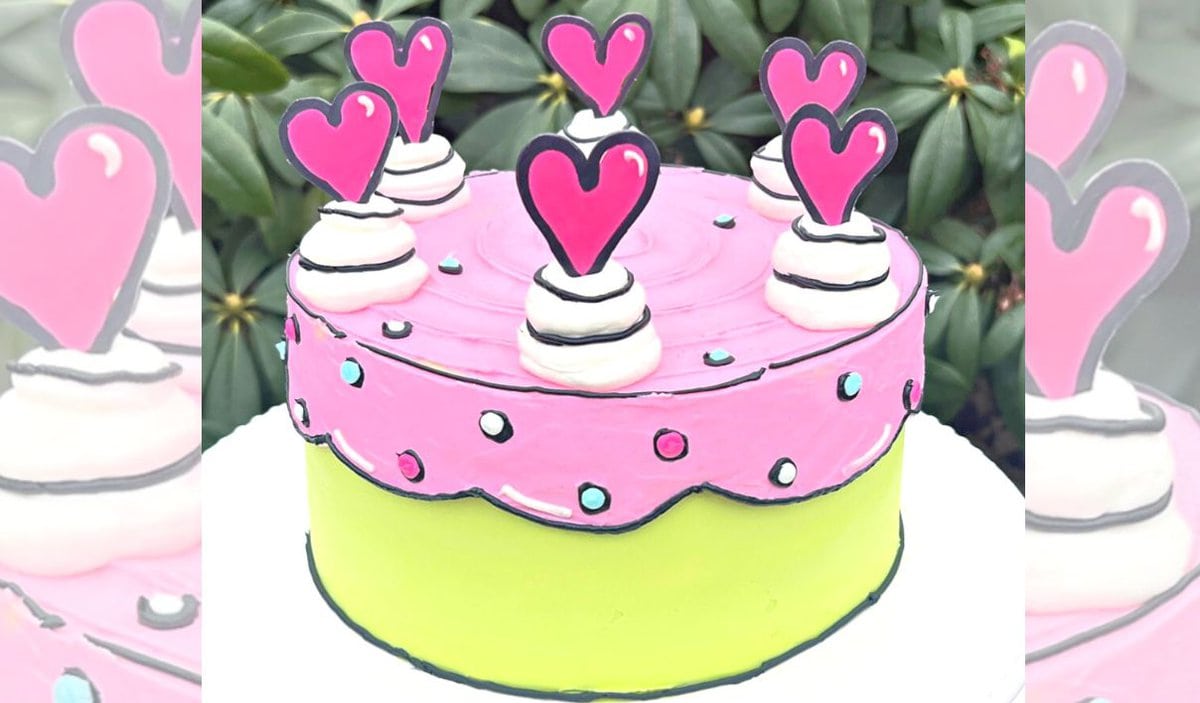
Cartoon Cake Tutorial
Today we are happy to share a super cute, simple Cartoon Cake tutorial with you!
Cartoon Cakes or Comic Cakes are a popular trend right now and we're so glad to have a design to share with you. If you've been searching for birthday cake ideas, keep this cake in mind.
Once you learn the basic style, the design options are endless!
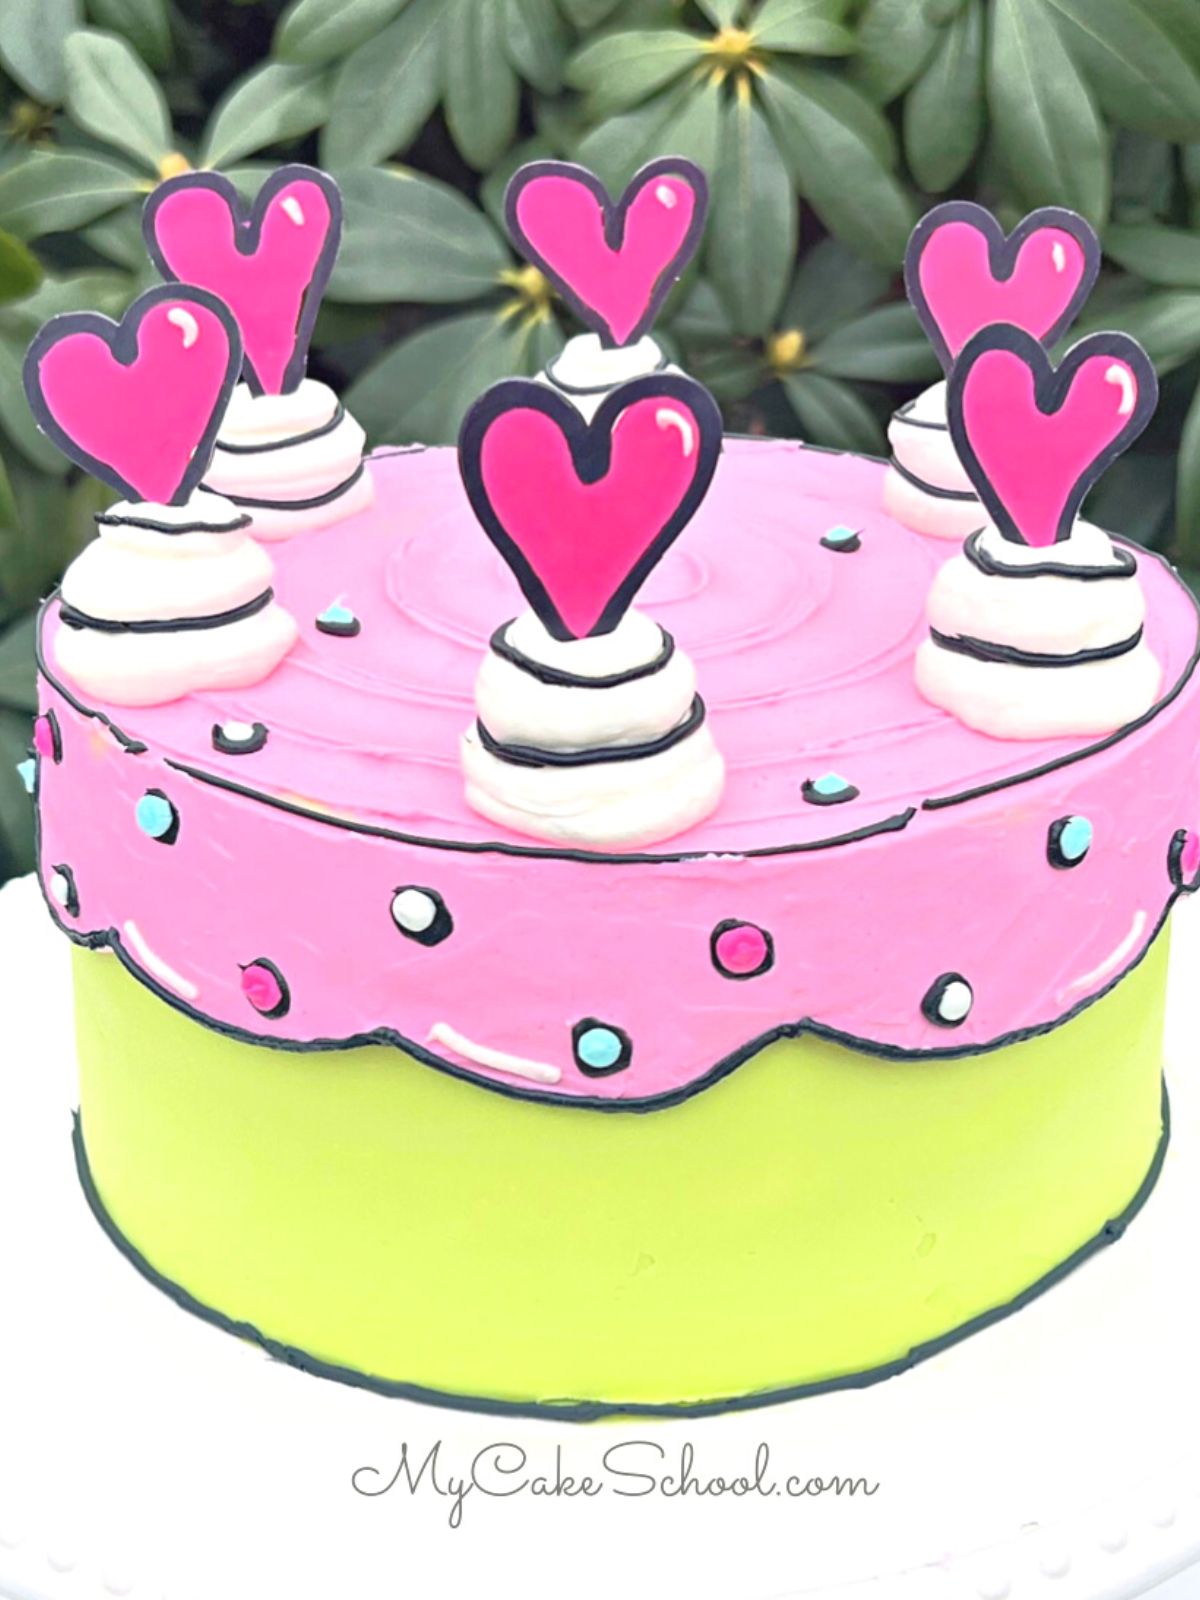
Table of Contents
What is a Cartoon Cake?
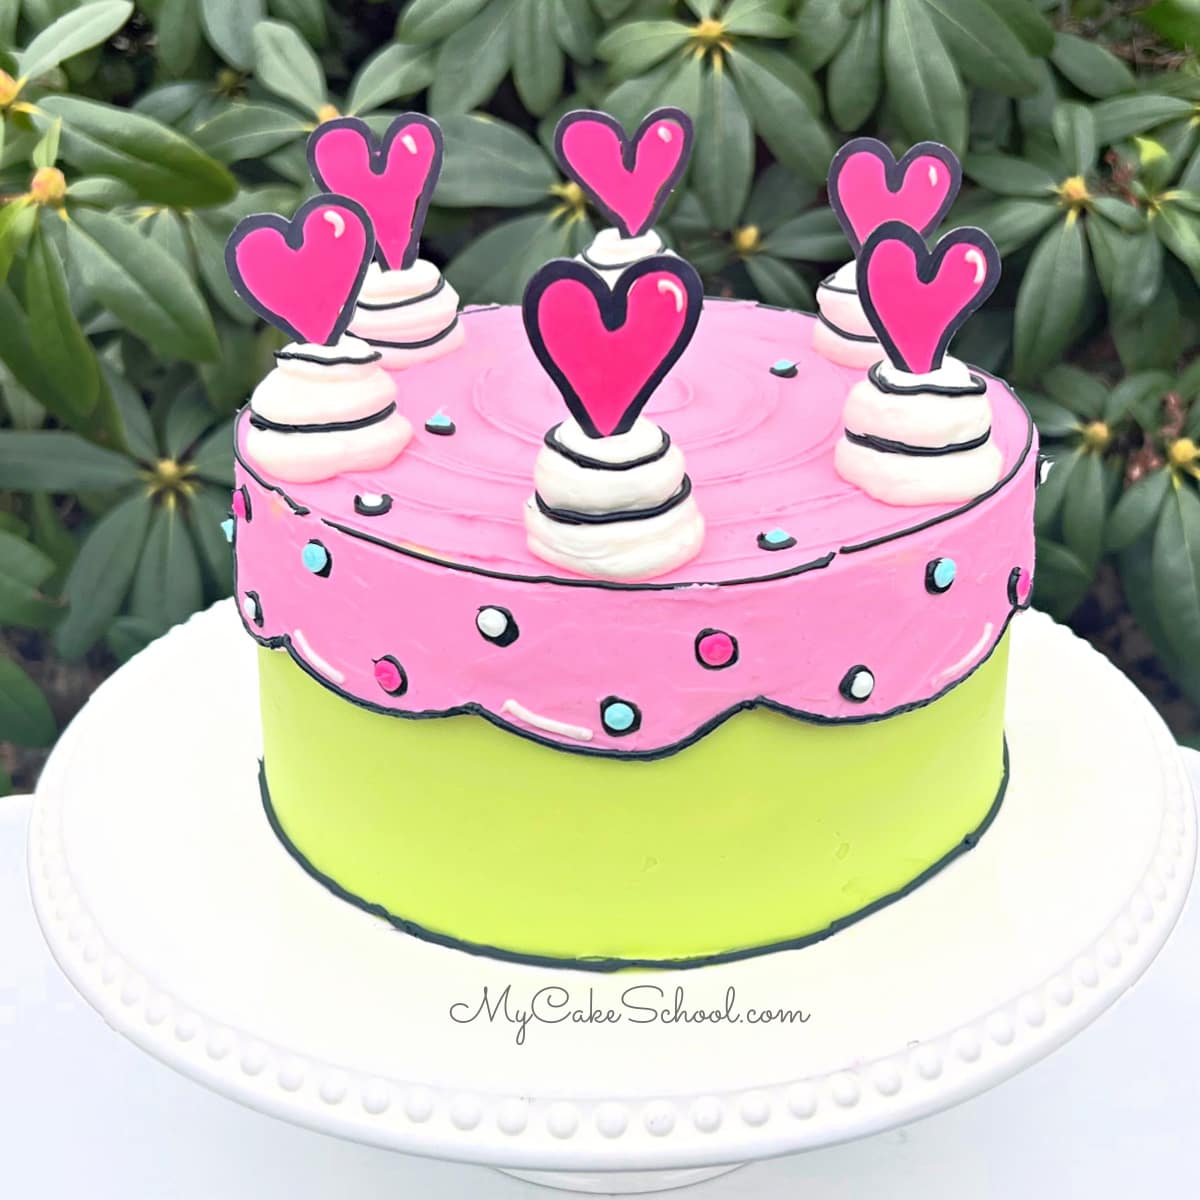
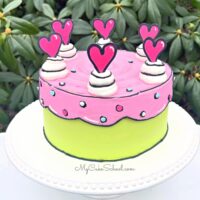
There are so many great variations of cartoon cakes or comic cakes out there, but what they all have in common is that the decorations are outlined in black, giving it a cartoonish feel.
Our cartoon cake is a buttercream design with candy coating accents. However, if you prefer to work with fondant, you can outline features of the cake either with a crusting buttercream or with thin extruded strands of fondant.
You could even use a black food coloring pen if the fondant is dry to the touch.
In fact, if you aren't a fan of buttercream piping, you could use extruded strands of black fondant on chilled buttercream-frosted cakes as well!
How to Make a Cartoon Cake
Our cartoon cake design for todays cake can be added to cakes of any size. We decorated a three layer Vanilla Buttermilk Cake and frosted with our Classic Vanilla Buttercream.
For the Heart Cake Toppers
For the heart cake toppers, we used melted black candy coating and melted pink candy coating. (We used Sweet Tooth Fairy Meltables from Michaels).
Melt the candy coating in small increments until they are almost melted. Then stir until smooth.
I spooned the black coating into a disposable piping bag fitted with a small round tip 2, and piped hearts onto a parchment lined cookie sheet.
I then followed with my melted pink candy coating which was in a piping bag with the tip snipped away.
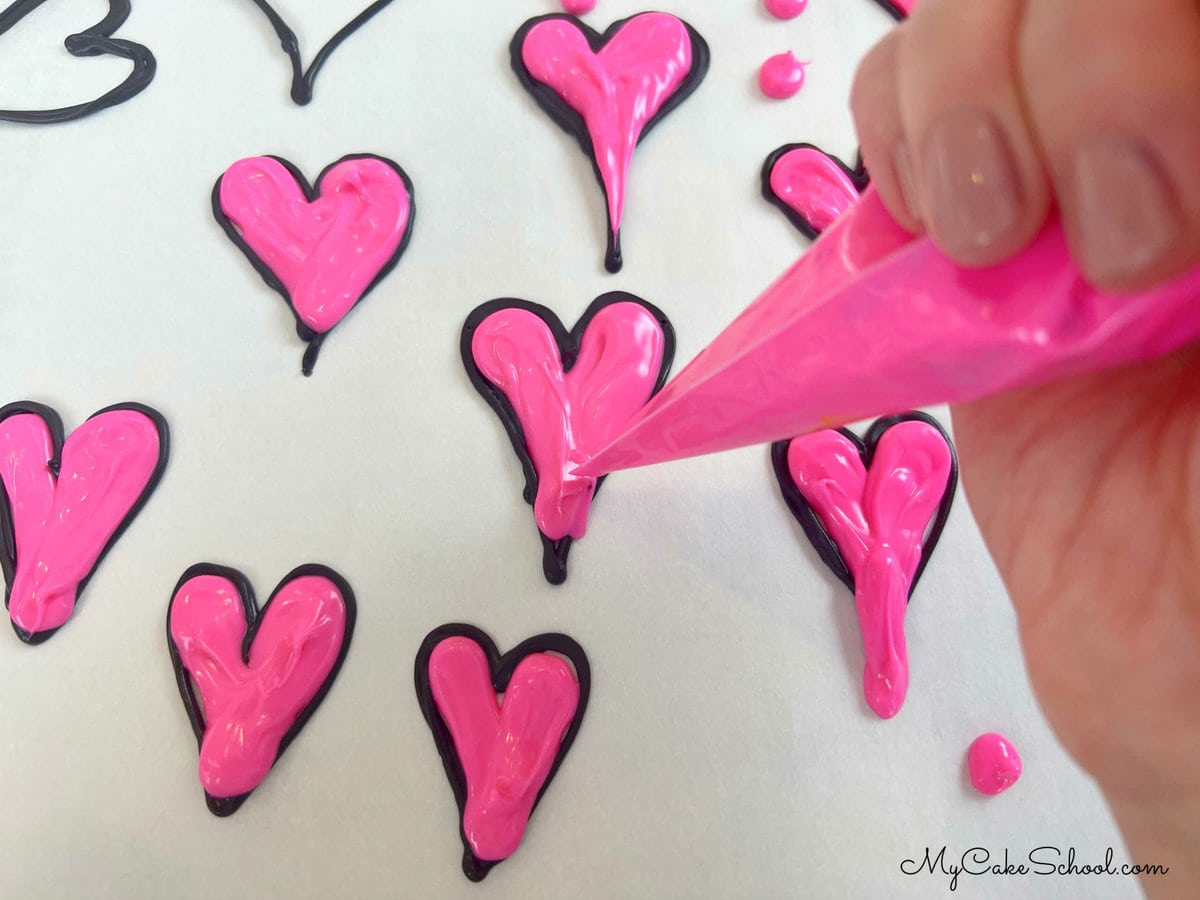
It is helpful to make the bottom point of the heart a bit longer than usual as it will serve as an anchor.
*You can let the hearts set up a room temperature or you can chill them for a faster set-up time. I always chill my candy coating decorations right before handling as they are much less fragile when chilled (Five minutes in the freezer or a bit longer in the refrigerator should do it!)
We used the flip side of the piped hearts for a smoother look.
Decorating the Cartoon Cake
I filled and crumb coated my cake with vanilla buttercream, chilled for 10 minutes in the freezer, and then applied my green buttercream with an offset spatula.
A metal bench scraper is a great way to smooth the frosting around the sides of the cake. As always, for an extra smooth finish, I like to freeze the frosted cake for 10-15 minutes before gliding back over it (adding fresh frosting here and there) with a heated bench scraper.
For the Pink Frosting
Once you've finished frosting the cake with green buttercream, it's time to add the pink "drip". To do this, I piped a scalloped outline around the sides of the cake, and filled in with pink frosting around the sides and on top of the cake.
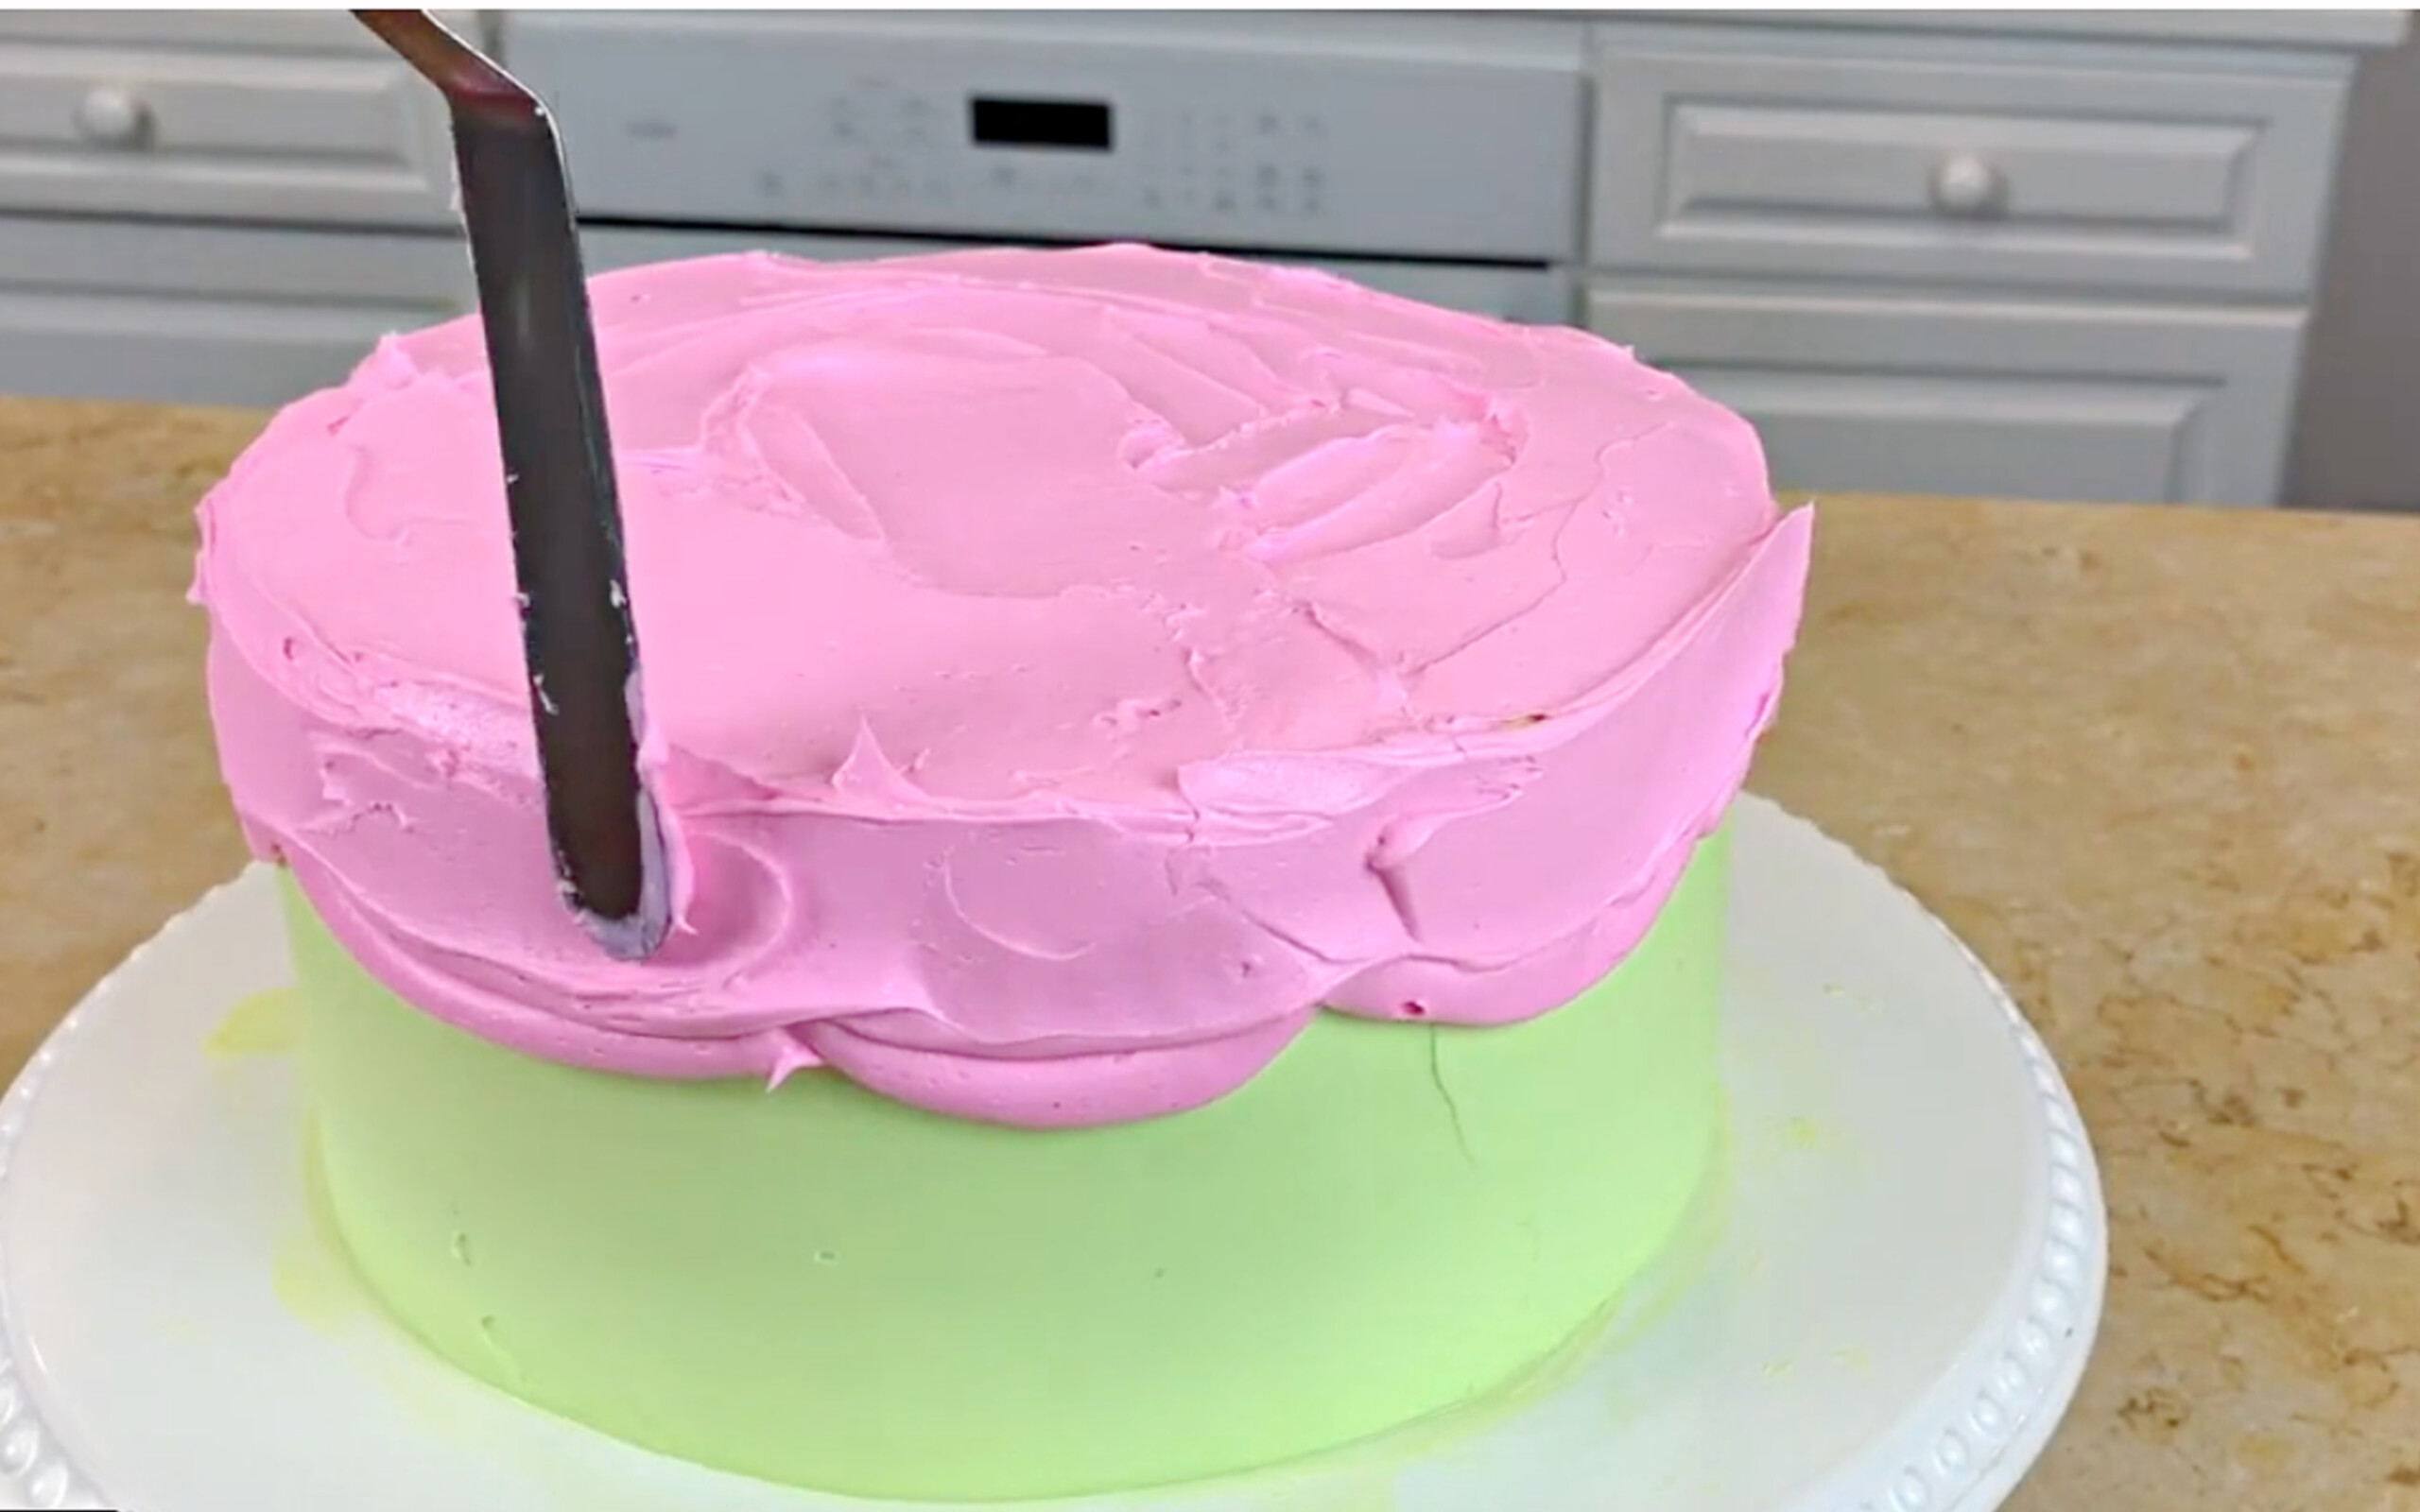
Smooth with an offset spatula to your liking, stopping to chill and then smooth with a hot spatula as needed. (We heat our spatulas and bench scrapers by running them under very hot water).
Outlining in Black
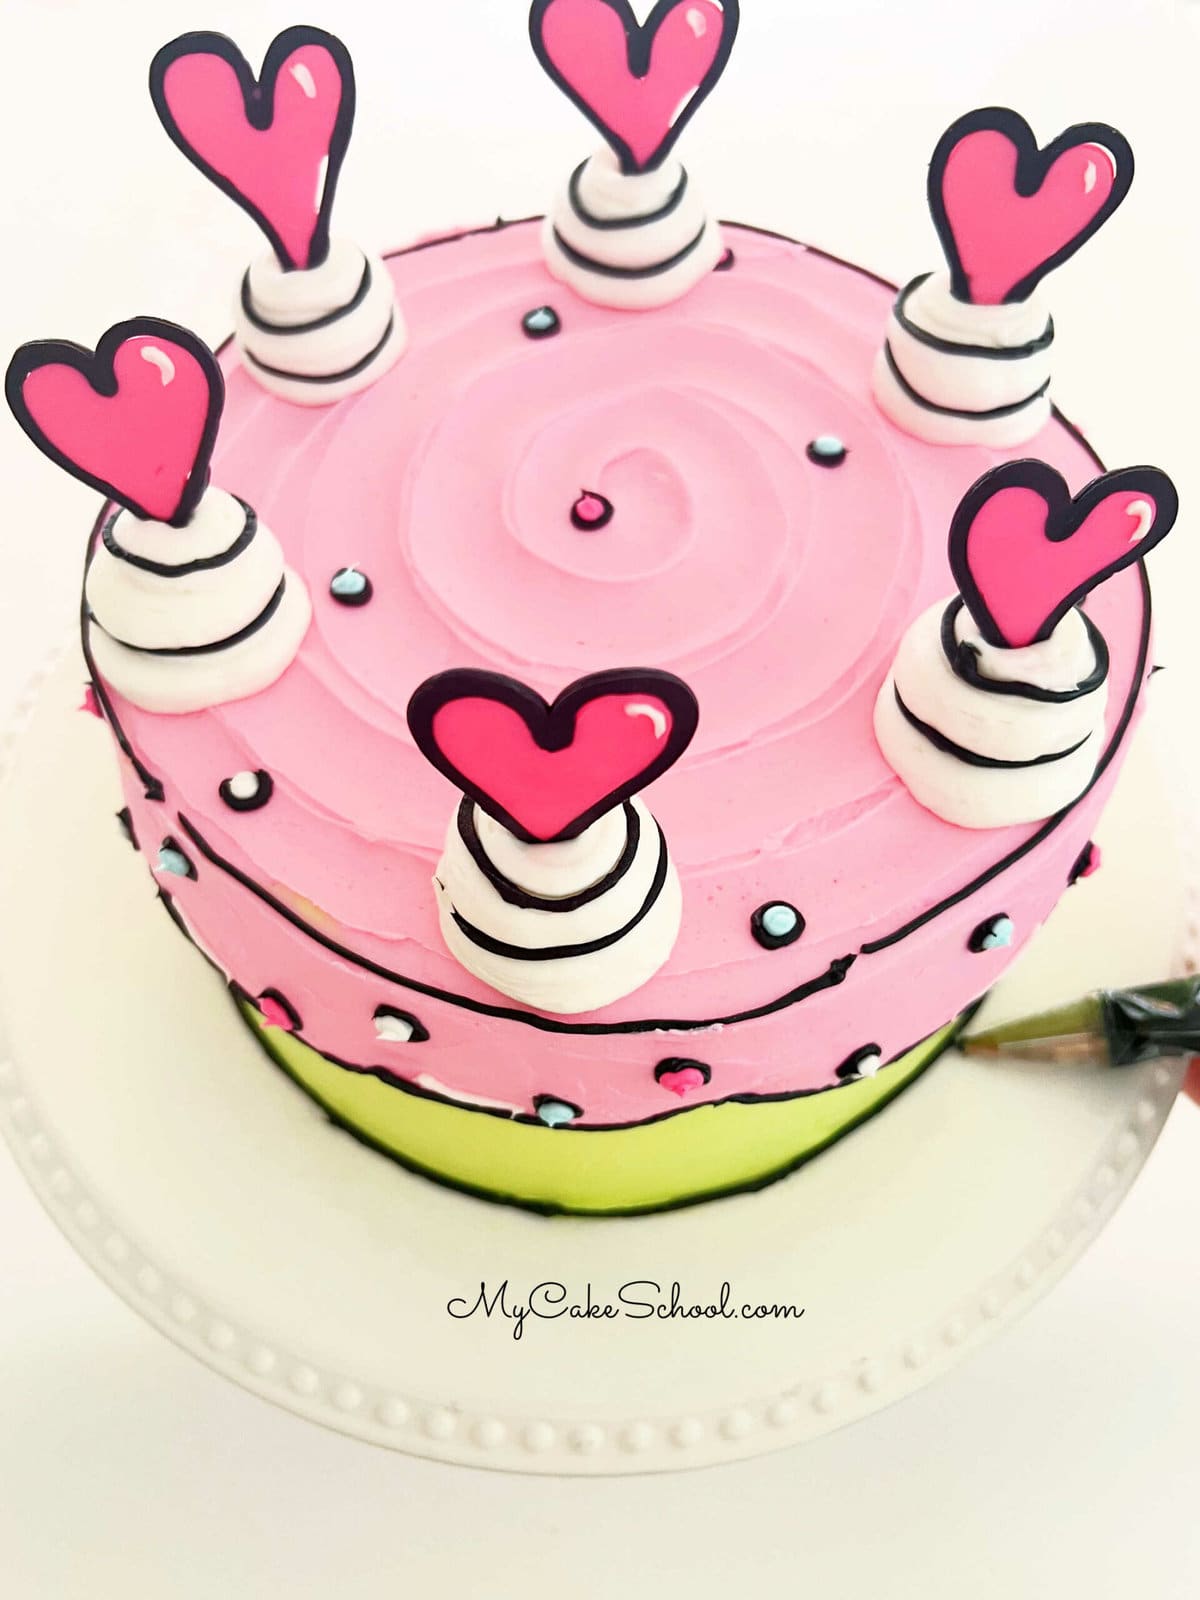
Using a disposable piping bag fitted with a small round piping tip 3, I piped black buttercream around the top edge of the cake and also outlined the scalloped edge of my pink frosting all the way around. You can also pipe a line around the base of the cake as well (as I mention below).
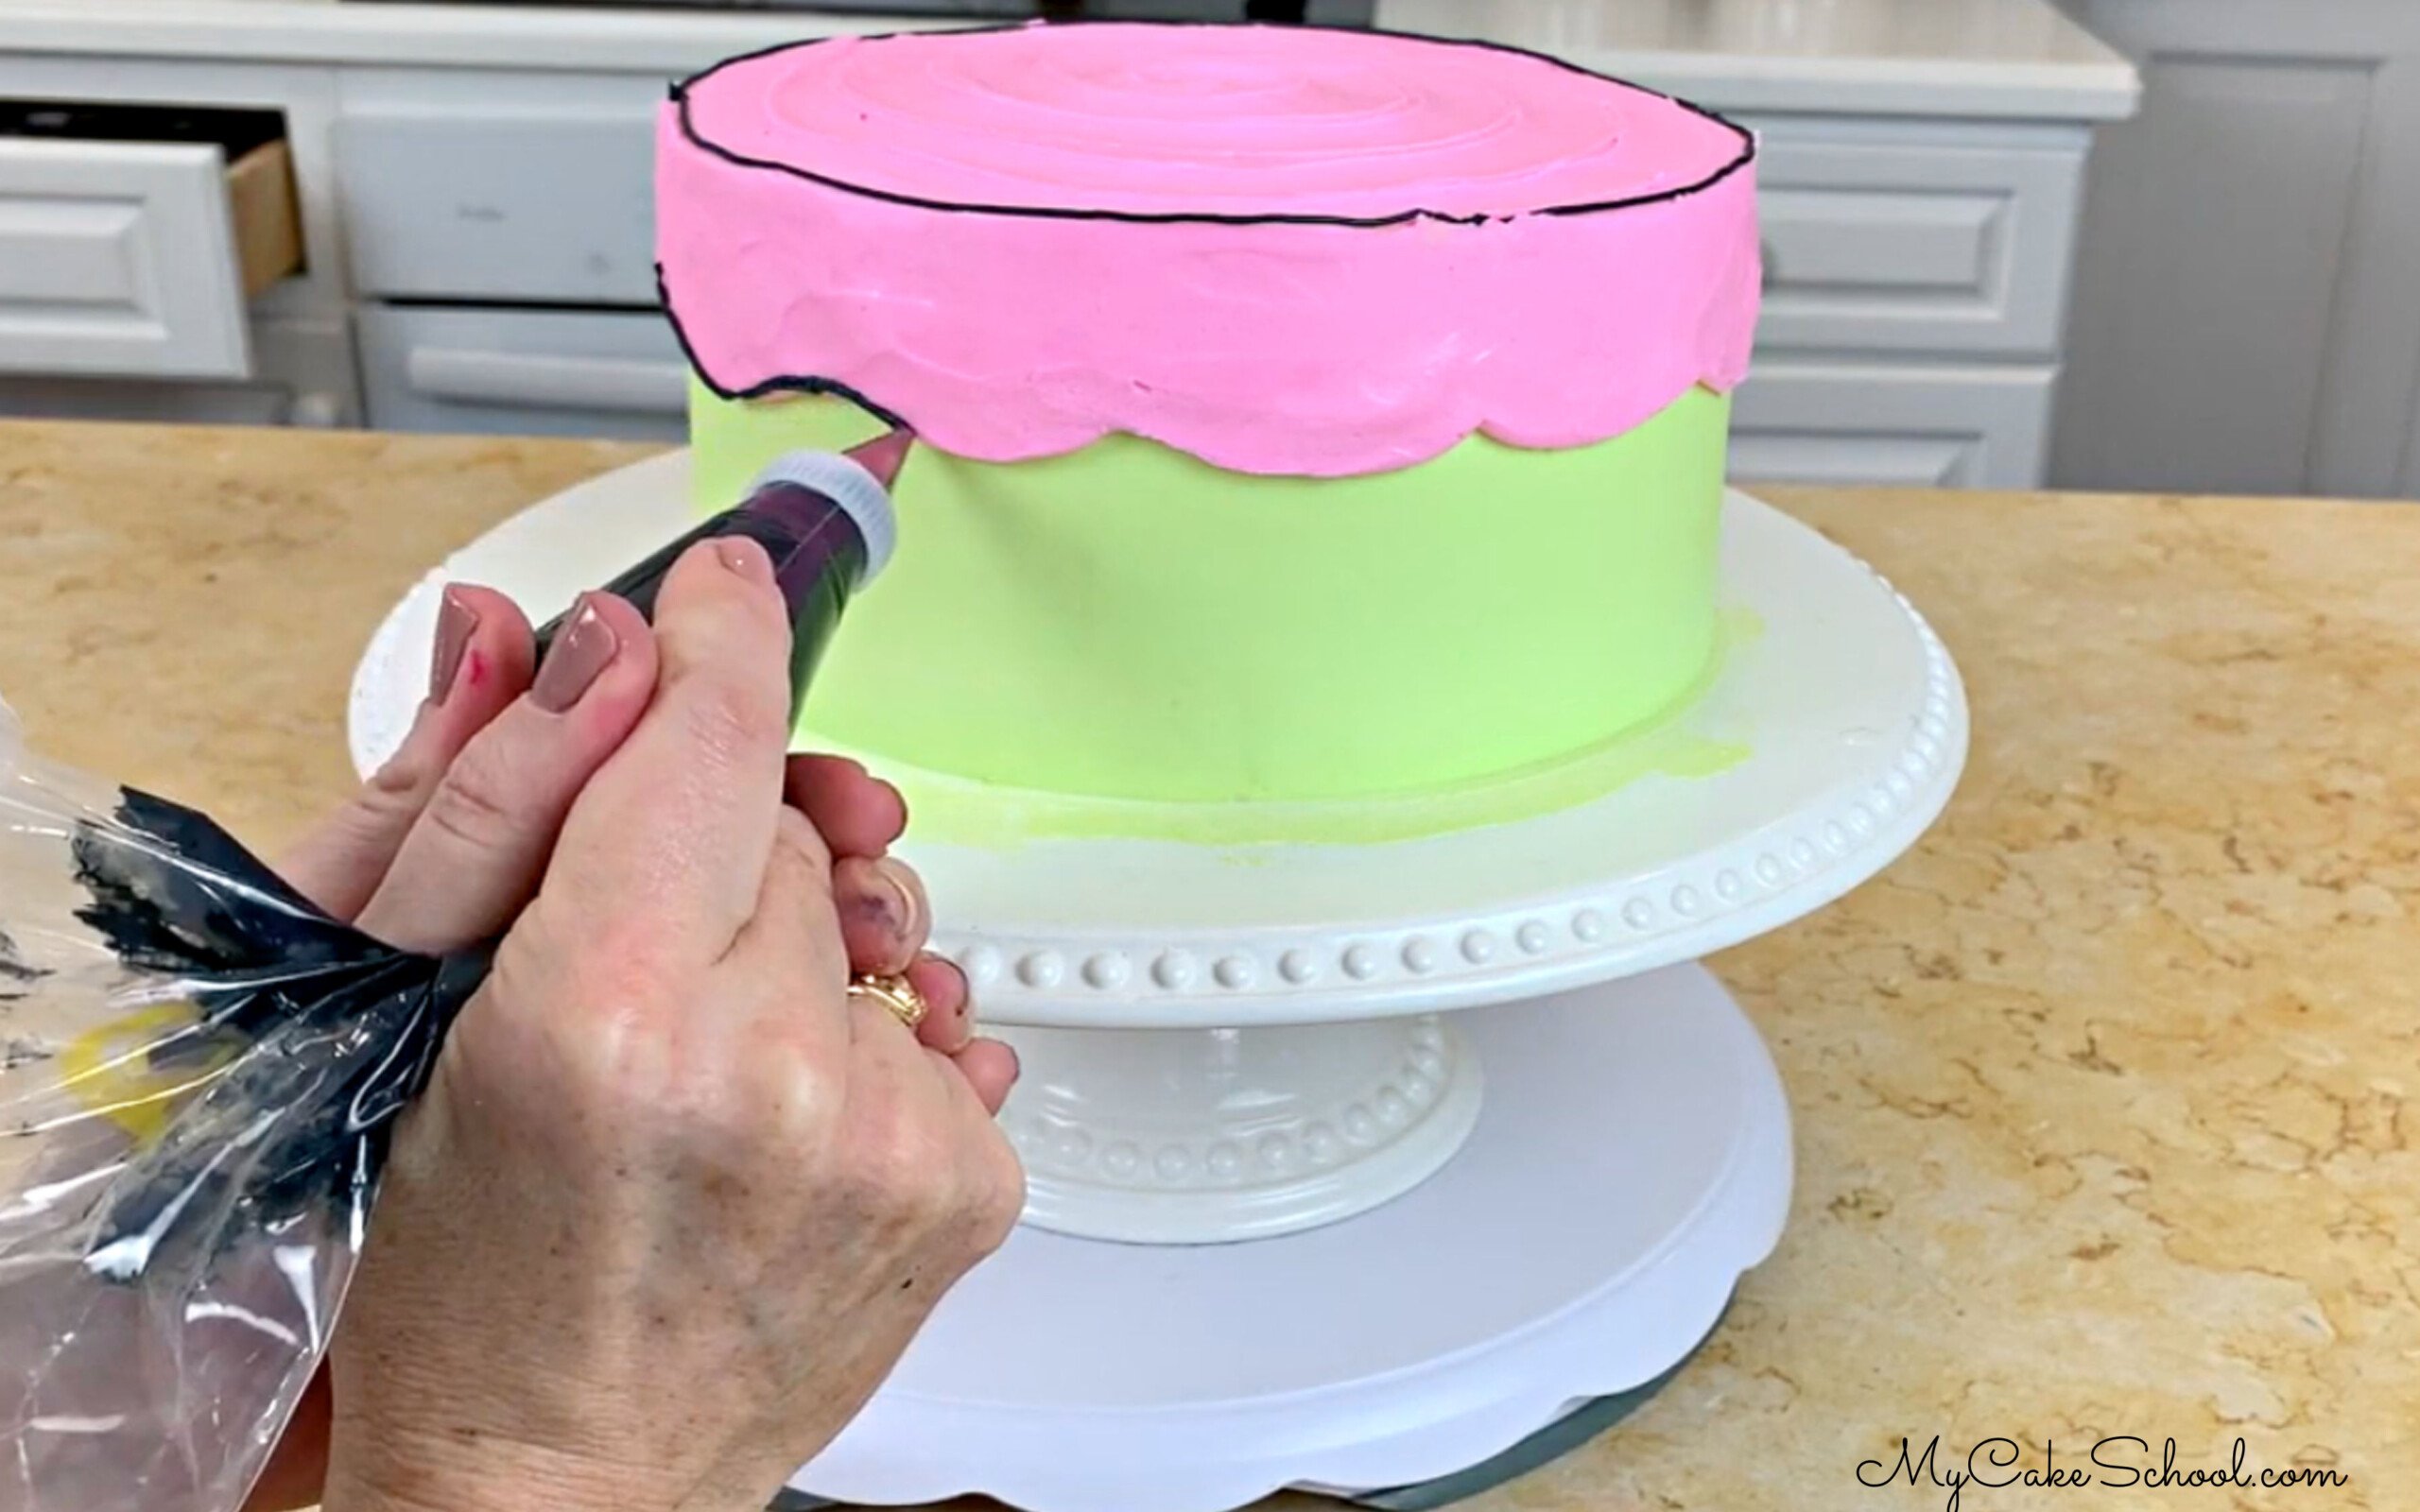
I added black circles to the pink frosting which I filled in with various colors to create "sprinkles" or polka dots.
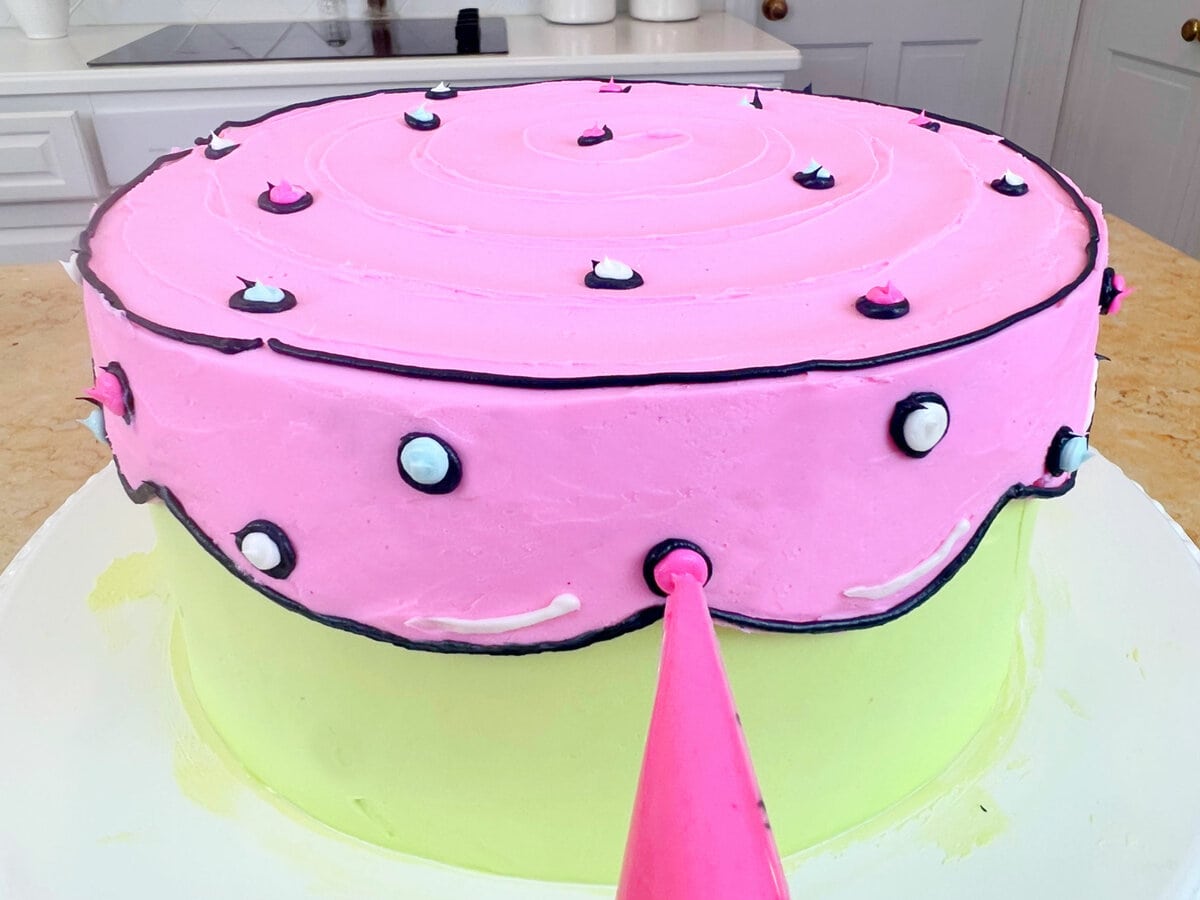
I added white lines here and there close to the scalloped edge as well for a cartoony look.
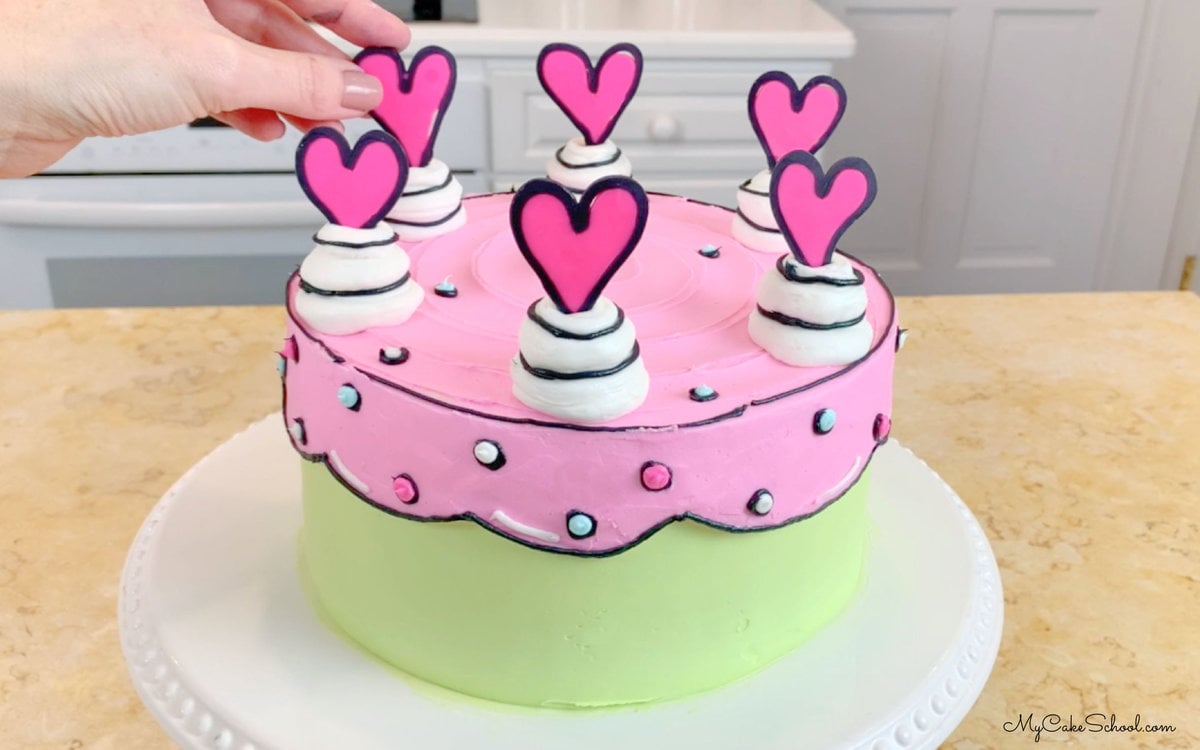
Top of the Cartoon Cake
For the top of the cake, we added "dollops" of buttercream using a large round piping tip (or you can snip the tip of a disposable piping bag) and added black outlines to these as well.
We topped with our chilled hearts (smooth side forward), and added white buttercream accents here and there with a small round piping tip.
**After filming my tutorial, I realized that I didn't pipe a black line around the base of the cake-- It looks nice either way but I think it helps to tie everything together.
More Party Cakes
We have hundreds more cakes for all sorts of occasions to share with you! Here are just a few birthday cakes below. Don't miss our full collection of free Cake Decorating Tutorials!

Cake Recipe Ideas
Today's cartoon cake is an 8 inch round, 3 layer cake. We have so many cake recipes that would be perfect for this design!
Make sure to check out our Birthday Cake Recipes! Some of our most popular are our Vanilla Velvet Cake, White Velvet Cake, Chocolate Cake, Strawberry Cake, and Marble Cake!
Some of our favorite easy cake mix recipes are Lemon Cake from cake mix, Easy Strawberry Cake, and Butterscotch Cake!
Enjoy the Video
Thanks so much for stopping by! Make sure to check out our other favorite ideas for Birthday Cake Ideas!
If you are looking for more heart-themed cakes, make sure to check out our collection of 60+ Valentine's Day Cakes! These are great for other occasions as well, from birthdays to anniversaries and more!
Have you made this? We would LOVE for you to leave a ⭐️ rating as well as a comment and photo below! We really appreciate your feedback!
How to Make a Cartoon Cake
Equipment
Ingredients
- Your Cake of Choice we used our Vanilla Buttermilk Layer Cake- 8 inch
- Vanilla Buttercream- We used two batches of our Classic Vanilla Buttercream Recipe
- Coloring Gels: We used Americolor Electric Green Deep Pink, Sky Blue (for dots), and Black
- Bench Scraper or Offset Spatula we used both
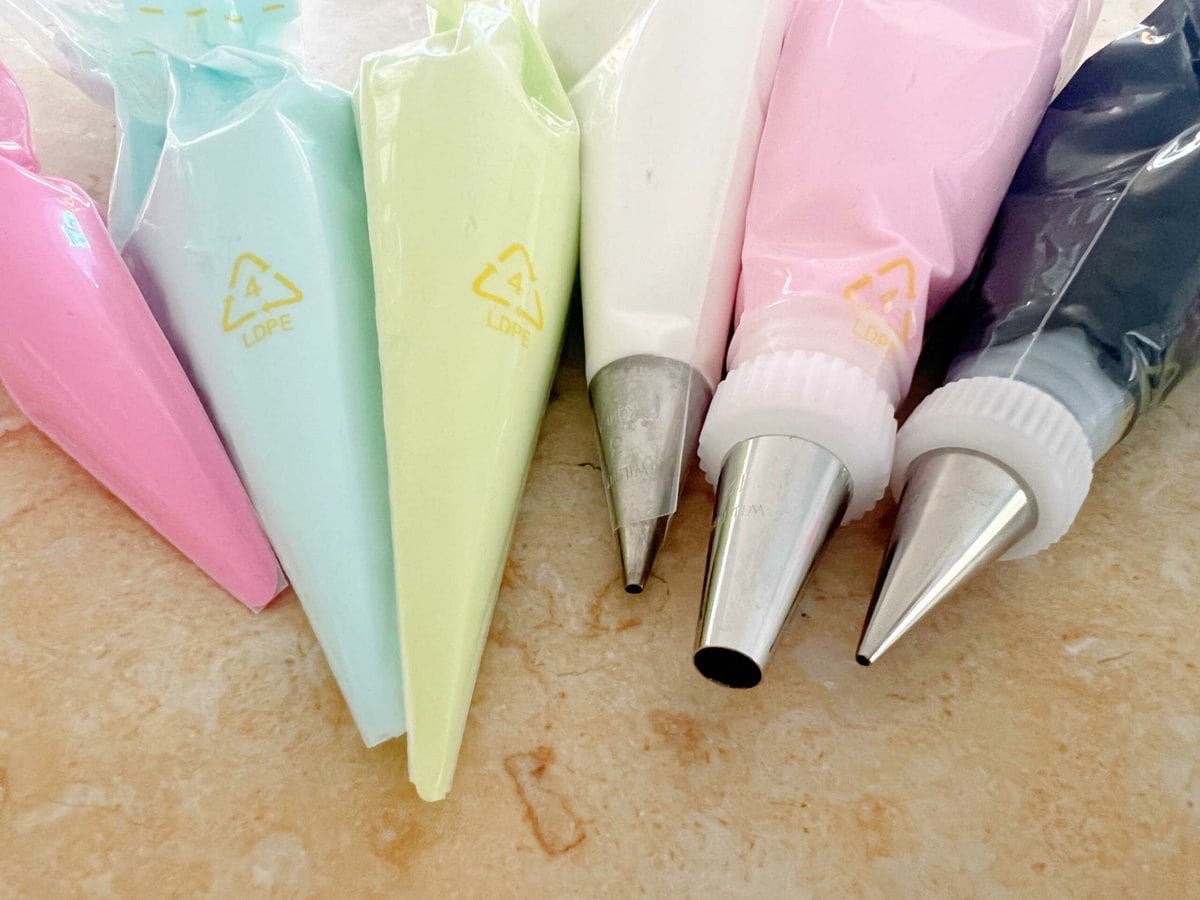
- Piping Tips: We used Tip 3 for black outlines and Tip 2 for outlining hearts
- Turntable - Optional but helpful
- Disposable piping bags
- Candy Coating- We used pre-colored Pink and Black Coating-- about ¼ cup of black and about ½ cup of pink (Ours was Sweet Tooth Fairy Brand- bright pink & black)
- Parchment-lined cookie sheet
Instructions
- For the Candy Coating Hearts
- (If you do not have pre-colored candy coating, you can tint white bark coating/candy coating using oil-based candy colors)
- Melt the coating in small, microwave-safe bowls. Heat in small increments until almost melted- then, stir until smooth.
- Pipe black candy coating outlines of hearts onto a wax paper or parchment paper-lined cookie sheet. You will need 6 total--but make a few extra just in case of breakage. You can slide a heart template beneath the parchment or wax paper if you need a guide.
- If the chocolate is way too runny, it with thicken slightly if you wait a minute or two.
- Next, fill in the hearts with melted pink coating. Again, if the coating is way to runny, let it cool just a few minutes more.
- Make the points of the hearts a bit longer than usual as they will be pushed into the frosting later.
- The hearts will firm up as they cool. You can speed this along by popping them in the freezer for 5 minutes, or in the refrigerator for a bit longer. It is fine to leave at room temperature--but I prefer to chill just before handling so that they are extra firm. We used the smooth side of the hearts.
For the Cake
- Bake the cake as usual and cool layers completely.
- We filled and crumb coated the cake with vanilla buttercream. Then, frosted the cake with green frosting. You can use a metal bench scraper for a smooth finish around the sides. We like to chill the frosted cake in the freezer for 10 minutes before gliding back over it with a hot bench scraper for a smoother finish.
- Next, we piped on our pink frosting. I used a piping tip 12 for piping the scalloped pattern around the sides of the cake. We filled in with pink frosting, smoothed with an offset spatula. (Chill as needed for 10 minutes in the freezer and glide over with a heated offset spatula for a smooth finish).
- As an optional step, we also created a spiral on top of the cake with an offset spatula.
- Outline the pink frosting scallops and top edge of the cake with black buttercream piping-- we used a piping tip 3. Outline the base of the cake also --We forgot to do this during the video and so we added it later! ;0)
- Pipe small black buttercream circles on top of the pink frosting and fill with various colors for "sprinkles".
- Pipe 6 large dollops of frosting on top of the cake. We outlined these as well. Top with the chilled chilled hearts. We added white buttercream accents to the hearts as well as here and there along our pink scalloped design.
Looks awesome! Definitely a very popular design. Love it! :-)
Hi, I love to see you making a tutorial again. Any chance that you will go back to making tutorials? I've been a member of your website for many years and while I like getting recipes, there's nothing like seeing a cake being made. You always had such fun and creative ideas. I really hope you wil consider it!
Hi Melissa
I am not being able to sign in to see the tutorials. Can you please help me 😳