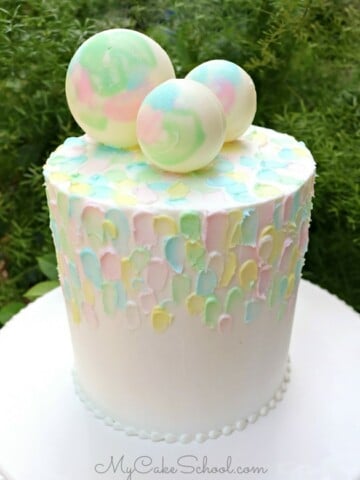
Painted Buttercream and Chocolate Spheres- Cake Tutorial
In this video tutorial, you will learn how to create a simple, beautiful "painted" buttercream technique as well as how to create matching pastel chocolate spheres.

I love buttercream techniques and especially techniques that have lots of color and texture! Today's cake design is a combination of a couple of cake trends that I've seen lately, which are very simple to create!
Table of Contents
Silicone Mold for Spheres
As you'll see in the video, I used a silicone mold to create the spheres. These are half-ball molds that are glued together with melted candy coating to create a full sphere or ball for decorative accents! (You can find the link to the mold that we used in our Recipe Card at the bottom of this post.)
We love these molds and have used them for additional dimension in several other free cake tutorials as well. Here are a few examples:
Knife Textured Buttercream Tutorial
Materials:
*You can find the full, printable materials & instructions list further down in this post. Here is a quick look at our materials!
In this video, we decorated a four layer double barrel cake. As usual, the bottom two layers are on their own cake cardboard cut down to size, with four bubble tea straws inserted and cut to the height of the bottom two layers. Then the next two (filled) cake layers are on their own cardboard cake circle cut to size, and placed on top of the bottom tier. Cake is frosted as one.) We frosted this cake with our fluffy vanilla buttercream frosting, but our Classic Vanilla Buttercream is a great option too.
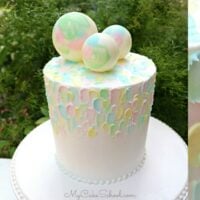
Silicone Spheres. We used spheres that were about 1 ¾ and 2 ½ inches diameter.
Candy Coating - Use your candy coating of choice. We used Candiquick bark coating
Coloring Gels- We used Americolor Candy Color Gels in Pink and Green to tint both our white chocolate coating and our buttercream (so the shades of buttercream and chocolate would be a close match). We used Americolor Sky Blue -regular gel color instead of Blue Candy Color since we liked the shade of blue better. However, it does make for a slightly thicker texture when mixed with the candy coating. Candy coloring gels don't alter the texture of the chocolate coating.
Offset Spatula- I used a small rounded offset spatula but a small tapered one would work well also.
Piping Tips: I used a Tip 4 for the bead border
Disposable Piping Bags
Misc: I applied my colorful chocolate accents to the spheres with a medium sized flat (small) paintbrush with fairly stiff bristles. Of course you can improvise with the brushes you have on hand or with a small spatula.
When frosting the double barrel cake, I applied my frosting as usual with a spatula, then smoothed with a bench scraper. Smooth with your method of choice, I used the hot knife method and so I chilled the cake in the freezer, then smoothed out remaining imperfections with a heated spatula.

Notes:
- It's easiest to do the buttercream technique when your base coat of frosting has been chilled and is firm. This helps to protect your smooth layer of frosting when spreading the colorful frosting dots.
- I only used one large sphere and two small ones. It's a good idea to make one or two extra though just in case!
- Make sure to brush your base layers of chocolate all the way to the top of the mold so that the spheres will fit together easily. Remember to do two coats (chilling in between) so that your spheres will be a good thickness. Clean up the areas around the molds before chilling so that the edges will be smooth.
- Adhere both completed, chilled halves with melted candy melts.
- I kept my contrasting colors away from the edges of the mold so that the seam joined with white chocolate wouldn't be as noticeable.
- Smooth over any rough areas on your finished sphere with a little vegetable shortening. The heat of your fingertips with minimize imperfections.
- Attach your spheres to the cake with a little buttercream. If your spheres seem too heavy, you can cut a bubble tea straw to the height of the cake beneath the sphere for support. Mine were lightweight enough that I didn't need to do this.
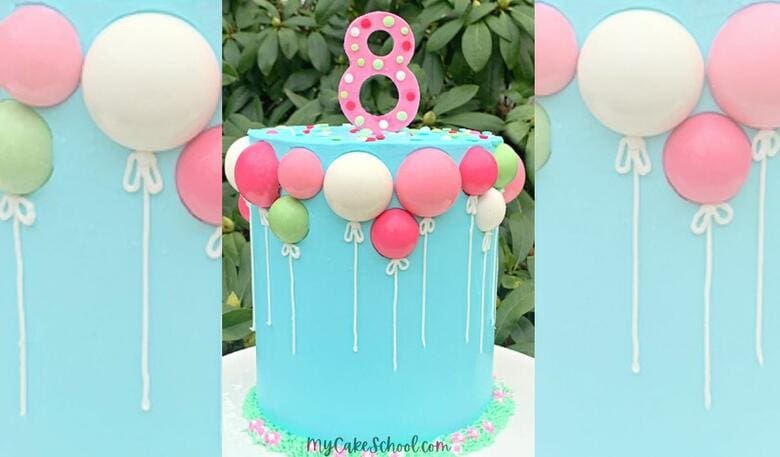
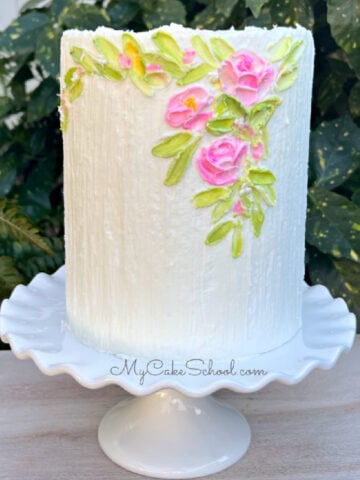
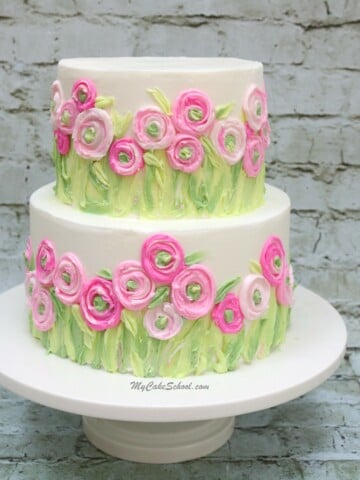
More Painted Cake Tutorials
We've made several free cake decorating video tutorials that have either have the textured look of a painting, or that have painted accents. Here are a few of them!
Buttercream Palette Knife Painting
Elegant Textured Buttercream Flowers

Enjoy the Video
Thanks so much for stopping by. Make sure to check out our full collection of cake recipes and cake decorating tutorials!
Painted Buttercream and Chocolate Spheres- Cake Tutorial
Ingredients
- Your Cake of Choice- We decorated a 6 inch double barrel cake.
- Vanilla Buttercream- We used our Fluffy Vanilla Buttercream Recipe. Our Classic Vanilla is a good option also.
- Silicone Spheres Mold. We used spheres that were about 1 ¾ and 2 ½ inches diameter.
- Candy Coating - Use your candy coating of choice. We used Candiquick bark coating
- Coloring Gels- We used Americolor Candy Color Gels in Pink and Green to tint both our white chocolate coating and our buttercream so the shades of buttercream and chocolate would be a close match. We used Americolor Sky Blue -regular gel color instead of Blue Candy Color since we liked the shade of blue better. However, it does make for a slightly thicker texture when mixed with the candy coating.
- Offset Spatula- I used a small rounded offset spatula but a small tapered one would work well also.
- Piping Tips: I used a Tip 4 for the bead border
- Disposable Piping Bags
- Misc: I applied my colorful chocolate accents to the spheres with a medium sized flat small paintbrush with fairly stiff bristles. You can improvise with the brushes you have on hand or with a small spatula.
- Cake boards and supports as needed if making a double barrel cake.
Instructions
- We decorated a four layer, 6 inch double barrel cake. As usual, the bottom two layers are on their own cake cardboard cut down to size, with four bubble tea straws inserted and cut to the height of the bottom two layers. Then the next two (filled) cake layers are on their own cardboard cake circle cut to size, and placed on top of the bottom tier. Cake is frosted as one.)
- Frosting the Cake Apply the frosting with an offset spatula. I like to do a thin crumb coat first, chill it in the freezer for 15-20 minutes (or longer in the refrigerator) to firm everything up and then apply the second coat of frosting.
- Next, smooth around the sides with a bench scraper while rotating the cake on a turntable. Smooth with your method of choice. Heating the metal bench scraper under very hot water before smoothing the frosting makes it extra smooth.
- Decorating the CakeStart with a chilled, frosted cake so that the base coat of frosting is firm. Re-chill as needed (15 minutes in the freezer).
- Using a disposable piping bags with the tips snipped away, pipe dots of buttercream (in varying shades) onto the cake. After piping the dots, I used a small offset spatula to spread it downward. We started at the top edge of the cake and worked our way down (covering about half of the cake). We also did this on top of the cake. Many of our "brushstrokes" overlap the colors beneath.
- Chocolate BallsTint melted candy coating/or white bark coating with candy coloring. (You can also use pre-colored candy melts like SweetTooth Fairy brand).
- Brush here and there on the inside of your sphere molds in difference colors. Chill in the freezer for 5-10 minutes.
- Then, spoon a bit of melted white candy coating into wells and use a brush to spread it over the inside, from bottom to top. Chill for 10 minutes in the freezer until firm. Go back in with a second coat of white coating. Chill to firm up. (15 min or until firm).
- Piece the chilled spheres together, "gluing" with melted white candy coating. Wipe away excess melted chocolate. Allow to firm up in molds. Chill if needed before applyting to cake.
- If you are concerned about the weight of the larger balls, you can place a bubble tea straw beneath, snipped to the height of the cake.
Video
Notes
- This design can be transferred to cakes of any size! Chill the frosted tier until the base coat of buttercream is firm before adding the colorful buttercream accents.
- Don't wash off your brushes in between applying the different colors as moisture may seize the melted candy coating. Just wipe them off on a paper towel instead.We matched the colors of our spheres to the frosting colors used on the cake.
- For best results, use candy coloring gels to tint your candy coating. This is because these colors are oil based and are less likely to effect the consistency of the melted coating. (We did use Americolor Sky Blue for the blue coating as we didn't have pretty blue candy color option.)
- We used the same coloring gels for both buttercream and melted coating for the balls so that they would match.
Really like this.
Very cute! Would be good for a gender reveal cake, you could add pink or blue candy inside the chocolate spheres. Love it! :-)
Thanks Ladies! @MsGF- love the gender reveal idea!
So pretty! Makes me think of Easter:)
Love this !
So cute! Love this!?
My strawberry filling is very runny what can I do to thicken. I thought about geltion. Help I need to do something now
@Dorothy- I'm sorry that you are having trouble with your filling. Feel free to e-mail recipe questions to info@mycakeschool.com. I'm not sure what recipe you are using, but if you are making a cooked strawberry filling, you can add a little corn starch to thicken it. Cooked fillings/reductions will also thicken as they cool. I don't believe we have a strawberry one in our Recipes section, but our Raspberry Filling is made in the same way if you'd like to take a look- https://www.mycakeschool.com/chocolate-raspberry-scratch/
Well I found the answer to my runny filling, I added gelatin and it thickened up real quick, I love your crusting buttercream thanks you so much it’s one I’ll always use
they are beautiful