Elegant Fondant Appliques
Today, I'm going to show you how to create beautiful fondant appliques for your cakes. We've done several tutorials for elegant cakes over the years, and this is one of our favorites!
There are all sorts of options available to cake decorators for embellished appliqués, including lace molds.
However, today's cake tutorial will demonstrate how you can achieve elegance with the simplest of tools.
You can do variations of this design for any size or style of cake. It would make a beautiful wedding cake, bridal shower cake, or even birthday cake design! Change up the colors for a more whimsical feel. We hope that you enjoy it!
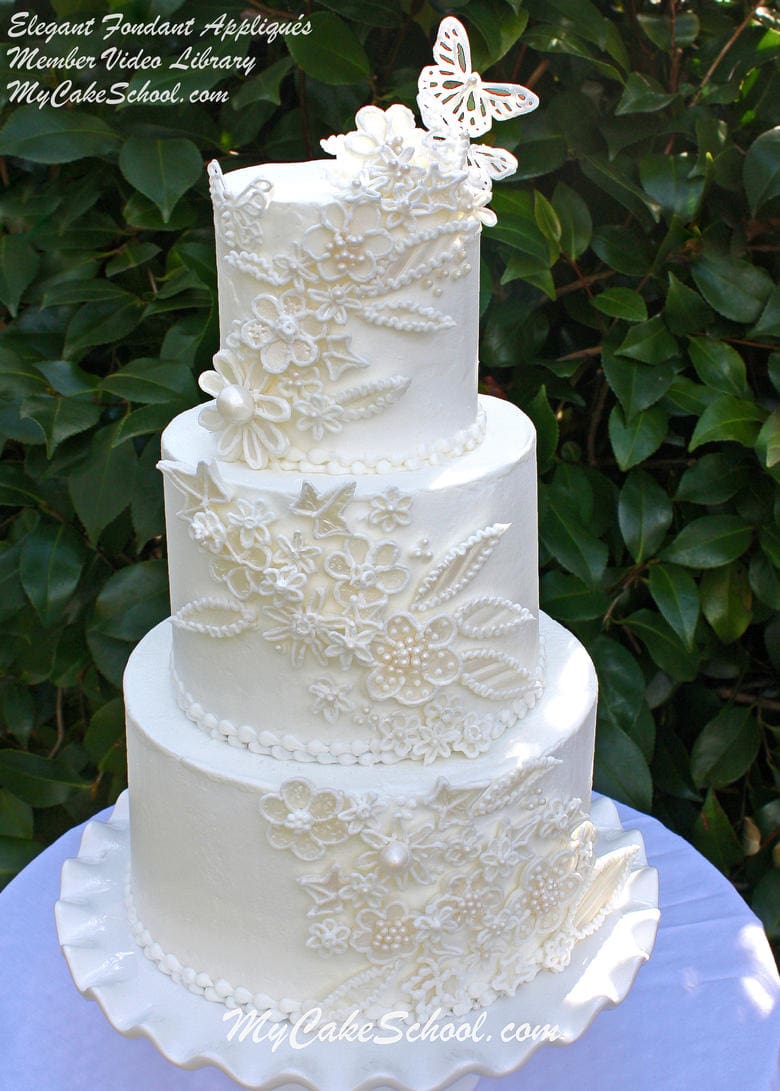
Table of Contents
Materials
The cakes in our tutorial are dummies frosted with High Ratio Frosting. Sizes: 8/6/4 inch. (I've only used this method on cakes frosted in crusting buttercreams or covered with fondant)
Liz Marek Fondant: This is my fondant of choice and so this is what I used for my flowers. You can use whatever you'd like with good results. If you are using a very soft fondant, you may wish to knead in a little gum paste or tylose powder to help the cut outs set more quickly and also so you can roll them more thinly.
Crusting Buttercream: I used High Ratio frosting (from our Recipes section) to frost the cake as well as to outline the fondant flowers and attach to the cake.
Misc. blossom/daisy cutters (Mine were from a PME blossom plunger set, Wilton Daisy set, and a few misc. metal cutters.)
Sugar Pearls: I used Wilton Sugar Pearls for my centers as well as marble-sized balls of fondant which I brushed with pearl dust.
Pearl Dust/Pearl Spray-- I sprayed my accents with Wilton Pearl Spray before placing onto the cake. I also used a little Super Pearl dust here and there on other accents. You can use one, both, or none...I just like a little shimmer!
"Glue" of choice: I used piping gel to glue the fondant centers to my flowers.
Wafer Paper & Butterfly Punch: This is optional but a nice touch. My butterflies were created with a punch that I bought from my local Michaels.
Floral Wire (I used 32 gauge) & Cocktail Straw: to anchor your "flying" butterfly.
Misc: Cake Boards beneath each tier cut to size, supports/dowels of choice, sturdy cake base/pedestal.
Fondant Appliques: Additional Notes
*As I mentioned in the video, you may find it easier to outline your flowers while they are still on the parchment paper, especially if you are not used to piping on the front side of your cakes (kind of a funny angle to get used to!).
If you go this route, you would want to do your piping in advance with either royal icing or crusting buttercream with plenty of time for it to set firm for easier handling & placement.
Although our cake is frosted with buttercream, this technique would work beautifully on fondant covered cakes as well!
Cake Recipes
There are so many cake recipes that would be perfect for an elegant cake like this. Some of our go-to recipes are Vanilla Velvet Cake, White Velvet Cake, Almond Cake, and our homemade Chocolate Cake.
You can find so many more recipes in our Cake Recipes section, which includes cake recipes from scratch as well as cake mix recipes.

More Elegant Cakes
We have even more elegant cake designs to share with you! Some of our favorites are our Elegant Chocolate Flowers Cake, Looped Ribbons of Buttercream Cake, Elegant White Flowers in Buttercream cake, and Palette Knife Buttercream Roses Cake.
Don't miss our full collection of cake decorating tutorials!
Enjoy the Video
Melissa, This is lovely.
Vintage is so popular now.
Love the movement of the top butterfly. Definitely a keeper cake.
@Bohnlo~ Thanks so much and I'm glad that you are experimenting with wafer paper! I think that my video just scratched the surface--so many more exciting things can be done with this medium! ;0) --
@Ann~ Thanks so much for your nice words, glad that you enjoyed the video!
Can we use fondant to caver the cake
Yes, fondant could be used to cover the cake.
Gorgeous! I appreciate how you demonstrate using tips and a fork to give texture to some of the cut outs, showing us how to use things we already have on hand to take it up a notch.
Thanks so much, Ellen!! I'm so glad that you like the cake & tutorial ;0)
Wow Malissa, your cakes are so beautiful and you make them look so easy, you make me want to run to my kitchen and start making cakes lol
Thank you Seema!! That means a lot! ;0) -- You should try this design, it truly is very simple to achieve, and so elegant too.
Melissa this is AMAZING! As always. I love it and i'm sure i will try it as i did a lot from your videos.
I have a question if i do it on a single tier how do i adjust the flowers?
Oh my - this is so beautiful. I love watching your videos, I always learn something. Your fork technique for leaves and using tips to make imprints is simply genius. May I ask one quick question? You mentioned using a cocktail stick for inserting the wires into the cakes. Where did you purchase them? Thanks again for such a beautiful video.
Hi Helen, we buy the cocktail straw/stick at our grocery store. They are near the wine isle in a display that sells bar ware (cork screws, bottle stoppers, etc.). Thank you for you nice comments about the video.
Love this cake!! Can the applique's be made in advance ? Plan to make them with fondant and tylos . Will they harden if frozen?