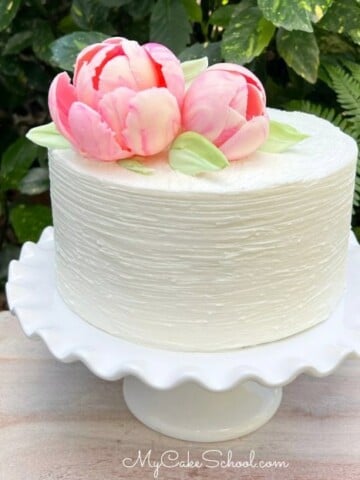
Elegant Chocolate Peony- Video Tutorial
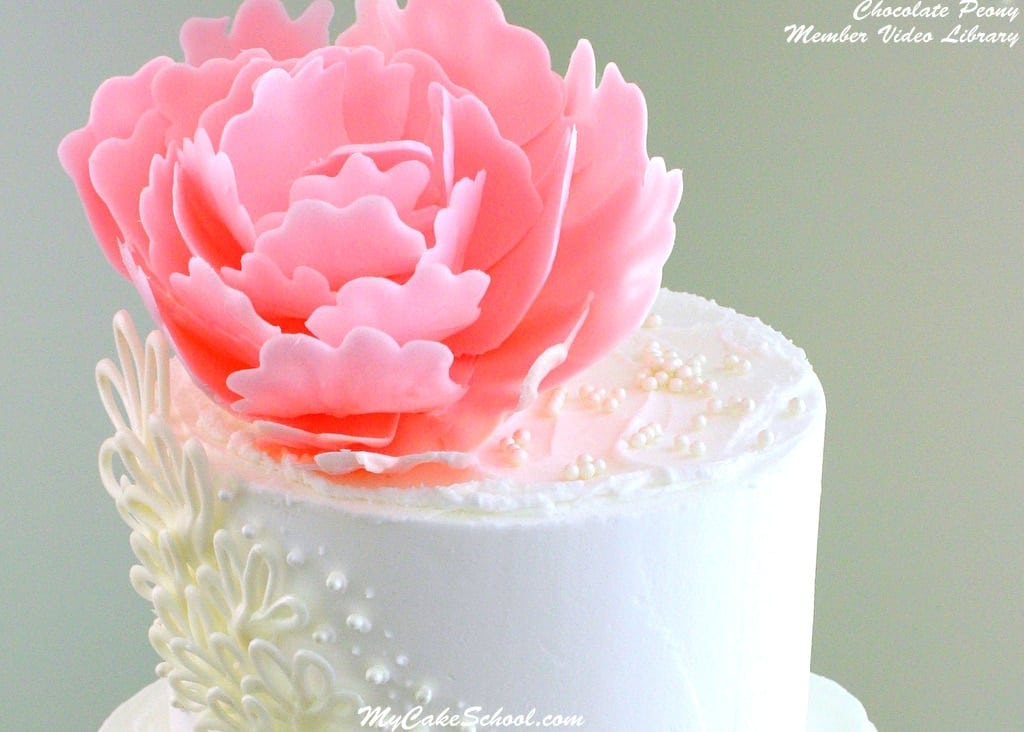
In today's video tutorial, you are going to learn how to make a gorgeous chocolate candy coating peony and also how to dress up your cake with simple yet elegant chocolate accents.
We love floral cake designs, and candy coating is one of my favorite mediums to work with in cake decorating. I LOVE that a chocolate flower petal or decoration can be piped, chilled, and ready within minutes!
The options are endless and the results are so impressive. I hope that you have fun with this technique!

Table of Contents
Materials for our Chocolate Peony:
We hope that you enjoy creating this beautiful chocolate peony. It really is not as difficult as it looks!
The Cake Tiers
In the tutorial, I used 8 inch and 6 inch stacked tiers, frosted in our fluffy vanilla buttercream frosting. Our Classic Vanilla Buttercream is a good option as well.
Our tiers are on their own cake cardboards cut down to size, and the 6" tier is supported with bubble tea straws beneath. For more information on how to stack tiers, check out our quick tier stacking cake tutorial!
Use any cake recipe you like! Some of our favorites are white velvet cake, almond cake, lemon cake, and vanilla buttermilk cake. There are so many great options.
The Chocolate Flowers
Template (optional) for piping chocolate fans
24 oz. Candy Coating/Candy Melts/Bark Coating of choice. {My grocery store sells Ambrosia brand and so that is what I used.} I used about half for the "chocolate fan" decorations, and the other half for the peony.
Candy Coloring- If your candy coating is white, and you'd like to tint it, make sure to use candy coloring rather than your usual icing or fondant coloring gels. We used Wilton Pink Candy Color.
Paper Towel Rolls or something of similar shape. We used 3 rolls in different sizes (One empty, One Half Full, and One in between). The forms don't have to be a specific size, just something that will give your petals a bit of curve as they set up.
Cookie sheet (or sheet cake cardboard)
Tape for securing tubes to cookie sheet
Waxed Paper
Plastic Spoon or your tool of choice for spreading petals
Piping Bags (we used disposable) for piping chocolate petals
Miscellaneous: Scissors, Pearl Dust (optional)
More Designs with Candy Coating
In addition to other chocolate flower designs like our Elegant Chocolate Flowers for Cakes and Chocolate Cherry Blossom Cake, we also have some great designs for other occasions as well. We love the dimension that candy coating decorations add to cakes!
Enjoy the Video!
Thanks so much for stopping by! If you give your chocolate peony a try, we would love for you to leave a comment or photo below.
Hi Terri! You are right, it can be really difficult to find gold luster dust locally (at least in chain stores). I have to order mine. I love the gold highlighter that I purchased from Global Sugar Art, but highlighter is not edible. I also like Rolkem Super Gold which I had to order from an Australian company.. which is edible according to their site but you would not be able to receive it in time. -
So, to your main question, I've never tried spray painting onto gum paste. I would do a sample to make sure nothing strange happens when the paint hits the paste. While it wouldn't be my first choice because of the idea of it (lol), I know you are in a time crunch. I don't see any harm in it as long as no part of the paint comes into contact with the cake, and of course nobody tries to eat it ;0) . I would just place onto the cake at the time of the event or just before. Good luck with everything!!
Hi Melissa, when working with candy melts, I microwaved then put in piping bag...not long after, it became hard and difficult to pipe. The more I reheated, it just got clunky and eventually was in almost a solid ball. How can my candy melts come out of piping bag more smooth which will allow my accents to look more clean? What am I doing wrong? Thanks!!!
Hi Terri-- I'm sorry that you are having this issue! It sounds like the candy melts may be getting too hot, which can cause the clumping and stiffening that you are experiencing. I used white chocolate bark coating for my tutorial (which I tinted with pink candy coloring). I do think that candy melts are a good option too, but I wonder if perhaps they are a bit easier to overheat since they are so thin? I would heat in 30 second increments at 50% power, stirring after each heating. At a certain point the candy melts will still be holding their shape but they are actually still melting and with stirring will completely melt. If you think that you've done all the right things and it is still too thick, try stirring in a bit of vegetable shortening. This will thin the consistency of the chocolate as you stir.
Let us know how it goes!
This is one beautiful cake. I have been trying all week to make a peony out of modeling chocolate and just haven't been able to get one like I want. I am most definitely try you way. So excited to make this cake and see how the st g let of peony turns out.
Hi Julie! Thanks so much, would love to hear how it turns out for you!!
Gorgeous cake with such a beautiful chocolate peony! Very creative! I'm definitely going to try this on one of my daughter's birthday cakes. Thank you for sharing your expertise.
Thanks so much, Darlita!