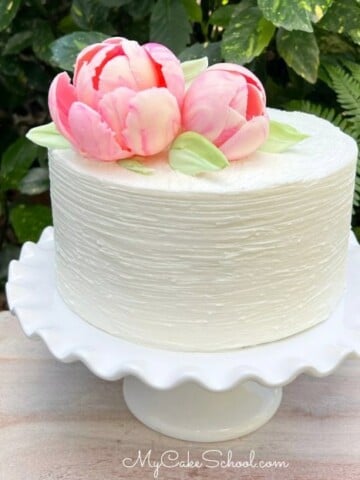
Elegant Chocolate Peony- Video Tutorial
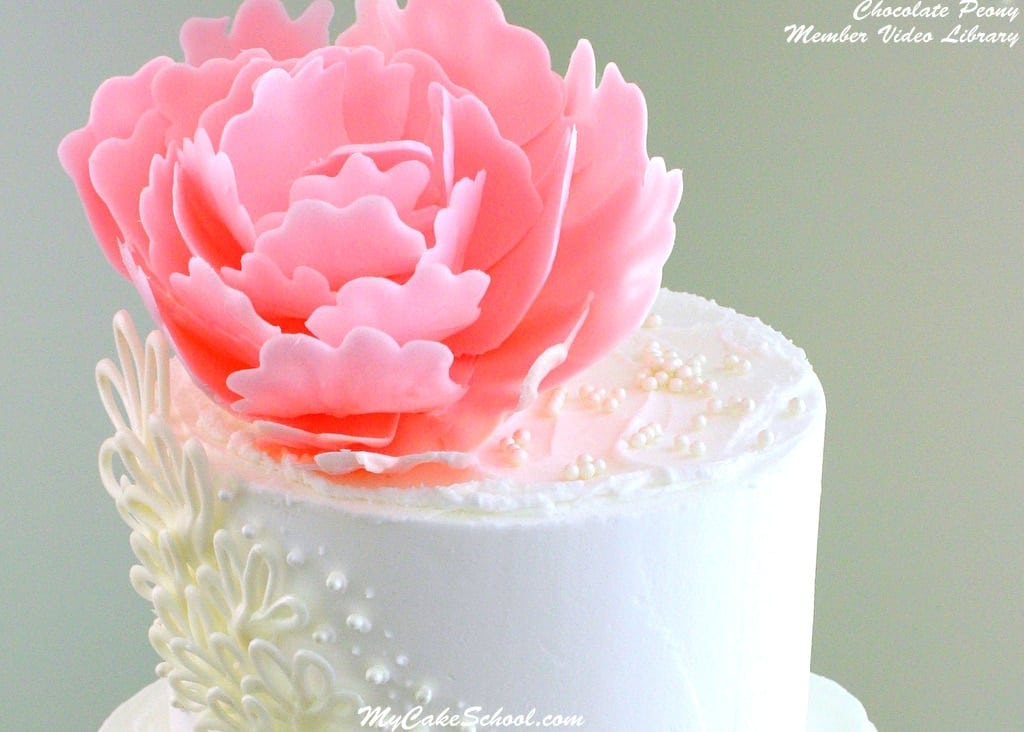
In today's video tutorial, you are going to learn how to make a gorgeous chocolate candy coating peony and also how to dress up your cake with simple yet elegant chocolate accents.
We love floral cake designs, and candy coating is one of my favorite mediums to work with in cake decorating. I LOVE that a chocolate flower petal or decoration can be piped, chilled, and ready within minutes!
The options are endless and the results are so impressive. I hope that you have fun with this technique!

Table of Contents
Materials for our Chocolate Peony:
We hope that you enjoy creating this beautiful chocolate peony. It really is not as difficult as it looks!
The Cake Tiers
In the tutorial, I used 8 inch and 6 inch stacked tiers, frosted in our fluffy vanilla buttercream frosting. Our Classic Vanilla Buttercream is a good option as well.
Our tiers are on their own cake cardboards cut down to size, and the 6" tier is supported with bubble tea straws beneath. For more information on how to stack tiers, check out our quick tier stacking cake tutorial!
Use any cake recipe you like! Some of our favorites are white velvet cake, almond cake, lemon cake, and vanilla buttermilk cake. There are so many great options.
The Chocolate Flowers
Template (optional) for piping chocolate fans
24 oz. Candy Coating/Candy Melts/Bark Coating of choice. {My grocery store sells Ambrosia brand and so that is what I used.} I used about half for the "chocolate fan" decorations, and the other half for the peony.
Candy Coloring- If your candy coating is white, and you'd like to tint it, make sure to use candy coloring rather than your usual icing or fondant coloring gels. We used Wilton Pink Candy Color.
Paper Towel Rolls or something of similar shape. We used 3 rolls in different sizes (One empty, One Half Full, and One in between). The forms don't have to be a specific size, just something that will give your petals a bit of curve as they set up.
Cookie sheet (or sheet cake cardboard)
Tape for securing tubes to cookie sheet
Waxed Paper
Plastic Spoon or your tool of choice for spreading petals
Piping Bags (we used disposable) for piping chocolate petals
Miscellaneous: Scissors, Pearl Dust (optional)
More Designs with Candy Coating
In addition to other chocolate flower designs like our Elegant Chocolate Flowers for Cakes and Chocolate Cherry Blossom Cake, we also have some great designs for other occasions as well. We love the dimension that candy coating decorations add to cakes!
Enjoy the Video!
Thanks so much for stopping by! If you give your chocolate peony a try, we would love for you to leave a comment or photo below.
I'm very excited about this! I love all of your videos but this one is definitely now one of my favorites! I can't wait to try it.
Wow!I just love this cake!I love working with chocolate,this is a must do!Amazing job Melissa!Thank you!
Wow Melissa! Love the peony and the loops! How creative! I do have to try these.
I have a helpful tip for you. I do a lot of royal piped hearts, etc., that I then place on a curve like you do here. Ceri Griffith taught me to use those splash noodles for kids to use in swimming pools. I buy them for a dollar at the dollar store and then cut them in foot long strips, then cut that strip in half lengthwise and you will then have your straight edge and it won't roll over like the paper towel card does.
Thank you so much for yet another brilliant cake idea! I love your videos! You rock!
~Mona
Beautiful! I've done melted chocolate flowers before, but I love this technique. As usual, your creativity amazes:)
Thanks!
This is it! Thank you! One of my lady friends will be 90 soon and I have been keeping an eye out for a lovely lady, cake. I think I can do it and she will love it no matter what.Your the best.
Thank you all SO much for your wonderful comments!! xoxo I hope that you have fun experimenting & making beautiful flowers ;0)
@Ramona~ I love your "pool noodle" tip!! Will definitely be trying this! xo
This is a GREAT idea! I prefer buttercream cakes and chocolate goodies so that everything is edible (whenever possible with the design). Although buttercream and chocolate have issues with heat, people love, love, love to receive chocolate 'anything'. This cake design incorporates my two favorites and has endless possible variations--thank you!
Such a beautiful cake, Melissa! Love, love, love this! I have a wedding cake to do the first of Oct. and was going to do a fondant Peony on the top of it. Do you think the white candy melts are "white" enough to make the Peony out of for a totally white lace wedding cake? I love the look and the couple loves chocolate. It will be in an A/C reception area. Thanks!
This is a genius way of making a flower! I only wish I would have seen it a few days ago when I needed to make a peony. I did it with fondant and tylose powder and although it turned out okay I think this method would have worked so much better in our humidity. Thank you so much!
Hello ladies, thanks for giving us yet another wonderful tutorial!
Question: I have a cake due Saturday night. I think the weather here in washington, dc will be about 75 degrees at night. Can I travel easily with this cake or should I attach the chocolate pieces at the venue?
One more question...have you guys ever used pastillage? Im asking because I am making a lifelike 3d saxophone as a topper. Currently, it is in the beginning stage without the keys attached..just the shape. I made it out of gumpaste and fondant (more gumpaste) about 2 weeks ago. I have a rod attached through it at bottom that is stuck in a support. When I begin to attach "keys" to the base, will it still hold up or should I use pastillage because it dries harder than gumpaste? The base is quite hard because it has been drying for two weeks, but im a little nervous about the stability once I put the keys and strings on...any suggestions would be reassuring. ..thanks in advance1!!
@Tori- Thank you! Happy that you like it! -
@Terri-- I'm glad that you are making this! If it were me, I would chill the cake before transport and transport with the flower on the cake. It should make the trip just fine! I'm sure that placing it on the cake would work also but I don't like to handle the flower too much when it is at room temperature because the petals are more fragile. -- Just fyi, the flower sat on top of our cake for a few days at room temperature with no issues (probably at least 75 degrees). ;0) -
As for the saxophone, I don't have experience with pastillage as I've always used gum paste when I needed firm decorations. I'm sure that pastillage would be fine as it dries very firm, but I really think that rolling the gum paste nice and thin will keep the keys lightweight for the base that you've created! I wouldn't worry about it crushing or sagging under the weight. Let us know if you have any more questions!
Thanks Melissa for getting back to me so quickly! I do appreciate it!! The sax is complete (today)but I have not sprayed it gold yet. One more question...can I use spray paint as opposed to an edible paint? I tried to spray my practice one with the wilton gold color mist spray, but it didnt give me the shiny gold look. The cake is for my niece and she is not interested in munching on a 3d sax...lol! I just dont know what edible gold I could use. If you have any suggestions, please let me know. Its due Saturday. Thanks!!