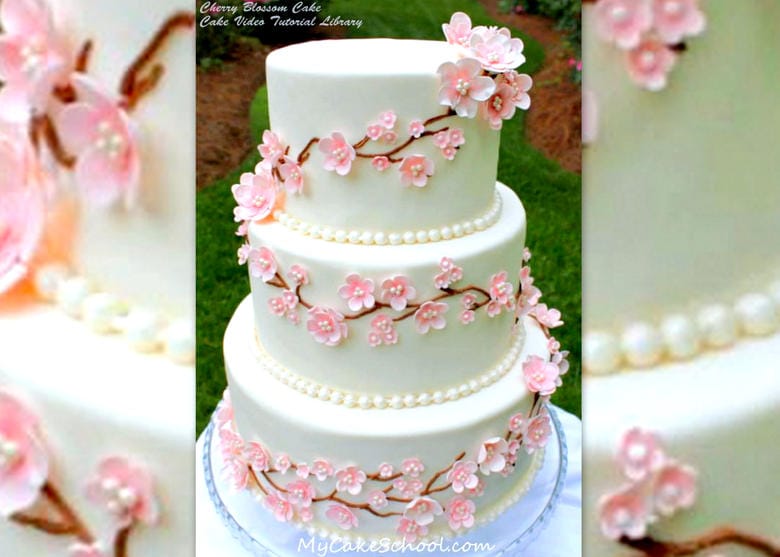
Chocolate Cherry Blossom Cake- A Video Tutorial
I just love cherry blossoms, and in today's video tutorial, I'm going to show you how to make a cherry blossom cake made with candy coating!

Table of Contents
More Cherry Blossom Cakes!
This is such a pretty design for spring, and it's not a difficult look to create!
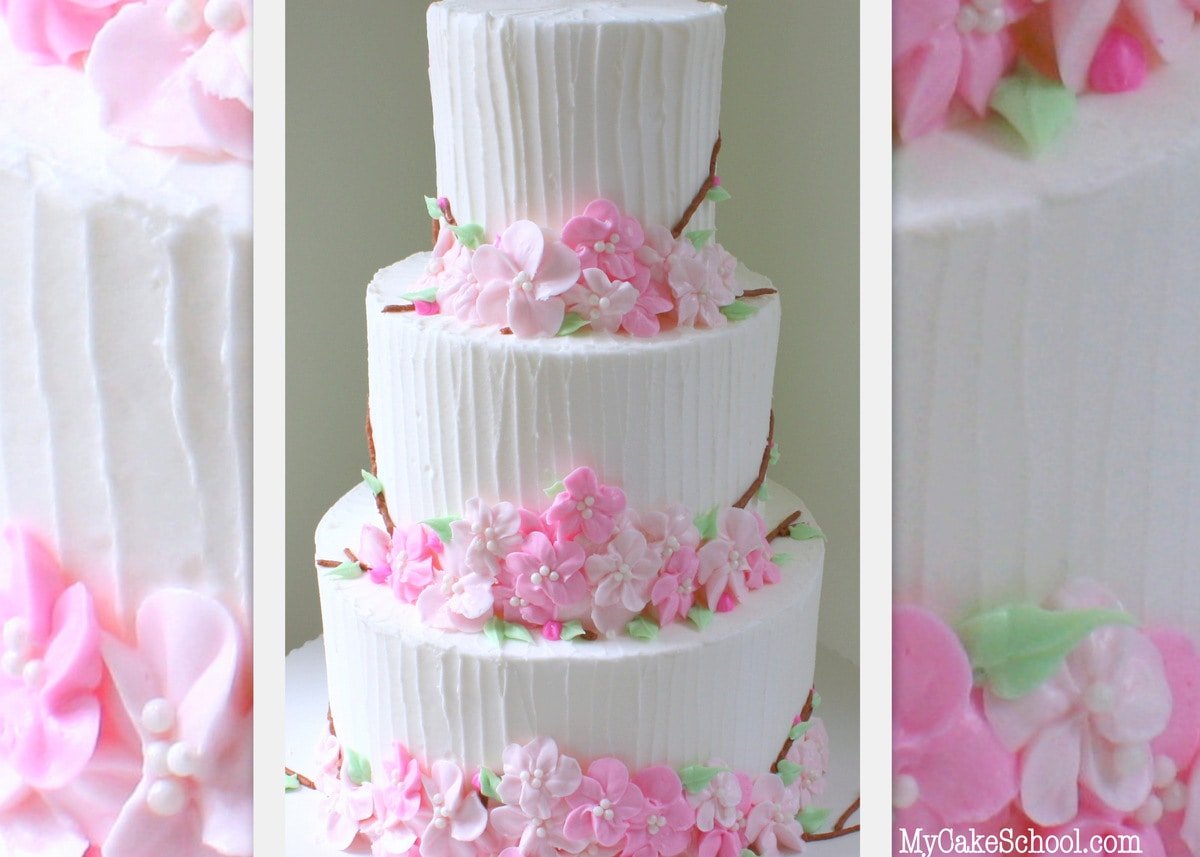
We've created cherry blossom cakes in other tutorials, using different mediums- one with buttercream cherry blossoms, and one with gum paste cherry blossoms.
We're happy to have another unique version that involves chocolate candy coating!
We hope that you enjoy this beautifully unique cake design for spring!
Materials for the Cake:
In this video, we are decorating a cake this consists of 8 inch and 6 inch stacked tiers. As usual, each tier is on it's own cardboard cake circle cut down to size, and the 6 inch tier is supported from beneath by 4 bubble tea straws (use your supports of choice) which have been trimmed to the height of the bottom tier. Our cakes are frosted in our Fluffy Vanilla Buttercream recipe. Our classic buttercream would work well for this too.
Buttercream: We used our Fluffy Vanilla Recipe, two batches. (Our Classic Vanilla Buttercreamis a good option too!)
Candy Coating: We used CandiQuik. We melted about 3 (2 oz) blocks of white coating for our flowers, and about 1 block of brown + 1 block of white for our twigs.
Candy Colors: I used oil based candy colors in pink as well as green --If you would prefer, you can buy pre-colored candy melts, but I like working with Candyquik, etc. because it melts so easily.
Sugar Pearls: We used mostly pink sugar pearls for the blossom centers, plus some white sugar pearls for accents.
Piping Tips: 102 petal tip for ruffles, tip 3 for bead borders
Wax paper (or parchment) lined cookie sheet
Artist palettes or something with small wells. We covered ours in plastic wrap, making sure to cover it loosely enough that we could press the plastic down into each of the wells, so that the flowers would still have a cupped look.
A mini cupcake pan could probably work for this also, or if you'd rather skip the cupped look altogether, you could do everything just as we did, but form the flower flat on the cookie sheet.
Small offset tapered spatula for spreading the chocolate petals. (or you could use a small spoon).
Disposable piping bags
Miscellaneous: Whenever I frost my cakes, I like to use a turntable as well as a bench scraper as I demonstrated in the video. I also used a spatula to clean up around the top edges of the cake.
Piping Gel: Optional for attaching any additional sugar pearls.
Tips for the Chocolate Cherry Blossoms:
Never handle the chocolate blossoms or twigs unless they have just been removed from the freezer as they can be very fragile at room temperature.
Freezing for an extended time may cause discoloration, so I usually just freeze for about 5 minutes or so just before it's time to handle them. Pop them back in the freezer as needed if they soften while you are working on your cake.
Make more flowers and twigs than you think you'll need.
My favorite twigs when assembling my design were the ones that were shorter or "v" shaped. Longer pieces don't bend with the curve of the cake and so you'll usually wind up needing to snap a little length off of them.

Loved it.
Gorgeous! I love it!
Beautiful.
Can cream cheese frosting be used for this decoration? Also my cream cheese frosting usually comes out off-white - even a bit yellowish sometimes. Any idea what I can do to make a more pure white color? I've heard you can add like half a drop of purple food coloring. What's your opinion on that?
I'm going to make this decoration on your vanilla bean cake and buttercream for Easter!! I really hope it turns out!! I'm going to skip the 6 inch tier though because I've never stacked cakes before and I'm not an expert.
Hi Fiona, That's great, post a picture of your cake.
This cake was delicious and I got so many nice comments on it!! Thanks for the recipe I'll definitely use it again!
Hi when smoothing out your cake with a hot spatula I always have a line from the spatula. How can you avoid the spatula line
Beautiful cake