Peppermint Cake
This delicious Peppermint Cake has amazing flavor and texture, and is perfect for the holiday dessert table!
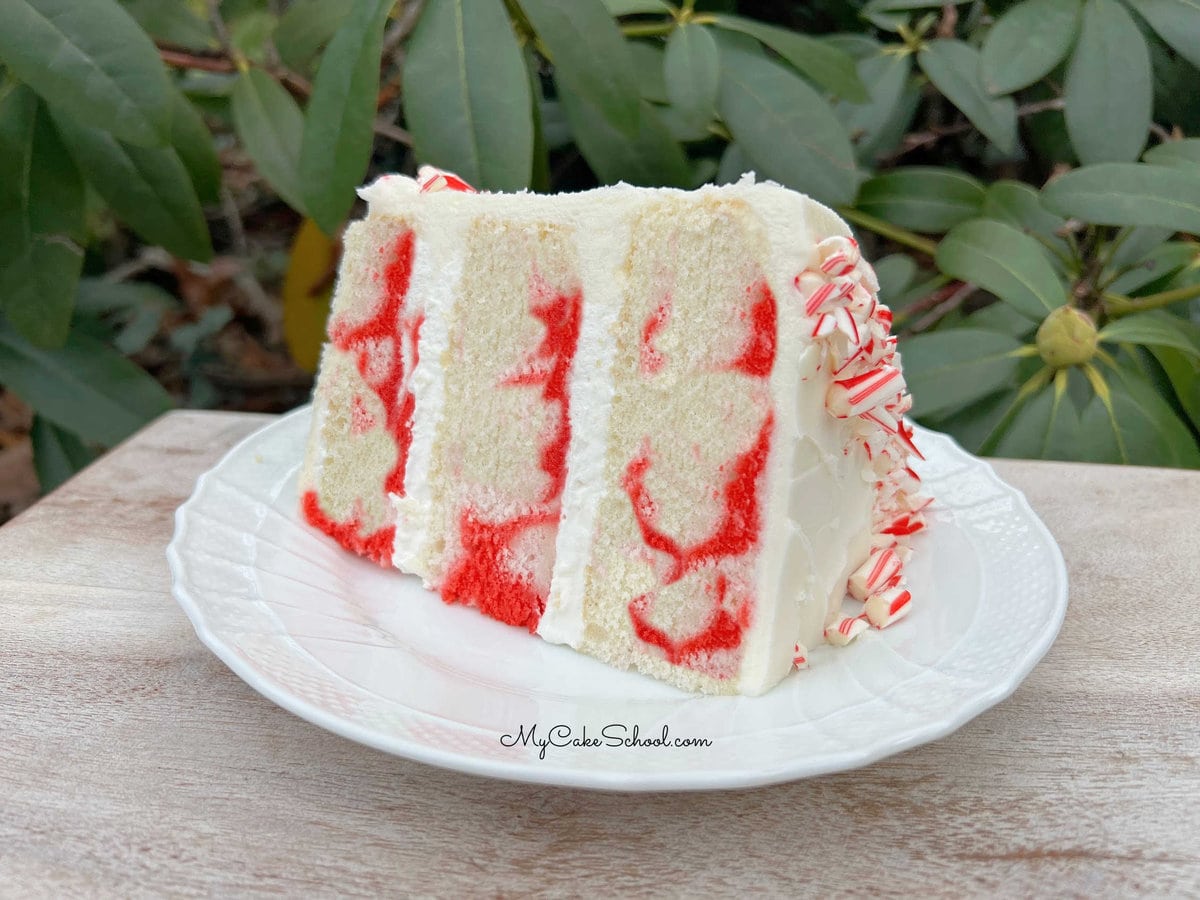
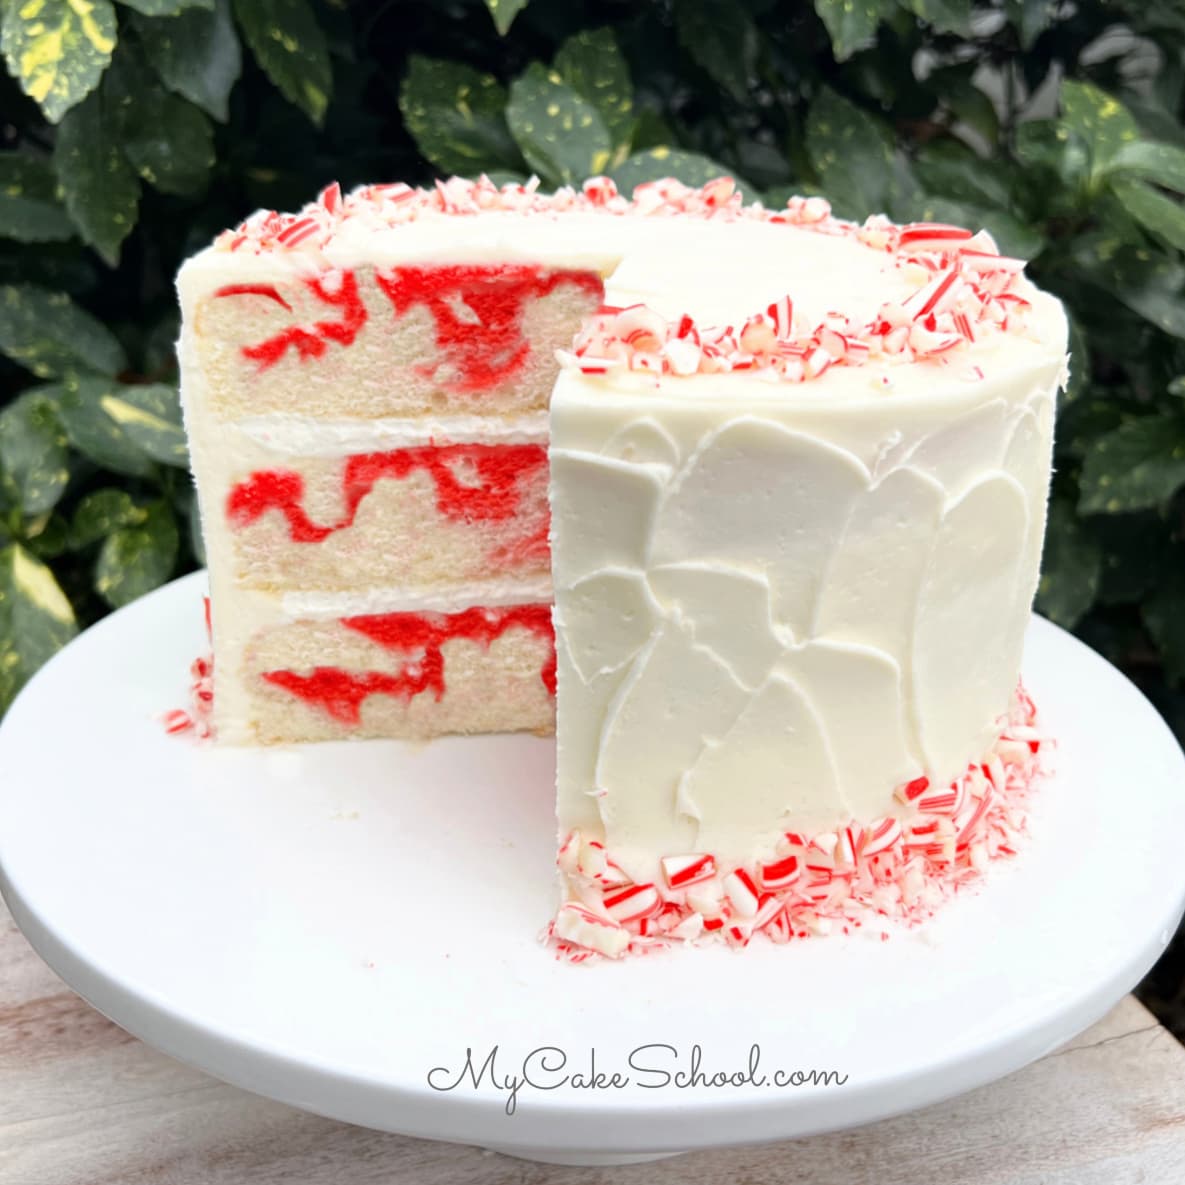
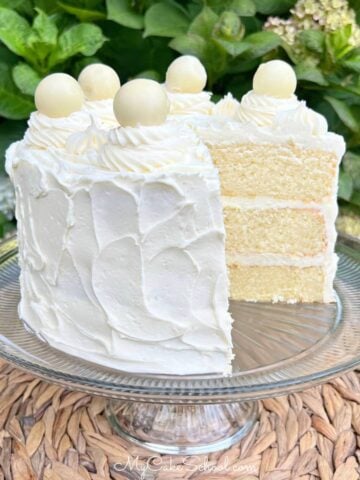
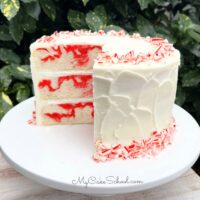
Based in part on our popular White Velvet Cake, this velvety soft, moist peppermint cake has beautiful swirls of red to fit the peppermint theme.
The cake layers are filled with a light peppermint whipped cream filling, and frosted with peppermint buttercream frosting.
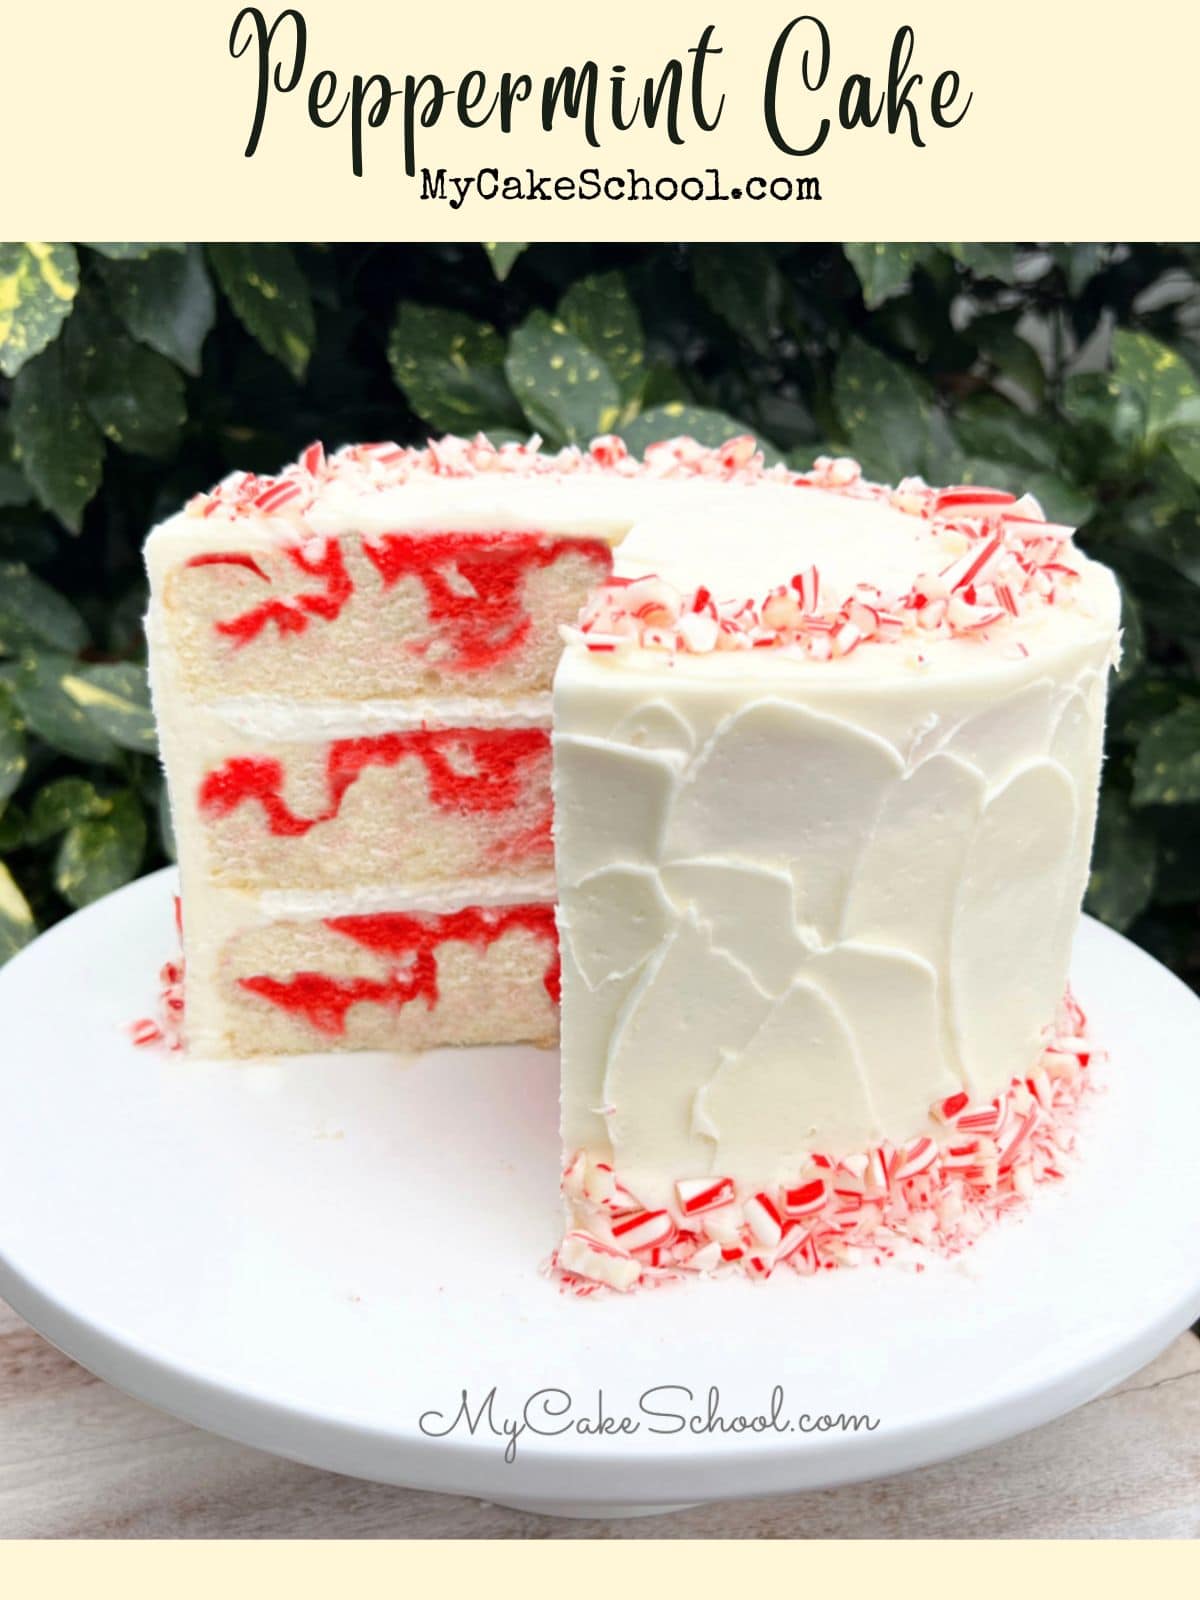
Table of Contents
Why we Love it
- Perfect for Christmas cake recipe for parties
- Slices have beautiful red swirls for a candy cane feel!
- Peppermint complements the white chocolate perfectly! (Peppermint Mocha Cake and our easy Peppermint Patty Cake are two more great peppermint desserts!)
We hope that you enjoy this festive, flavorful cake!
How to Make Peppermint Cake
You can find the full, printable Peppermint Cake recipe further down in this post. Here is a quick rundown of the steps!
- Preheat the oven to 325 degrees F. Grease and flour three 8 inch pans, adding a circle of parchment or wax paper to the bottom of each pan.
- Egg Whites: Separate your eggs, saving only the 6 egg whites for this recipe. Set them in a bowl to the side. (*It's fine to use carton egg whites for this cake if you'd like!)
- Flour Mixture: In a medium bowl, whisk the flour, baking powder, baking soda, and salt for 30 seconds and set aside.
- Buttermilk Mixture: In another bowl, add the buttermilk, vegetable oil, and vanilla extract and peppermint extract. Set aside.
- Butter & Cream Cheese: In the bowl of your mixer, add the butter and cream cheese and mix at medium speed until smooth.
- Sugar: Gradually add the sugar and mix at medium speed for 2-3 minutes.
- Adding Egg Whites: Mixing on low speed, add the 6 egg whites one at a time (it's fine to estimate), mixing to incorporate after each addition.
- Add Dry and Wet Ingredients Alternately: With the mixer on low speed, alternately add the flour mixture and the milk mixture, beginning and ending with the flour mixture (We did 3 additions of the dry mixture, 2 additions of wet). Mix just until blended.
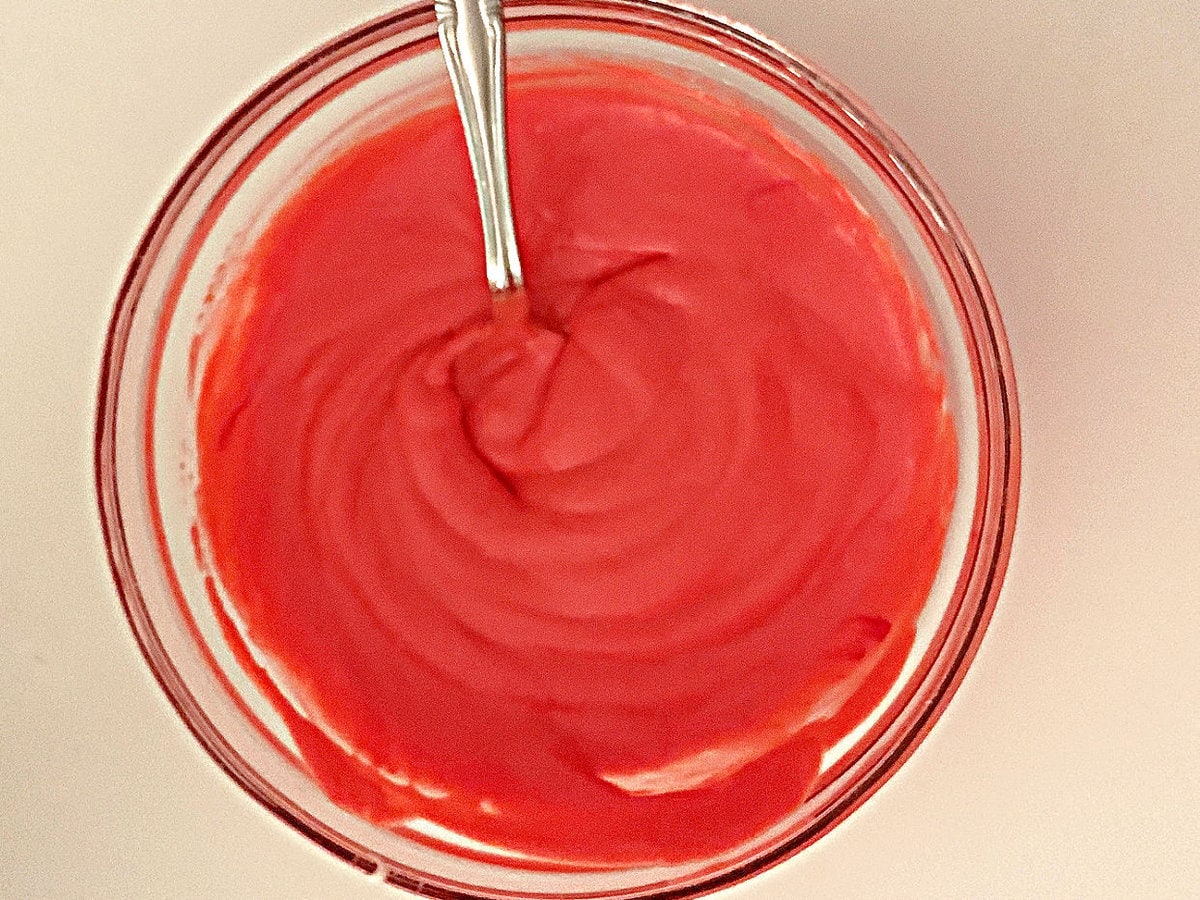
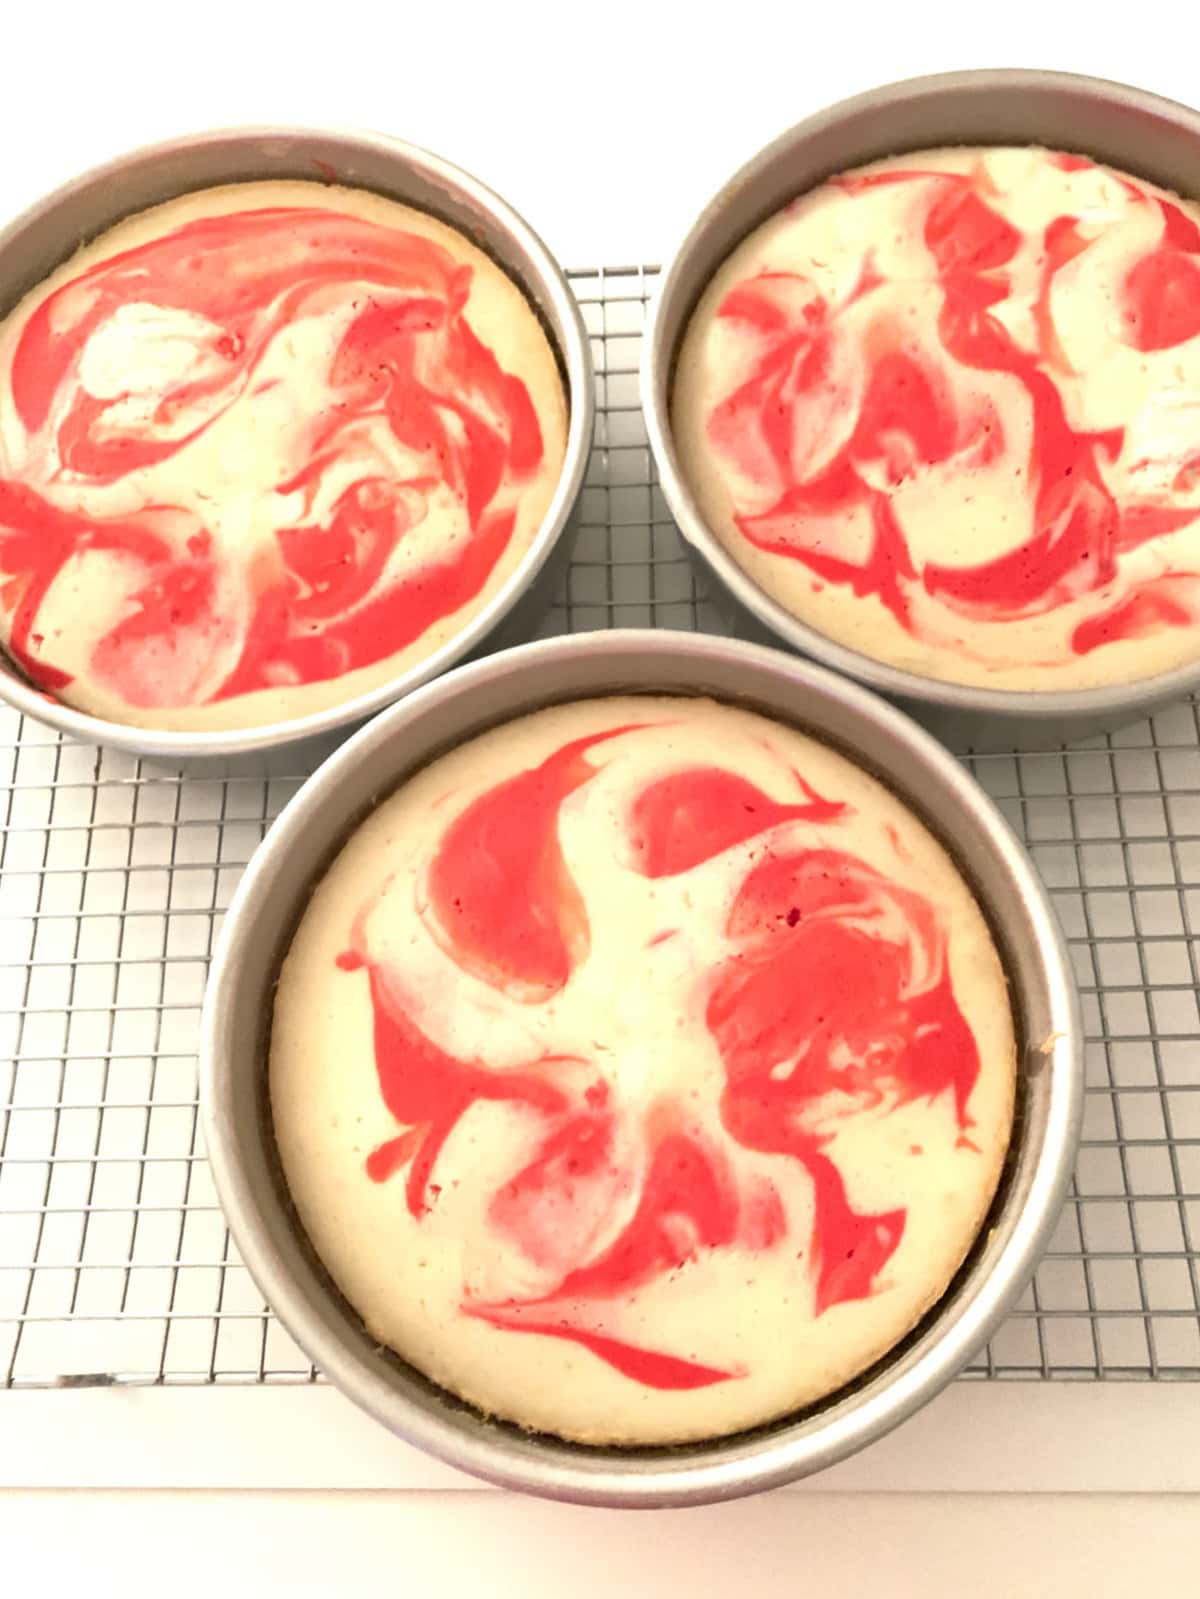
- Reserve 1 ½ cups of batter and place in a small bowl. Tint this batter red.
Marbling the Cake Batter
- I spread about one cup of white batter into each of the three prepared cake pans. I then divided most of the red batter between the three pans, adding by the spoonful on top of the plain batter.
- Add the remaining white batter to each of the pans, and then any remaining red batter. Try to keep the batter amounts the same in each pan.
- Tap each of the pans on the counter to level out the batter, then run a knife through the batter in each pan a few times to create a swirled effect.
- Bake at 325 degrees F for 28-30 minutes or until a toothpick inserted into the center comes out clean or with just a few crumbs attached. Let cool for 5-10 minutes in the pans on a wire rack before turning out.
Peppermint Whipped Cream Filling
We used a light, peppermint whipped cream filling between the layers of this cake. This is based on our homemade whipped cream recipe. If you'd prefer to use peppermint buttercream, that is a great option also!
This peppermint whipped cream filling is just like our sweetened whipped cream recipe, but with the addition of peppermint extract.
It is a delicious combination of whipped cream, powdered sugar, and peppermint.
Peppermint Buttercream Frosting
We frosted the cake in a simple and delicious buttercream frosting (based on our Classic Vanilla Buttercream recipe) flavored with peppermint extract.
This versatile frosting is often referred to as "American Buttercream". It is a simple combination of softened butter, confectioners sugar, a pinch of salt, extracts, and a splash of milk.
It is so easy to work with, makes a great filling or frosting, and is perfect for piping also!
If you plan to add a lot of decorative piping, you should increase the recipe by half (or even double) to make sure that you have plenty to work with. We kept our design very simple ;0)
Decorating the Cake
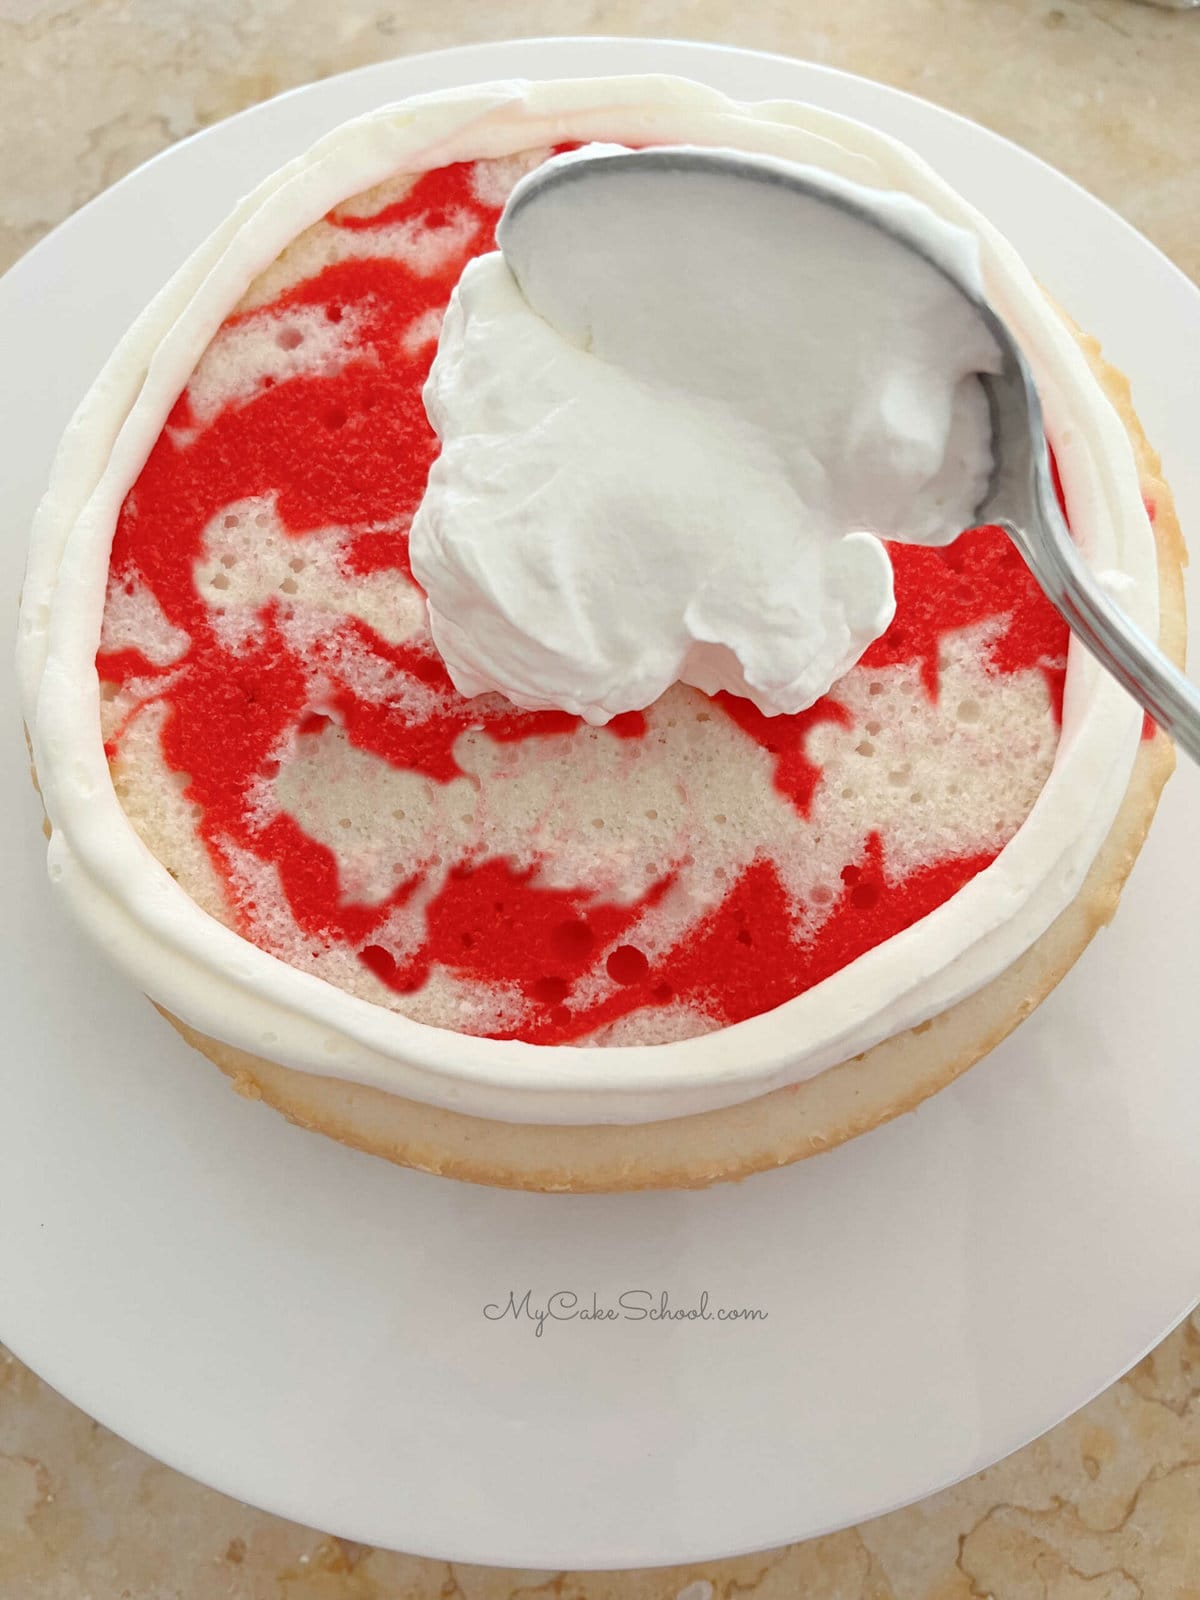
- Place the first cake layer on the cake plate or pedestal. Pipe a dam of buttercream frosting around the edge of the layer (about ¼ inch from the edge). I do this with a disposable piping bag with the tip snipped away.
- Spread the whipped cream filling within the dam. Top with the second cake layer and repeat. Top with the third cake layer and frost the cake as usual.
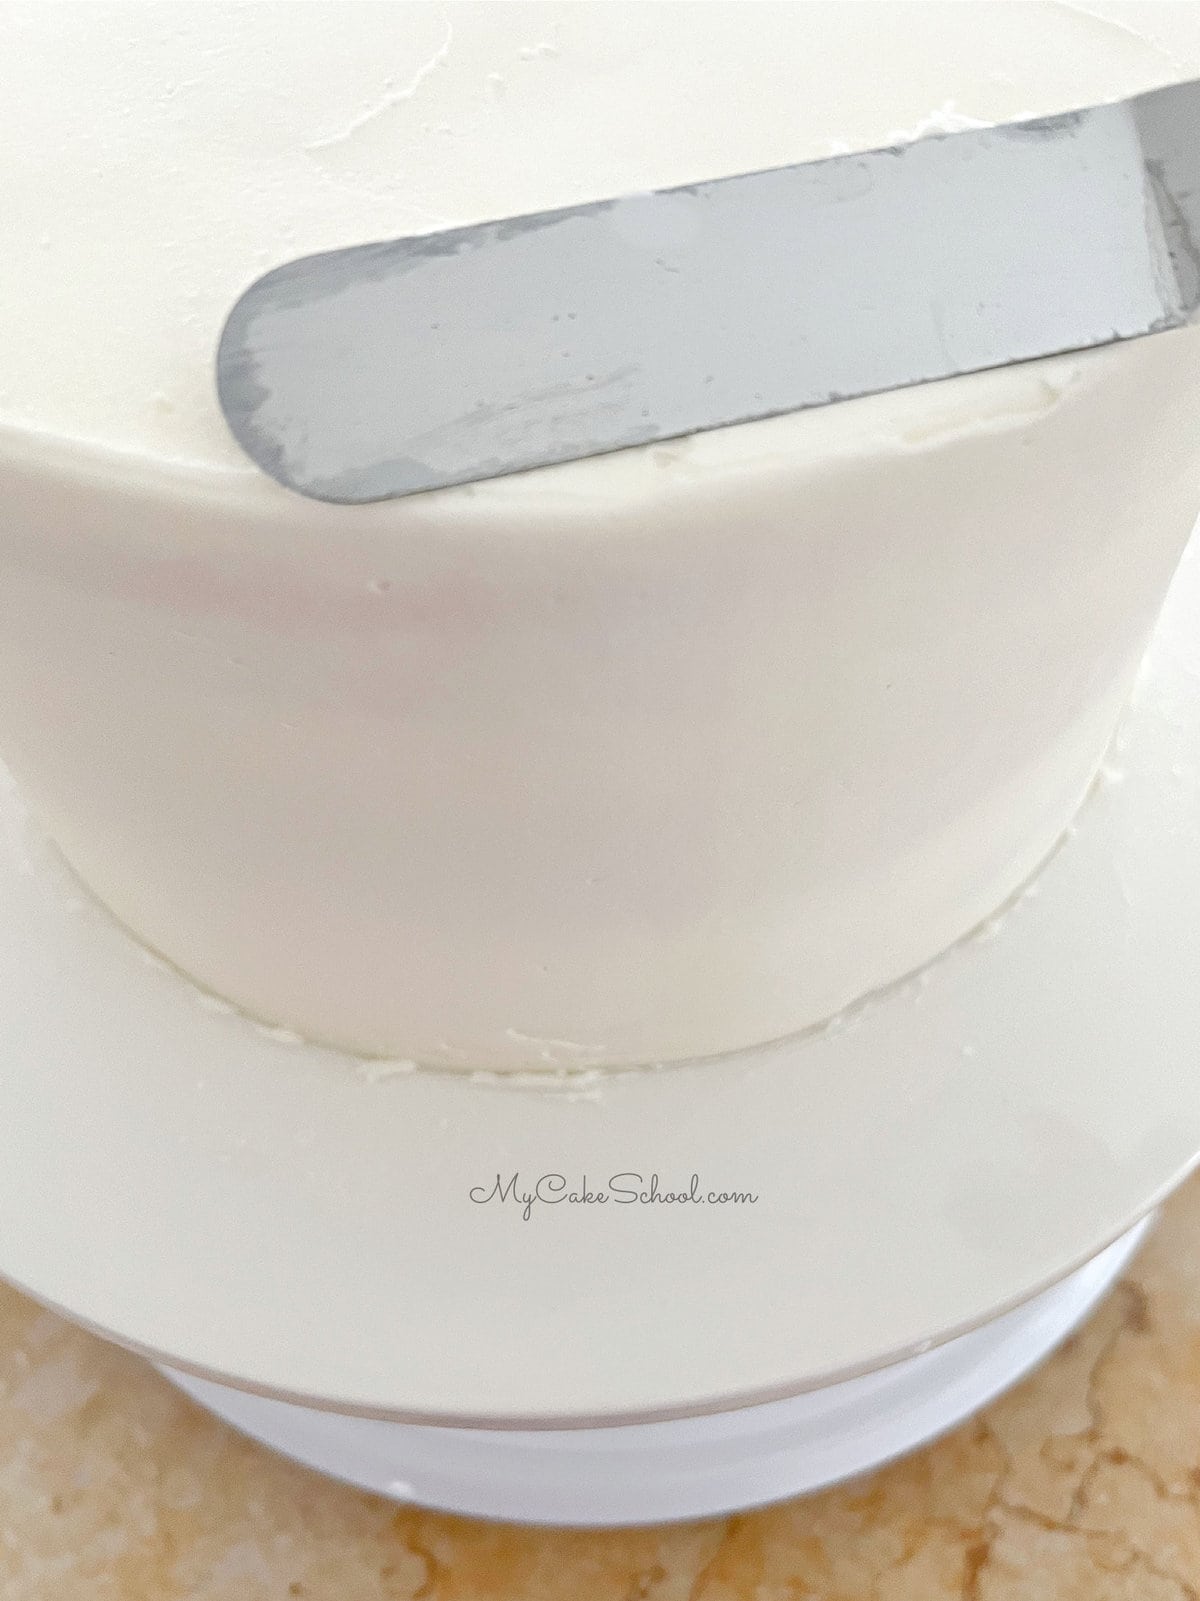
- I like to apply a thin "crumb coat" of frosting first, chill for 15 minutes in the freezer, and then apply the second layer of frosting.
- I added texture with a small offset spatula. I pressed crushed candy canes as a top and bottom border for the cake.

Here's a peek at the inside!
Recipe FAQs
More Holiday Cake Recipes
We have a few more peppermint cakes like our White Chocolate Peppermint Cake, Peppermint Bundt Cake, Chocolate Peppermint Cake, and Peppermint Mocha Cake. We also have many more holiday desserts to share with you.
We are leaving a few favorites below, but don't miss our full collection of Christmas and Winter Cake Recipes! Some of our most popular are our Eggnog Pound Cake, Gingerbread Cake, and Red Velvet Pound Cake.
Thanks so much for stopping by! We hope that you enjoy this Peppermint Cake recipe. Don't miss our full collection of cake recipes as well as our cake decorating tutorials!
Have you made this? We would LOVE for you to leave a ⭐️ rating as well as a comment and photo below! We really appreciate your feedback!
Peppermint Cake
Ingredients
- 1 8oz(226g) package cream cheese, softened
- 1 ½ sticks (168g) unsalted butter, softened (Should be cool enough to hold its shape but soft enough to easily dent when pressed.)
- 2 cups (400g) sugar
- 6 egg whites room temperature (Carton egg whites are fine to use also)
- 3 cups (342g) cake flour- see Notes for substitution
- 2 teaspoons (8g) baking powder
- ½ teaspoon (3g) baking soda
- ½ teaspoon (3g) salt
- 1 cup (242g) buttermilk - See Notes for substitution
- ¼ cup (54g) vegetable oil (we used canola oil)
- 1 ½ teaspoons (6g) Clear Vanilla Extract (You can use real vanilla extract if you would rather but the cake will not be quite as light in color)
- 1 ½ teaspoons (6g) Peppermint Extract
- Red Coloring Gel to tint 1 ½ cups of reserved batter liquid red food color is fine also
For the Peppermint Whipped Cream Filling
- 1 cup (240g) heavy cream
- ¼ cup 29g powdered sugar
- 1 teaspoon (4g) vanilla
- 1 teaspoon (4g) peppermint extract (adjust amount to your liking)
For the Peppermint Buttercream
- 2 sticks (226g) unsalted butter, softened
- 6 cups (690g) powdered sugar ( Adjust up or down according to desired consistency.
- 2 teaspoons (8g) vanilla extract (use clear imitation vanilla if you like a whiter frosting)
- 1 teaspoon (4g) peppermint extract (adjust amount to your liking)
- ⅓ cup (72g) milk or cream (Add a bit more as needed for desired consistency.)
- ½ teaspoon (3g) salt
Decoration
- *Crushed Candy Canes optional for decorative borders (We sealed mini candy canes in a ziplock bag and crushed by hitting with the handle of a table knife).
Instructions
- Preheat the oven to 325 degrees F. Grease and flour three 8 inch pans, adding a circle of parchment or wax paper to the bottom of each pan.
- Go ahead and separate your eggs, saving only the 6 egg whites for this recipe. Set them in a bowl to the side.
- In a medium bowl, whisk the flour, baking powder, baking soda, and salt for 30 seconds and set aside.
- In another bowl, add the buttermilk, vegetable oil, and vanilla extract and peppermint extract. Set aside.
- In the bowl of your mixer, add the butter and cream cheese and mix at medium speed until smooth.
- Gradually add the sugar and mix at medium speed for 2-3 minutes.
- Mixing on low speed, add the 6 egg whites one at a time (it's fine to estimate), mixing to incorporate after each addition.
- With the mixer on low speed, alternately add the flour mixture and the milk mixture, beginning and ending with the flour mixture (We did 3 additions of the dry mixture, 2 additions of wet).
- Mix the batter just until well combined- be careful not to over-mix.
- Reserve 1 ½ cups of batter and place in a small bowl. Tint this batter red.
For the Marbling Step
- I spread about one cup of white batter into each of the three prepared cake pans. I then divided most of the red batter between the three pans, adding by the spoonful on top of the plain batter.
- Add the remaining white batter to each of the pans, and then any remaining red batter. Try to keep the batter amounts the same in each pan.
- Tap each of the pans on the counter to level out the batter, then run a knife through the batter in each pan a few times to create a swirled effect.
- Bake at 325 degrees F for 28-30 minutes or until a toothpick inserted into the center comes out clean or with just a few crumbs attached. Let cool for 5-10 minutes in the pans on a wire rack before turning out.
- This recipe makes 7 ½ cups of batter. Works for cupcakes also (although there will be little to no dome).
For the Peppermint Whipped Cream Filling
- Chill the mixing bowl and beaters/ whisk attachment in the freezer for 10 minutes.
- Pour the whipping cream, powdered sugar and vanilla into the chilled mixing bowl, begin beating on low speed gradually increasing to medium high speed.
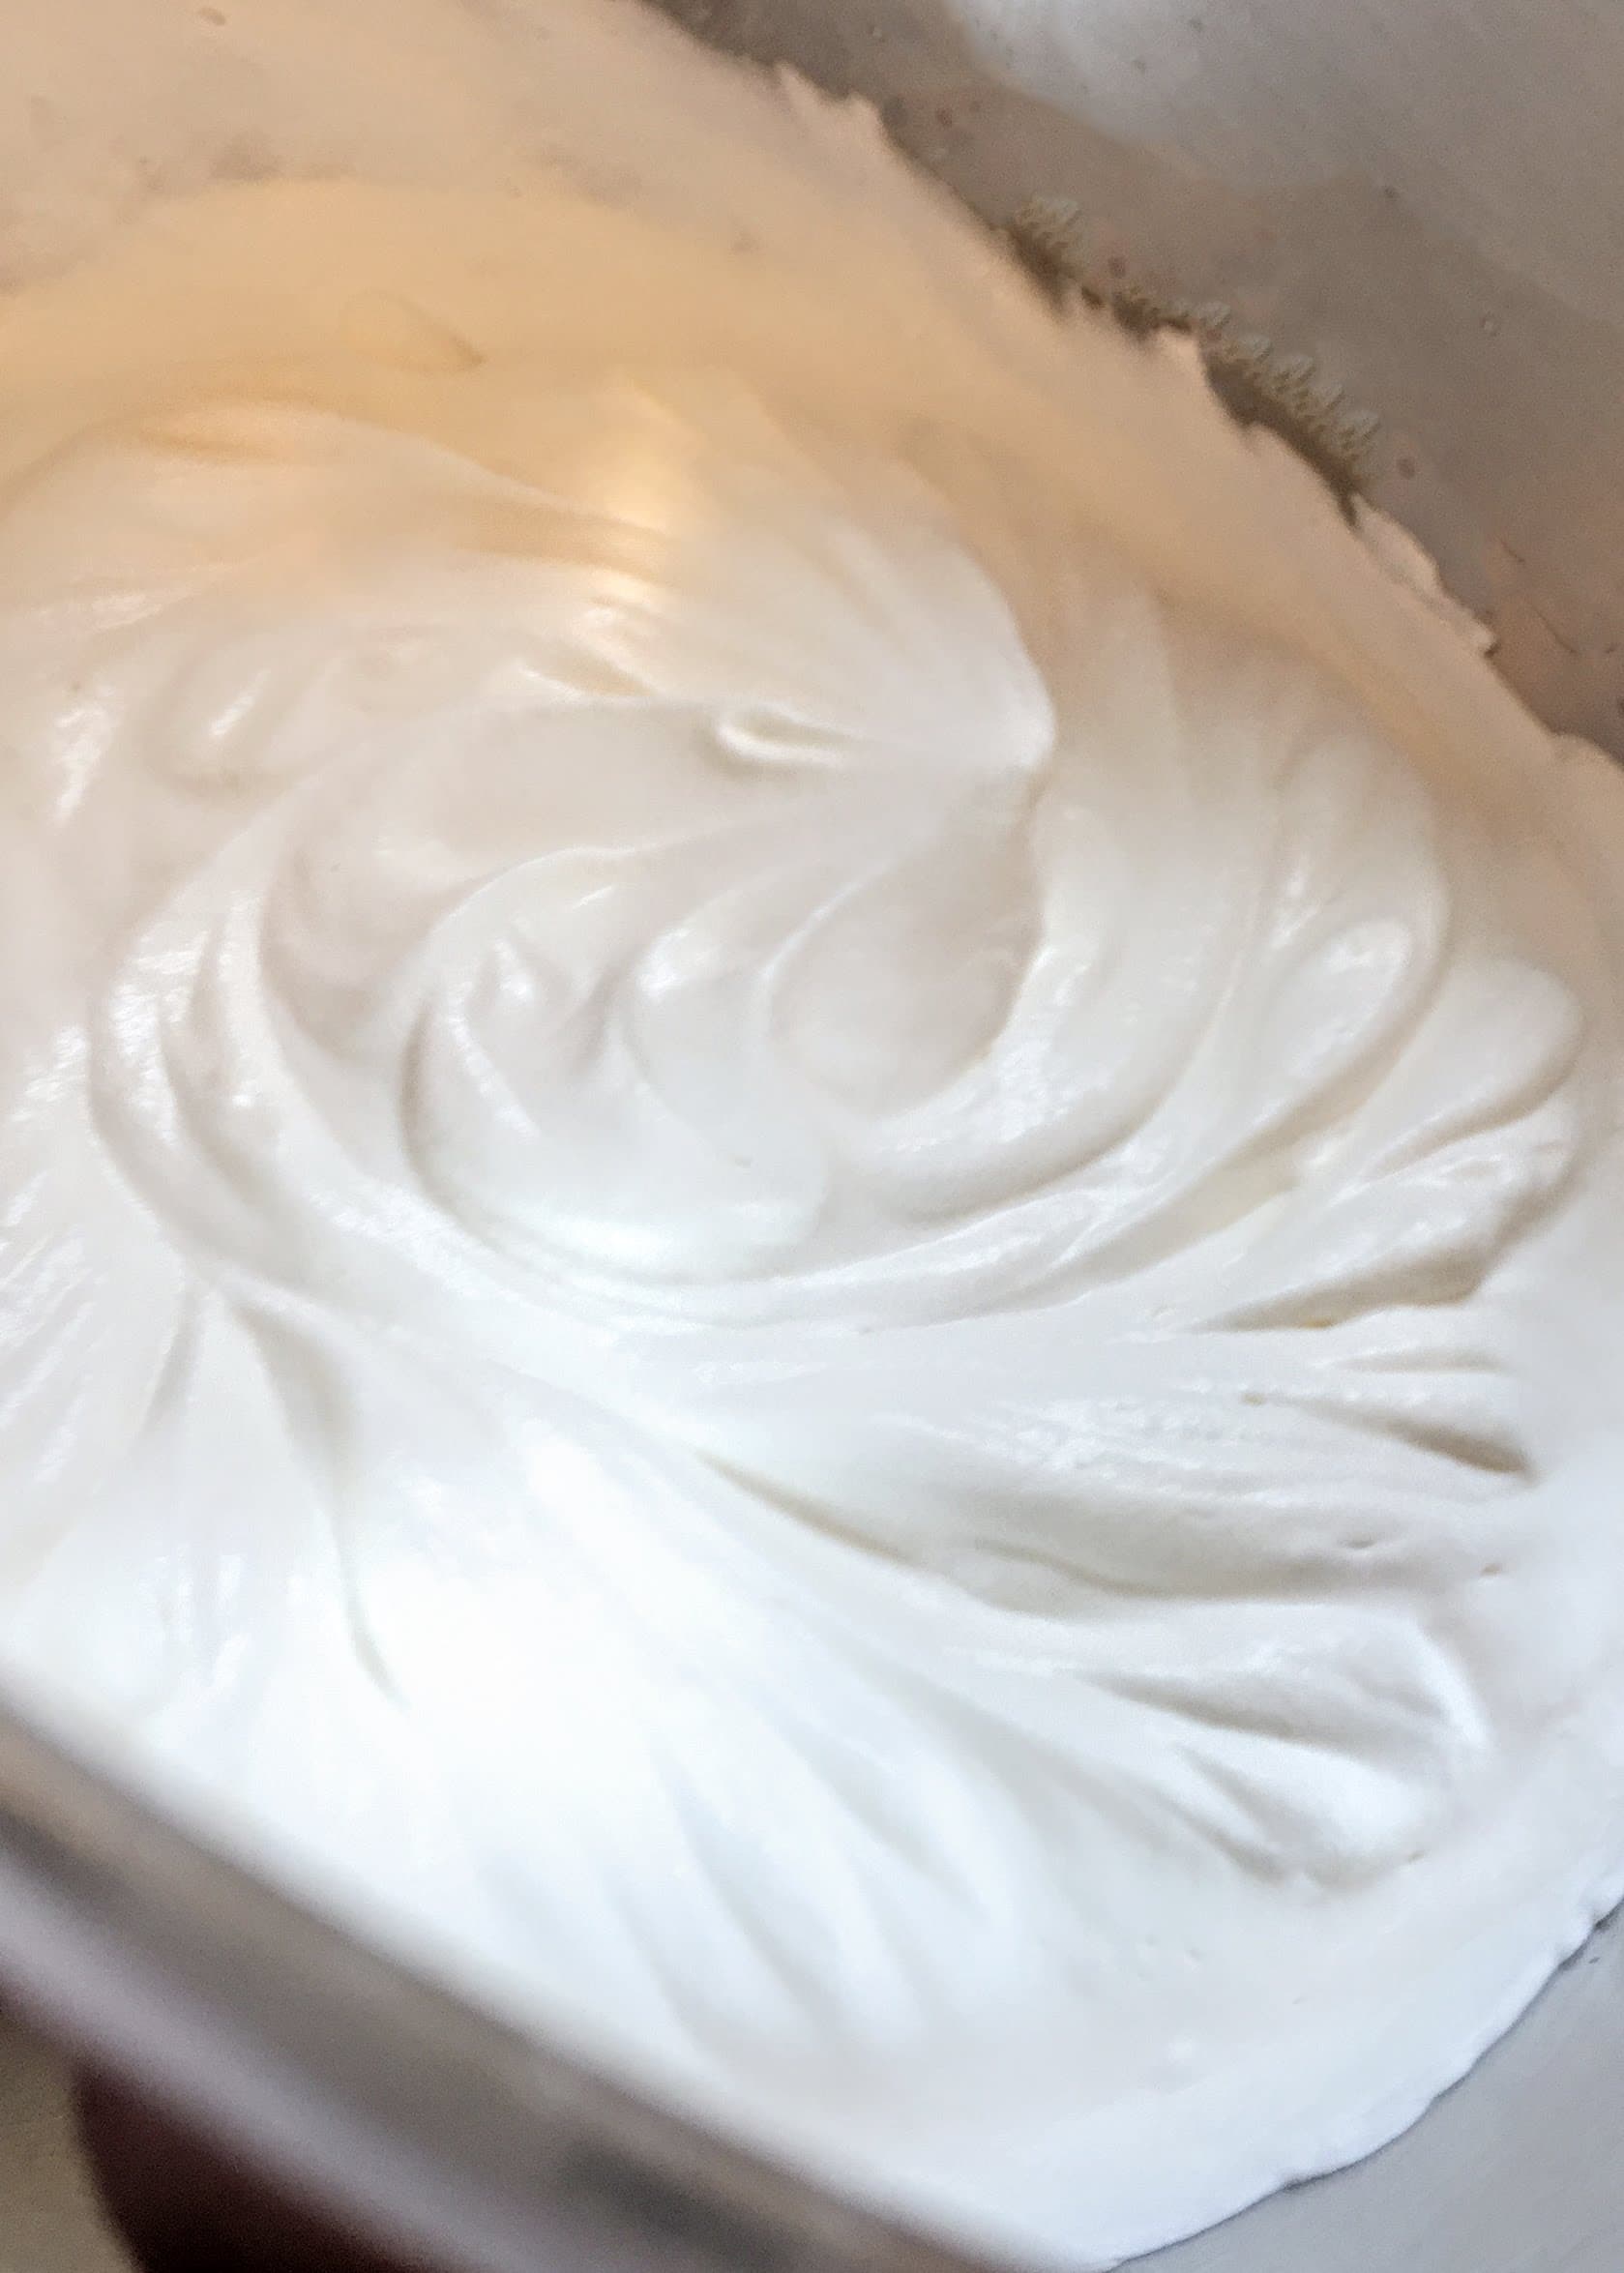
- The cream begins to thicken (approx. 1 ½ minutes) and soft peaks form....peaks that slightly bend over. Watch closely as this happens quickly. Do not over beat.
- Use immediately as the whipped cream will gradually begin to deflate over time.
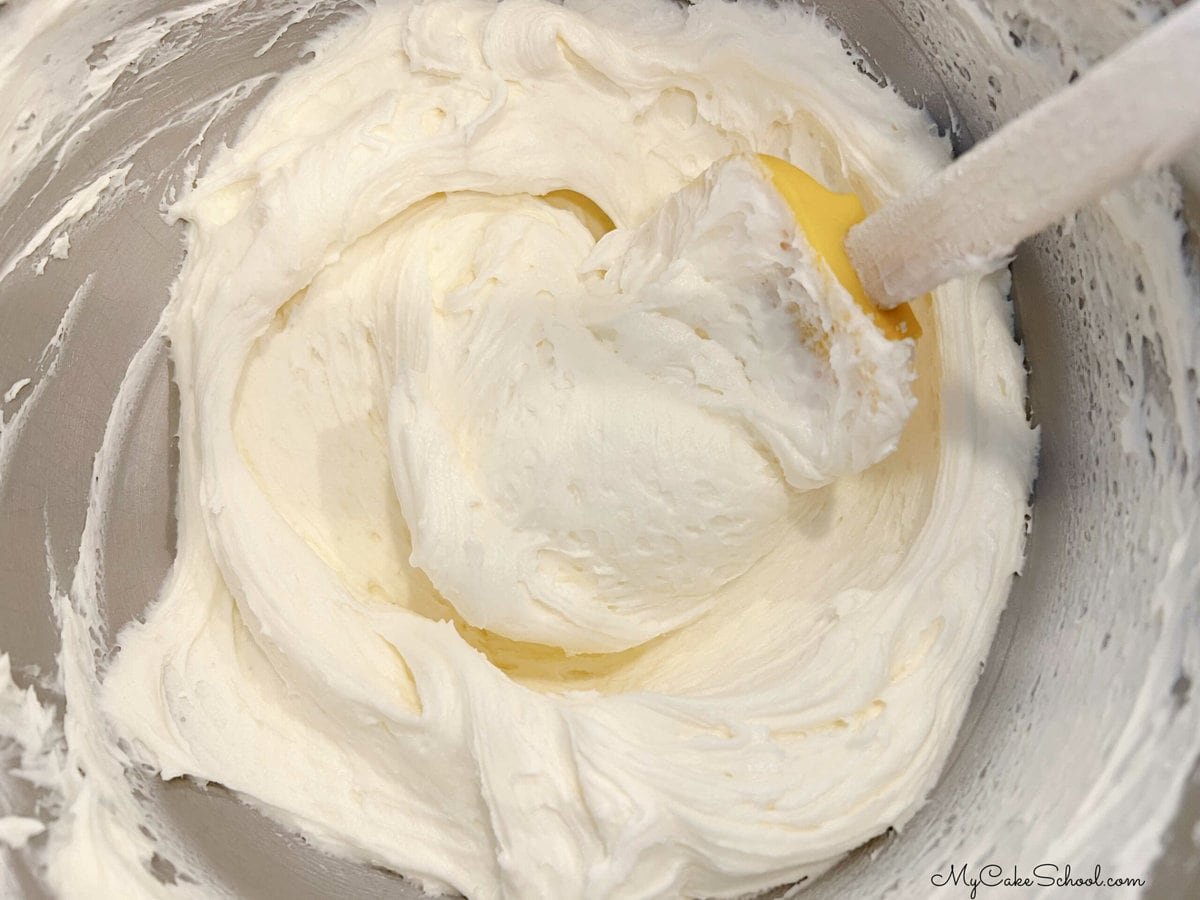
For the Peppermint Buttercream Frosting
- Cream the (slightly softened) butter until smooth. Blend in the vanilla extract and peppermint extract.
- Add half of the powdered sugar and most of the milk. Beat at medium speed until the powdered sugar is incorporated.
- Add remaining powdered sugar and milk and mix at medium speed another 3 to 4 minutes scraping the sides of the bowl occasionally. I slow down the mixer to very slow for 1 to 2 minutes. This will help eliminate air pockets in the buttercream. The texture will become very smooth.
- This recipe can be doubled or halved.
- Yields approximately 4 ½ cups of frosting.
- If your buttercream is too thin, add more sugar. If the consistency is too thick, add a bit more milk.
Decorating the Cake
- Place the first cake layer on the cake plate or pedestal. Pipe a dam of buttercream frosting around the edge of the layer (about ¼ inch from the edge). I do this with a disposable piping bag with the tip snipped away. Add the whipped cream filling within the dam.
- Top with the second cake layer and repeat. Top with the third cake layer and frost the cake as usual. I like to apply a thin "crumb coat" of frosting first, chill for 15 minutes in the freezer, and then apply the second layer of frosting. I added texture with a small offset spatula.
- I pressed crushed candy canes as a top and bottom border for the cake.
- RefrigerationBecause of the whipped cream in the filling, this cake should be refrigerated. We like to remove the cakes from the refrigerator 2 hours before serving so that the cake and frosting can have time to soften.
Looks beautiful! :-) I love mint, so it sounds delish! :-)
Can you make the buttercream frosting a day ahead of time and just refrigerate it, then make the cake the next day?
Hi Christina, yes that is fine!
If I double the frosting recipe, should I also double the peppermint? Out would that make it too strong.
Hi Shonni, yes I would think so but to be on the safe side, you could use less and then increase to your liking as needed.
Hi!
I am looking for a red velvet and vanilla swirl cake recipe, do you know if I could add cocoa powder and red food coloring to the 1 & 1/2 cups of batter that you dye red in this recipe? I am just not sure if the extra powder would throw off the consistency of the cake...
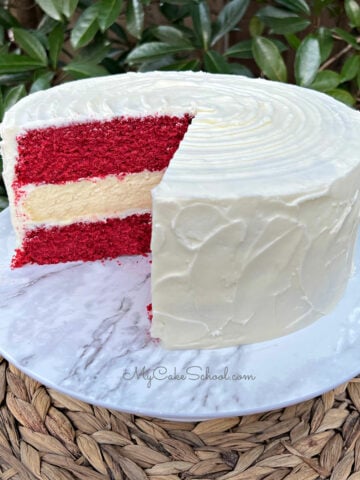
Hi Bella, that should be fine if you are just using a small amount of cocoa- we did something similar in our red velvet marble pound cake recipe:
https://www.mycakeschool.com/red-velvet-marble-cake/
For chocolate marble cakes that call for a bit more cocoa as with our doctored cake mix recipe, we recommend blooming the cocoa in a bit of hot water first as cocoa tends to absorb moisture when added to batter. I don't think you'll need to do this for your red velvet swirl cake though as you won't need as much cocoa.
https://www.mycakeschool.com/marble-cake-from-cake-mix/
I made this for a party this weekend and it was fabulous. I doubled the whipped cream recipe, added crushed peppermints to the buttercream, and mixed the leftover whipped cream filling with the buttercream. I will absolutely make this again
Thank you so much for your review, Cassie! We're so glad that you enjoyed it!
Delicious! Mint can go strong quickly…this was the just right amount to make such a rich cake become refreshing.
Your cake looks beautiful, Sinead! Thanks so much for your feedback, we're so glad to hear that you all enjoyed the cake!