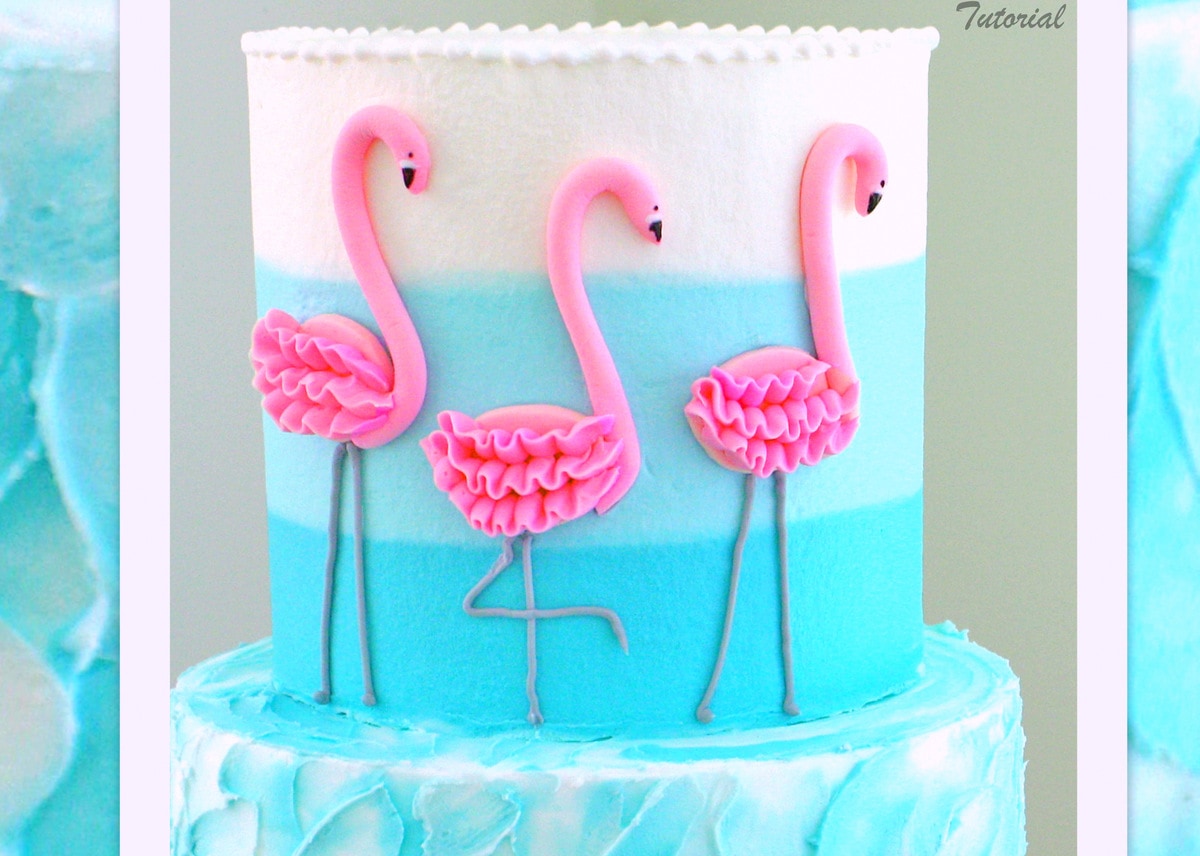
Flamingo Cake with Ombre Buttercream
Today we're sharing a pretty Flamingo Cake for your beach parties, luau parties, or just for fun!
If you love cute cakes like we do, you must give it a try! In the tutorial, we demonstrate three techniques: the tri-colored buttercream stucco texture of the bottom tier, a nice and smooth buttercream ombre on the top tier, and of course, our sweet flamingos!


Table of Contents
Materials:
In the tutorial, we are working with a 6" double barrel tier and an 8" standard sized tier. These are actually dummy tiers, but if you have questions about creating a double barrel (tall) cake, we demonstrate in our Carousel Cake Video (9:40 mark)
Crusting Vanilla Buttercream frosting of choice (We used our Fluffy Vanilla Buttercream recipe from the recipes section. Our Classic Vanilla Buttercream is a good choice also.)
Viva brand paper towels (if smoothing the ombre top tier as we did)
Fondant for the flamingos
Coloring Gels: Americolor Teal, Wilton Rose, Americolor Super Black, Bright White (optional- for marking on beak)
Black Food Coloring Pen (for eyes and Beaks)
Piping Tips: Wilton 2 for legs, 3 for top bead border
Small rounded spatula (or similar utensil) for spackled look
Bench Scraper
Clay Extruder (Mine is a Makin's Ultimate Clay Extruder -aff) -- If you don't have one, just roll snakes of fondant by hand for a similar look!
Gum Paste or Fondant with tylose kneaded into it for the plaque, along with two circle cutters in the desired size.
FMM Funky Alphabet Tappit Cutters
Miscellaneous: Turntable, cake cardboards cut to size for each tier, appropriate supports/bubble tea straws, ribbon for the plaque, piping gel
Cake Notes
*At the last minute before photographing, I added a small bead border to the top tier. I did this with a Wilton 3 piping tip. I liked it with no border at all also ;0)
-In the video, I attached the birds' bodies and necks separately. This is mainly because I did not allow them to dry in advance. If you'd rather attach the necks to their oval bodies with a little tylose glue and dry overnight, you could go that route as well!
-I piped the flamingos legs with a Wilton 2 piping tip. If you aren't a fan of piping straight lines directly onto the cake, you could also use either extruded fondant, or pipe lines of chocolate onto waxed paper, chill until firm, and then apply your favorite legs to the cake.
- I always chill my tiers before stacking.
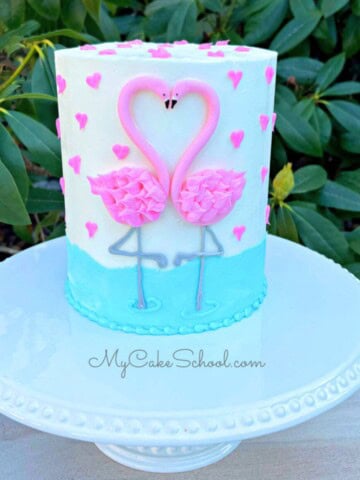
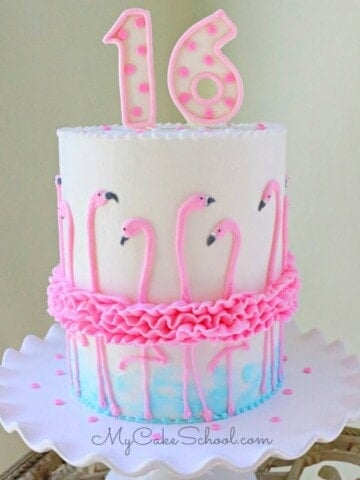
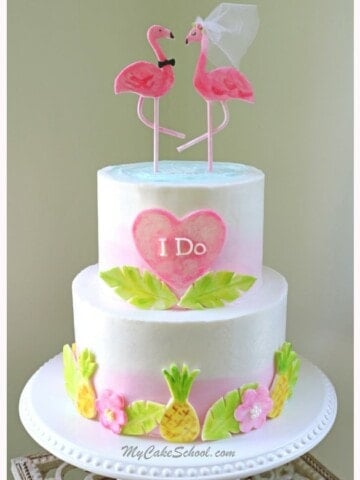
More Flamingo Cakes!
We have a few more flamingo cake tutorials on our site! Make sure to check out these fun cake designs, they would make great summer cakes or birthday cake ideas!
We also have a really fun mermaid cake which features a homemade mermaid tail cake topper!

Cake Recipes
There are so many cake recipes that would be perfect for this cake design! Some of our favorites are our almond cake, strawberry cake from a mix, lemon cake from scratch, and orange cake recipe! Or, consider our Pink Velvet Cake to go along with the flamingo theme!
Enjoy the Video!
Thanks so much for stopping by! If you give this flamingo cake a try, we would love for you to leave a comment or photo below! Don't miss our full collection of free cake recipes and cake decorating tutorials!
ABSOLUTELY ADORABLE!
Little nervous about making this cake, but going to try it after watching your video for my granddaughter, will post how it turns out...thank you!
@Shari- Great!! So glad you are making it!
My granddaughter made this cake for her 11th birthday will just a little help!
Good afternoon,
I want to make the flamingo cake with the ombre design, but I don't see the video link. I was able to watch the Flamingo Ruffle Cake video, so it proves I can make the videos work. Is the Ombre Design Flamingo Cake tutorial available online?
Hi Rebecca! I've just re-embedded the video for you. There was an ad attached to the previous one and so if you have an ad blocker, that may have caused issues. I hope that you enjoy the video!