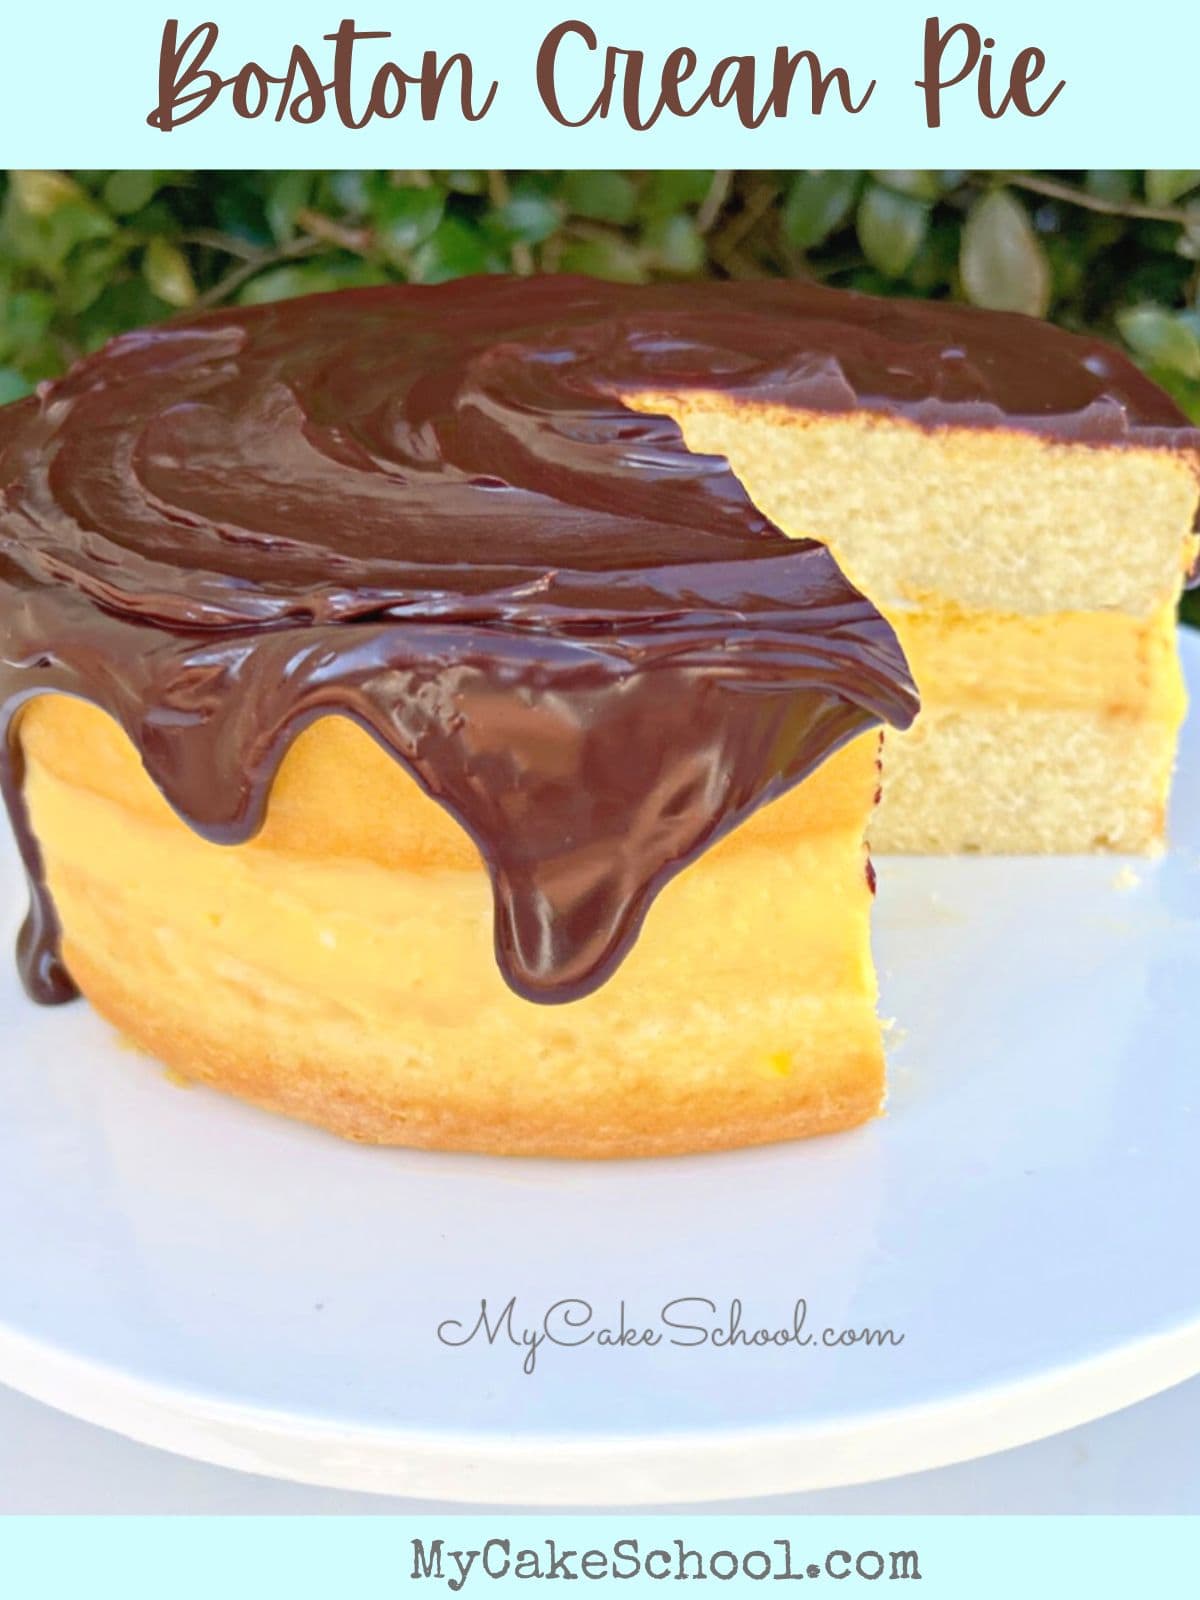
Boston Cream Pie (A Scratch Layer Cake)
Today we are making a Boston Cream Pie! If you've never tried this classic dessert, you may be surprised to learn that it isn't a pie at all.
It is a delicious vanilla layer cake filled with pastry cream and glazed with rich chocolate ganache.
This homemade Boston Cream Pie recipe is guaranteed to please. We hope that you enjoy this delicious dessert!
Table of Contents
A Quick History of Boston Cream Pie
Boston Cream Pie was first created at the Parker House Hotel in the 1880s, by French Chef Raelyn.
The traditional version of this cake was first referred to on the menu as a chocolate cream pie, then the Parker House chocolate cream pie, and finally the Boston Cream Pie.
Why is it called Boston Cream Pie rather than Boston Cream Cake?
It seems that cakes and pies were baked in the same pans back then, and so the words were used interchangeably.
Early Version to Present Day
The early version of the dessert consisted of two layers of butter sponge cake, filled with custard, brushed with rum syrup, and the top coated with chocolate fondant.
Over the years, Boston Cream Pies have changed a bit but still have the same main components- yellow or vanilla cake layers, custard filling/pastry cream filling, and a chocolate glaze.
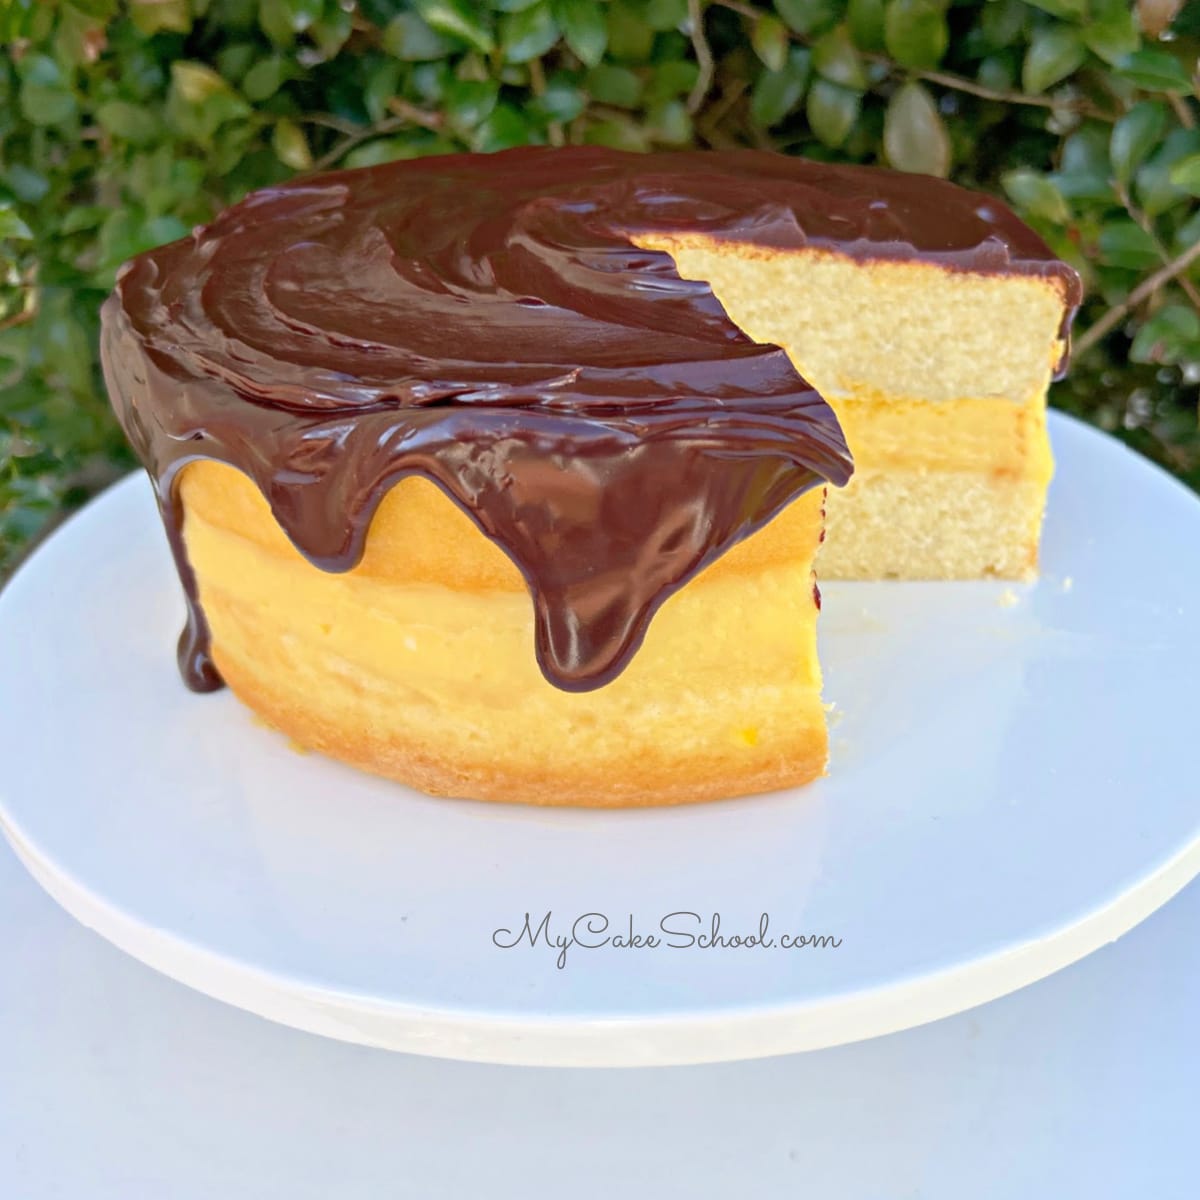
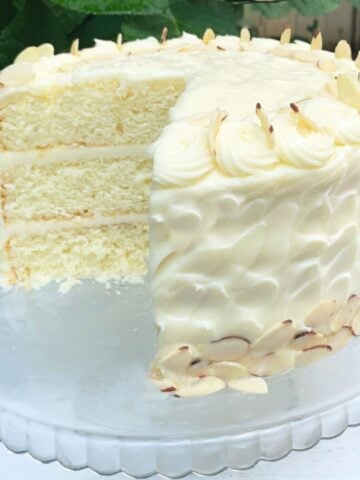
Our Boston Cream Pie consists of two fluffy cake layers of our popular Vanilla buttermilk cake recipe, filled with a heavenly pastry cream and topped with a glaze of ganache.
Our yellow cake from scratch would also be perfect for this recipe!
How to a Make Boston Cream Pie
You can find our full, printable recipe card for this delicious cake recipe further down in this post, but here is a quick rundown of our steps!
For the Vanilla Cake Layers..
- First, preheat the oven to 350 degrees F, grease and flour two 9x2 inch round pans. I also like to line the bottom of the pans with parchment circles.
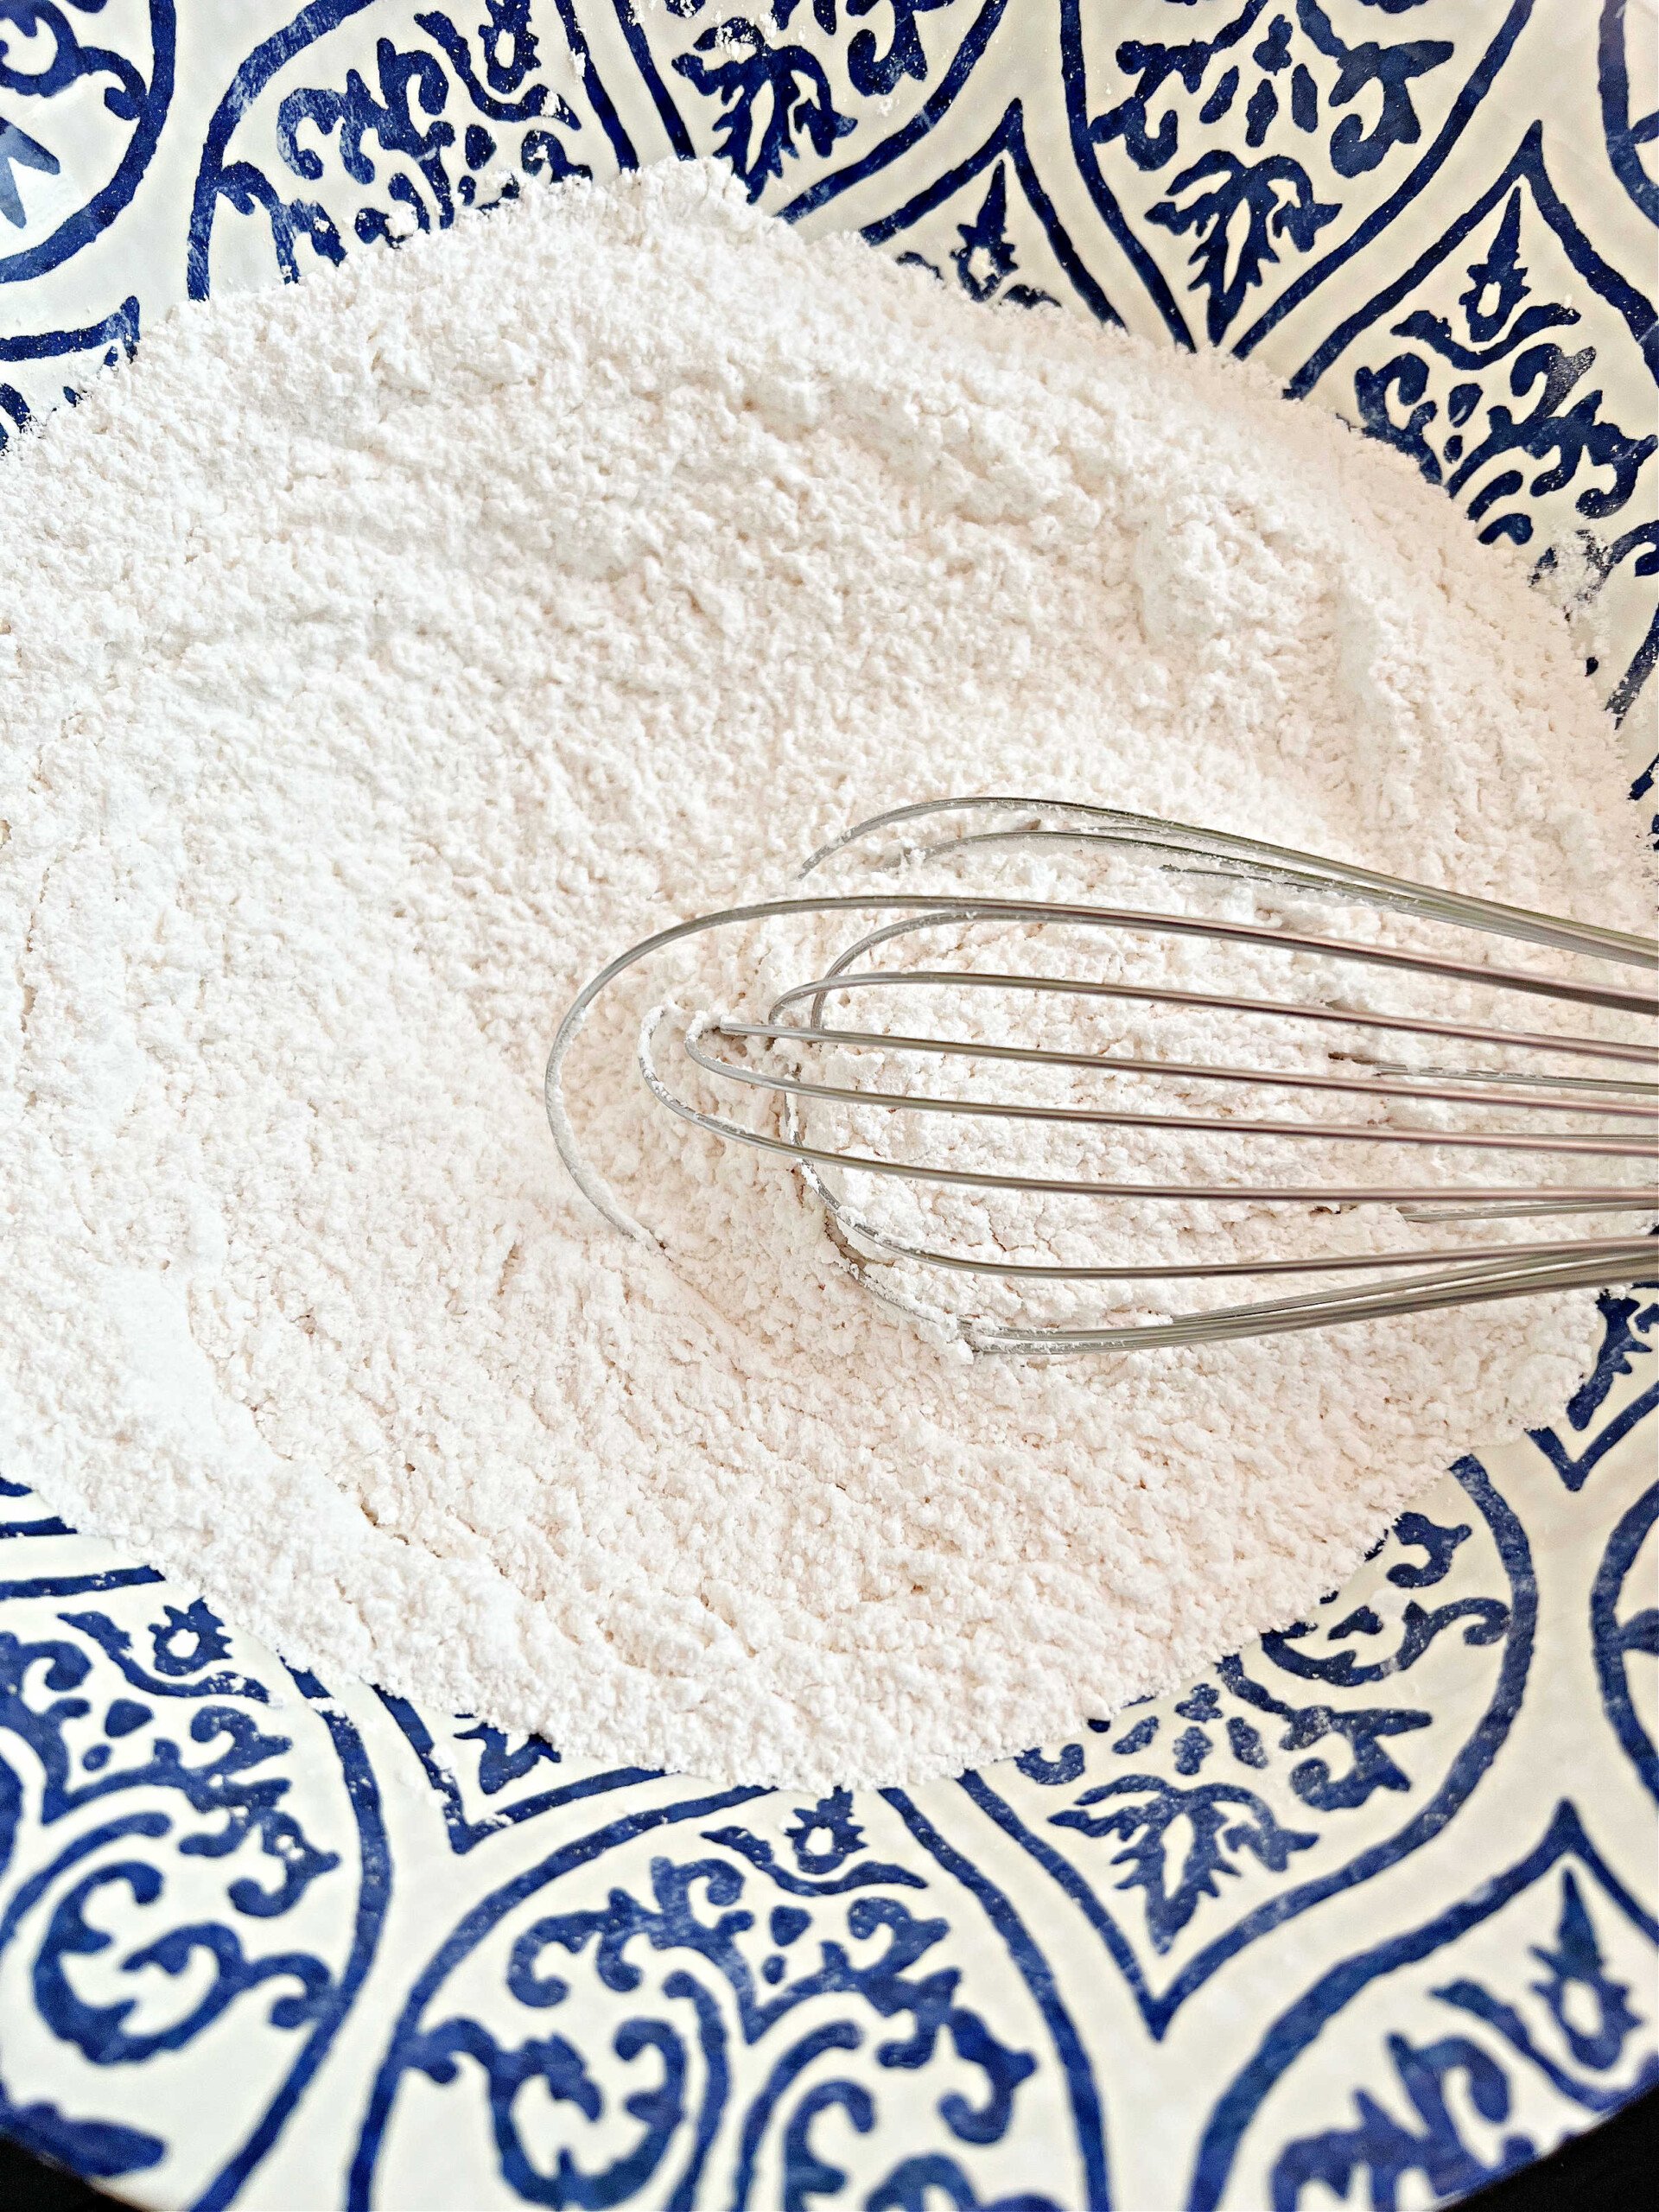
- Next, in a medium bowl, whisk flour, baking powder, baking soda and salt for 30 seconds and set aside.
- In another bowl, add the buttermilk, vegetable oil and vanilla extract. Set aside.
- In the bowl of a stand mixer with paddle attachment, add the softened butter and mix at medium speed until smooth. Gradually add the sugar and continue to mix for 3-5 minutes until fluffy.
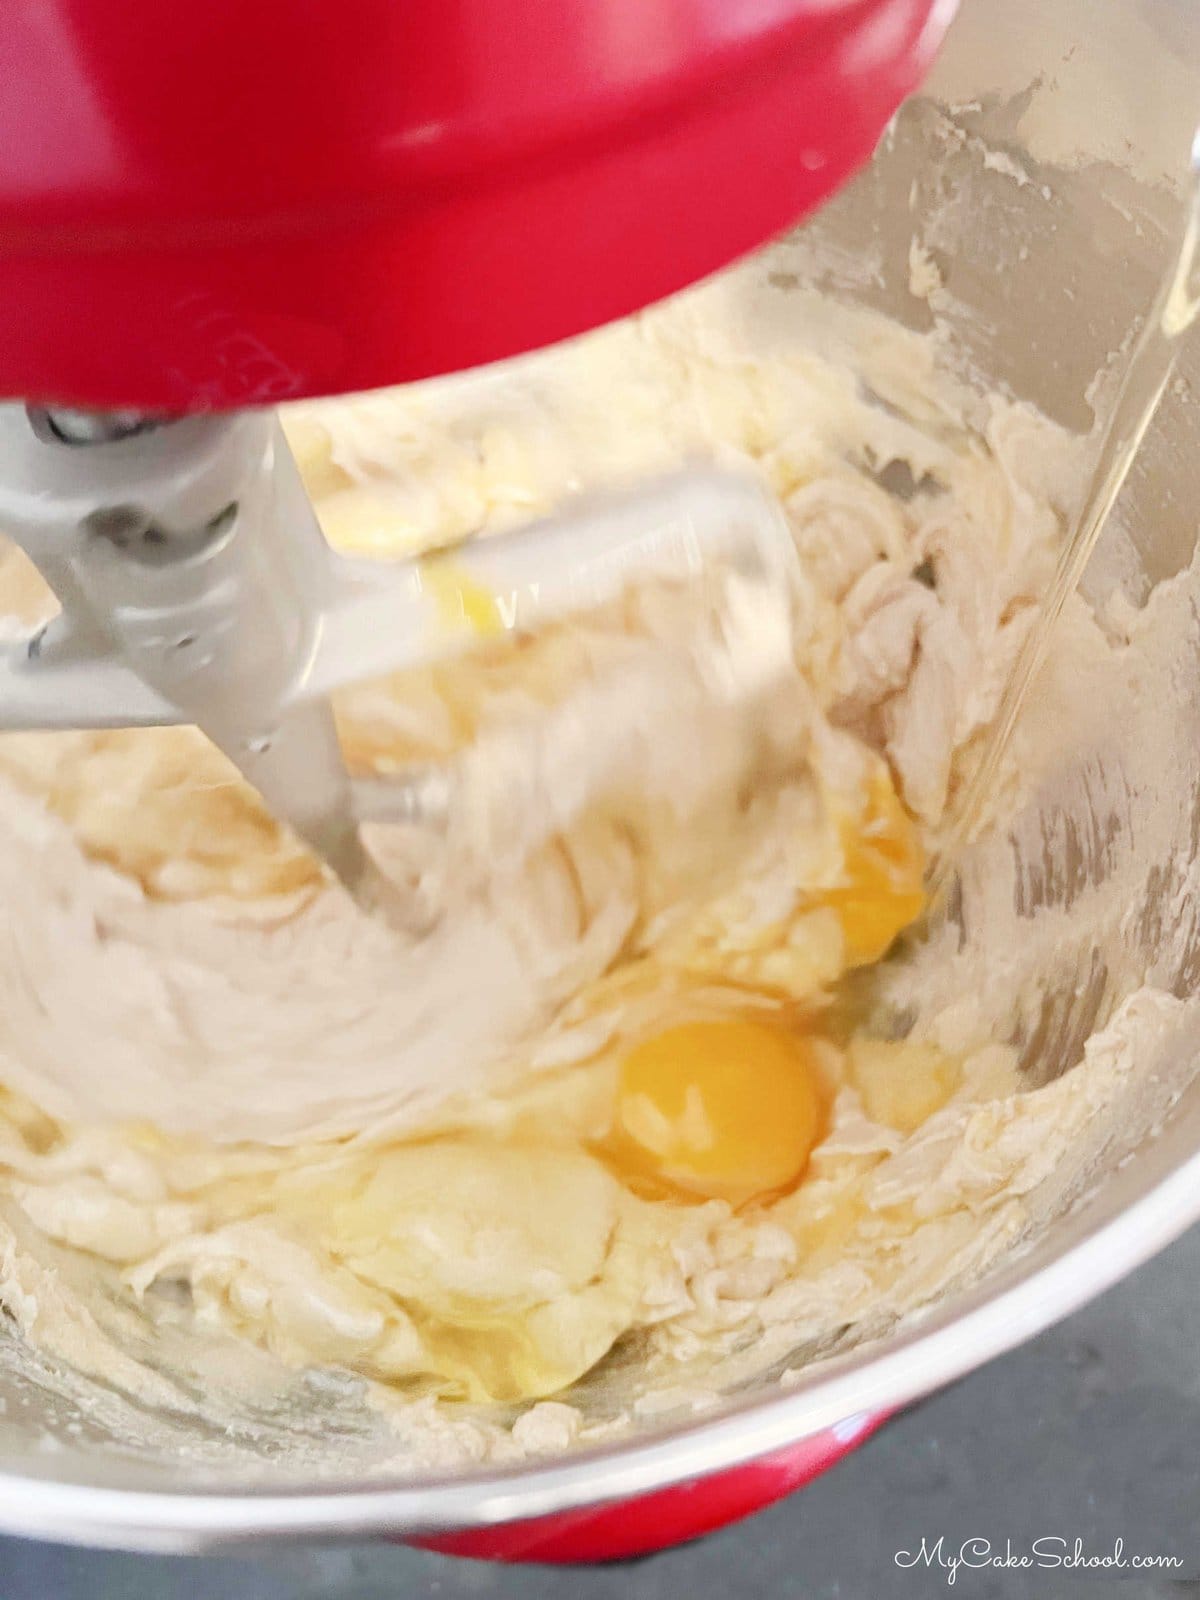
- Add the eggs one at a time mixing until the yellow of the yolk disappears.
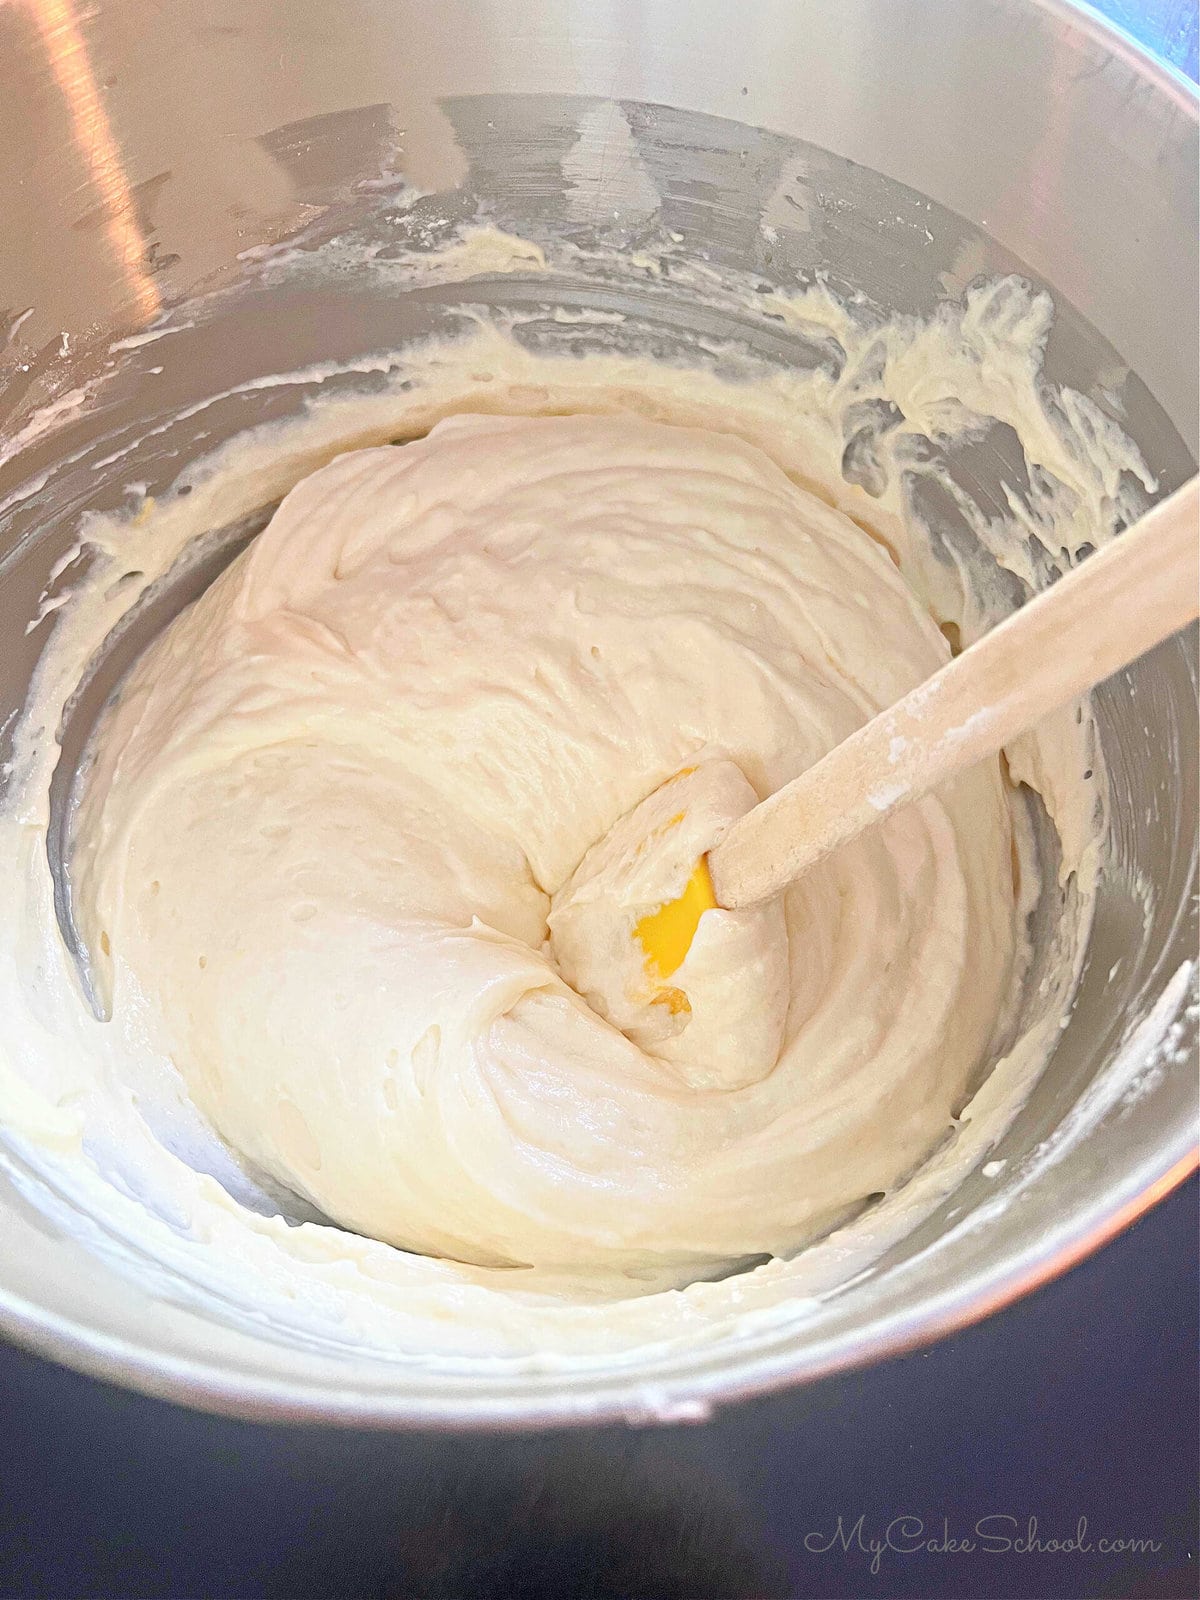
- Alternately add the flour mixture and buttermilk mixture, beginning and ending with the dry ingredients (three additions of dry ingredients and two of liquid).
- Do not mix above medium speed or over mix the cake batter. Divide the batter the two prepared pans.
- Bake at 350 degrees for 25-35 minutes or until a toothpick inserted in the center comes out clean or with a few crumbs attached. Let the cake layers cool, still in their pans 5 to 10 minutes on a wire rack before turning out.
Pastry Cream Filling
The fresh pastry cream filling is the star of this cake! It is so good.
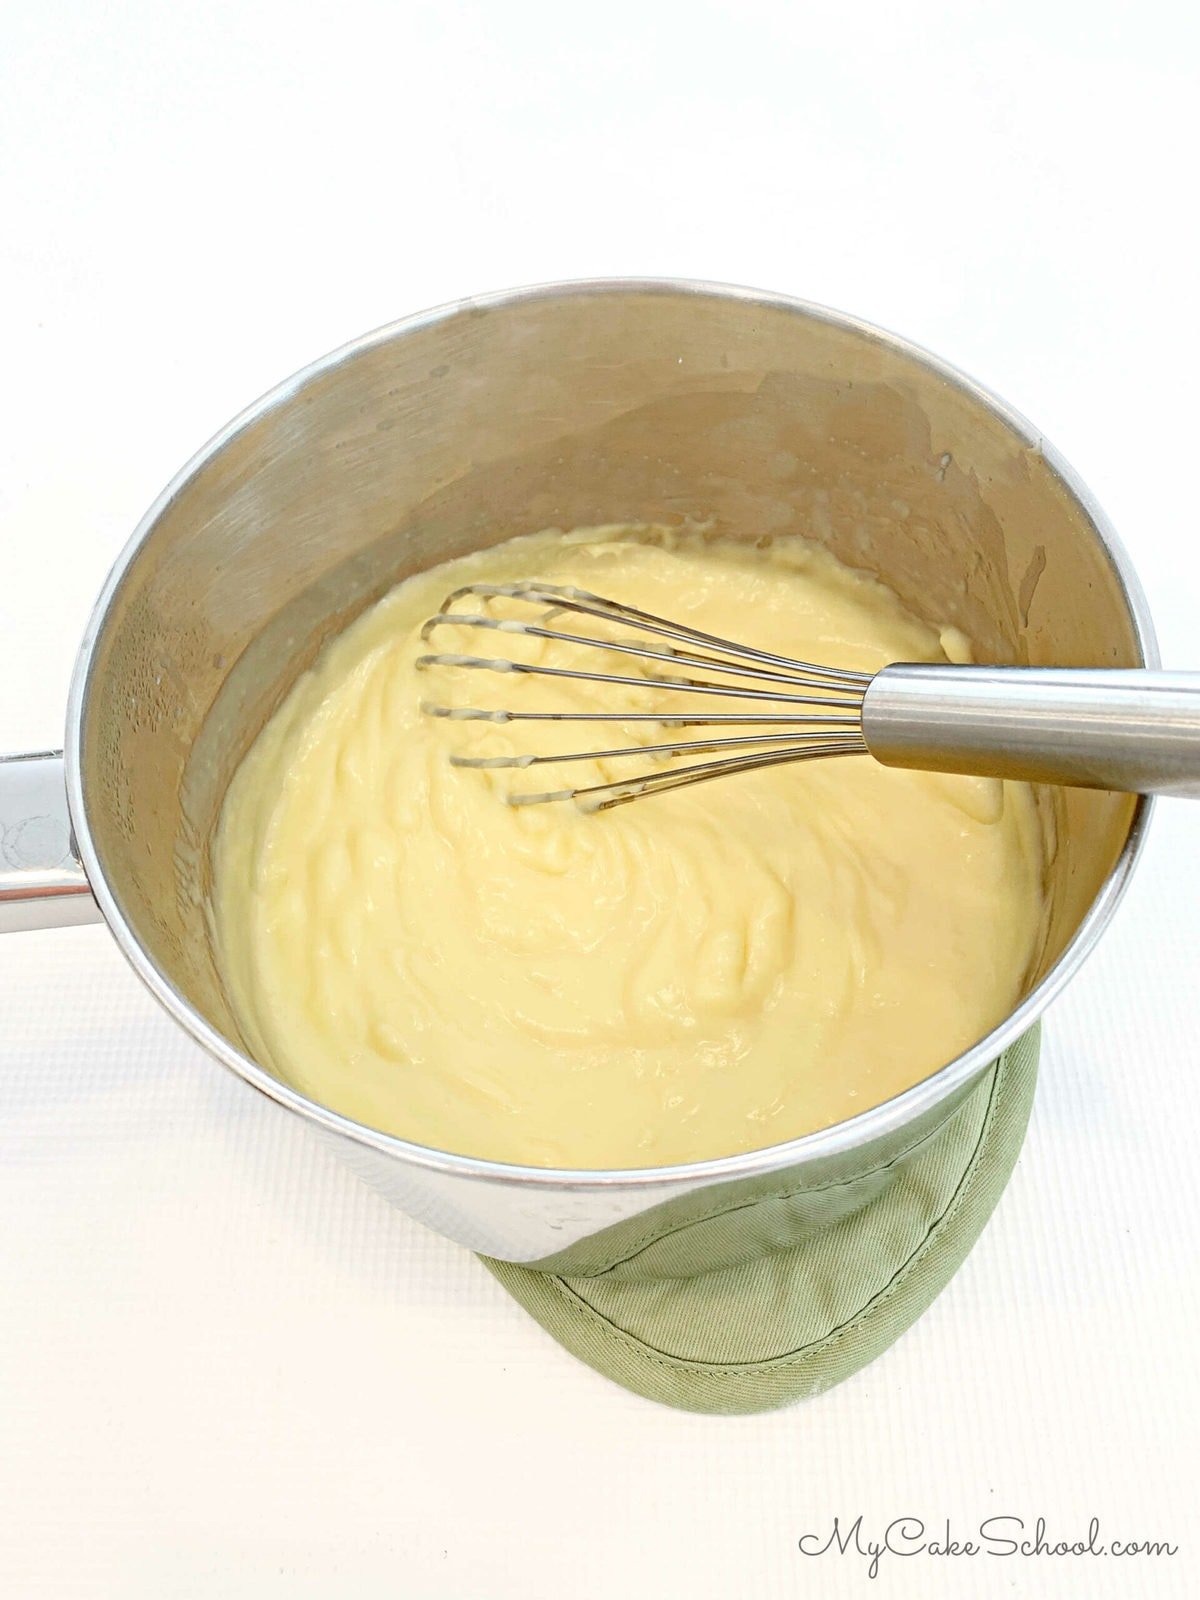
Pastry cream is a silky smooth vanilla custard that is prepared on the stovetop, and is a simple combination of sugar, cornstarch, egg yolks, milk, and vanilla.
You can find the full pastry cream recipe in the recipe card at the bottom of this post, but here is a quick rundown of our steps.
- To prepare the pastry cream, whisk the egg yolks in a medium sized bowl and set aside. Next, combine the sugar, cornstarch and salt and blend together in a medium saucepan. Gradually stir in the 2 cups of milk.
- Cook over medium heat, stirring constantly to dissolve the sugar. Bring the mixture to a simmer. Remove the saucepan from the heat.
- Spoon ¼ to ½ cup of the hot mixture into the bowl holding the egg yolks, stir constantly to temper the eggs.
- Pour the egg mixture back into the saucepan, whisking constantly as it simmers until the mixture thickens, this could take 3 to 4 minutes. When thickened, remove from the heat and add the vanilla extract extract. The filling will thicken even more as it cools.
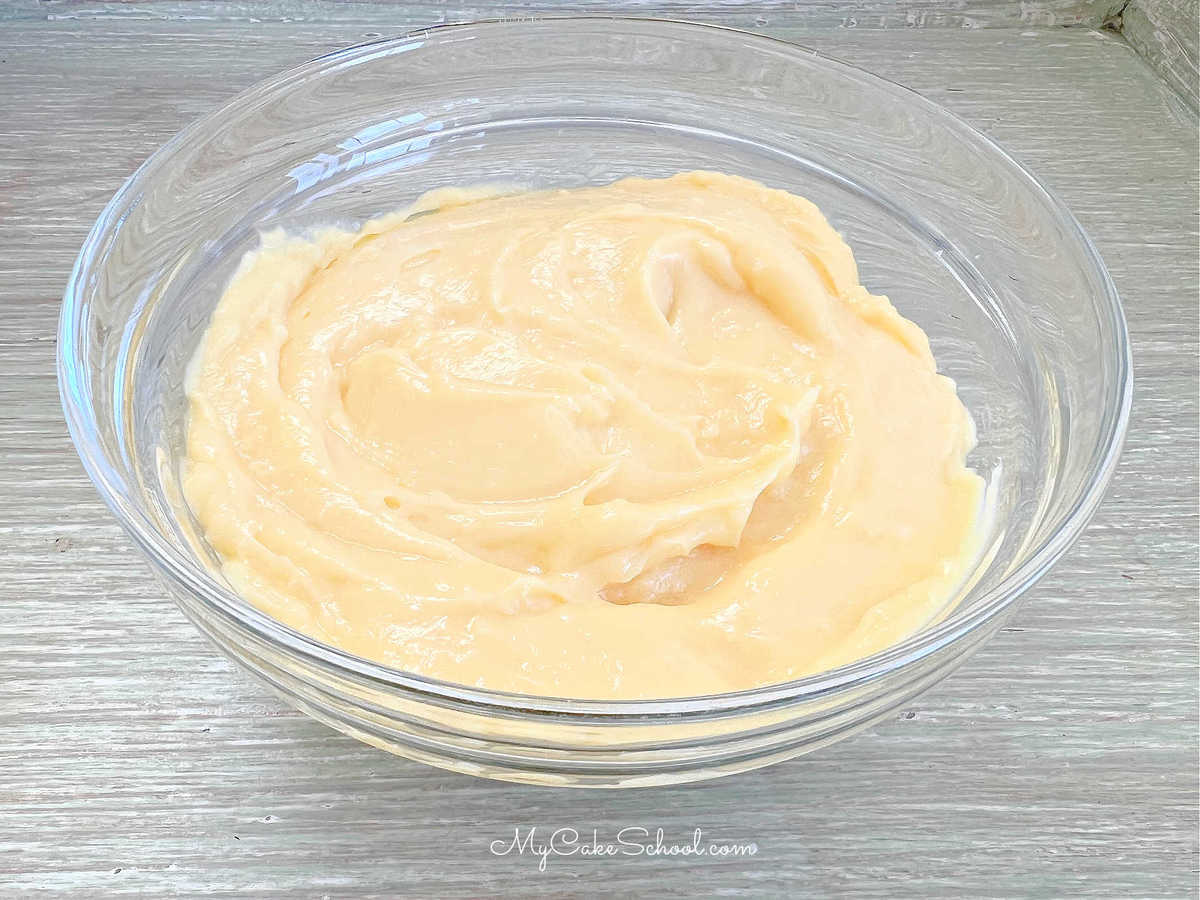
- Remember that pastry cream will thicken even more as it cools. Pour it into a heat proof bowl let cool a bit then cover with plastic wrap, pressing wrap against the filling to prevent a skin form forming.
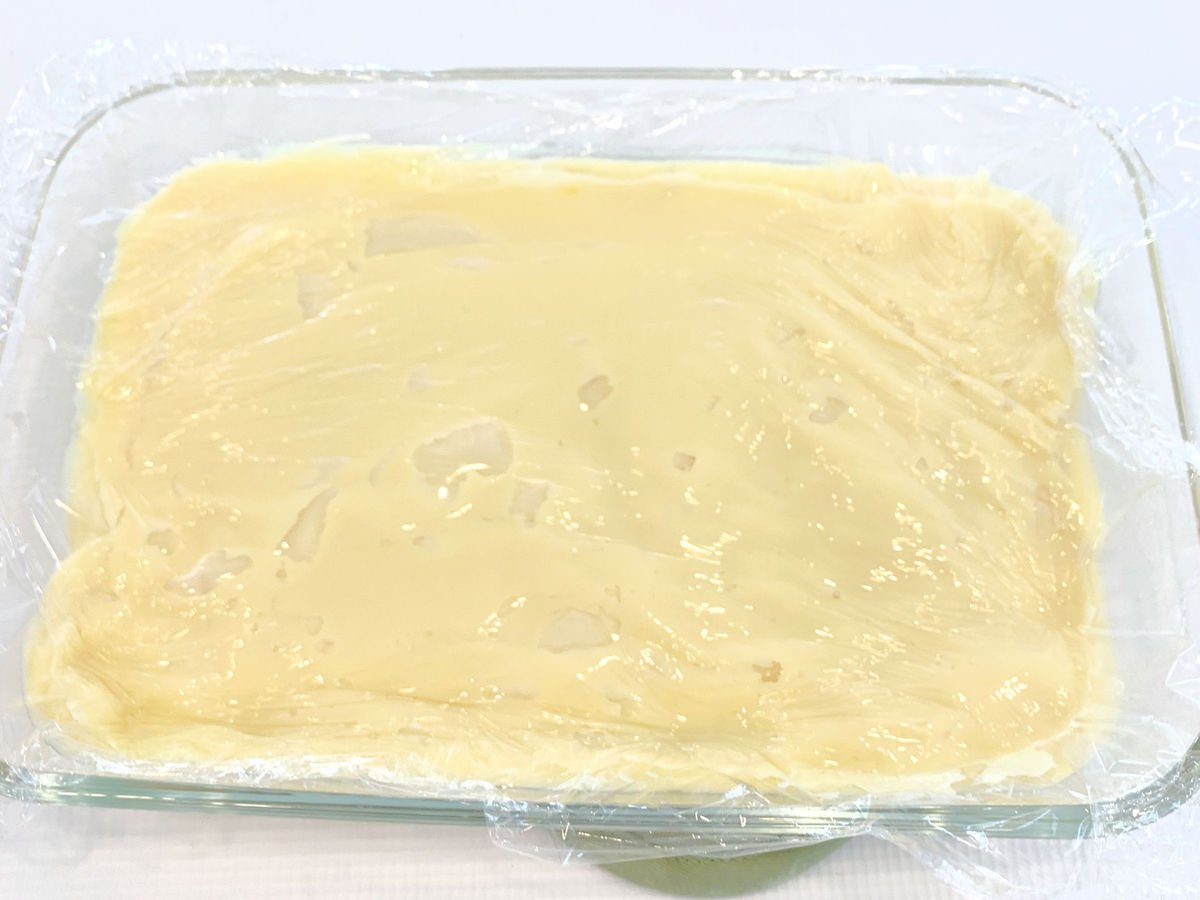
- Refrigerate until throughly cold before using. (We cooled ours even more quickly by spreading into a glass casserole dish.)
Easy Chocolate Ganache Glaze
For our chocolate glaze, we are making a simple ganache, using equal parts of semi-sweet chocolate and heavy cream (by weight).
This ganache can be easily prepared in the microwave, combining the chocolate and cream in a microwave safe bowl and heating for 30 second increments (or less).

For us, heating for 30 seconds, giving a quick stir, and heating for another 30 seconds was all that it took to melt our chocolate.

Always be careful not to overheat. After you microwave, let the bowl sit for a minute or two for the chips to soften even more before giving it a final stir. You will need to stir a minute or 2 for it all to come together.
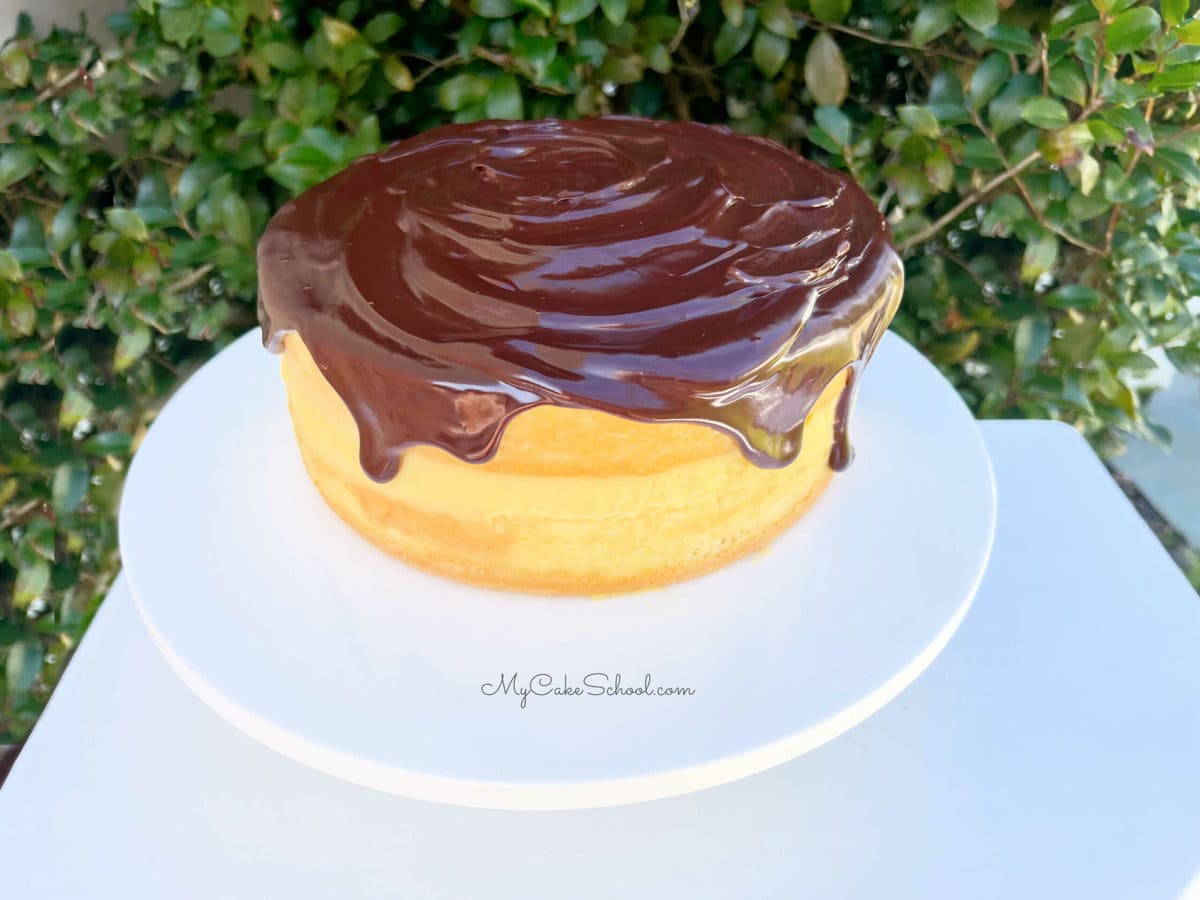
The chocolate glaze will thicken as it cools. When we applied the ganache to the cake, it was no longer hot--just slightly warm.
It had cooled enough that it was not overly runny or loose. This is a good consistency for spreading over the edge of the chilled cake as the ganache won't travel all the way down (unless of course you want it to!)
Assembling the Boston Cream Pie
Place the first vanilla cake layer on your cake plate or pedestal. Then, spread with the chilled pastry cream.

Top with the second cake layer and repeat. Keep in mind that you will reserve a bit of the cream to spread around the outside of the cake.
Finally, top with the last cake layer and make sure that all of the gaps in between the layers are filled with pastry cream.
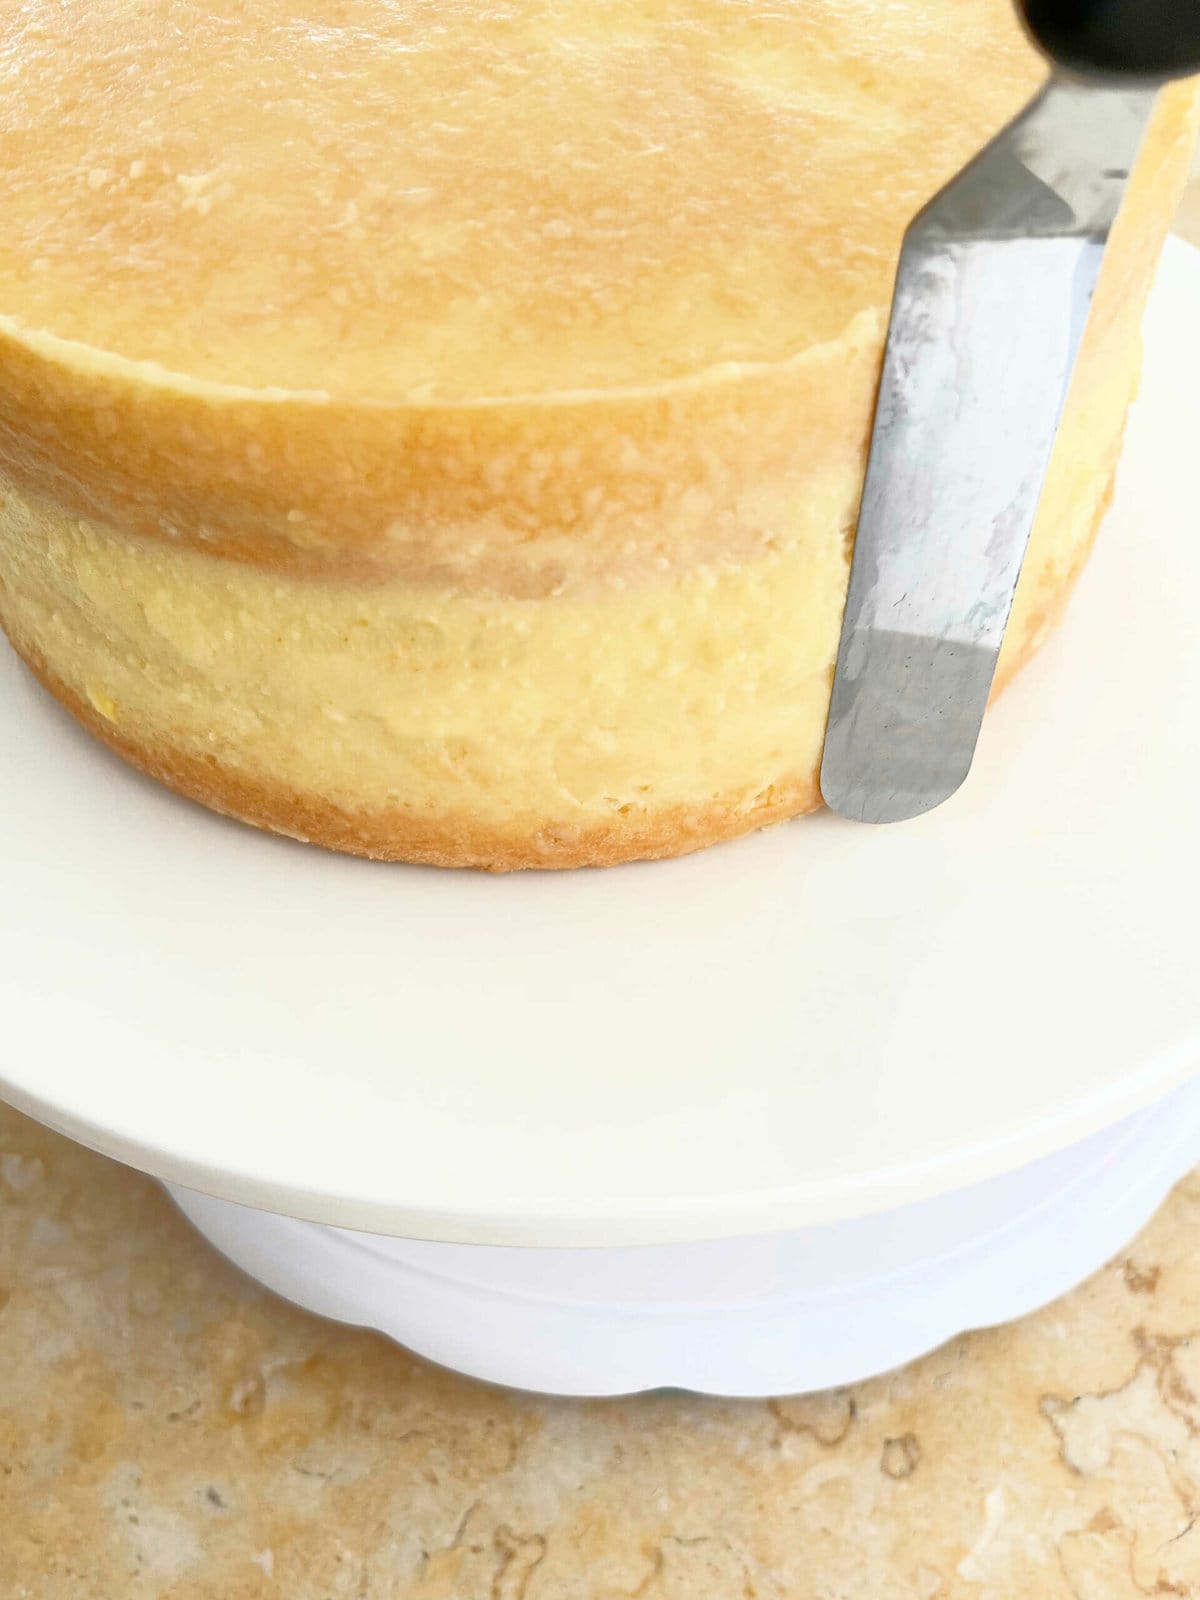
How to Prevent the "naked cake layers" from Drying Out
I spread a very thin layer of pastry cream around the sides of the cake, so thin that it looks transparent.
I did this so that we could have the look of a "naked cake", but without the worry of the exposed cake layers drying out.
Applying the Ganache Glaze
When your ganache has cooled to a soft, but not overly loose or runny consistency, It is time to glaze!
Spread the ganache over the top of the cake with a small offset spatula and push a bit of the excess over the edge so that it partially spills over the side of the cake.
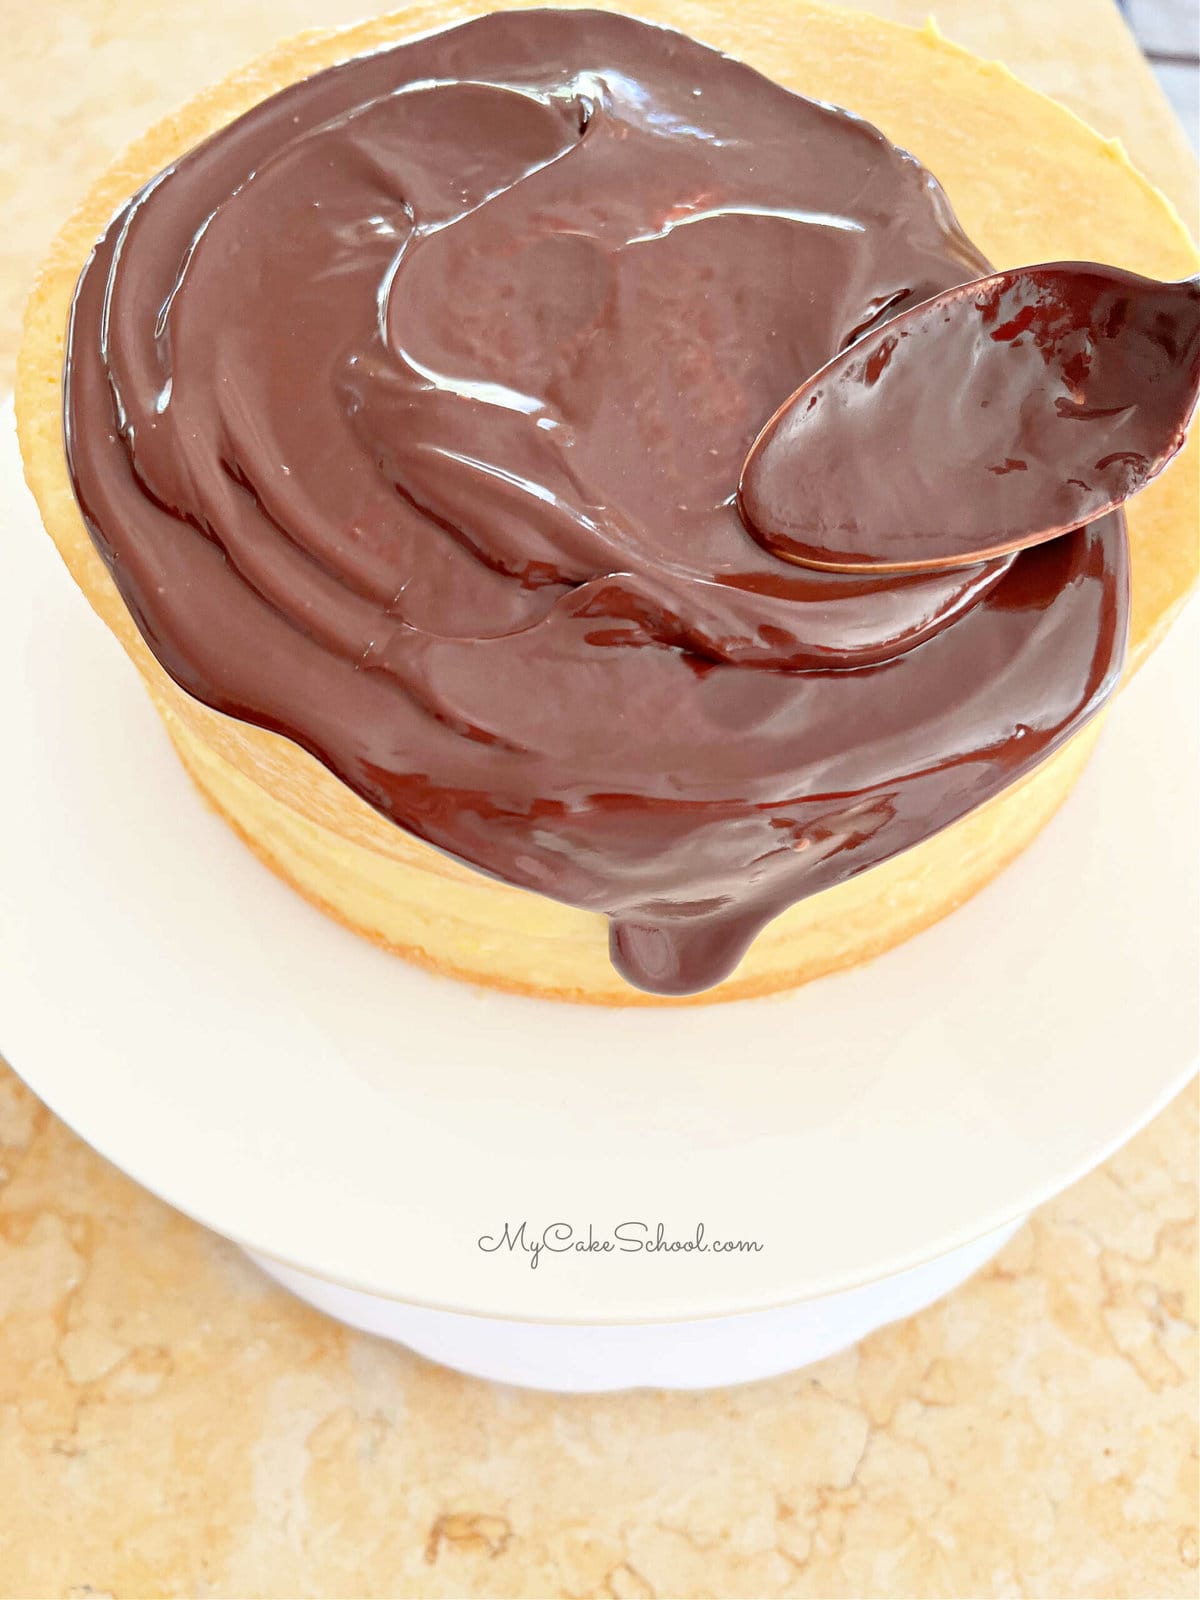
If your ganache has cooled too much and has become thick, you can reheat for just a few seconds at a time to return to the desired consistency.
As you've seen with many of my other cakes, I often apply the ganache glaze using a disposable piping bag with the tip snipped away to create a very controlled drip effect all the way around.
However, for today's cake I went with a thicker, less planned application of the glaze and I love the look. There's really no wrong way to apply the glaze, just have fun with it!
Here is the finished cake! Don't you just want to dive right in?
Here is a peek inside.
Cake Mix Version of Boston Cream Pie
Did you know that we have a cake mix version of Boston Cream Pie as well? This delicious recipe features doctored cake mix layers as well as an easy vanilla cream filling that can be prepared in minutes!
You can find it here: Boston Cream Pie from Cake Mix.
We also have a great doctored cake mix version of Boston Cream Cupcakes!
More Classic Cake Recipes to Try
Here are just a few more of our favorite classic recipes. Some of our most popular are our scratch Carrot Cake, Black Forest Cake, Italian Cream Cake, and German Chocolate cake !
We hope that you enjoy this scratch Boston Cream Pie as much as we have!
Don't miss our full collection of Cake Recipes, which includes both cake recipes from scratch as well as cake mix recipes!
We also have a great section of cake decorating tutorials if you'd like to learn more about cake design! We'll show you everything from how to make a cake, to creating elegant cakes, themed birthday cake ideas, and more!
Have you made this? We would LOVE for you to leave a ⭐️ rating as well as a comment and photo below! We really appreciate your feedback!
Boston Cream Pie (A Scratch Layer Cake)

This moist, delicious Boston Cream Pie consists of three vanilla cake layers filled with pastry cream and topped with a decadent chocolate glaze!
Ingredients
Vanilla Cake
- 1 ½ sticks (170g) unsalted butter, softened ( holds it shape but dents when pressed)
- 2 cups (400g) sugar
- 4 large eggs
- 3 cups (342g) cake flour (spooned into measuring cup and leveled off) If you do not have cake flour see substitution in Notes below.
- 2 teaspoons (8g) baking powder
- ½ teaspoon (3g) baking soda
- ½ teaspoon (3g) salt
- 1 ¼ cups (296g) buttermilk — if you do not have buttermilk, see substitution below
- ¼ cup (54g) vegetable oil
- 1 Tablespoon (12g) vanilla extract
Pastry Cream Filling
- 4 large egg yolks, (save the whites for another recipe)
- ¾ cup (150g) sugar
- ¼ teaspoon (1g) salt
- 4 Tablespoons (32g) cornstarch
- 2 teaspoons (8g) vanilla
- 2 cups (484g) milk ( I used whole milk)
Chocolate Ganache Glaze
- 6 oz semisweet chocolate (this is 1 cup or 171g) We used Ghirardelli mini chips
- 6 oz heavy cream (this is ¾ cup or 171g)
Instructions
For the Vanilla Cake Layers
- Preheat the oven to 350 degrees, grease and flour two 9×2 inch round pans.
- In a medium bowl, whisk the flour, baking powder, baking soda and salt for 30 seconds. Set aside
- In another bowl, add the buttermilk, oil and vanilla. Set aside..
- In the bowl of your mixer, add the butter and mix at medium speed until smooth. Gradually add the sugar and continue to mix on medium speed for 3 to 5 minutes until lightened in color and fluffy. Add the eggs one at a time mixing until the yellow of the yolk disappears.
- Alternately add the flour mixture and buttermilk mixture, beginning and ending with the dry ingredients (3 additions of dry ingredients and 2 of liquid).
- Do not mix above medium speed or over mix the cake batter.
- Divide the batter between two 9 inch pans.
- Bake at 350 degrees for 25-35 minutes or until a toothpick inserted in the center comes out clean or with just few crumbs attached. Let cool 10 minutes in the pans on a wire rack before turning out.
For the Pastry Cream Filling
- In a medium size bowl, whisk the egg yolks and set aside. In a medium size saucepan, combine the sugar, cornstarch and salt, blend together. Gradually stir in the 2 cups of milk. Cook over medium heat, stirring constantly to dissolve the sugar.
- Bring the mixture to a simmer. Remove the saucepan from the heat. Spoon ¼ to ½ cup of the hot mixture into the bowl holding the egg yolks, stir constantly to temper the eggs. (You are tempering the eggs so you will not have tiny pieces of scrambled egg when you pour them into the simmering saucepan).
- Pour the egg mixture back into the saucepan, whisking constantly as it simmers until the mixture thickens, this could take 3 to 4 minutes. When thickened, remove from the heat and add the vanilla extract extract. The filling will thicken even more as it cools.
- Pour into a heat proof bowl or small casserole dish (for faster cooling) and let cool a bit then cover with plastic wrap, pressing wrap against the filling to prevent a skin form forming. Refrigerate until the cream is throughly cold before using.
For the Chocolate Ganache Glaze
- Place your chocolate into a microwave safe bowl.
- Pour heavy cream over the chocolate and place in the microwave for 30 seconds. (times may vary)
- Remove and stir. Microwave for 30 seconds more and when the chocolate has melted almost completely, allow it to sit for 1 minute more before stirring. Stir until you've reached a silky smooth consistency.
- * If your chocolate hasn't melted after the 1 minute recommended in the instructions, simply microwave in small 10-15 second increments until it has nearly completely melted. Let sit one minute, then stir until smooth.
- The ganache will cool thicken as it cools. Cool for about 15 minutes or until the ganache has thickened to the desired consistency. It should not be hot when applying to the cake. You can speed up the cooling process by pouring it into an elongated glass casserole dish.
- If the ganache becomes too thick to work with, just microwave for a few seconds at a time until it returns to desired consistency.
Assembling the Cake
- Place the first cake layer on the cake plate or pedestal. Spread with pastry cream filling. Keep in mind when applying the filling that we will also be using a very thin layer of the pastry cream for the outside of the cake as well.
- Top with the second cake layer. Fill in any gaps between the cake layers with pastry cream using an offset spatula.
- As an optional step, I like to apply a very thin (transparent) layer of pastry cream around the sides of the cake. The cake will have a "naked" look to it, but the layers will be sealed by the cream to protect it from drying out. You may have some cream leftover.
- Top the cake with ganache. I spooned on the ganache and spread around the top of the cake, and used my small offset spatula to gently push some of the excess over the edge here and there. It's difficult to predict how the ganache will fall with this method, but I do like the look! My cake was chilled at the time that I applied the ganache.
- *This cake should be refrigerated until an hour or so before serving.
Notes
Substitute for Buttermilk:
No Buttermilk? Here is a substitution: To a measuring cup, add 1 Tablespoons vinegar or lemon juice. Add milk to the 1 ¼ mark, stir. Wait 5 minutes and it is ready to use.
Substitution for Cake Flour:
Using all purpose flour (plain in UK) to make Cake Flour: For each cup of flour in a recipe, remove 2 Tablespoons of flour and replace with 2 Tablespoons cornstarch (cornflour in the UK). This recipe has 3 cups of flour so you will measure out 3 cups of all purpose flour, remove 6 Tablespoons and replace with 6 Tablespoons cornstarch, whisk to blend
Recipe makes 7 ½ cups batter
Three Layer vs. Two Layer Cake
We originally posted this recipe as a three layer cake. However, we heard from a couple of our readers that they had trouble with transporting the cake, due to the softness of the filling and lack of frosting to firm things up. So, two layers is now our recommendation, just to be on the safe side! ;0)
Recommended Products
As an Amazon Associate and member of other affiliate programs, I earn from qualifying purchases.

My sponge layer is sliding off the pastry cream. How do I prevent this ?
Hi Tia, I'm sorry that you are having this issue. I would gently slide the top layer into place and refrigerate to firm it up or set it up. If you haven't already added the chocolate on top, you could also gently press down the top as well. Did the bottom layer have a dome or is it possibly on a surface or board that isn't level? Either way, chilling should help set it up.