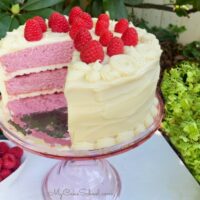
Raspberry Layer Cake
Today's homemade Raspberry Cake is the perfect dessert for spring and summer celebrations!
This layer cake is moist, soft, and light, and has wonderful raspberry flavor from the raspberry puree reduction mixed into the cake batter.

Table of Contents
Why we Love It
There are so many reasons to love this delicious Raspberry Cake! Here are just a few:
- Perfect spring and summer cake recipe, birthday cake recipe, and it's pretty pink layers make it a great Valentine's Day Cake recipe also!
- Delicious, tender raspberry cake layers. (Don't miss our Raspberry Cake Mix recipe also!)
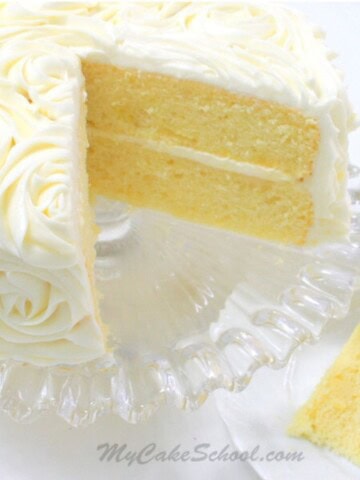
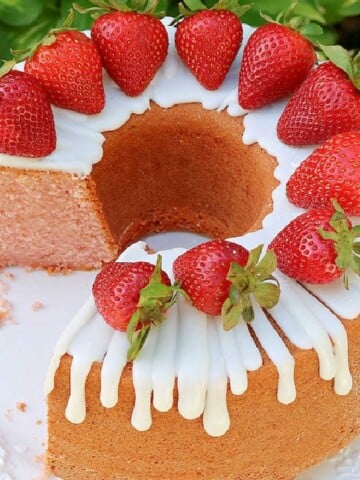
- We love light and refreshing cakes with fruit (just as with our lemon bundt cake, strawberry cake recipe, and lemon blueberry cake)!
- This is a great year-round recipe as frozen raspberries can be used! (The same is true for the strawberries in our strawberry cake.)
- We love the combination of soft raspberry layers with homemade raspberry filling and cream cheese frosting!

How to Make Raspberry Layer Cake
If you love raspberries, you're going to love this flavorful layer cake! You can find the full, printable raspberry cake recipe further down in this post- but here is a quick rundown of our steps!
Raspberry Puree for the Cake Batter
We've found reducing pureed fruit (as we also did with our Blueberry Cake) really enhances the flavor of the cake layers without having to introduce too much liquid into the recipe.
The same is true for today's cake. I love the flavor that the cooked and reduced raspberry puree adds to the cake recipe. *With raspberries, we do have the extra step of running the puree through a strainer to remove the seeds! This may take about 10-15 minutes but it is worth it.
First, thaw the raspberries. We used about 10 oz or approximately 1 ½ cups of thawed raspberries.
Puree and Strain out the Raspberry Seeds!
Puree in blender (we used our little bullet blender) and run through a small strainer. I used the back side of a spoon to help push the puree through-- don't forget to scrape the additional puree that tends to cling to the back of the strainer!

Raspberry Reduction
Next, add the strained puree to a saucepan along with ¼ cup water a 2 Tablespoons sugar. Cook over medium high heat and stir frequently.
Cook until the raspberry puree has reduced to ¾ cup. If you happen to reduce too much, just add the amount of water needed to reach the ¾ cup mark. This may take about 10-15 minutes or so.

Before adding to the cake batter, you'll want to let the raspberry puree cool down a bit. (You can also make the puree the night before and refrigerate if you'd like!)
Baking the Raspberry Cake
First, preheat the oven and grease and flour three 8 inch x 2 inch round cake pans. We also like to line our cake pans with parchment circles.
For this cake recipe, we're using the traditional creaming method (rather than reverse creaming), for raspberry cake layers that are fluffy and light.
In a medium sized bowl, whisk together the dry ingredients- flour, baking powder, baking soda and salt. Whisk together for 30 seconds. Set aside.
In another bowl, combine these wet ingredients: sour cream, cooled raspberry puree and vegetable oil. Blend with fork and set aside.
In the bowl of a stand mixer, mix the softened butter until smooth, Gradually add the sugar and mix on medium speed 3 to 5 minutes or until fluffy and lightened in color. *If using a hand mixer, you may need to mix a bit longer.
Add the eggs one at a time mixing until the yellow of the yolk disappears.
Add the flour mixture and the sour cream mixture alternately, beginning and ending with the flour mixture (We do 3 additions of dry ingredients, 2 additions of wet ingredients).
Add pink coloring gel at this time (optional). I added just a small amount to brighten the color. Mix until combined and smooth. (Be careful not to mix above medium speed or to mix too long.)
Bake at 350 degrees F for 22 to 25 minutes or until a toothpick inserted into the center of the cake comes out clean or with just a few crumbs attached.
*Baking times will often vary depending on your oven, the types of pans used, etc. Peek in at the layers as you approach the estimated baking time.
We baked three cake layers because we like the extra layer of filling that this allows. However, the layers are not super thick-- they will bake up to approximately 1 ¼ inches.

Raspberry Filling
For this recipe, we are pairing our raspberry cake layers with raspberry filling and cream cheese frosting.

Can Seedless Raspberry Jam be used as a Filling?
Yes it can! If you would like to use seedless raspberry jam instead of the cooked raspberry filling pictured above, that would be delicious also (and faster)!
Assembling the Raspberry Cake
To assemble the raspberry layer cake, place the first raspberry cake layer on a cake pedestal or cake plate.
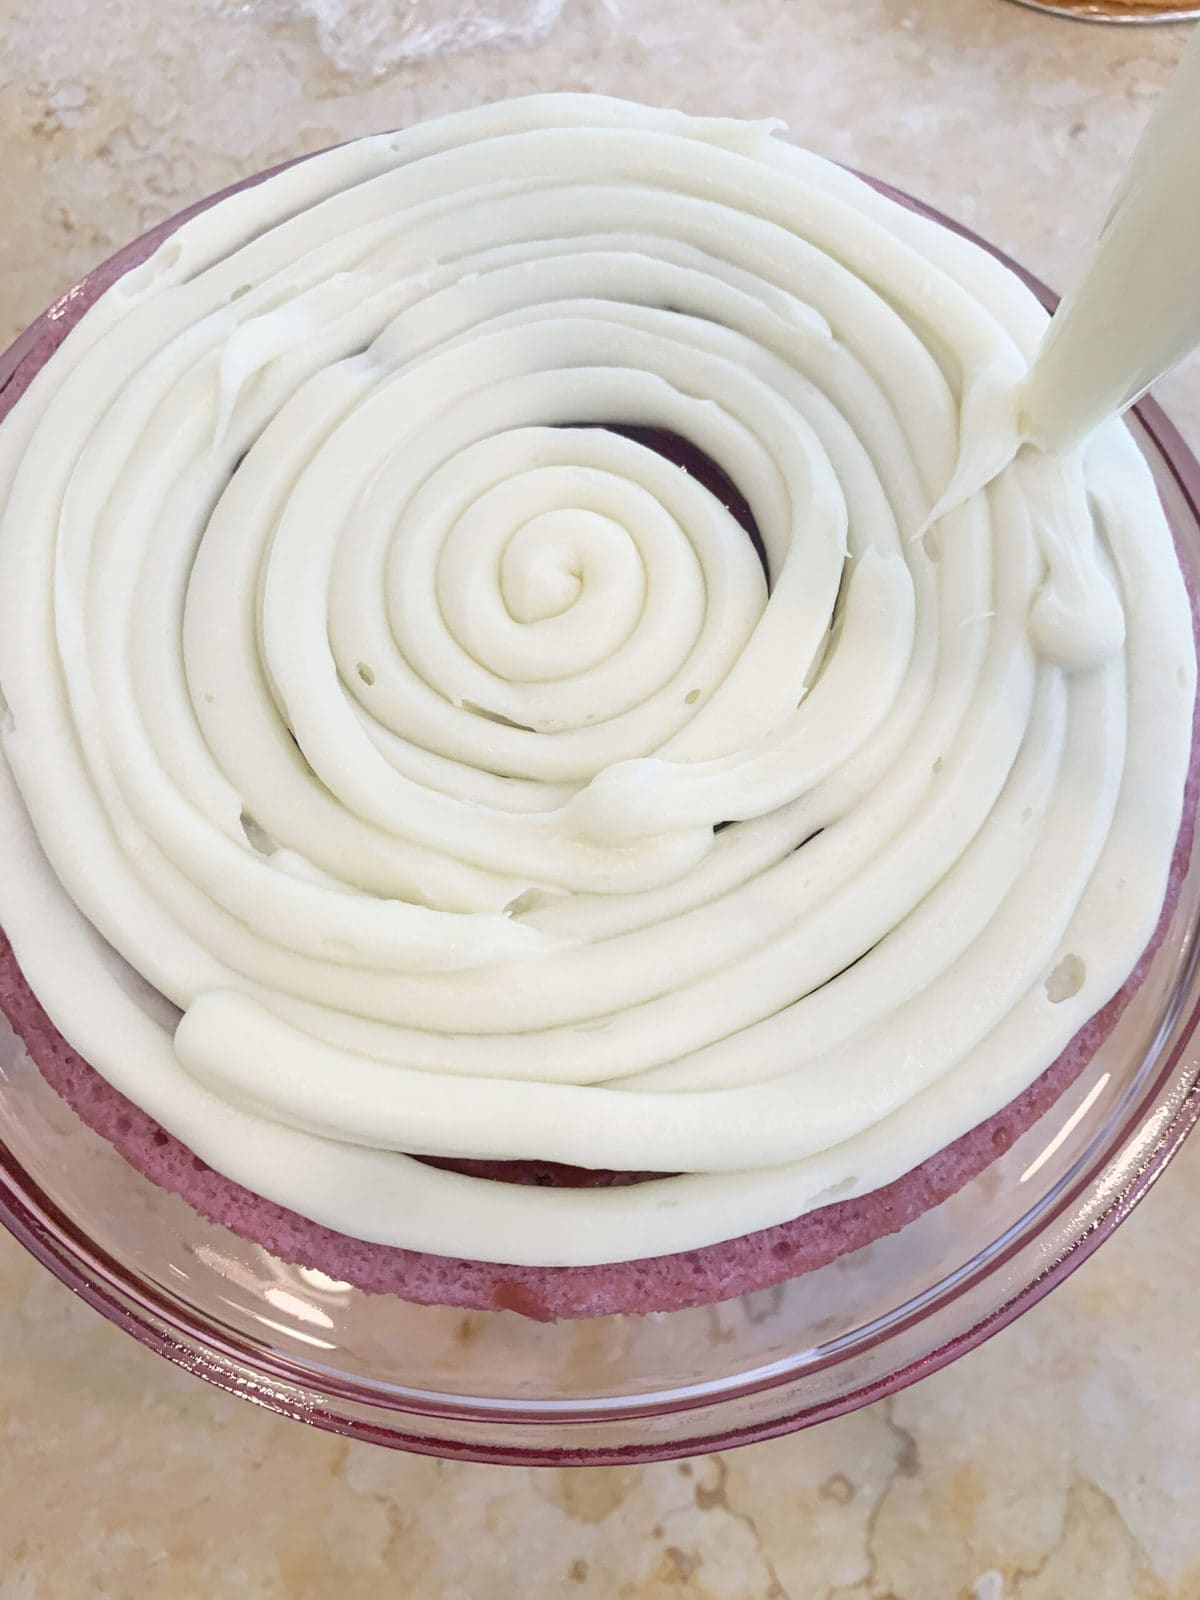
Next, pipe a dam of cream cheese frosting about ½ inch from the edge of the cake layer. (I do this using a disposable piping bag with the tip snipped away). Spread inside of the dam with a layer of raspberry filling- I do a fairly thin layer.
The purpose of the dam is to keep the raspberry filling from escaping from the sides of the cake as you stack your cake layers.

Pipe over the top of the raspberry filling with cream cheese frosting. (Or if you would rather, you could spread the next cake layer with cream cheese frosting and apply to first layer frosting-side-down- this option is easier if the layers are partially frozen and less fragile.)
Repeat these steps for the next cake layer and top with the final cake layer.
Fill in any gaps between cake layers with frosting. (I like to fill in any gaps with the same piping bag that I used for piping my dam).
Frost a thin crumb coat of cream cheese frosting over the cake. (This is the thin layer of frosting that catches the crumbs.)

Decorating the Raspberry Cake
**At this point, I like to chill the tier for about 15-20 minutes to firm up the frosting. This is an optional step but I find it very helpful to firm things up! Next, frost the final coat of frosting.
I textured the frosting around the sides of the cake with a small offset spatula, and then piped a border around the top of the cake using a star tip 21 (using miscellaneous stars, shells, and rosettes.) I also piped a shell border around the bottom of the cake.
We have a video on Buttercream Piping with Star Tips (for borders, etc.) if you would like to learn more!

I filled the top of the cake with fresh raspberries-I love the color that they bring to the finished cake!


Recipe FAQs
More Fruity Cakes
We've made so many fruity cake recipes over the years! We love cake recipes from scratch as well as cake mix recipes.
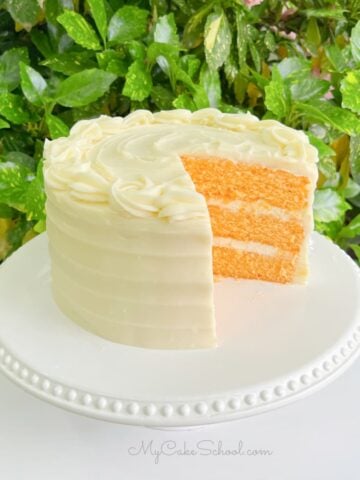
We love these recipes year-round but they are especially popular options in the spring and summer months! We're listing some of our favorites below. A few of our most popular are: Lemon Raspberry Swirl Pound Cake, Pineapple Cake, Pina Colada Cake, Lemon Cake from Scratch, and Orange Cake!
You can find the full roundup of our favorite fruity cakes here: Best Cakes for Spring and Summer.
Enjoy the Recipe
Raspberry Layer Cake
Ingredients
Raspberry Cake Layers
- 1 ½ sticks unsalted butter, softened (170g)
- 2 cups sugar (400g)
- 3 large eggs, room temperature (If in a hurry, place eggs in a bowl of warm water for five minutes.)
- 3 cups Cake flour (342g)
- 2 teaspoons baking powder (8g)
- ½ teaspoon baking soda (3g)
- ½ teaspoon salt (3g)
- 1 cup sour cream (227g)
- 10 oz frozen raspberries thawed (approximately 1 ½ cups thawed). Puree them in blender, and strain through fine strainer (to remove the seeds). **Then cook with ¼ cup water and 2T sugar over medium heat until reduced to ¾ cup (180g). Cool before using.
- ¼ cup vegetable oil ( I use canola oil) (54g)
- * Pink Coloring Gel - Optional. We used a small amount to brighten up the color.
Raspberry Filling
- *You can also substitute seedless Raspberry Jam for the cooked Raspberry Filling if you'd like.
- 12 ounce package frozen raspberries (340g)
- ½ cup sugar (100g)
- 3 Tablespoons cornstarch (26g)
- 1 teaspoon lemon juice (4g)
Cream Cheese Frosting
- 2 sticks unsalted butter, slightly softened (226g)
- 16 oz cream cheese, softened. ( I use full fat cream cheese. Using reduced fat or the spreadable cream cheese will cause the frosting to be too soft. )
- 2 teaspoons vanilla extract (8g)
- ½ teaspoon salt (2g)
- 6 to 6 ½ cups powdered sugar (690g-747g)
Decoration
- We used fresh raspberries for the top of the cake. Star tip 21 was used to pipe top border of stars, shells, and rosettes. Texture was added with a small offset spatula around the sides of the cake
Instructions
Preparing the Raspberry Puree
- It is good to prepare the raspberry puree for the batter first. Thaw raspberries (if using frozen). Puree in blender (we used our little bullet blender) and run through a small strainer. It helps to use the back of a spoon to push it through- Don't forget to scrape the other side of the strainer for additional juices.
- Add the strained puree to a saucepan along with ¼ cup water a 2 Tablespoons sugar. Cook over medium high heat until reduced to ¾ cup (180g). This may take about 10-15 minutes. If you happen to reduce too much, just add water to reach the ¾ cup mark.
- Allow the raspberry puree to cool before using. Can be made in advance and refrigerated.
Preparing the Batter
- Preheat the oven to 350 degrees, grease and flour three 8 inch x 2 inch round cake pans. We like to line our pans with circles of parchment paper also.
- In a medium sized bowl, add flour, baking powder, baking soda and salt. Whisk to blend for 30 seconds. Set aside.
- In another bowl, combine the sour cream, raspberry puree and oil. Blend with fork and set aside.
- In the bowl of your stand mixer, mix the butter until smooth, Gradually add the sugar and mix on medium speed 3 to 5 minutes or until lightened in color and fluffy. If using a hand mixer, you may need to mix a bit longer.
- Add the eggs 1 at a time mixing until the yellow of the yolk disappears.
- Add the flour mixture and the sour cream mixture alternately, beginning and ending with the flour mixture (3 additions of dry ingredients, 2 additions of wet ingredients).
- Add pink coloring gel at this time (optional). I added just a small amount to brighten the color. Mix until combined and smooth. Do not mix above medium speed or mix too long.
- Bake at 350 degrees for 22 to 25 minutes or until a toothpick inserted into the center of the cake comes out clean or with just a few crumbs attached. Keep an eye on it, ovens can bake differently.
- Let cool in pans 5 to 10 minutes, then turn out.
Cooked Raspberry Filling
- Completely thaw the frozen raspberries. If in a hurry, and your raspberries are in a plastic bag you can thaw them more quickly by placing the bag in a bowl of hot water.
- Pour thawed raspberries into blender and puree. Place a fine wire strainer over a bowl. Pour the raspberry puree into the strainer. Using the back of a spoon, press the raspberry puree through the strainer- we are doing this step to remove the seeds. This will take several minutes. When finished be sure to scrape off raspberry pulp that will be clinging to the bottom of the strainer into the bowl. Discard the remaining seeds and pulp that would not go through the strainer. You should get about ¾ cup of strained puree. Add enough water to this to make 1 ¼ cups
- In a small saucepan, combine the raspberry juice, sugar, lemon juice and cornstarch. Whisk to blend. Cook over medium heat whisking constantly until the mixture thickens.
- Remove from the heat and allow to cool. Can be refrigerated in a covered container for a week.
- Makes 1 ¼ cups.
For the Cream Cheese Frosting
- Cut the butter into slices and add to the bowl of your mixer. Beat on low to medium speed until the butter is softened and smooth.
- Cut the softened cream cheese into pieces and add to the butter, beating at low to medium speed until incorporated. If you are using a hand mixer you may need to soften the cream cheese a bit more.
- Add the vanilla. Gradually add the powdered sugar beating on low speed until blended. Cover the bowl with a towel to keep down the cloud of powdered sugar.
- Increase mixing speed and beat until fluffy. Don't over beat or it will become too soft. If it becomes too soft, just refrigerate a short while to firm it up a bit.
- This frosting will pipe best if used while still chilled. You can make it in advance, refrigerate and when ready to use let it soften slightly (do not microwave) and remix.
- Will frost a 3 layer 8 or 9 inch cake.
Assembly of Cake
- Place first raspberry cake layer on pedestal or cake plate. Pipe a dam of cream cheese frosting about ½ inch from the edge of the layer. Fill with a thin layer of cooled raspberry filling (or jam), pipe on a layer of cream cheese frosting. Top with second cake layer. Repeat steps. End with final cake layer.
- Fill in any gaps between cake layers with frosting. Apply thin crumb coat. At this point I like to chill the cake for about 15 minutes in the freezer to firm up the frosting. Apply final layer of frosting and decorate.
- I textured the frosting around the sides of the cake. I piped a border of miscellaneous shells, stars, and rosettes around the top of the cake. I filled with fresh raspberries.
Could I use this recipe to make cupcakes? Would the measurements change at all?
Hi Amanda, I'm not sure that we've made cupcakes from this recipe- but it should work fine. We normally bake our cupcakes at 350 for about 16-18 minutes. (About 1/4 cup batter per cupcake).
Hi Amy! I can see why it is confusing with the different cup measurements, etc. -
For the raspberry puree in the cake batter, I would just go with the 10 oz/284g measurement for the raspberries. And then when you puree and strain and add to the saucepan, you'll add 2 Tablespoons sugar (30g) + 1/4 cup (60g) water. You'll cook it down til it is around 3/4 cup (180g).
I hope this helps!
This yielded a really good crumb, but I found it to be really under-sweet at this flour/sugar ratio. More like raspberry bread than cake. I guess the idea was that the berries would make up for the lower amount of sugar? They really did not. Can I just add another 1/2 cup of sugar next time or will it throw the whole thing off?
Hi Amanda- Thanks for your feedback, is it possible that you were looking at the amount of sugar for the filling (1/2 cup) rather than for the cake (2 cups)? Since you mentioned it having the sweetness of a bread rather than a cake, it makes me wonder if a measurement may have been off. I wouldn't describe this cake as not being sweet. Most of our layer cakes call for around this ratio (342g cake flour/400g sugar).
All of that aside, if you were to add an additional 1/2 cup of sugar, I can't say for sure how it would change things- it would be an experiment ;0)
Unfortunately this was not a win for me. I am an accomplished baker and followed the recipe exactly. I know my oven can bake a little hot so used a baking tray on the shelf above, adjusted the temp down very slightly and used baking wraps to ensure a level bake. The sponges rose evenly initially but then sank in the middle making them unusable for the planned birthday cake. What was left tasted ok but basically a waste of ingredients and time!
Can you use fresh raspberries instead of the frozen?
Hi Redd, yes fresh raspberries will work also!
Hello! I was wanting to make just the cake part of the recipe for cake pops -- do you think it would be dense enough to hold, and also with AP flour instead? I am also planning on making the buttercream to hold the cake crumbles together, but that only goes so far. :)
Hi April, I haven't tried this cake with cake pops but I would think that it would work! With AP flour, the texture may be slightly different but still good. (In the Notes, we have a substitution for cake flour using AP flour if you are interested).
Hi! I was wondering if you have tried swapping out oil for butter in the recipe and if so, how much butter you used instead? Did it turn out ok still?
Hi Sierra, I haven't tried it but I think it would be fine to just do an equal substitution.
Hey! I was wanting to make this cake but I was curious if it could be made as a sheet cake? If so, would anything be different in baking or amounts? Thanks!
I will be making a triple layer 6 inch version cutting your receipe by 2/3. I will keep the layer height the same; 1 1/4 inches; tossing extra cake batter. If you are interested, I will explain my math to convert from a triple layer 8 inch to a triple layer 6 inch. How would I adjust the baking time for a 6 inch cake?
I’ve just made this recipe (1/3rd) for the first part of my Granddaughter's birthday cake. Tomorrow I’m going to make the full recipe for the three 8” rounds. I’d like it to rise a bit higher (first one has come out 1”). If I make 1.5x the batter and divide between the three tins will it still work? Should I lower oven temp or just bake slightly longer? Thanks in advance.
Hi Kelly, I would think so- I haven't tried this. I would just bake it a few minutes longer.
Even without making changes, the cake should be close to 4 inches in height once filled and frosted. Most of our cake layers (for 3 layer, 8 inch cakes) are approximately 1.25 inches--I can't remember exactly for this one- but if you'd like to experiment with increasing the recipe it should be fine.