Haunted House Cake Tutorial
Learn how to make a creepy Haunted House Cake in this cake decorating video tutorial!
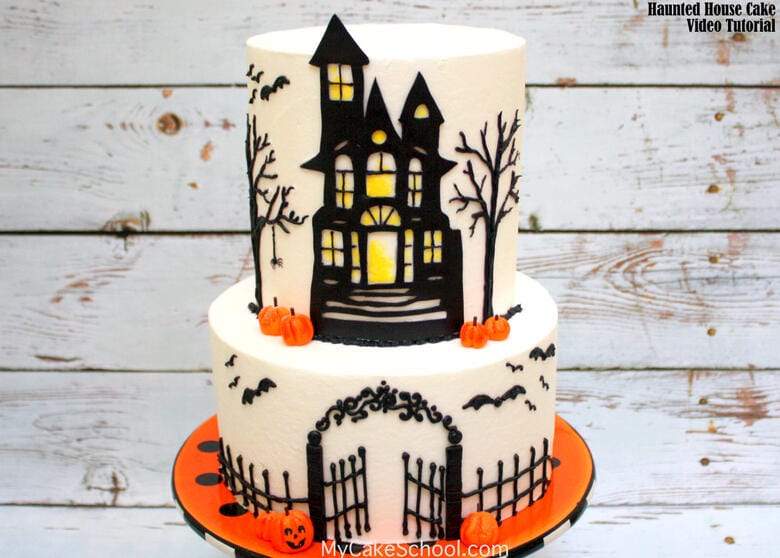
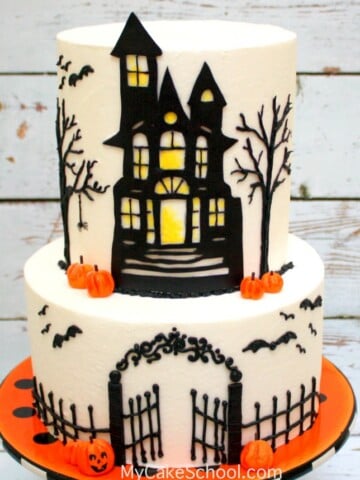
This festive haunted house cake is perfect for Halloween parties! It's great for any age, and incorporates a few of my favorite cake decorating techniques: a wax paper transfer, buttercream piping, and painting on buttercream!
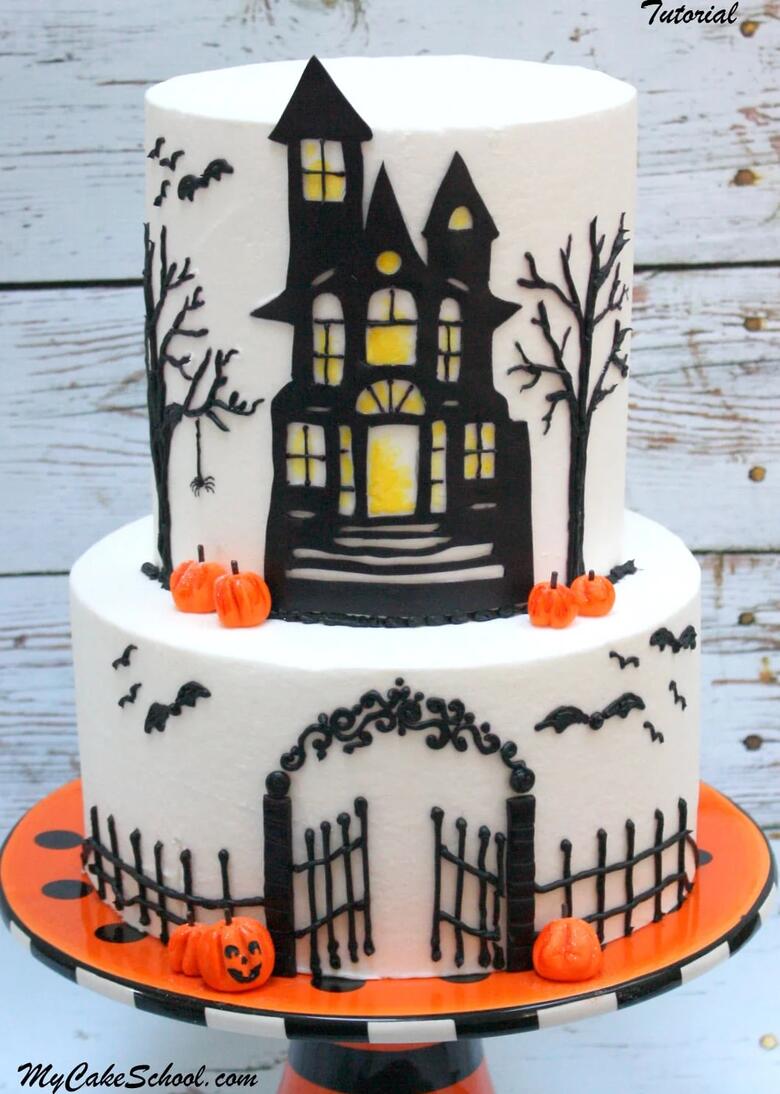
Table of Contents
Why we Love It
- This haunted house design looks impressive but is simple to do!
- You can easily use this design idea on a single tier cake or on top of a sheet cake.
- Perfect for Halloween parties
Cake Tiers
In this video, we are working with an 8 inch tier, and a 6 inch double barrel tier. (We explain double barrel {"Tall"} cakes in a separate video if you are interested in learning this technique.)
We've frosted the tiers with our crusting Fluffy Vanilla Buttercream from the recipes section and stacked (with bubble tea straw supports) as usual.
Each tier is on its own cake board. The double barrel has an extra cake board with supports within it.) Please see our video on tier stacking if you have any stacking questions!
Materials for Haunted House Cake
Vanilla Buttercream (We used our crusting Fluffy Vanilla Buttercream recipe from our Recipes section but our Classic Vanilla Buttercream is a good choice also.
Black Fondant for the silhouette
Piping Tips: Small round tips for the tree, gate, etc. : We used Wilton tips 1 & 2
Viva paper towels (Optional, but I used the Viva method for smoothing buttercream. You could also use the hot knife method of smoothing buttercream or go with a textured look!)
Food Coloring: Super Black, Orange, Lemon Yellow, Bright White (I used Americolor, use whatever brand you like.)
Vodka or lemon extract (I mixed a little vodka with my yellow & white coloring gels to create a paint.)
Sharp Knife or X-acto blade
Waxed Paper
Shortening
Piping Gel
Fondant rolling pin
straight pin (for the pin-prick method)
Black Food Coloring Pen (We used an Americolor Pen. If you don't have one, dip a toothpick into a paint of black coloring gel + vodka to add your details.
Notes on the Haunted House Cake:
While my cake is buttercream, this design could easily be transferred to an all-fondant cake.
Windows for Haunted House
We painted our buttercream yellow for the windows, but if you'd rather, you can either frost that section of cake in yellow buttercream before applying your house, or you can place very thinly rolled pieces of yellow fondant to the back of your haunted house.
You could even pipe buttercream into the windows with a thin piping tip. I do like the variation of color that painting gives though!
Haunted House Gate
Don't feel confined to my haunted house gate design. If you don't feel comfortable piping the scrollwork of the gate, you can use fondant to create a decorative entrance instead, or a simpler piping pattern.
Remember, piping the doors of the gate so that the bottom and top of each door is slanted will give you the feeling that they are opened.
More fun Halloween cakes to Try
We have more fun Halloween Party cakes to share with you, including a Fun Haunted House Cake! This carved haunted house cake is bright green and decorated with candy and other spooky accents. (It is the Halloween version of our gingerbread house cake!)
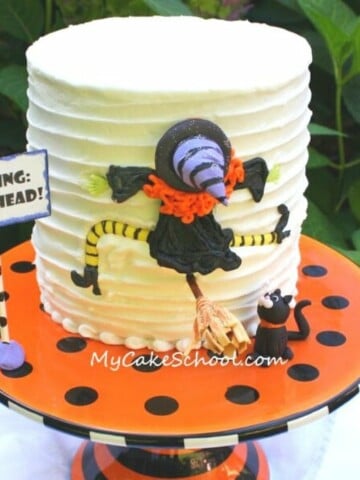
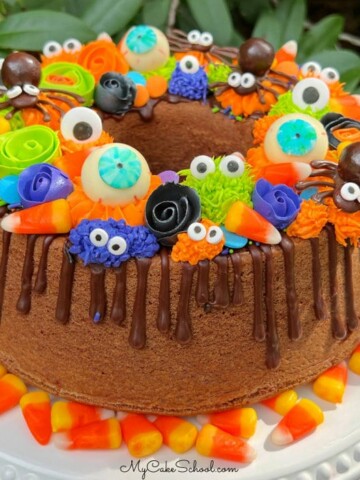
We have more free Halloween cake tutorials to share with you! Some of our most popular are our Monster Bundt Cake Tutorial, Ghost with Balloons Cake, easy Pretzel Monster Cake, and cake with Ghost Cake Topper!

You can find our full collection of favorites here: Favorite Halloween Cakes!
Enjoy the Video!
We hope that you enjoy this Haunted House Cake! If you give it a try, we would love for you to leave a comment and photo below!
Hi Michaela- I'm so glad to hear that you all liked the cake! Happy decorating!
Fantastic tutorial amazing detail I will have to try and make this for my grandchildren, Melissa can you tell me where you purchased your turntable please.
Thanks Marie! It's just an inexpensive Wilton Trim and Turn like this one:
https://www.amazon.com/gp/product/B0012Q5QIM/ref=as_li_tl?ie=UTF8&camp=1789&creative=9325&creativeASIN=B0012Q5QIM&linkCode=as2&tag=mycakcom-20&linkId=247c619581109ac6c016972b2c997ae7
It's funny, I have a very nice metal turntable also but the plastic one is what I use most of the time ;0)
Love the design! Do you put anything on the back the cake or just leave it blank?
Thanks Shelby! I didn't decorate the back but if you'd like, you could carry the spooky trees all the way around! ;0)
This cake is awesome! I love the theme of the cake too. I just got a membership for my B-Day. Can't wait to see all the videos!
I have made wax paper transfers before. I laid the paper over a design and fillled it in with buttercream then froze it. When solid I applied it to a buttercream cake and rubbed the back until the design stuck to the cake and then pelled the wax paper off. Could I use this method with the haunted house?
Hi Linda, a frozen buttercream transfer could possibly work, although I've always placed them on top of the cake rather than in the front and so I can't speak from experience on that. If the house is small enough that it won't extend past the top edge of the cake, and that it won't need to bend with the curve of the cake, it could be an option.
The fondant would be easiest, but if you'd like to avoid fondant, I would probably go with a frozen chocolate transfer (with black candy melts/coating) as it would be a little more sturdy on the front of the cake than a buttercream transfer. I hope this helps!
You are right, candy melts make much more sense. I will let you know how it works and send you a photo come October.
i'd like to make this cake for Halloween, but can't seem to locate the video tutorial. I just keep getting sent back to this page. Hope I'm not missing something super obvious!
Hi there! It was at the very end of the post but I wonder if the fact that it had an ad at the front was hiding it from you (if you by chance have an ad blocker)? I've just posted an ad-free version at the bottom of the page- see if that solved it for you! ;0)
Such a cute design.
By chance… do you remember where you found that orange/black cake stand?!?! 🤩
Thank you Gail! We bought it from Sur La Table many years ago. ;0)