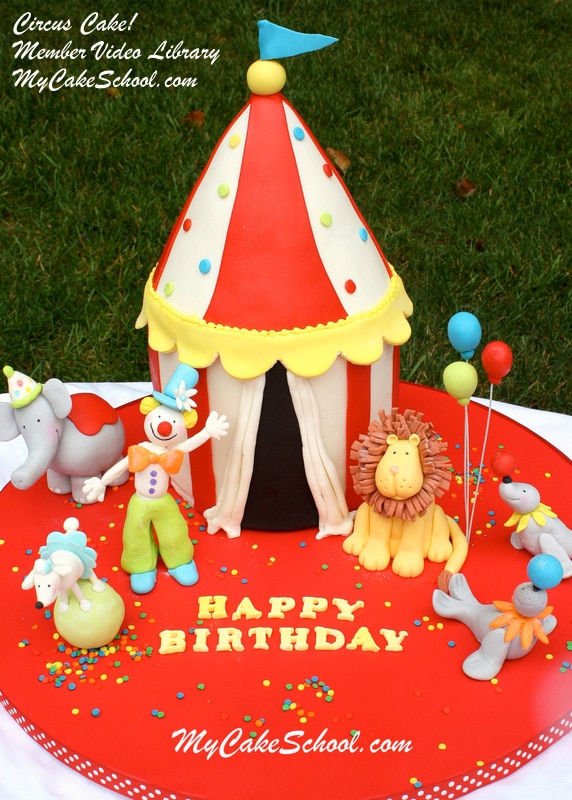
Circus Tent Cake~ Video Tutorial
Hi everyone!
In this video, you will learn to create a fabulous, fun, (and not too difficult, I promise) circus tent!
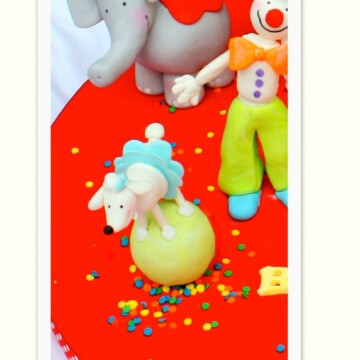
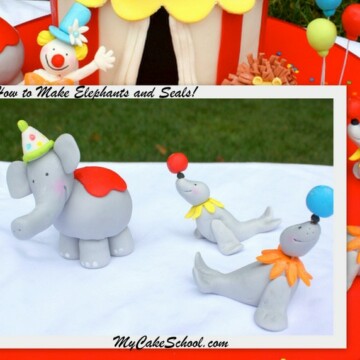
We've been making modeled circus character tutorials for over a week now and they really needed a place to call home. Finally, with this tent, they have one! This video is for our Circus Tent only, so make sure to find our other tutorials listed below for a clown, elephant, seal, lion, and poodle! ;0)
Have fun!
Materials:
Our tent is made from five 6 inch cake layers. We used three for the bottom tier (approx 5 inches high total), and two 6" cake layers to carve our "cone" shaped tier which is the top of the tent.
We formed a point at the very top with one (22g) rice cereal treat.
We used our white almond sour cream cake recipe, which is a doctored mix. Any fairly dense cake will do (since there is a bit of carving involved, I wouldn't go with a very soft cake.)
White Chocolate Ganache: (I'm estimating using The Ganacherator ganache calculator) - 1298 g white chocolate + 15 oz cream for a total of 1731 g white chocolate ganache.
Fondant (we used Liz Marek's recipe) -Approx. 3 lbs (1400g.) for covering the tent, trim, etc.
Fondant for stripes (we used pre-colored red fondant)
Waxed Paper (for transferring stripes--optional)
Shortening for light coating of waxed paper
Cake Base: We used three 16 inch cardboard cake circles, glued together and covered with a red plastic tablecloth which was then wrapped around the edge with ribbon.
Additional Colors used: Americolor Lemon Yellow, Americolor Royal Blue for flag, Americolor electric green
Nail: We used a nail to hammer holes into our cake base, which we then placed toothpick anchors into. Did this for the poodle, clown, and balloons.
Rice Cereal Treat (22g) to shape into point for the top top- Optional
Letter Molds for birthday message- Ours was a Martha Stewart Alphabet Mold
Piping Gel or Tylose Glue
Toothpicks (or preferred anchoring method)
FMM Fondant Ribbon Cutter--(spaced to 1 inch) for our stripes. This could also be done by hand.
Scalloped Frill Cutter (optional) for trim.
Bubble Tea straws or your supports of choice
Cardboard cake circles for each tier to rest on
Floral wire for balloons (stiff gauge-- 20 gauge or 18)
Turntable is helpful
Here are links to the Circus clown & animal tutorials featured on our cake!

How to Make a Clown
How to make Elephants & Seals
Hi Denise- Yes, I think that would be just fine to carve the 6" half-ball pan into the top portion of the cake. I'm glad that you are making it, and it sounds like you are off to a great start --(too funny about the "no clowns" request!) - Can't wait to hear how it goes, let us know if you have any more questions!