Peanut Butter Chocolate Marble Cake (Doctored Cake Mix)
Everybody loves peanut butter and chocolate together, and this peanut butter chocolate marble cake with peanut butter whipped cream frosting is no exception!
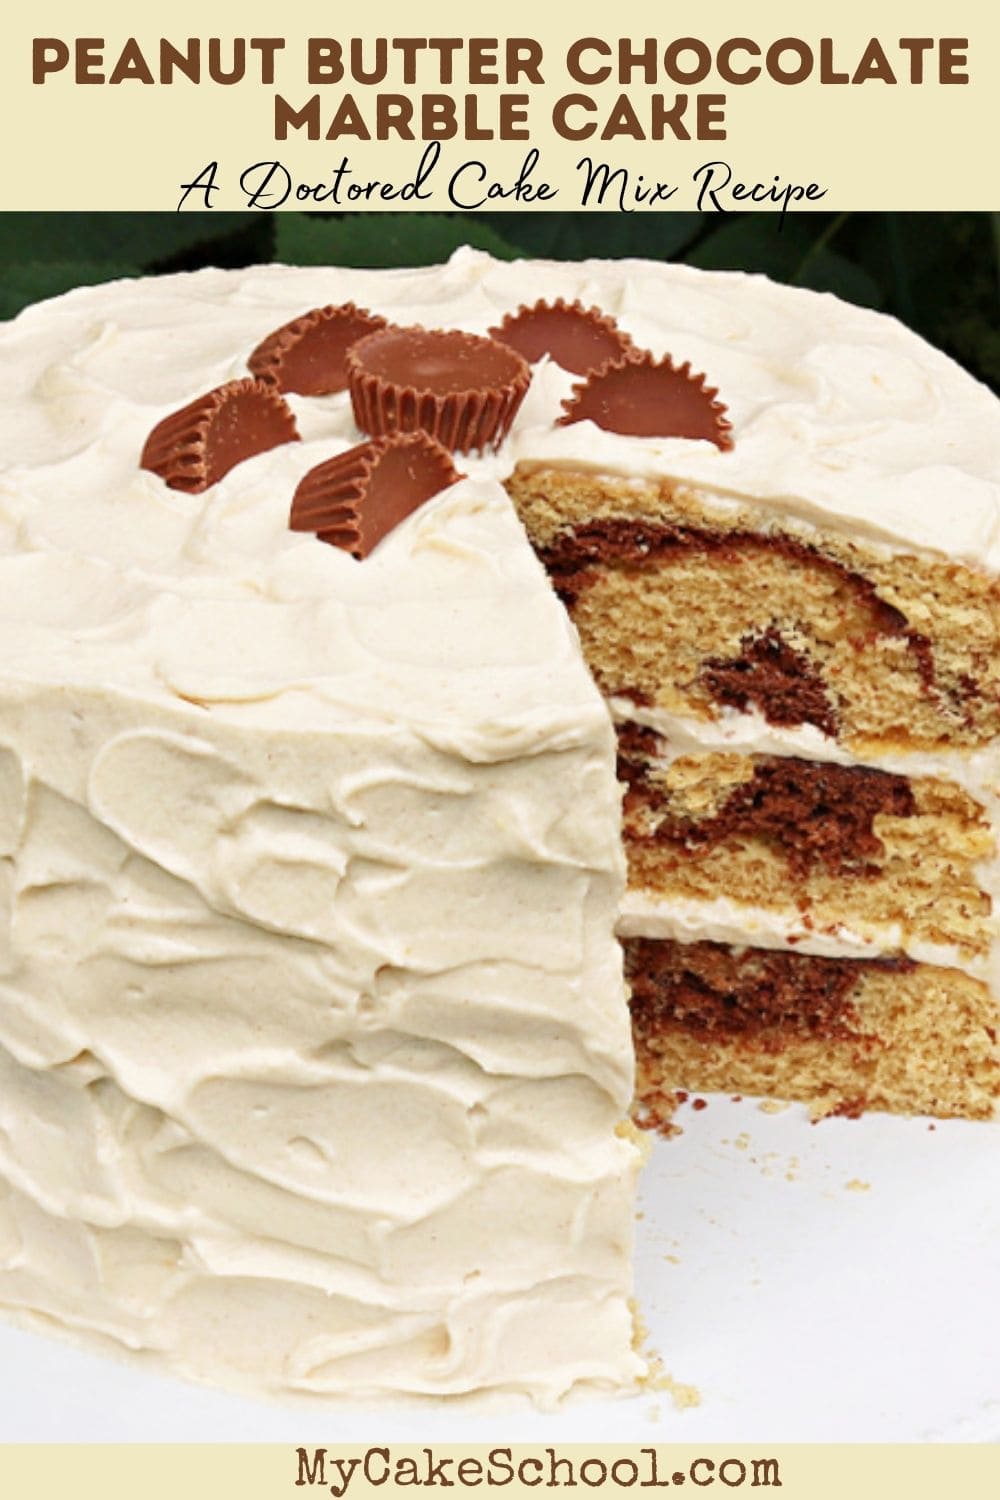
This easy doctored cake mix recipe tastes amazing with the perfect balance of peanut butter and chocolate flavor! It is ultra moist, delicious, and couldn't be easier to make.
If you are a fan of this winning flavor combination, this might just become your new favorite recipe. We hope that you enjoy it!
Table of Contents
Recipe FAQs

How to Make Peanut Butter Chocolate Marble Cake
*You can find the full, printable cake recipe at the bottom of this post- but here is a quick rundown of our process.
Preheat the oven to 325 F, and prepare three 8 inch cake pans (we grease, flour, and add a parchment circle to the pans).
In the bowl of your mixer, combine dry ingredients and mix for 30 seconds to combine.
In another bowl, combine water, eggs, oil & vanilla. Add the peanut butter and wet ingredients to the bowl of dry ingredients and mix on medium speed for 2 minutes. Use a spatula to scrape the bottom and sides of the bowl after one minute.

In a separate small bowl, combine 4 tablespoons of cocoa with 4 tablespoons of hot water and stir to dissolve. Allow the cocoa mixture to sit for a few minutes.

Then, combine the cocoa mixture with two cups of peanut butter cake batter to create the "chocolate" batter and set aside.

Fill the prepared pans with peanut butter and chocolate batter. I started by pouring about half of the peanut butter batter into the three pans, followed by about half of the chocolate batter, and then repeated.
There is less chocolate batter than there is peanut butter batter, and so you can see that I sort of poured the chocolate batter here and there. I followed with another round of layered peanut butter and chocolate batter.

Now for the marbling! Run a knife through the batter to marble. Tap the sides and bottom of the pan to help the batter to spread out evenly within the pan. This part is fun! Just be careful not to over-marble ;0)

Tap the pan on the countertop a few times to make sure the batter is nice and even after swirling.

Bake at 325 degrees....check at 23 minutes to see if middle of cake springs back when touched, a toothpick inserted in the center of the cake come out clean or with just a few crumbs attached.

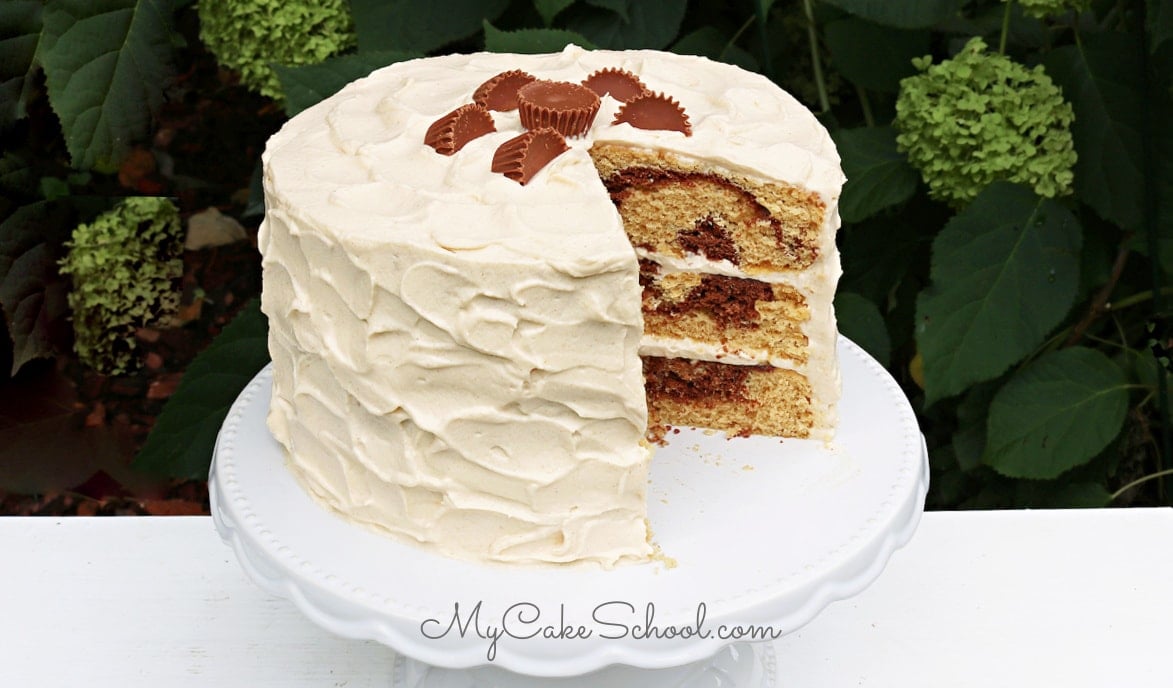
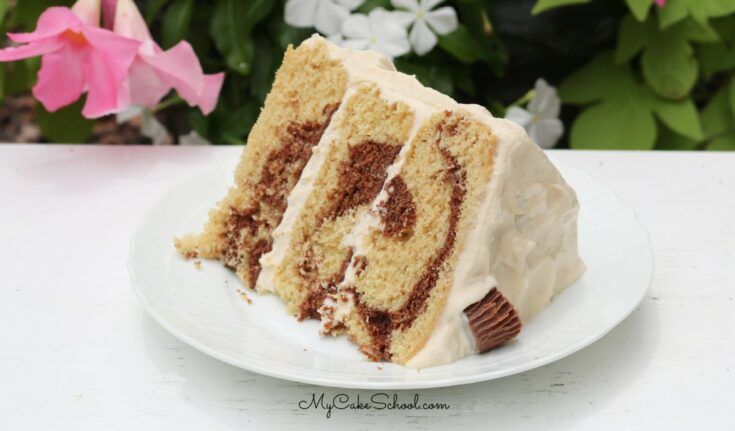
I love the look of marbled layers! If you are looking for a plain version of doctored Marble Cake, don't miss this recipe: Marble Cake Mix Recipe
How to Make Peanut Butter Whipped Cream
There are several fillings and frostings that would be perfect for this cake, including our peanut butter buttercream, peanut butter cream cheese frosting, and chocolate buttercream- but today, we've made a luscious and light peanut butter whipped cream that goes perfectly with our Peanut Butter and Chocolate swirled cake layers!
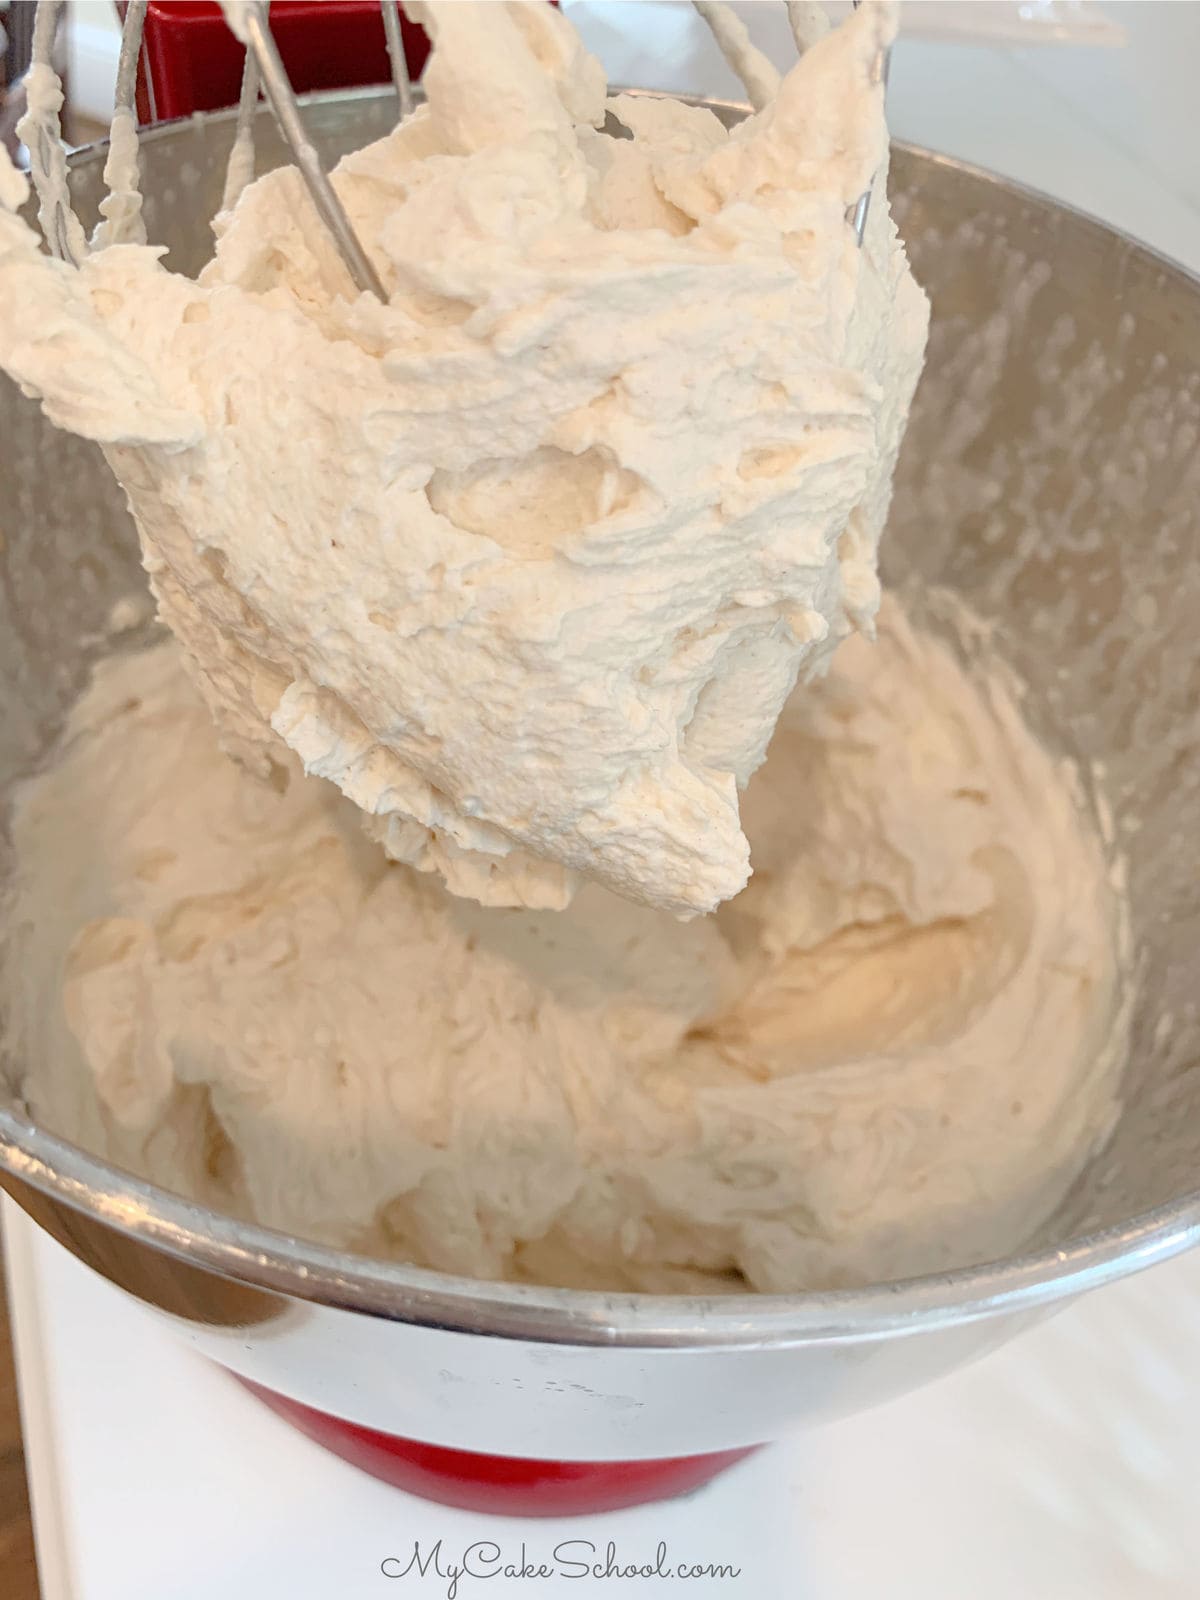
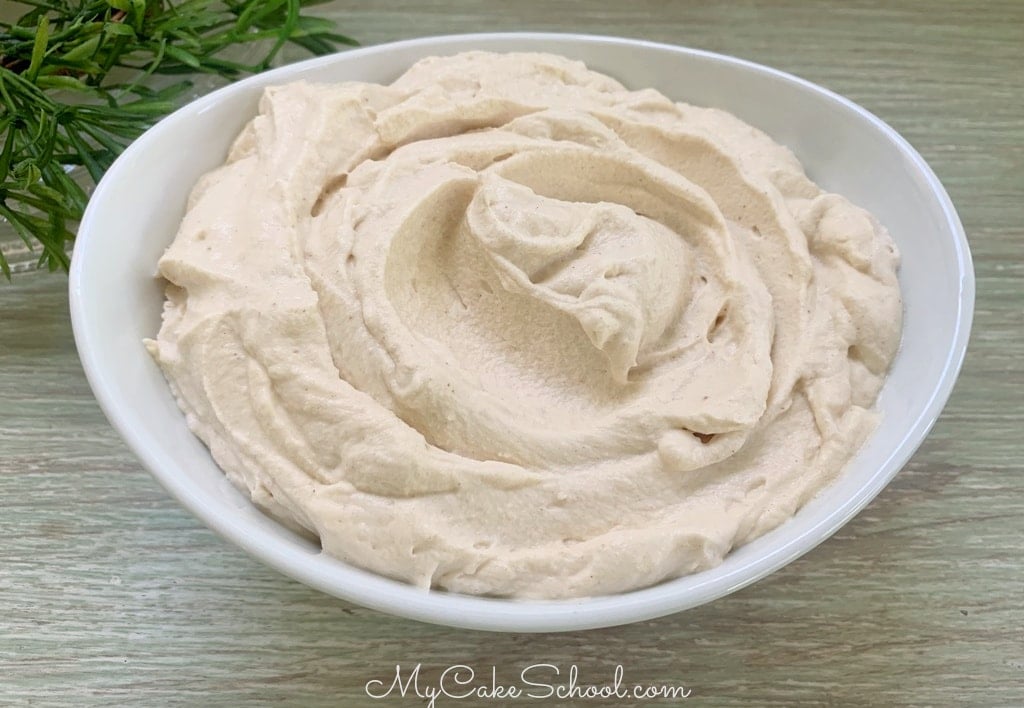
To make peanut butter whipped cream, all you need is heavy cream, creamy peanut butter, and powdered sugar.
I mixed a bit of the cream with the peanut butter first to make it more thin, and then added in the remaining cream and powdered sugar and whipped it until stiff peaks formed.
This peanut butter whipped cream is so easy and delicious you'll want to put it on all of your peanut butter or chocolate desserts!
Assembling the Peanut Butter Chocolate Marble Layer Cake
To assemble this three layer cake, place the first marbled cake layer on the pedestal. Spread with a layer of peanut butter whipped cream.
I don't carry the filling all the way to the edge as it can bulge from the sides once the layers are stacked. I like to spread the filling to about ¼-1/2 inch from the edge of the layer.
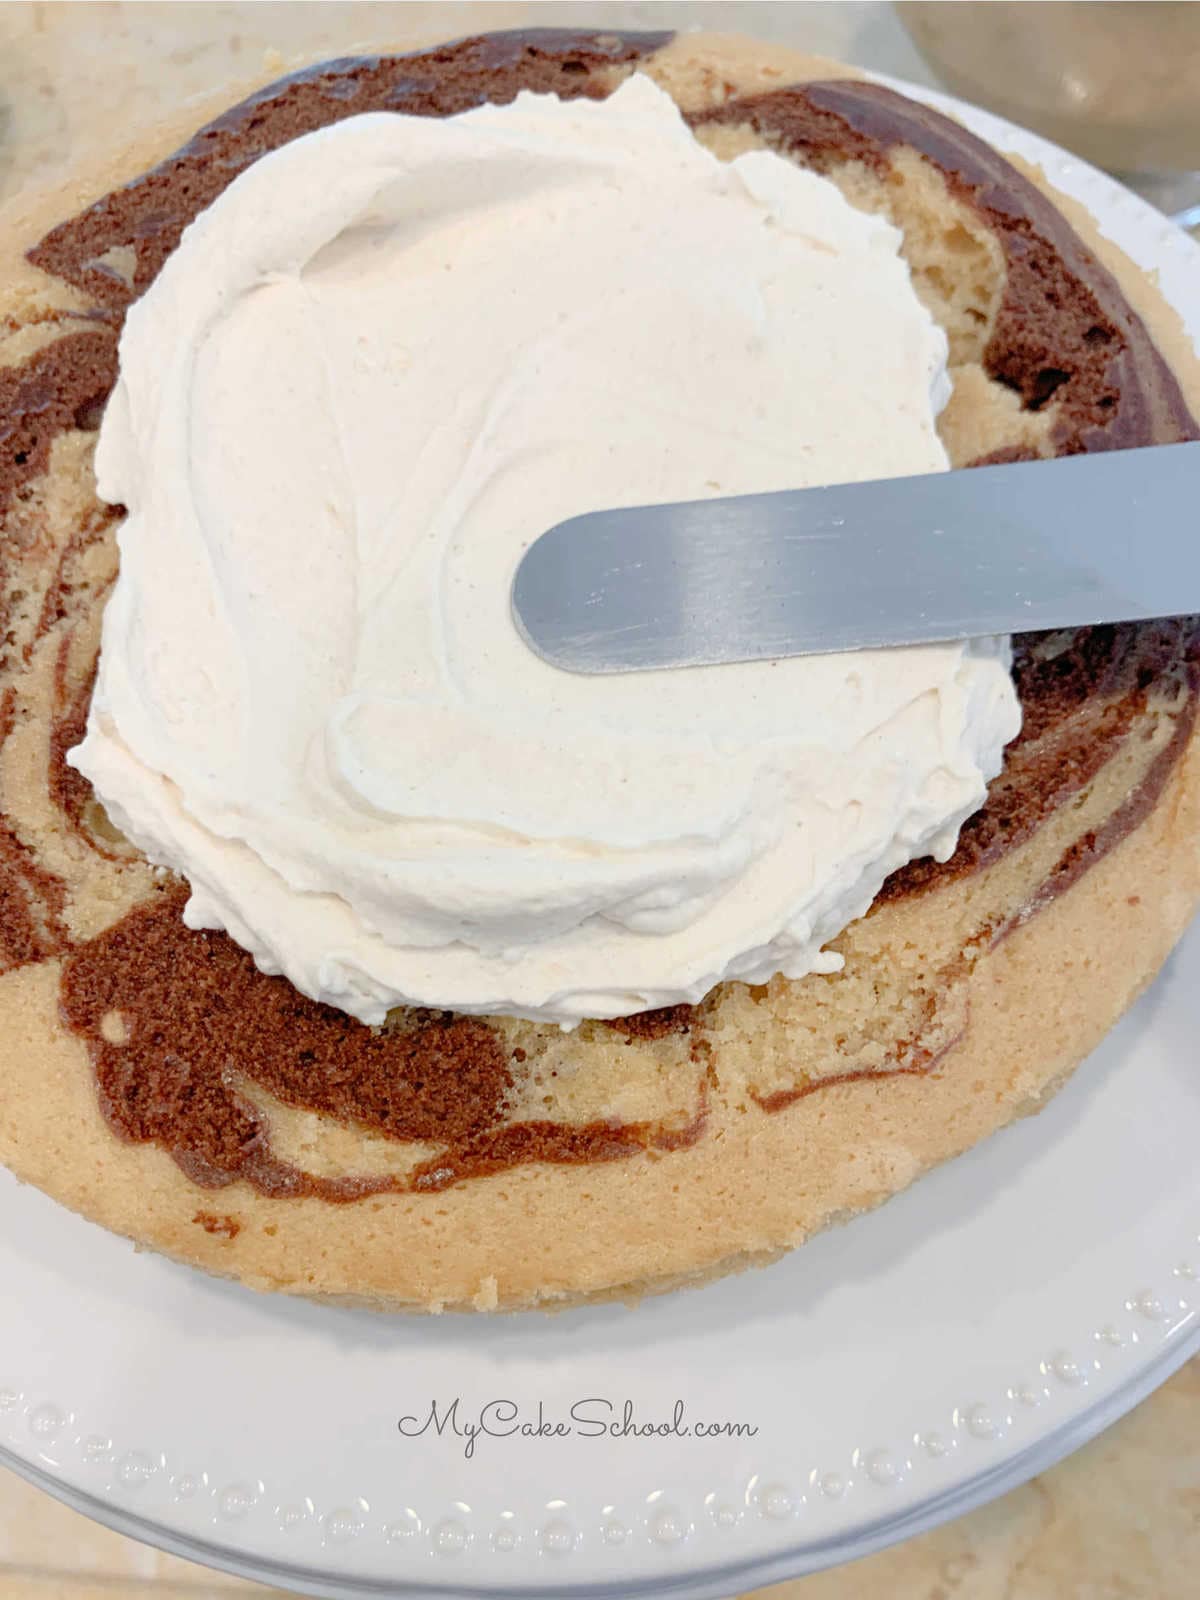
Add the next layer and repeat. Top with the final cake layer. At this point I like to fill in any gaps between the cake layers- you can do this with a spatula but I prefer to fill in any gaps using a disposable piping bag with the tip snipped away.
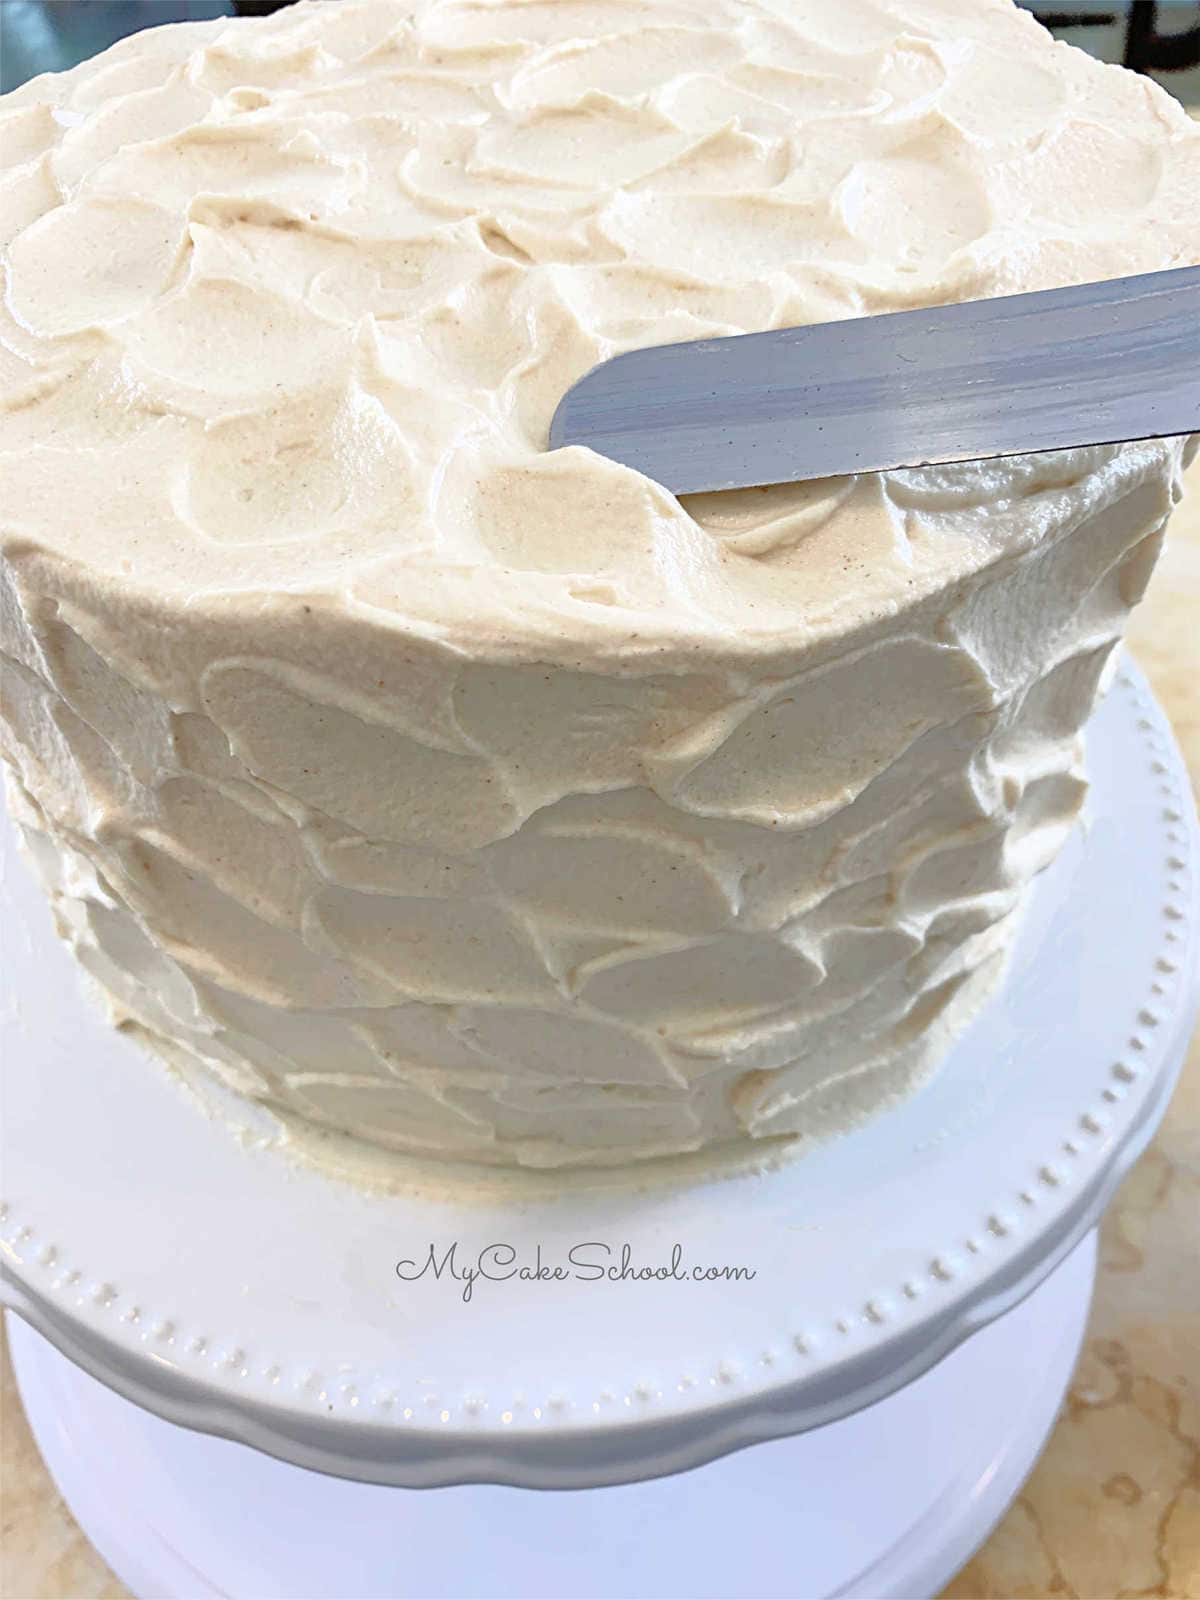
Crumb coat the cake (thin frosting layer) to catch the crumbs and then frost the final layer of peanut butter whipped cream.
It is more difficult to get a smooth finish to your frosted cakes when working with whipped cream. So, to keep things simple, I opted for a pretty textured effect using a small offset spatula.
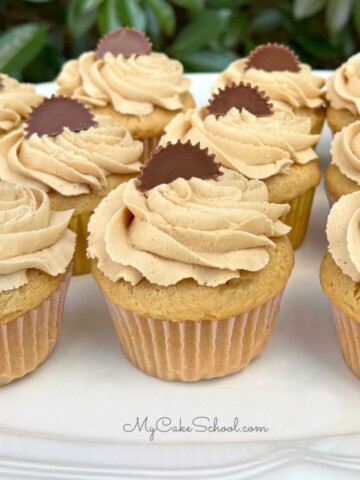
I topped the cake with miniature Reese's Peanut Butter Cups, and sliced some of them to vary the sizes.
I pushed them into the top of the frosting. I often use peanut butter cups as a decoration whenever working with peanut butter and chocolate cakes. They just make everything better, don't they?

More Peanut Butter Cakes and Frostings
If you love peanut butter desserts, don't miss these other delicious recipes!
Enjoy the Recipe
We hope that you enjoy this recipe! Make sure to check out our other cake mix recipes as well as our cake recipes from scratch!
Also, if you are interested in learning how to decorate your cakes, we have hundreds of free creative cake decorating tutorials!
Have you made this? We would LOVE for you to leave a ⭐️ rating as well as a comment and photo below! We really appreciate your feedback!
Peanut Butter Chocolate Marble Cake with Peanut Butter Whipped Cream Frosting (Doctored Cake Mix)
This moist Peanut Butter Chocolate Marble Cake is SO delicious! We've frosted it with a luscious Peanut Butter Whipped Cream. This recipe all starts with a simple cake mix!
Ingredients
For the Peanut Butter Chocolate Marble Cake
- 1 box Yellow Cake Mix (We used Duncan Hines, Classic Yellow)
- 1 cup granulated sugar (200g)
- 1 cup All Purpose Flour (121g)
- 1 cup Creamy Peanut Butter- We used Jif brand, full-fat (255g)
- 1 ½ cups water (360g)
- 2 teaspoons vanilla (8g)
- 1 Tablespoon canola oil (8g)
- 3 whole eggs
- 4 Tablespoons unsweetened cocoa powder (measure then sift) + 4 Tablespoons very hot water (for marbling)
Peanut Butter Whipped Cream
- 3 cups (726g) heavy cream or whipping cream
- ½ cup (132g) creamy peanut butter - we used Jif but any creamy peanut butter will be
- fine. We have not tested with natural peanut butter or reduced fat.
- ⅓ cup (40g) powdered sugar - measure then sift if needed, if you want it sweeter you
- could add a bit more powdered sugar
- *We used sliced and whole miniature Reese's Cups to decorate the top of the cake.
Instructions
For the Peanut Butter Chocolate Marble Cake
- Preheat the oven to 325 degrees.
- Grease and flour three 8x2 round cake pans. (I also line my pans with parchment or wax paper.)
- In the bowl of your mixer, combine dry ingredients and mix for 30 seconds to blend.
- In another bowl, combine water, eggs, oil & vanilla. Add the peanut butter and wet ingredients to the dry and mix on medium speed for 2 minutes. Stop after 1 minute to scrape the sides and bottom of bowl then continue to mix for the second minute.
- In a small bowl, dissolve the 4 tablespoons of cocoa powder with 4 tablespoons of very hot water and allow to sit for 3 minutes. Then, combine this cocoa mixture with 2 cups of peanut butter batter to create the chocolate batter for marbling.
- To marble, I divided about half of the peanut butter batter between the three cake pans. Then, I divided half of the chocolate batter between the three cake pans on top of the peanut butter batter (scoop/drizzle approximately ⅓ cup chocolate batter into each pan). Repeat with the second half of the peanut butter batter and the remaining chocolate batter. Run knife through the pans a few times to marble the batter. Tap pans on countertop if needed so that the batter will spread out evenly.
- Bake at 325 degrees....check at 23 minutes to see if middle of cake springs back when touched, a toothpick inserted in the center of the cake come out clean or with just a few crumbs attached, and the cake will be slightly pulled away from the pan.
- Makes about 6 cups of batter.
For the Peanut Butter Whipped Cream
- Fifteen minutes or more in advance of making, chill your mixing bowl and whisk attachment or beaters in the freezer.
- Add the peanut butter to the mixing bowl and approximately a cup of heavy cream. Mix until the peanut butter is blended into the cream.
- Add the powdered sugar and the remaining cream. Mix at medium to medium high speed.
- As the mixture begins to thicken, stop the mixer and scrape the bottom and sides of the bowl.
- Continue to mix until the mixture thickens, and stiff peaks form. Don't over mix.
Makes 5 cups of peanut butter whipped cream
Assembling the Peanut Butter Chocolate Marble Cake
- Place the first cake layer on the pedestal or cake base.
- Frost with a layer of Peanut Butter Whipped Cream Frosting.
- Repeat for the other two layers.
- Frost the top and sides with the Peanut Butter Whipped Cream. Smooth around the sides with a bench scraper or spatula to even out the amount of frosting all the way around. I then added texture with a small offset rounded spatula. When decorating cakes using a soft whipped cream frosting like this one, it is easier to use texturing techniques as we did rather than to go for a completely smooth finish.
- We topped of the cake with whole and sliced miniature Reese's Peanut Butter Cups!
- Because of the whipped cream frosting, this cake should be refrigerated until an hour or two before serving.
OMGosh! That sounds and looks delish! :-)
Thanks Teri!!
YUM!!!!! Love both marble and PB cakes! Can't wait to try combined!
I'm confused. Step 6 gives instructions on getting the batter into the 3 pans, but step 7 starts out by saying "pour into prepared cake pans..." I can't wait to make this cake, although I'll go with a chocolate frosting like a whipped ganache since my husband doesn't care for whipped cream type frostings. Maybe sprinkle some chopped peanut butter cups between the layers to make up for the omission of peanut butter frosting.
Hi Diane! Yes, thanks for pointing that out, I've deleted the sentence that doesn't belong ;0) - Glad that you will be making this recipe! This will be great with chocolate buttercream- we have a good peanut butter buttercream also in our recipes section.
This is a very good cake but I found the whipped cream frosting unable to support three layers. I may try it again and make a two-layer or rectangular one-layer cake.
Hi Eunice, I'm glad that you enjoyed the cake- I'm sorry that you had trouble with the peanut butter whipped cream. It definitely is a softer frosting and so if you'd like something that will firm up when chilled (especially if transporting), you may prefer to use our peanut butter buttercream or chocolate buttercream from the Recipes section. Thanks for your feedback!
Hello Melissa - I would love to try this but without eggs. What would your recommend as a substitute ?
I made this delicious cake in a 9x13 pan for a birthday party using chocolate buttercream to support the weight of the decorations. I made a Bigfoot cake that was topped with handmade trees to create a little forest surrounding the cake topper. It was a HUGE hit. I will definitely make again using the peanut butter frosting, but man is it good with the chocolate!
Hi Pam, I'm happy you used our recipe! Your Bigfoot cake sounds super cute for a birthday party!!
why put flour in the cake mix
Hi Louis, the flour and sugar, etc. extend the recipe so that we have enough cake batter for 3 layers. They also give the cake a more from-scratch texture.
How would you adjust this recipe for a 6" cake
Hi Jason, I would keep the recipe as it is, use the 2 or 3 six inch pans (whatever your preference), and if you have some batter leftover, you can use that for cupcakes or a mini layer- you can wrap and freeze and they will keep for 3 months. Just keep in mind that you don't want to fill the pans more than 2/3 full.
The baking time has more to do with the depth of the batter in the pan than it does the size of the pan, and so the bake time will still be around the same, unless you are making two thick layers in which case it will be a bit longer. Just peek in as the end time approaches. Hope you enjoy it!