Writing on Cakes with Buttercream
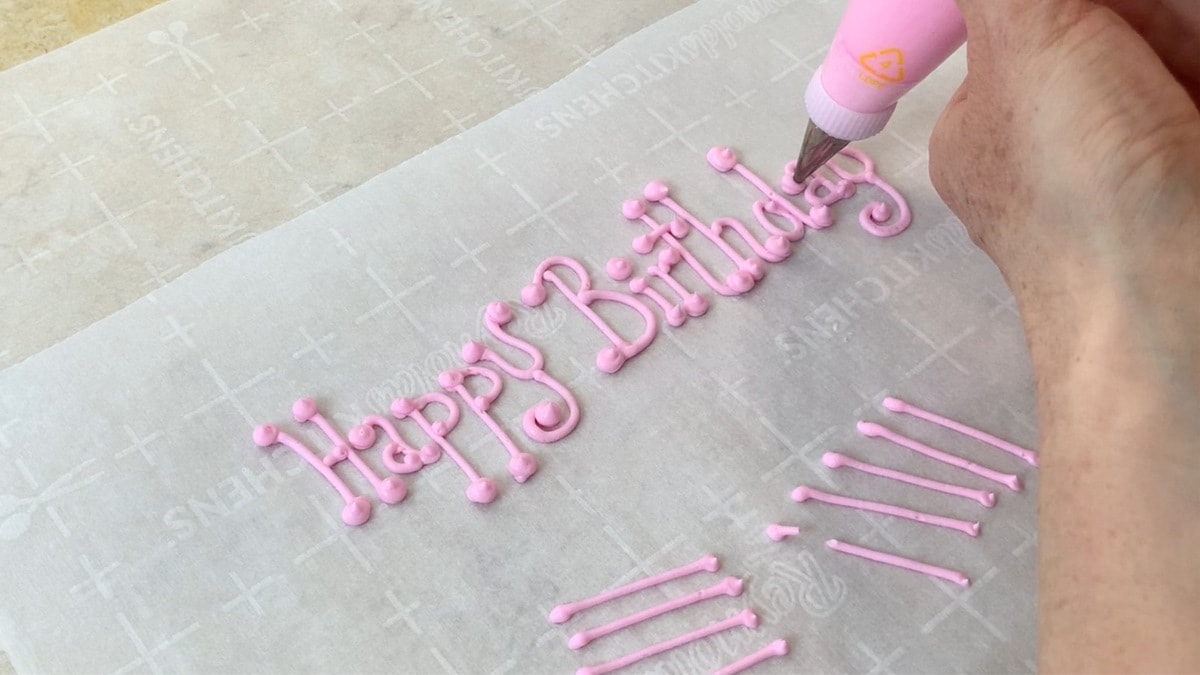
Writing on Cakes with buttercream can be a little intimidating at first, but in this free cake tutorial, I'm going to show you my favorite tips and tricks to make the process easier!
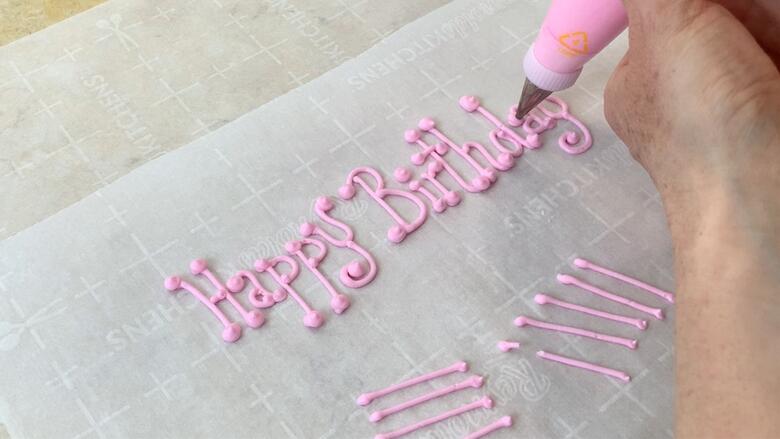
Table of Contents
Alternatives to Writing on Cakes in Buttercream
I had a home-based cake business many years ago, and when I first began, I avoided writing on cakes entirely. Instead, I made cute little printed signs that were attached to lollipop sticks that contained the birthday message.
Then, I moved on to piping melted candy coating messages onto waxed paper, which I would then freeze until firm and place onto my cakes one letter at a time. (You can find more about this great technique here: Piping Chocolate Letters for your Cakes)
In time, I felt comfortable with piping buttercream messages or names directly onto my cakes or the cake board, but it's nice to have options!
Today, there are so many more options available for applying messages to cakes! There are great letter molds and cutters for fondant and gum paste, cute plastic or metallic cake signs and toppers, edible images, and more- but it's still nice to know how to write on cakes- especially if you love buttercream piping! Enjoy the video!
Chill Cakes before Writing on Them
It is a very good idea to chill your buttercream-frosted cakes until the buttercream is firm (maybe 15 minutes in the freezer or so) before writing on the cakes. If you don't have the freezer space, you chill the cakes for longer in the refrigerator (30 minutes or until firm).
Correcting Mistakes when Piping in Buttercream
This chilling step will allow you to more easily remove any mistakes without messing up your frosting. You can easily remove the soft buttercream piping from the firm, chilled cake. This step has saved me many times!
Also, if you realize after piping your buttercream message that you want to make a change, and the frosting has already softened, just pop the cake back in the freezer for 15 minutes or so to firm everything up and then use a toothpick or small knife, etc. to lift off the message.
You can smooth over any imperfections in the base frosting with a heated spatula as needed.
Materials:
In this video, I'm piping with a Tip 3 piping tip. You can experiment with other sizes of small round tips-- I find that size 1 & 2 piping tips don't work as well for me as any shakiness (hello caffeine!) is more noticeable with thinner strands of piping ;0)
More Helpful Tutorials to Cover the Basics
If you are new to cake decorating or are just brushing up on your buttercream piping skills, here are a few more tutorials that you may find helpful! Let us know if you have any questions!
The Basics of Cupcake Decorating
How to Make a Cake from Start to Finish
Piping Basics: Petal and Ruffle Piping Tips
Piping Basics: Round Piping Tips
Piping Basics: Star Piping Tips
*Video Updated March 2021
alright so... i need a recommendation for the best letter mould for fondant letters. any ideas?
Loving the video lessons for the cakes. You make it look so easy. Once I get my butter cream frosting make properly, I will start practicing my piping. Also, how do I keep the frosting from getting to soft while it's in the bag?
Hi Delores, some people have warmer hands and this can cause the buttercream to get too soft in the bag. When you feel the buttercream is getting too soft, you can put the piping bag you are using into the refrigerator for just a few minutes and it will quickly firm up and be ready for piping again.
You could also use two piping bags and alternate between the two of them so that neither would get too warm and soft. Hope this helps.
Where is your recipe for thin consistency buttercream? You mentioned in the video that was what you were using. Thanks!
Hi Cathleen, I see how that might be confusing. When Melissa and I thin the buttercream we just add a bit more liquid. Add milk ( or whatever liquid you are using) a teaspoon at a time because you probably won't need very much to reach the consistency you need for printing. If it should become too thin, just add a bit more powdered sugar and mix. Your buttercream could be just the right consistency your like without adding any extra liquid so give it a try before adding additional liquid.
Is it possible to use italian meringue buttercream to write on cakes instead of American buttercream?
Hi Andromeda, yes you can! ;0)
Thank you!
Thank you. This was extremely helpful!! This is exactly what I was looking for in an instruction video
Thank you Jodi! I'm so glad to hear it.