Knife-Textured Buttercream Technique- Cake Video Tutorial
Hi everyone! Today I'm sharing an elegant knife-textured buttercream technique that is surprisingly simple to create!
I love working with buttercream, and experimenting with different methods of texturing. In today's tutorial, I'm combining two fun techniques.
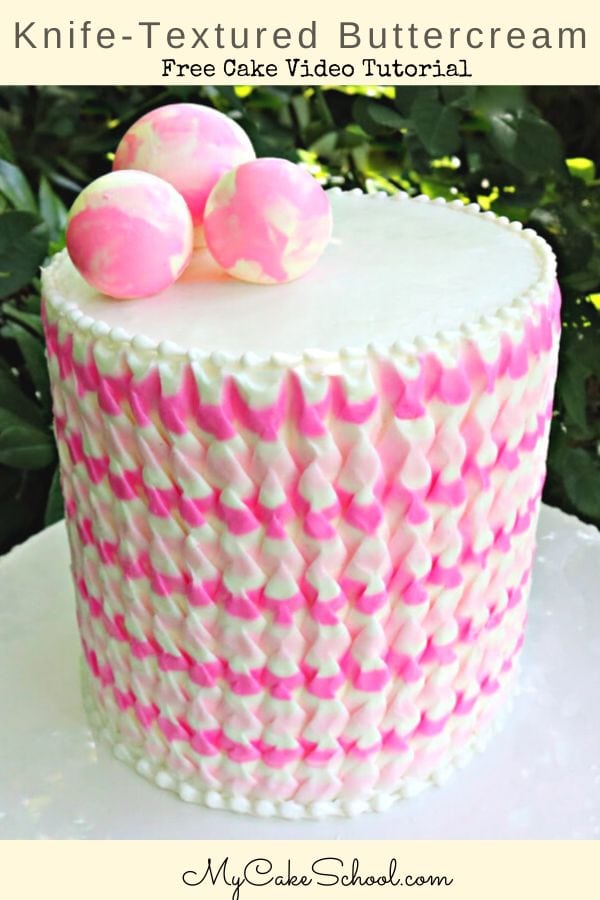
First, I'm going to create buttercream stripes on the cake tier, which you've seen us do in our "how to" tutorial on striped buttercream.
Next, I'll follow up with creating a textured pattern in the buttercream with a simple knife! (You could also experiment with a palette knife). This is actually a super short video tutorial because the technique is just the repetition of the same zig zag motion over and over again.
I love the look of this design, and the technique is so versatile! This is a technique that looks beautiful without the striping step as well. So, if you are not a fan of buttercream stripes or if you are in a hurry, the knife texturing is beautiful on a solid shade of buttercream as well!
Starting with a watercolor buttercream or ombre buttercream design before texturing is another option for introducing more color! We hope that you enjoy the video!
Table of Contents
Materials:
*This technique would be beautiful on any size cake, including sheet cakes. However, for this tutorial, we are decorating a 6 inch double barrel cake (which stands about 7 inches tall).
This double barrel cake is 4 six inch cake layers and has a cake cardboard halfway up with 4 bubble tea straws cut to the height of the bottom two (stacked) layers beneath it. We frosted it with our classic vanilla buttercream although our fluffy vanilla buttercream recipe would work well too!
Classic Buttercream Frosting- This is our favorite because the butter in the recipe causes it to firm up more quickly when chilled (in preparation for the texturing).
Coloring Gels: Americolor Deep Pink
Sharp Knife
Wilton Cake Comb (for stripes)
Piping Tips: 3 for border, 10 for stripes
Mold for Spheres (optional)
Candy coating/candy melts in white
Oil Based Candy Coloring Gel- Pink (you can also use pre-colored candy melts)
Miscellaneous: Turntable, Bench Scraper, Disposable piping bags
Additional Notes:
Take some time to experiment just with a solid color of buttercream to get the hang of the technique before creating your buttercream stripes.
I applied my frosting slightly thicker than usual to get a little more dimension.
I applied my texturing when the cake was still slightly chilled, and I like to dip my knife in a glass of hot water before texturing. If your pattern isn't quite as clean as you'd like, it may be that the frosting is a bit too soft. Try chilling for just a few minutes longer in the freezer.
Have fun & experiment with other designs as well! The options are endless with this type of texturing with knives & palette knives!. ;0)

Wow! That looks incredible - I love it! Very clever & Simple too! My favourite :-)
What kind of puppy did you get? :-)
Where can you get the mold for the balls?
Hi Tammy, thanks for pointing that out- here's a link for you! (I'm sure that there are others on Amazon also!) --
https://www.amazon.com/gp/product/B074ZHMW16/ref=as_li_tl?tag=mycakcom-20&ie=UTF8&linkId=c645604bf52d71bf78eb40762914b95e
WOW! When I first saw that a video tutorial was coming I thought it was going to be so complicated and not worth doing. BOY WAS I WRONG! I love the way this looks! Thanks for the excellent tutorial!
Wow Melissa. This is incredible. So simple. How do You even think of these ideas ❤️?
Thanks everybody! I hope you'll give it a try! @MsGF- she's a sweet little Maltipoo ;0)
Such a cool design and looks so hard. Nobody needs to know how easy it is! Thanks for this idea,so unique. :)
Hi Guys!!, Love this look. Am I the only one or if you were to do this in orange yellow and white it would look just like Candy corn?!!! Im so trying this. I keep looking at it and I can't unsee candy corn.lol Super excited to try this.
@Jan- Haha yes! Nobody has to know ;0)
@Anniejoe- I totally see it! You'll have to do it in candy corn colors!
Hi folks. Thanks much for the tutorials. I really love this cake school. I just joined last week and I have probably watched all the tutorials.
However, I have a serious problem. I live in the Caribbean, Anguilla, and it is normally hot. I do not have central air conditioning, but there is always a cool breeze, but the kitchen is hot. My buttercream melts before I can get it piped good. I have tried freezer, refrigerator, morning, night and every thing.
Do you think that if I used all shortening and flavorings, instead of butter, that I would get a better effect? What about margarine? I really cannot get any further.
the balls would work great as hot cocoa bombs! you can do it the same way just fill with marshmallows and hot cocoa mix!