The Hot Knife Method for Smooth Buttercream
The "Hot Knife" Method of smoothing buttercream frosting is one of the three smoothing methods that we use most often for buttercream.
Unlike the other two methods that we often mention (The "Viva Paper Towel" Method and the "Roller" Method), this hot knife method of smoothing does not require the icing to have crusted.
It is the chilling of the crumb coated cake that creates the firmness needed to apply the final smooth coat of frosting.
Table of Contents
What is the Hot Knife Method of Smoothing Frosting
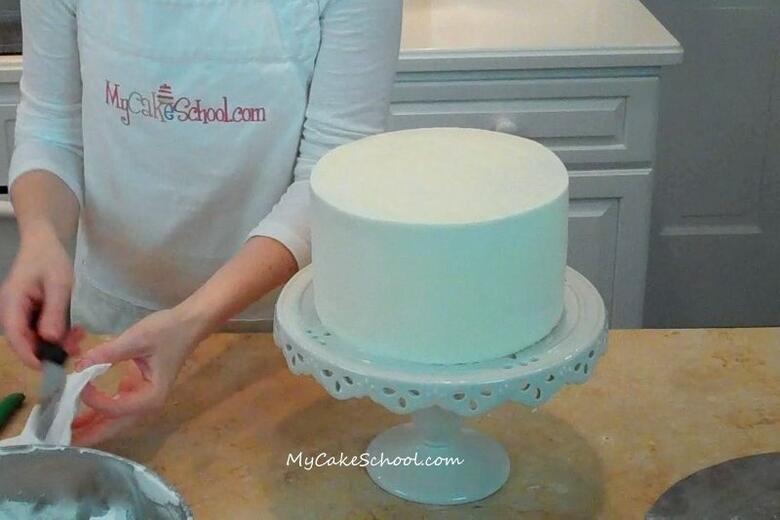
With the Hot Knife Method method, we smooth fresh buttercream across our cold, crumb coated cake, and in the process we melt that fresh buttercream into a flawless final coat.
You'll notice that there is a lot of repetition in this tutorial. We returned our cake to the freezer twice in this process, but if this method is new to you, you may find yourself heading back and forth from the freezer a time or two more. The smoothing can actually be a little addictive, haha ;0)
I hope that you enjoy this method. I think that it is really important to familiarize yourself with at least a couple of smoothing methods. The Viva Paper Towel method of smoothing is another great option.
There have been many times when my trusted smoothing methods haven't worked according to plan for one reason or another, and it's nice to have a backup option.
I also love the sharp corners that you can get with this method. It works great with our "simple spreadable ganache" recipe also!
Materials for Hot Knife Method
*In this video, I am frosting a 3 layer, 8" cake which is our White Almond Sour Cream Cake Recipe.
Use your frosting of choice. In the tutorial, I am using our "Classic Vanilla Buttercream", which is an American Buttercream that uses all butter rather than shortening or a combination of the two.
Frosting recipes that have butter instead of shortening work best with this method (part butter, part shortening works okay too) as the butter frostings get really nice and firm when chilled.
A pot wide enough for your bench scraper to easily fit into. This holds the hot water-- We removed our pot from the heat just as it began to simmer.
Bench Scraper (I prefer metal bench scrapers as they get nice and hot!)
Spatula of choice--Mine is smallish Wilton offset spatula with a rounded edge
Turntable (Not essential but extremely helpful. I used my Ateco brand turntable in this particular tutorial.)
Miscellaneous Notes
My cake is resting on a cardboard cake circle (8 inch) which allows me to easily transfer it to the pedestal
Sharp knife (optional, but helpful in releasing the cake from the turntable)
HI Melissa-
Great video! This is helpful because I make butter-only buttercreams and am always wanting to try new methods. I've done a version of this method before, but not exactly the way you do it, so this was great. I have notice, however, that when I'm smoothing colored buttercream with a hot knife that the color bleeds and I get streaking. Do you notice the same? Is there anything I can do differently? I just use the Americolor gels colors. Thank you!
Like the Tutorial!! Can you use this same method with Swiss Meringue Buttercream? Thanks
Thanks ladies! @Abbie~Hmmmm....what kind of buttercream are you using? Is it an American buttercream? I have had that problem when working with Swiss Meringue buttercream but not so much with American. I may need to experiment with this more to see if I can replicate what you are seeing. -- I would say that if you are using an American buttercream, you can work with water that is not quite so hot and see if that makes a difference. Do you notice this happens with all colors or just certain shades? --
@Dena- When we made our SMBC video, I was working with tinted buttercream and did notice streaking with the hot knife method. If using white buttercream, I'm sure it would be fine. In our video for smoothing SMBC, I do freeze or frosted cake and then scrape with the room temperature bench scraper--you can still get a really smooth finish doing it this way---here's the link~
Where can I get a Metal scraper ( I think you called it a "bench scraper")?
Hi Heather, click on this link to Amazon,
The Stainless Steel Scraper/Chopper for $7.43 looks like the one Melissa uses. Hers used to have measurements across the bottom but she has used it so much the numbers have worn off.
Melissa & BeBe, Loved the video as always! It seems that everyone who uses the hot knife method uses a cake board the size of the cake. Question – If you were to sell this cake and need to put it in a cake box, how would you do that? Also, what if you were selling the cake and wanted to add a border? There is obvisiouly no room on the 8” board. Would you use and additional 10” board and box? Have you considered making a video on “packaging a cake for sale?” I would love that!
I have also had the streaking issue. The first time it was a pink cake. Another time it was a purple cake. It doesn’t seem to happen with the lighter colors. I will post a photo of the purple cake in the special occasion category. I used all-butter buttercream, AmeriColor gel and the hot knife.
Hi Donna-- In this tutorial, I put my cake on a pedestal, but I could have just as easily put it on a covered cake board/base if it was for a cake order. We have a tutorial on covering cake boards, etc. --You'll choose a cake board/base that will give you plenty of room for the borders and decorations you'd like to use. I often use a 10" or 12" base for an 8" cake.
You would just smear your "glue" choice on your covered cake base (which may be royal icing, buttercream, or even non-toxic glue as long as it is not in contact with the cake) and place your cake which is resting on a board cut down to size, on top of it. Then, you can pipe borders, etc. I usually use bakery boxes that are the same size as the cake base so that there is no sliding around--however, if this isn't possible and the box is larger than the base of the cake, I put a piece of non-slip liner beneath the cake base.
I apply some kind of border whether piped or ribbon or fondant on most of my cakes. I just did not demonstrate this step in the tutorial. Glad that you asked!
On the streaking--let me get back to you. I'll see if I can replicate it on my end this week.
Thank you, Melissa. I have never used 2 cake boards. Normally, I just “wing it” when I apply the buttercream but guess I should for the “straightness” of it all! ☺ I normally sit the cake on the final resting board/drum and don’t bother with the board that is the same size as the cake. However, I need to start doing this. Thank you for your super quick response. I am impressed.
Re the photo of the purple zebra cake…it is not the photo, this is how it really looked. Thank goodness the client didn’t seem to notice. YIKES!
Hi Melissa! I have a problem... I crumb coat and put it in the fridge or freezer to firm up....then I do the hot knife method on my crusting buttercream... All is well until I do the top of the cake with another coat of icing. It seems to "pull" the already firm, chilled icing up and I basically sometimes have to scrape off the entire top layer of icing from the top of the cake and start over.. What am I doing wrong? Thx!