Cherry Blossom Cake Tutorial
I love the elegance cherry blossoms, and after many requests, I am so happy to demonstrate a beautiful Cherry Blossom Cake design!
Cherry Blossom themes continue to be a popular theme for wedding cakes, but these techniques could be applied to any cake that calls for something special.

Our cherry blossoms with their sugar pearl centers are extremely easy to create, and make for a gorgeous design when applied to delicately piped branches.
Table of Contents
How to turn Fondant into Gum Paste
The cherry blossoms are made from thinly rolled gum paste. Gum paste dries firm and quickly, can easily be rolled very thin, and is food safe although not intended to be consumed (it doesn't have the sweetness of fondant).
However, if you would rather use fondant for your flowers, kneading in a bit of tylose powder into the ball of fondant that you are working with before rolling it out gives it the qualities of gum paste.
You will notice that the fondant takes on a more elastic consistency as you knead it in. I just add small amounts at a time until it feels right - however, to give you an idea on a larger scale, kneading in about 1-3 teaspoons per pound of fondant will give you something very similar to gum paste.
We are working with smaller quantities of fondant for our flowers today.

More Cherry Blossom Cakes!
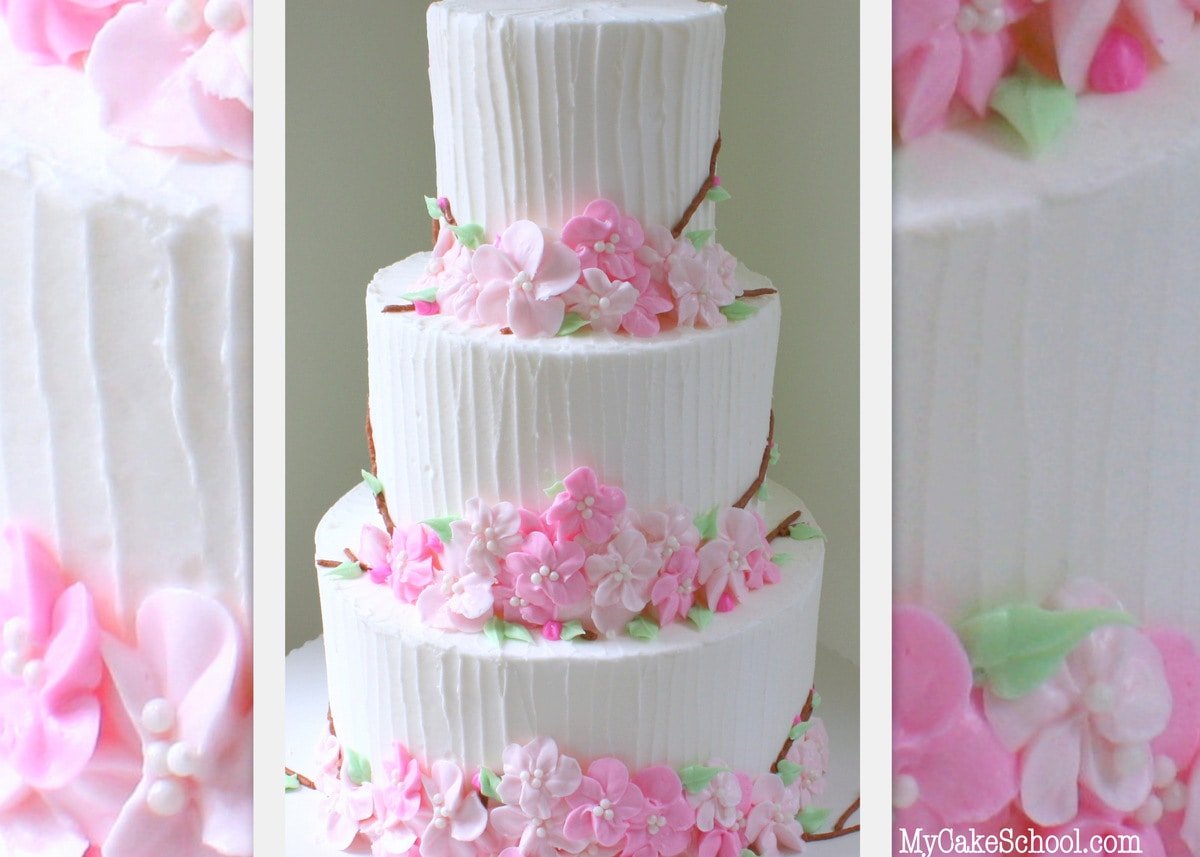
Looking for more cherry blossom cake ideas? We have a beautiful buttercream cherry blossom cake design which you can find here!: Buttercream Cherry Blossom Cake Tutorial
We also have another fun, elegant alternative for cherry blossoms made from candy coating! Chocolate Cherry Blossom Cake
Enjoy the Video!
Thanks so much for stopping by! We hope that you'll give this beautiful cherry blossom cake a try. If you do, please leave a comment and photo below. We would love to see it!
This design can easily be transferred to cakes of any size, from single tiers to sheet cakes and more.
Cherry Blossom Cake-Cake Decorating Video Tutorial
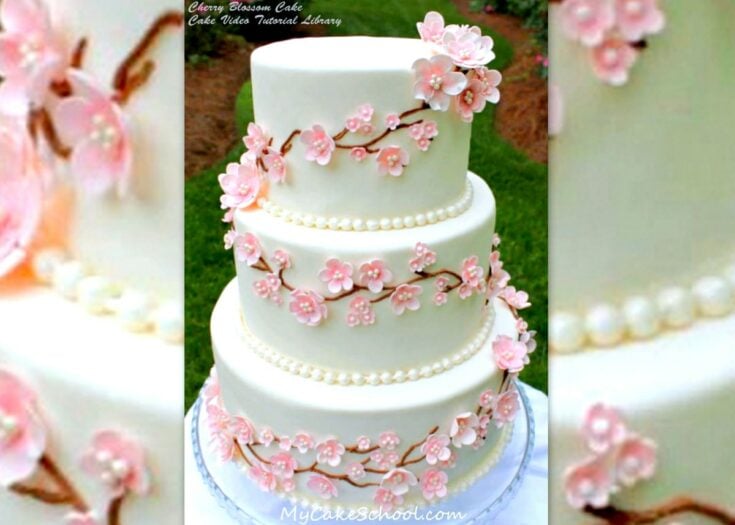
This elegant Cherry Blossom Cake features fondant blossoms and piped branches. It is surprisingly simple to create!
Ingredients
- Cake Tiers- I am using 10"/8"/6" tiers which have been covered in fondant. (We like Wilton, Liz Marek MMF, or Satin Ice)
- Cake Boards beneath each tier & preferred support method (dowels, plastic hollow dowels, support system, etc...)
- Gum Paste- I used Satin Ice gum paste for my flowers, however you could also use fondant with a bit of tylose powder kneaded into it.
- Cutters- 5 petal blossom cutters in various sizes.
- Cel Pad- Some sort of cel pad or foam pad for thinning your petals.
- Ball Tool- For thinning/frilling petals
- Preferred mold/palette/former for drying flowers (I used wells from my artist palette & chocolate molds)
- Royal Icing- I used for the branches & for the tiny blossom centers. (Medium consistency). I also used royal to glue the flowers to the cake. You could also use a crusting buttercream.
- If your cake is frosted in buttercream, your branches should be piped in buttercream or they should be fondant (but not royal).
- Tips- Wilton tip 4 (or similar size) for the branches
- Silicone Bead Former- (Optional) - Used for border. You could also just pipe a royal icing border for fondant covered cakes or a buttercream border for buttercream cakes.
- Dusts- Your pink petal dusts of choice (optional) -I used a mixture of Watermelon Petal Dust & White Petal Dust for the flower centers. (See notes)
- I used Pearl dust for the pearls. I used a little White Pixie/Disco Dust on the blossoms.
- Wilton Sugar Beads- Used for the centers of the flowers. You could also pipe royal icing dots or crusting buttercream dots instead.
- Misc: Small paint brushes, tylose/sugar glue (¼ tsp. tylose combined with 2 T warm water)
Instructions
- Its best to prepare the gum paste (or fondant with tylose powder kneaded in) flowers in various sizes first. Make more than you think you'll need! You will be layering these on.
- Roll the gum paste very thin on prepared countertop (we grease our counter or workspace with a light coating of vegeatble shortning.). If gum paste or fondant is extremely soft, you may need to roll it out and allow to sit for a few minutes until you can get a clean cut with your flower cutters.
- Thin petals around the edge to your liking with ball tool on foam pad to create a bit of movement.. (If this is difficult, the flowers may need to dry a few minutes more before using the ball tool.
- Allow flowers to dry in formers so that they won't lie completely flat when applied to cake. Drying may take anywhere from 30 minutes to several hours.
- Layer smaller dried flowers onto larger for a fuller blossom. (attach with tylose glue a dab of candy coating, or your "glue" of choice). Add additional details to centers: petal dust, sugar pearls, etc.)
- Bake, frost, cover, and stack cake layers as usual.
- Pipe on branches (we used royal icing tinted brown but we've also never had issues with piping crusting buttercream details onto fondant.- like our classic buttercream frosting)
- Apply the flowers on or around the branches.
Notes
Decorating the Flower centers:
We used petal dusts but you can also use a plate or artist palette to mix a bit of pink coloring gel and vodka or everclear to create varying shades of pink that can be lightly added to the centers. A touch of white coloring gel could be mixing with pink + vodka as well for softer shades.
The Flower Cutters:
I'm having trouble finding the exact cutters that I used in the tutorial - but any 5 petal blossom cutters in varying sizes will work! I'm linking to something similar below.
Recommended Products
As an Amazon Associate and member of other affiliate programs, I earn from qualifying purchases.


How big do you need the cutters to be???
And can you use a different color???
This is a beautiful cake. how many layers of cake are used for each tier?