Golf Bag Cake- A Video Tutorial
In today's video tutorial, I'm going to show you how to make a golf bag cake!
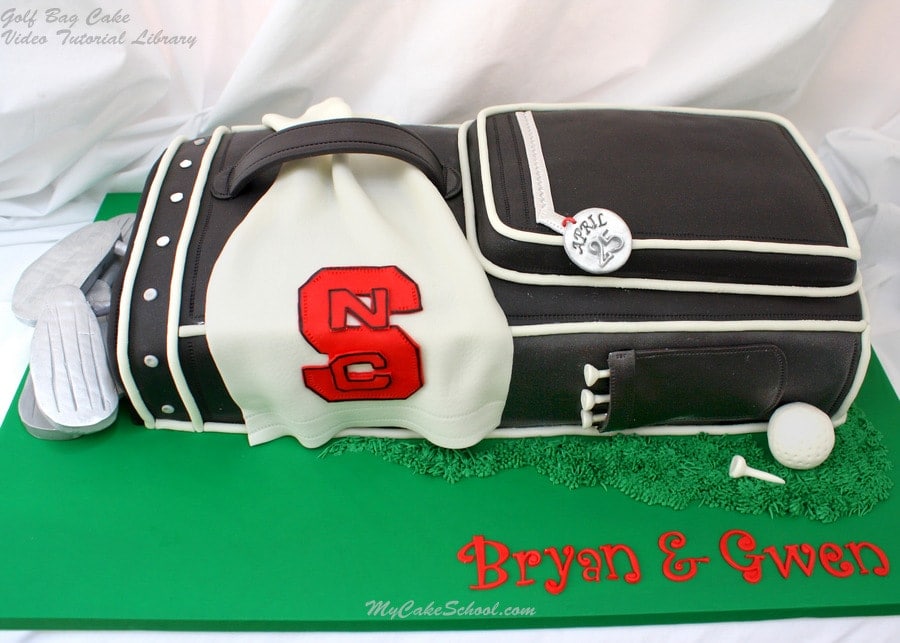
If you are a golfer, or have golf-loving friends and family, this fun cake is for you! I love it because it gives the look of a 3D golf bag cake, but there isn't a lot of carving involved. It is the simplified version of a golf bag cake for sure. You can dress it up or down as much as you like.
Our golf cake is covered in fondant, but you could create a buttercream-frosted version as well (with fondant accents here and there).
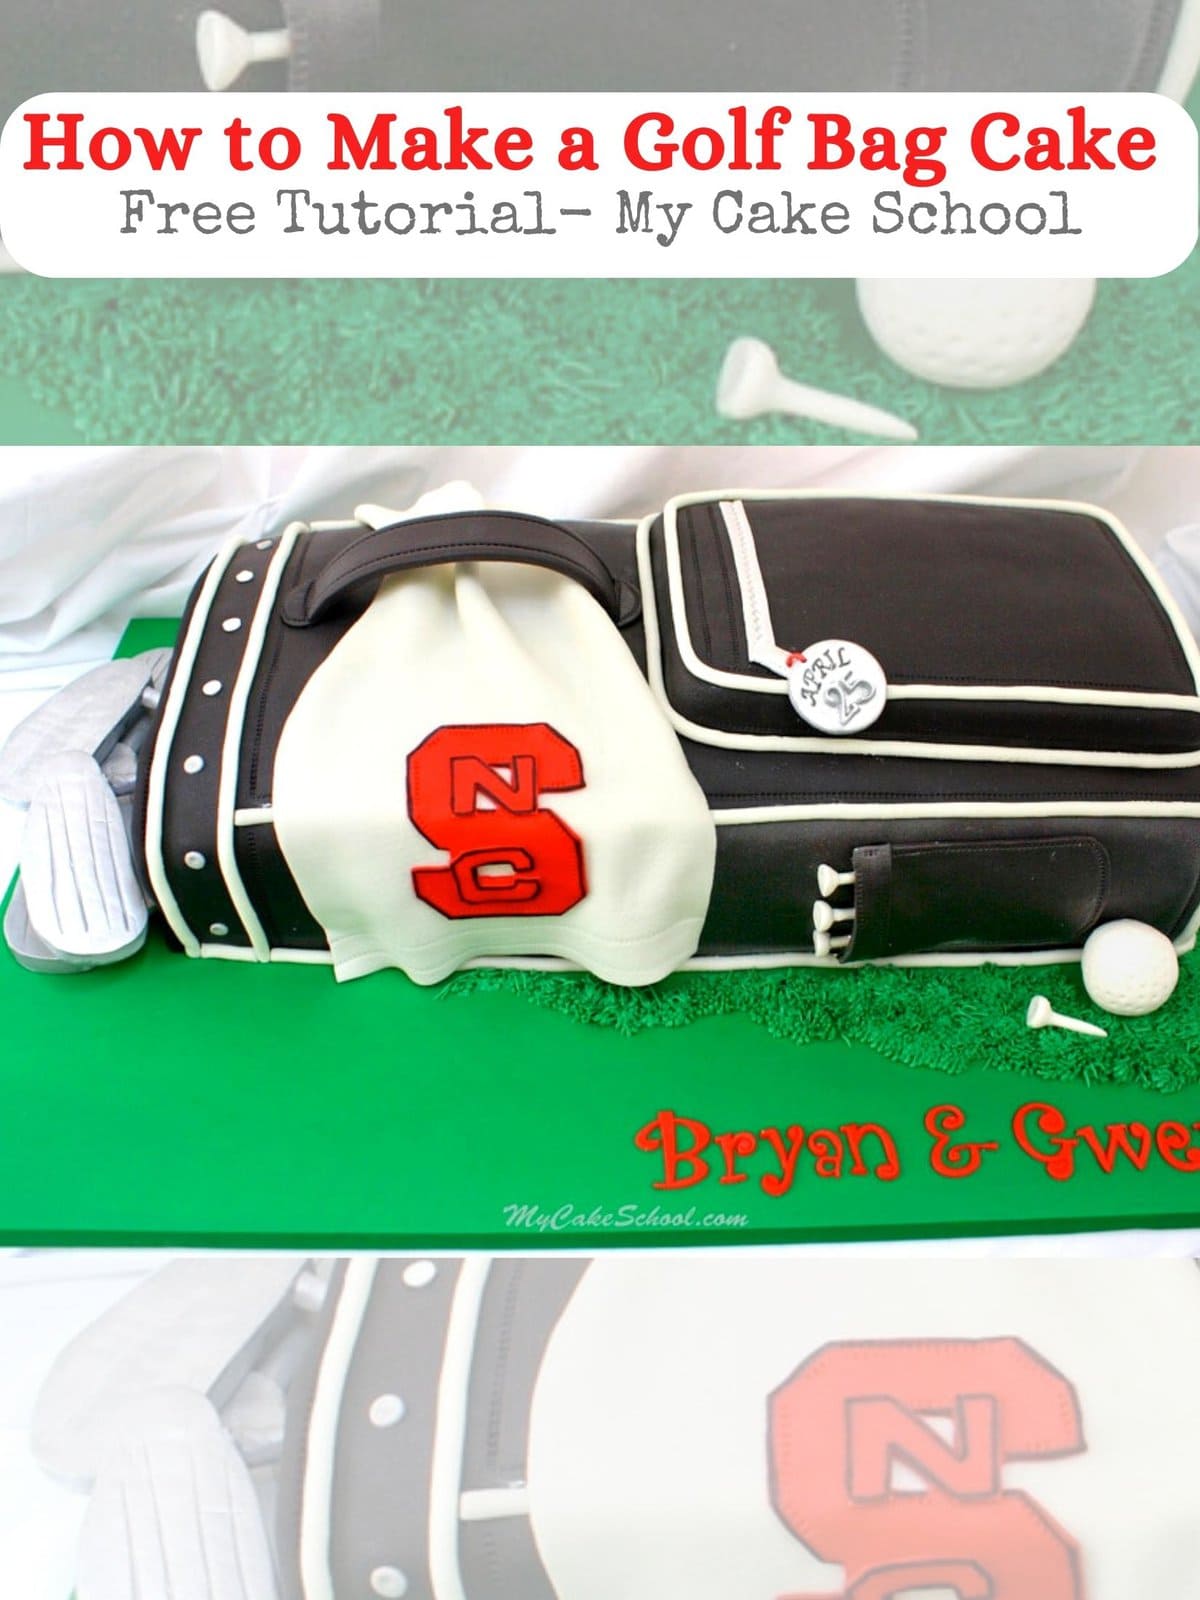
Last weekend was my cousin Bryan's wedding, and this was the groom's cake! He loves to golf, and so we decided to go with a Golf Bag cake design (and filmed the process for you!).
In this video, you will learn how to transform two sheet cake layers into a golf bag with the help of ganache, fondant, and lots of fun little details!
Table of Contents
Materials for Golf Bag Cake:
The cake layers used in this tutorial are two 12x18 sheet cakes. Of course, you can use the same method with smaller sheet cake pans if you need fewer servings! We used our {Scratch} Classic Chocolate Cake recipe. We used our Classic Chocolate Buttercream frosting as the filling between the layers.
*Reminder: Dry handle & clubs in advance...2-3 days in advance to be on the safe side. Here is a link to the Templates that I used!
Ganache - We frosted our cake with simple spreadable ganache (a 2:1 ratio of chocolate to cream)
Fondant - We used Liz Marek fondant (tinted with Americolor Super Black coloring gel)
Cake Cardboards or Foamcore- We stacked the cake on two stacked cake cardboards cut to the size of the cake.
Gum Paste (or tylose powder which an be kneaded into your fondant)
Silver dust- I used non-toxic luster dust & also silver highlighter dust for the pieces that would not be consumed
Piping Gel or your "glue" of choice
Extruder (I use Makins Ultimate Clay Extruder (aff))- Used for the white fondant piping on the golf bag
Misc Letter cutters or stamps- I used Tappit cutters (Funky Alphabet) for the bride & groom's name
Rice cereal treat (22g.) - We used this for the golf ball.
Piping Tips: Piping tip 12 was used for small circles used as accents on the bag.
Wilton Stitching Wheel (which also includes zig zag wheel attachment). You can improvise with a toothpick or gum paste tools.
Lollipop Sticks- I used extra long sticks for the clubs, although eventually shortened portion to be anchored.
Templates: We have templates for the handle, pocket, and club
Optional: A textured dish towel or rubber shelf liner gives nice detail to the golf towel. Sports logo was made with red fondant & outline with Americolor black coloring pen.
Cake Base- This is a heavy cake and so you'll need a sturdy base. Ours was a wooden base, approx. ½ inch thick. We covered our board with a green plastic table cloth as usual and secured on the underside of the base with a heavy duty (upholstery) staple gun.
Then we used 4 small felt surface protector pads so that the base would be slightly elevated & staples would not scratch the table. *We like this method, but you could also cover your wooden board with a layer of fondant and glue ribbon around the sides!
Enjoy the Video!
We hope that you enjoy the golf bag cake tutorial! You can easily change up the colors or details on the bag or golf towel to personalize it for the person of honor. This would make a great birthday cake for the golfers in your life as well!
Part One:
We carve the cake, cover with ganache, cover with fondant, and also begin to create the clubs.
Part Two:
The bag comes to life with extruded fondant piping, zippers, a small handle, clubs, & more!
Enjoy the Video!
Thanks so much for stopping by! If you give this golf bag cake a try, we would love for you to leave a comment and photo below.
We hope that you enjoyed this video. If you're a sports fan, don't miss our Football Stadium Cake and Soccer Ball Cake as well!
Where can I purchase the tool used to make
the fondant snake?
Hi Sylvia, Melissa used the Makin's Professional Ultimate Clay Extruder to make the borders on the golf bag. It can be found on amazon.com, joann.com, etc. Here is a https://www.amazon.com/Makins-Professional-Ultimate-Clay-Extruder/dp/B0018BOXWQ/ref=sr_1_1?ie=UTF8&qid=1488595430&sr=8-1&keywords=makin%27s+professional+ultimate+clay+extruder
One more question. There are two versions of the fondant recipe, which one did you use. Thank you for your help.
Hi Sylvia, I am not sure I am understand the question....under the Materials Section, there is a link to the Liz Marek video and recipe that we used. Be sure to use mini marshmallows. Please let me know if I am not answering this correctly.
If I use a 9x13 pan, what measurements should I use when cutting the cake for the bag? Thank you.
Hi Sylvia, Do you mean the small bag Melissa cuts for the top of the golf bag. If so, you can't go wrong, just cut away what you think looks to be in the right proportion. It will be a small amount of cake, that is then split to make a pocket on top of the golf bag.
No, I'm wanting to make a smaller bag. Thanks.
Hi Sylvia, Yes, I understood that you were using a 9x13 cake pan. I thought you were asking about the small bag on top of the golf bag. Your measurements will be different than in the video since Melissa used a 12x18 pan. To get a visual, turn your 9x13 pan upside down as look at it as if it were the cake. Decide how wide you would like the golf bag to be......you could measure over 7 1/2 inches and you would be cutting away 1 1/2 inches. If you did this your finished golf bag would be 7 1/2 inches wide and 13 inches long. As Melissa shows in the video the portion that was cut away will be used to make the small pocket on top of the golf bag and it can also be used to add to the length of the cake if you want more servings. So you will be deciding the measurements to use depending how wide you want the bag to be. It will make a very cute small golf bag.
Hello, did you have to double Liz’s fondant recipe or was her recipe enough to cover this golf bag cake. Thanks in advance :-)
One more question, I’m going to put dry luster dust over a happy birthday stencil in the middle of the towel. Do you recommend I wait for the fondant to dry completely before putting the dry dust on, or paint the dry dust on the fondant before it dries. Thank you so much!
Hi Debbie, I'm sorry that we didn't include the fondant amounts for this one. I really think that rolled thinly to about 1/8 inch, one batch of Liz Marek fondant should do it, as it makes 4.25 lbs. Charts often say that a 12 x 18 cake takes 5 lbs of fondant, but rolled thinly it should be fine.
**Edit: I'm just thinking more about this- I would probably go ahead and double it just to be on the safe side. Although rolled thinly, it should be enough to cover the bag, the added details of the towel, strap and clubs, etc. may require more fondant than 1 batch will give. Any leftover fondant that you have can be kept in an airtight container.
As for the luster dust, I would create a paint using a tiny bit of vodka or lemon extract mixed with the luster dust to apply to the stencil. You can paint it on when the surface of the fondant is dry to the touch. I would do a little trial run on a scrap piece of fondant. If you are just needing a translucent luster dust or pearl lust as an accent, I would apply it while dry. I hope this helps!
Yes it does! I am so grateful.