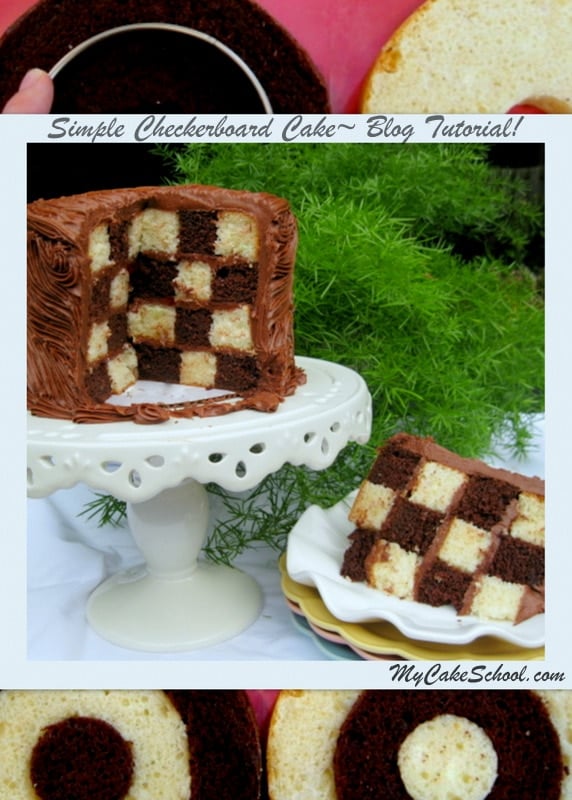
Checkerboard Cake!~ A Blog Tutorial
Today I'm going to show you how to make a checkerboard cake!

These cakes are so much fun, surprisingly easy, and no special pans are required! I love this creative cake design option for incorporating two different cake flavors or colors into one slice of cake!
Table of Contents
How to Make an Easy Checkerboard Cake
I started out with four, 6" round cake layers, leveled. You will need to cut two circles from each layer--- I used 2" and 4" cookie cutters.
The size of your cutters will vary depending on the size of your cake. The more evenly spaced your rings, the better. It helps to see this done in pictures...

First, insert the smallest circular cutter into the center of each layer (You can also use a template and cut your circles out with a knife.) Carefully remove the center, leaving them intact. ** Note-- this cake is most easily cut & assembled when partially frozen.

Now, it's time to cut your larger circles! The idea is to make the width of the cake in each of your rings as equal as possible, so that the squares of your checkerboard will all appear to be equal in size.
For this reason, I used 2" and 4" circles for a 6" cake. For a larger cakes, you'll slightly adjust the size of your cutters (or templates).

Circles, circles everywhere! These become our puzzle pieces. Let's put the puzzle back together.

How cool is this? Suddenly...I want to go to Target :0) If your chocolate and white layers look like this, you're doing it right.

I decided to place these cakes in the freezer to firm up a little before stacking, just to be on the safe side for easy handling. I stacked on a cardboard cake circle, and then stacked my layers with waxed paper in between.

Once your are ready, frost as usual...I'm using our Classic Chocolate Buttercream. YUM!

Make sure that the outer rings of your layers alternate as you stack them.

I crumb coated my cake with chocolate buttercream frosting just before breaking out my star tip 21 for a little piping fun...

I didn't have any piping design in particular in mind when I started, ha! But I like the whimsical outcome! Buttercream piping is such a versatile way to decorate a cake...whether you are piping intricate designs, or quick and easy styles like this one!
We're finished! The cake is just so pretty sitting there on the pedestal...but you know the inside is even better!

Marble Cakes & Zebra Cakes- Alternatives to Checkerboard
Checkerboard cakes are such a creative (and unexpected) way to incorporate multiple cake flavors!
Along the same lines, Marble Cakes and Zebra Cakes are also great options for incorporated two colors or cake flavors into your cake slices with a little flair. Check out our tutorials and recipes for these cake techniques as well!
Checkerboard Kit Kat Cake
Update! We now have a fun and easy Checkerboard Cake design tutorial for the outside of your cake using simple mini Kit Kats!
Keep this free Kit Kat Checkerboard Cake Video in mind if you'd like to take your checkerboard cake to a whole new level of fun -Easy Kit Kat Checkerboard Cake Tutorial
Is it Necessary to Frost in between the rings of cake in your Checkerboard Cake?
We've received this question several times over the years and it's a really good question- after all, we're piecing back together rings of cakes. It makes sense to wonder what happens when it's time to cut the cake!
I promise you, your slices aren't going to fall into a pile of chocolate and white cake cubes ;0)
Although we do not frost between the rings of cake during assembly, they fit tightly enough together that there is no worry of this, and they also are held together with the layers of chocolate buttercream filling and frosting.


How to Make a Checkerboard Cake- A Blog Tutorial
Learn how to make a checkerboard cake in this fun step by step cake tutorial!
Materials
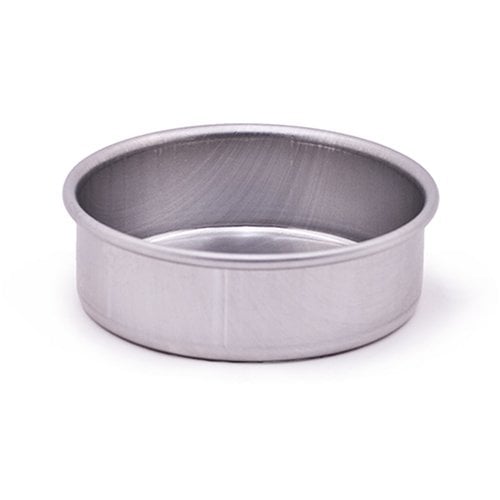
- *Using the technique that we are teaching today, you can change things up based on the size of cake that you need. We made a four layer 6 inch cake.
- We used two 6 inch yellow cake layers and two 6 inch chocolate cake layers.
- Circle Cutters (or template) We used 2 inch and 4 inch cutters because we are working with 6 inch cake layers. If you are using different size cake layers, adjust accordingly so that your rights are spaced equally apart.
- Chocolate Buttercream Frosting
- Miscellaneous: piping bags, spatula, piping tips of choice, cake board (optional)
Instructions
- First, insert the smallest circular cutter into the center of each layer (You can also use a template and cut your circles out with a knife.) Carefully remove the center, leaving them intact.
- Now, it’s time to cut your larger circles! The idea is to make the width of the cake in each of your rings as equal as possible, so that the squares of your checkerboard will all appear to be equal in size
- For this reason, I used 2″ and 4″ circles for a 6″ cake. For a larger cakes, you’ll slightly adjust the size of your cutters (or templates).
- Now it's time to reassemble the cake layers using alternating colors of cakes. You'll wind up with two 6 inch cake layers that have a yellow, chocolate, yellow pattern...and two cake layers that have a chocolate, yellow, chocolate ringed pattern.
- (Optional) I decided to place these cakes in the freezer to firm up a little before stacking, just to be on the safe side for easy handling. I stacked each layer on a wrapped cardboard cake circle, and then stacked my layers with waxed paper in between. (You can wrap with plastic wrap to protect from the circulating air in the freezer). Freeze for about 30 minutes or until it's as firm as you'd like.
- Place the first cake layer on the cake base or pedestal. Spread with a layer of Chocolate Buttercream, then stack with another cake layer (opposite order of rings) and repeat.
- Frost the cake however you like with the remaining chocolate buttercream! I created a pattern using a star tip 21.
Notes
It is easiest to cut and assemble the cakes to create the alternating rings pattern when they are partially frozen.
Recommended Products
As an Amazon Associate and member of other affiliate programs, I earn from qualifying purchases.


love chocolate cake recipes? we have more for you to try!
You can find a full collection of favorite Chocolate Cakes in our Roundup of the Best Chocolate Cakes!
Cake Tutorials, Favorite Cake Recipes, and More!
I hope that you enjoyed this little tutorial!! Sometimes the most interesting cakes are actually very simple to make! Do they still make checked ice cream? I'm going to have to look into that!
Keep in mind that checkerboard cakes don't necessarily have to be chocolate and white! Have fun experimenting with various flavors and colors! For instance, chocolate & pink checkerboard, red and white, and so on! Enjoy!
Make sure to check out our Recipes & Tutorials section for hundreds more free cake decorating tutorials and delicious cake recipes!
Thank you so much for the instructions. My mom used to make these when I was a child. I lost her when I was 21, and all her great baking ideas as this with her. Now at 64 I can make it myself. Thanks to you. ?
Hi Janice, You are welcome, I'm glad this brings back happy memories of your mom.
I am confused. I have made this cake several times using inserts rather than baking the separate cakes & cutting them. Only one time did the squares stay intact & square & not “blend” into the opposite flavor, but the flavor from the perfect one (recipe from back of insert box) wasn’t as good. My question is this: If the cake flavors are baked separately as in your recipe, how do the squares stay together when the cake is cut? Since the flavors aren’t baked together & are cut prior to assembly, it seems the squares would fall apart when cut.
Hi Sharyn, We have never had a problem with squares falling apart. Looking at the pictures you will note that the rings of cake fit rather
closely together. Also, each layer has a filling, this also helps to secure them in place. Follow the text and pictures and you will be happy with the cake. Let us know if you give it a try.
Does this work with just two layers of cake?