Autumn Leaves in Chocolate~ Blog Tutorial
We are excited to share a beautiful free cake tutorial for colorful Autumn Leaves in Chocolate! Of all of our fall cakes, this is one of our favorites, and one of the simplest also!
This cake design features a simple idea and method for creating a vibrant autumn themed cake that is as unique as it is beautiful.

This makes a great fall birthday cake, Thanksgiving cake, and more.
While we used a double barrel (tall) cake, you could use scale the size of the tree to fit sheet cakes, standard height cakes, or even tiered cakes (as we did with our Autumn Quilling Cake Design).
Table of Contents
How to Make Autumn Tree Cake with Candy Coating Leaves
First, I frosted my 6" round (approx 6" tall) cake with vanilla buttercream. I then combed it with my trusty Ateco cake comb.

Next, I tinted my buttercream with Americolor Chocolate Brown and piped on my tree trunk with a Wilton star tip 16. Any star piping tip of your choice would work nicely--even a round tip. I wanted my tree trunk to have ridges and so I went with the star tip.

Now for the leaves! I melted pre-colored Wilton candy melts in autumn shades for our next step.
After melting, I put each color into it's own piping bag, and snipped the tip of the bag (rather than using piping tips).
You'll want to work fairly quickly during this next step, but if your chocolate becomes too cool and firms up, you can always reheat the bag for a few seconds in the microwave...or even have a warm cake pan nearby that you can place them in as you alternate between bags.

Here, you see that I piped several dots of chocolate onto my waxed paper lined cookie sheet. With some of the dots, I added a touch or two of another color.
It's a little hard to tell from the photo, but my dots are larger than pea-sized, but smaller than marble-size ;0) --Experiment to see what size you like the best!

Now, time to create our leaves! I used a kitchen knife but any number of tools would work for the next step--a smallish spatula, a spoon , etc.
Using the knife, I started from one side of my "dot" of chocolate and smeared it out, dragging the chocolate into a point--(or somewhat of a point!) This creates a teardrop shaped leaf.
Look at mine---they are not perfect! In fact, out of context, these don't look like leaves. But you'll see...they will!

I made two full "cookie sheets" of these leaves. Then, I chilled them in the freezer until they became hard-- approximately 5-10 minutes is perfect.
Next, it was time to build the tree! I used buttercream as my glue. You can see below, that I dotted the areas around the branches with white buttercream.
I realized later that buttercream tinted yellow, orange, or green would have been an equally good (if not better) "glue". More on that in a little bit!

With each new leaf, our little tree becomes more beautiful...(and the more our leaves begin to look like leaves!) ;0)
***It's important to note that your leaves need to be cold when handling. They are so thin, that they warm & therefore become more fragile quickly.
So, I found it easiest to have two trays of leaves. One in the freezer, the other out. And then swap them out when things warm up.

I mentioned earlier that yellow buttercream would make a good adhesive for our leaves. I found this helpful in a few areas where I wanted to build out my leaves a little more, but the white buttercream would have stood out too much.
The yellow buttercream was a perfect glue because it blended in so well with the chocolate leaves. It's a great way to fill things out here and there too if necessary!

This cake was a little more time consuming than I expected-- there are lots of leaves happening here! I found it fun though...a little addictive too. I couldn't make myself stop adding leaves!
You could get a somewhat similar look by just piping buttercream leaves with a piping tip (352), but I really liked the unusual texture and dimension that the flat chocolate leaves gave us. Some almost had a transparent look to them.
I scattered a few of my extra leaves around the base of the cake.

Thanks so much for stopping by, if you give this cake a try, we would love for you to share a photo!

More Fall Cake Designs
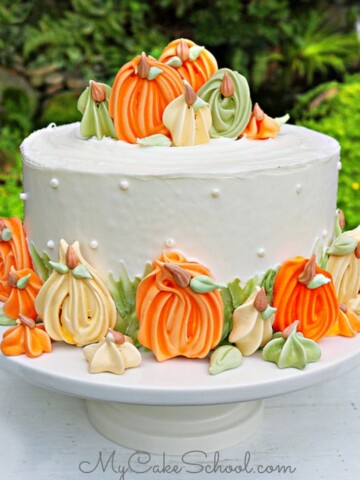
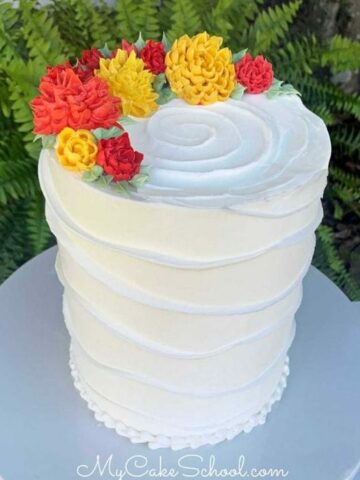
We have any more fall cake designs for you to check out! Some of our favorites are our Fall Wreath Cake, Pumpkin Meringues Cake, and Wave Cake with Buttercream Chrysanthemums.
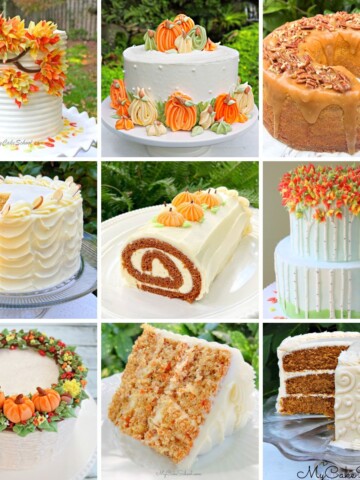
Fall Cake Recipes
Today's Autumn Leaves in Chocolate Cake would be perfect for any cake recipe! We have hundreds of options in our Cake Recipes section, including cakes recipes from scratch as well as cake mix recipes!
A few of our favorites are Pumpkin Spice Cake, Gingerbread Cake, and Carrot Cake, but there are so many more to choose from! Hop over to our Fall Cake Recipes Section to see!
I attempted this cake for my Father-in-law's birthday and was pleasantly pleased. Although my cake wasn't as clean as yours was, I had fun doing it. Thanks for the tutorial.
Wonderful, we are so happy you made this cake!!
Can this be done using a sheet cake? Planning on giving it a shot for my daughter's 1st bday :-)
Thanks for your comments!
@Margot--Sorry that I didn't see this sooner. The leaves are just Wilton candy melts. Any melted candy coating or bark coating would work well.
@Emily- Of course! A sheet cake would actually allow for a larger tree (or larger leaves) if you'd like! It will be beautiful ;0)
Hi Emily, Yes, I think it would look great on a sheet cake .
Gorgeous cake Melissa... I made something like that but I used ganache...it turned out quite good ...thanks for the inspiration
love this cake..
<3
for starters I LOVE this cake, it's gorgeous!!! I'm thinking of doing this cake for my fall wedding. I was wondering about how long this cake could set out before the chocolate leaves melt or lose there shape? Since I'm thinking of this for my wedding cake it would set out on display (in an air conditioned room) for a long time. Thank you!
Thanks for your comments!
@Samantha, so glad that you are thinking of making this! The leaves will be fine at room temp for a long period of time. We actually left this cake out at least overnight and it was fine!
For your peace of mind, you can make a few leaves sometime between now and then just for practice to see how they do. This chocolate/candy coating is firm at room temp (just as it is in it's original "button" form), but the leaves are thinner and so they are a bit more fragile when handling. That is why I recommend applying them to the cake when the leaves are chilled. Would love to see the finished cake!
Espectacular!!!!
Hi Melissa,
Do you comb the cake immediately after smoothing and do you only comb lightly ?? I use a crusting buttercream. It seems to be an easy technique that i am making harder than it should be !!! Thank you for doing these tutorials for us !!!
Hi Sharon- After frosting the final coat of frosting on my cake, I immediately hold my bench scraper against the side of my cake and spin the cake on the turntable to smooth things out. This step also removes excess frosting, etc. If you don't have a bench scraper, you can just use a long spatula. (I'm not concerned with the frosting being perfectly smooth since we'll be going back over with the comb) - Once the frosted cake has been neatened up, I hold the cake comb against the side of the cake as I spin it once again on the turntable. It's also easiest if you can turn your turntable a full rotation (or at least close to a full rotation) without stopping so that your lines will be as seamless as possible. You'll want to comb your frosting before it has a chance to crust ;0) Hope this helps!