Leopard Print Cake Tutorial (Pattern Inside)
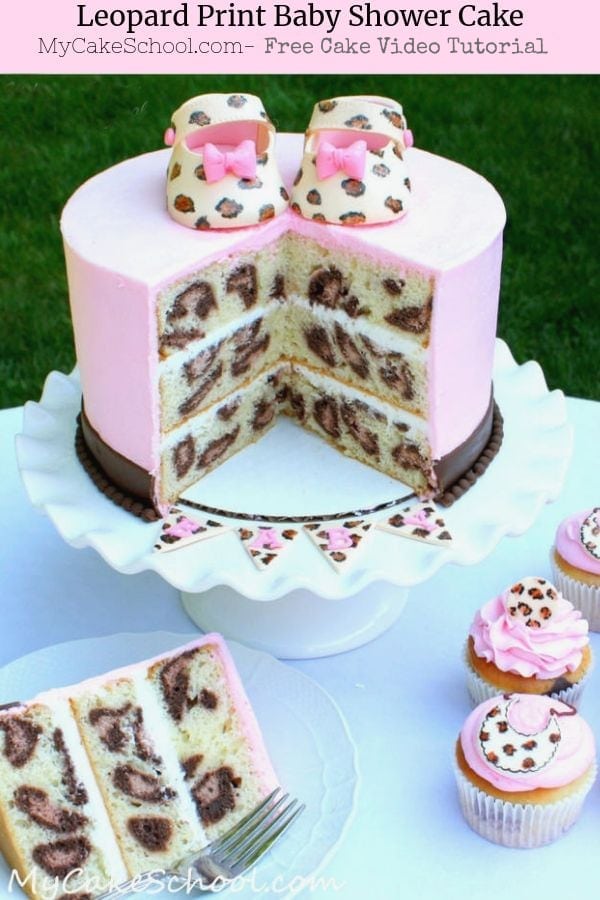
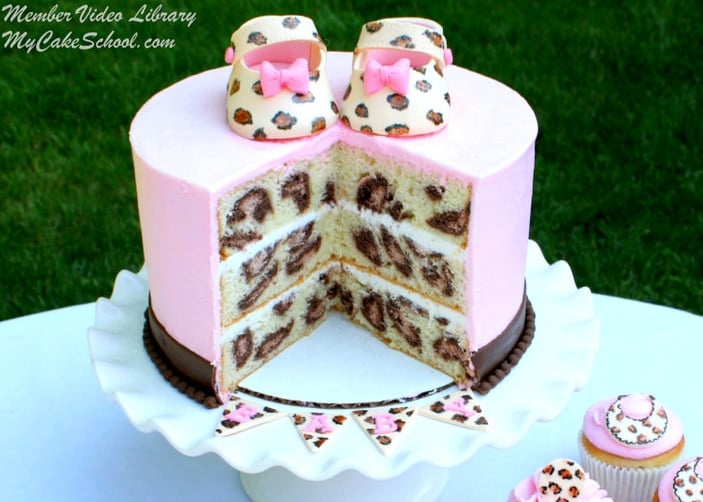
We are so excited about our leopard print cake.
Not only does it have a sweet baby shower theme with cute leopard print baby shoes, but we also carried the leopard print to the inside of the cake! Eek! So much fun!
I posted a photo of our cake on our Facebook page a couple of days ago and the response has been unbelievable! So, I can tell you with certainty that if you make this cake for someone, it will be a hit.
There is more than one way to make a leopard print cake. In fact, in our leopard print cupcake video, I demonstrate another way.
However, for cake layers, I find that the technique demonstrated in this video works best for me. I've listed some supplies and additional notes beneath the video---I hope that you enjoy it!

Table of Contents
How to Make a Leopard Print Cake on the Inside
Make sure to watch the video tutorial further down in this post, as well as our printable how-to card. Here is just a quick rundown of our steps:
Three Shades of Batter:
For our leopard print cake, we are working with vanilla cake batter- we divided it into three colors: plain, light brown, and darker brown (almost black). See measurements in the card below.
Fill three piping bags with the different colors.
Filling the pans:
Start by putting a thin layer of white batter–approximately 1 ¼ cups- into each of the three pans.
Time to Pipe the Lines (which will become our spots)! Pipe elongated lines of the dark batter on top of the white batter. You don't want the bands of dark batter to be very thick, but pipe them wide enough for the lighter shade of brown batter in the next step.
Light Brown Lines: Next, pipe thicker (but narrow) lines of light brown batter on top of the dark brown lines (these light lines are not as wide).
Go back in with the piping bag of dark brown batter, piping an outline around the light brown batter and on top. Enclosing the light brown batter in this way will give us the look of leopard spots later.
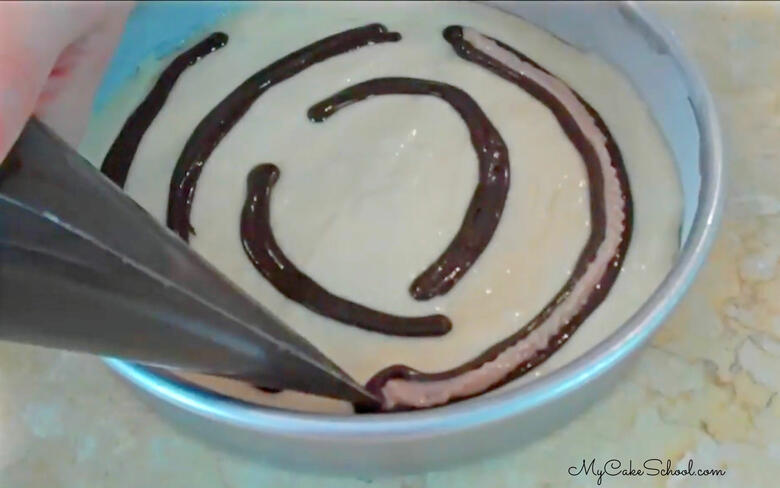
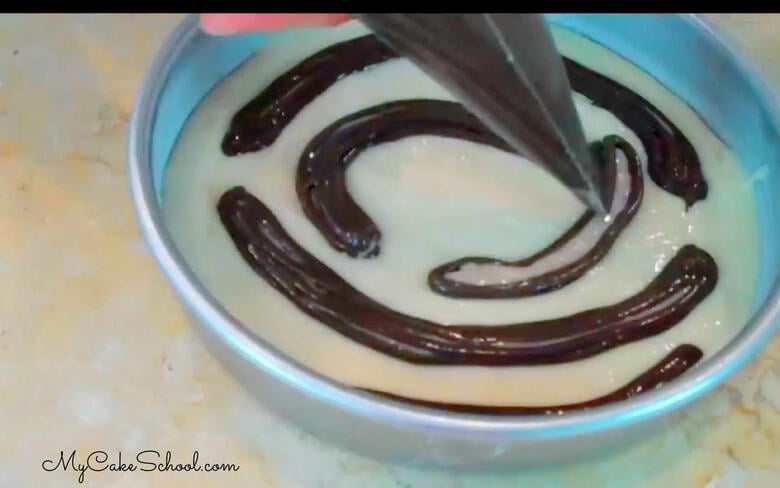
Using a piping bag with the tip snipped away, pipe on a layer of the white batter to cover the dark lines.
Optional: Another Layer of "Spots":
Next, still working on the same pan of batter, repeat the above steps, making one more layer of leopard print batter. (This is going to give us two layers of leopard spots in each cake layer).
If you would prefer to just have one layer of leopard spots per cake layer, that is fine also! We just wanted extra spots ;0)
Follow the above steps for the next cake layer(s) also. Then bake the leopard print cake according to recipe instructions.
And here is our sliced cake!
Thanks so much for stopping by. We hope that you enjoy this leopard cake and leopard cupcake design tutorial!
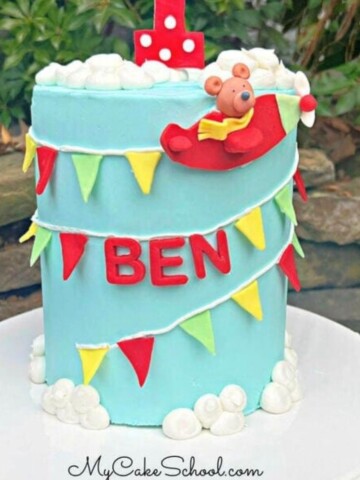
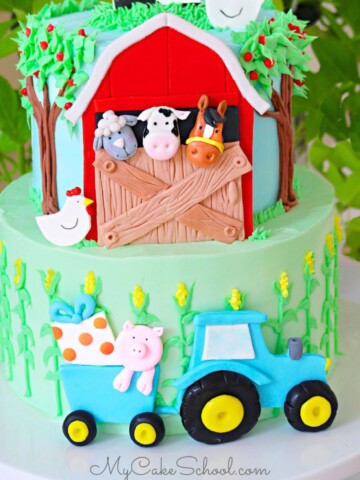
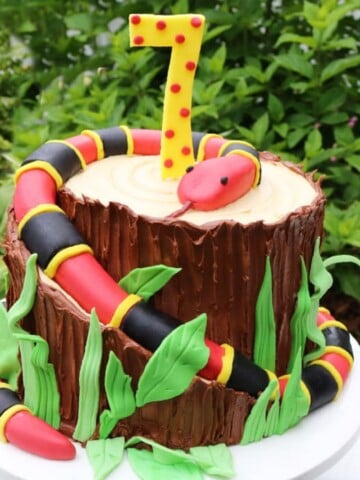
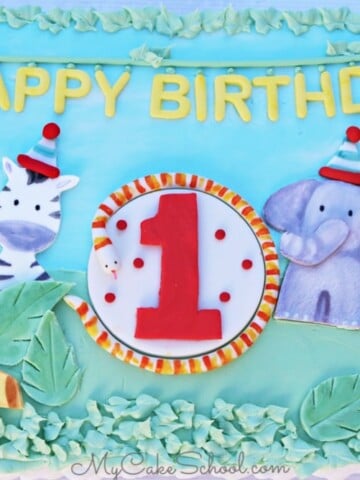
We have many more free cake decorating tutorials for you! Here are a few more animal theme designs for you! You should also check out our baby shower cakes for more ideas!
Leopard Print Cake Video
Leopard Print Cupcakes
If you loved our leopard print cake tutorial, make sure to check out our leopard print cupcake tutorial as well!
You will love this simple technique for creating leopard spots in cupcakes- they match our cake perfectly ;0)
A Different Method-Leopard Print Cupcakes
In my leopard cupcake video, I layer dots of dark batter, light batter, and dark batter here and there rather than making the elongated layered lines.
The “layered lines” of batter that I use in this cake video allow me to make lots of dots at once. For me, it is easier and ensures that every slice will have at least a couple of dots, while the “layered dot” method gives a more sporadic arrangement.
The layered dot method does work well with cupcakes though, since they are so small! I’ll post our cupcake video and so you can decide for yourself what works best for you!
Leopard Print Cupcakes Video
Leopard Print on the Inside Cake (for a Baby Shower!)
Learn how to make a Leopard Print Pattern on the Inside of your cakes in this free cake video tutorial! Today's cake has a fun baby shower theme, complete with baby shoes on top!
Ingredients
FOR THE CAKE LAYERS
- We made a 3 layer, 8 inch cake (2” deep pans) using a double batch of white almond sour cream cake-doctored cake mix recipe. You can use any recipe you’d like, as long as it is white or yellow…and for best results, use a batter that isn’t too runny.
- Cocoa Powder– We used this to tint part of our batter (2 tablespoons). You could also use coloring gel.
- Coloring Gels– Use whatever brand/colors you like. This is what we used- Americolor Ivory to tint our gum paste for the shoes & bunting, Super Black & Chocolate Brown for tinting our batter & for painting our leopard spots, Deep Pink for the letters & bows on the shoes.
- Buttercream Frosting– We used our “Fluffy Vanilla Buttercream” recipe.
DECORATIVE ACCENTS
- Satin Ice Gum Paste &/or Fondant—We used gum paste for our shoes & bunting, but you could also use fondant with tylose kneaded into it.
- Vodka/Lemon Extract-Mixing a small amount of either with coloring gel will give you the “paint” for your leopard print.
- Tylose Powder/Sugar Glue– This is our preferred food safe “glue”. You can easily make it by dissolving a ¼ teaspoon tylose into 2 tablespoons of warm water.
- Template– Baby Shoe Template
- Star cookie cutter—I used this to quickly create uniform triangles for our pennants/bunting.
- FMM Alphabet Block Set- Upper Case Tappit Cutters- (Optional) – to spell out “baby” on our bunting.
- Satin Ice Chocolate Fondant- (Optional) I had to knead in some white fondant to lighten it. This is for our fondant ribbon border.
- Silicone Pearl/Bead Former- We used the 6mm size. This was for the trim at the base of the cake.
- FMM multi-ribbon cutter (aff.) (for fondant ribbon around base of cake). Mine was spaced at 1 inch. You could also just measure and cut by hand.
MISCELLANEOUS
- Small paint brush for paining leopard spots
- plate or palette for mixing your “paint”
- parchment paper, plastic piping bags for dispensing your batter
- sharp knife, blade, or x-acto for cutting out your template
Instructions
FOR THE LEOPARD PRINT CAKE LAYERS
- (Preheat oven and prepare pans per recipe instructions. We used the White Almond Sour Cream Cake- Doctored Mix recipe)
- After mixing up the batter we scooped approximately 1 ½ cups of batter into one bowl, and ½ cup of batter into another bowl. The remaining batter will stay white.
- Mix 2 tablespoons cocoa powder into the first bowl (This will be the darker of the two shades of brown). Then we alternated drops of brown and black until we got the shade of very dark brown that we liked. (Approx. 2-3 drops each).
- We tinted the 2nd bowl of batter with a little bit of the batter from bowl #1, and then a drop of brown coloring gel. This batter should be a light shade of brown.
- Once you have your two shades of brown batter, scoop each color of batter into a separate disposable piping bag. You'll have a light brown, dark brown, and white piping bag of batter.
- Now you are ready to begin the process! With each pan, start by putting a thin layer of white batter–approximately 1 ¼ cups for my 8 inch pans.
- Time to Pipe the Lines (which will become our spots)! Snip the tip of the piping bag for the dark brown batter (not too big). Pipe elongated lines of the dark batter on top of the white batter. You don't want the bands of dark batter to be very thick, but pipe them wide enough for the lighter shade of brown batter in the next step.
- Next, pipe a thinner light brown line of batter on top of the dark brown lines (these light lines are not as wide).
- Go back in with the piping bag of dark brown batter, piping an outline around the light brown batter and on top. Enclosing the light brown batter in this way will give us the look of leopard spots later.
- Using a piping bag with the tip snipped away, pipe on a layer of the white batter. Pipe all around and on top of the lines.
- Next, still working on the same pan of batter, repeat the above steps, making one more layer of leopard print batter. (This is going to give us two layers of leopard spots in each cake layer). If you'd prefer to just have one layer of leopard spots per cake layer, that is fine also! We just wanted extra spots ;0)
- Follow the above steps for the second cake pan also.
LEOPARD PRINT BABY SHOES
- Use template for the Mary Jane style baby shoes to cut out gum paste pieces. Roll out your gum paste, and cut out the parts using the template. My shoes are made from ivory-tinted gum paste, but with a "lining" of thinly rolled pink gum paste. After making the first cutout, flip the template to cut out the second so that you don't wind up with two right shoes or two left shoes.
- Glue the pieces with tylose glue (a combination of tylose powder and a small amount of warm water). You can use a little pillow stuffing or plastic wrap, etc. to fill the soft gum paste shoes until they are dry. Add gum paste bow and paint on leopard print spots with a "paint" created from brown and black coloring gel + a touch of vodka.
- It's best to do the shoes at least a day in advance.
Final Details
- I created the little bunting with triangles of gum paste. "Baby" letters are cut out from Tappit Cutters.
- Our cake is frosted with vanilla buttercream and the border is brown fondant (I used chocolate fondant). I cut a strip (using an FMM Brand Multi Ribbon Cutter) about 1.5 inches wide to wrap around the base, and then used a silicone bead former to create brown beads of fondant to wrap around the base.
Recommended Products
As an Amazon Associate and member of other affiliate programs, I earn from qualifying purchases.


Inside...(the spots are not as defined ad I would like).
You did such a good job with this cake, Debbie! Thanks for sharing your pictures!
Thank you
Thanks Melissa
Hi Debbie, Your doll cake looks fantastic, beautiful work!! Thanks for posting!
I used your white almond sour cream cake recipe and didn’t change anything. Yet my rings sink to the bottom..