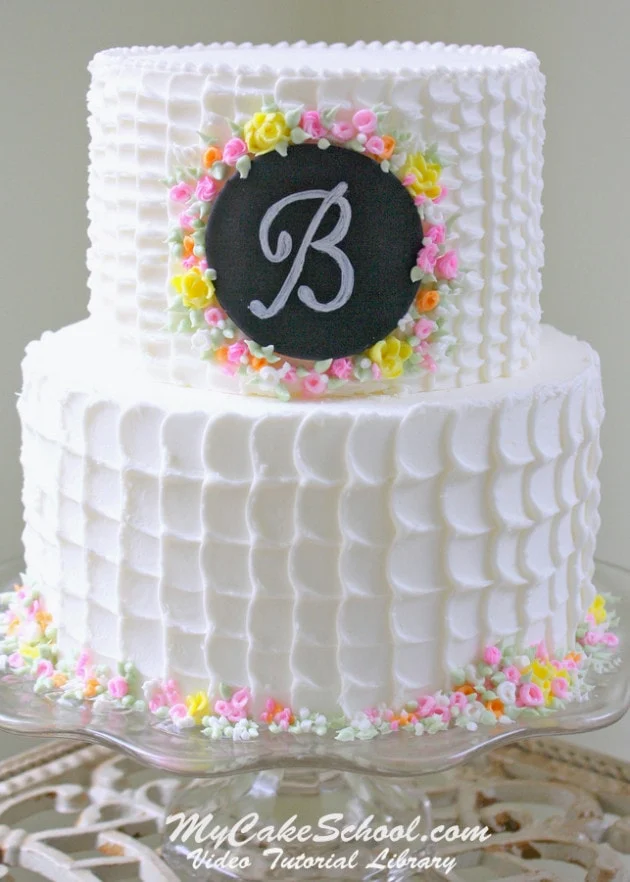
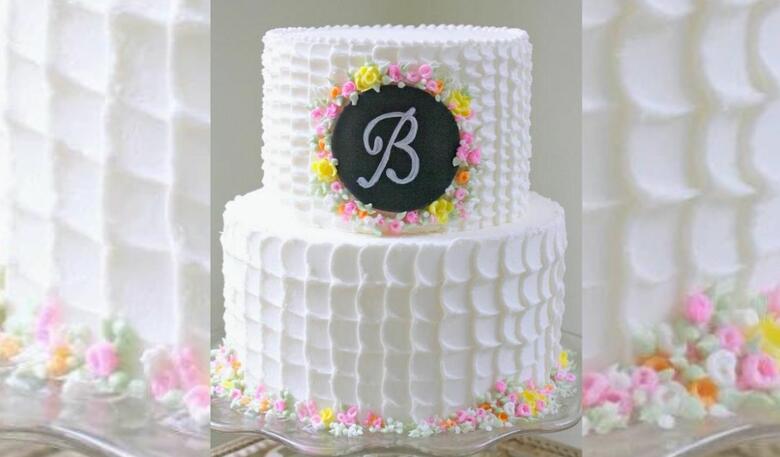
Textured Buttercream with Fondant Chalkboard Plaque
In this free cake video I'll demonstrate how to create beautiful textured buttercream with a chalkboard plaque made from fondant.
This elegant design is easier to create than it looks! You can apply this textured buttercream technique to cakes for any occasion- it is simple yet so beautiful and unique.

This cake video features a couple of techniques that I really think that you will love! First, as you may have noticed, experimenting with textured buttercream is one of our favorite things. ;0)
Our cake features a textured design that is similar to a buttercream "petal cake", but the method is faster & has a wonderful vintage feel!
In the tutorial, we also demonstrate how to create a "Chalkboard" plaque from fondant and edible paint (including a pin-prick transfer of the monogram). We hope that you enjoy the video!
Table of Contents
How to Create the Textured Buttercream Effect
There are so many different ways to texture buttercream but for today's technique, the final design has almost a ruffled effect. It is very easy to create once you get the hang of it.
You can find the full, printable how-to instructions further down in this post (along with the video demonstration), but here is a quick rundown of our steps!
- First, make a vertical straight line impression in the crumb coated bottom tier. Trace over this with buttercream piped from a Wilton Tip 10 (or similar size)
- Use an offset rounded spatula to pull the buttercream piping slightly to the right. Repeat this motion and texturing working from the bottom to the top of the vertical line.
- We will repeat this all the way around the cake. Each new piped vertical line will slightly overlap the texturing next to it.
- Repeat the same pattern on the top tier, but this time, we used a smaller offset spatula with a tapered tip for a different effect. You can see that the "ruffles" are smaller and closer together on the top tier.
- Chill both tiers in the freezer for about 15 minutes to firm up the buttercream before stacking the 6 inch tier on top of the 8 inch tier.
FOR THE FONDANT CHALKBOARD PLAQUE
- Mix white coloring gel with a touch of vodka and use a small paintbrush to paint your monogram onto a black circle of fondant. (In the video, we demonstrate doing the "pinprick method" to transfer the exact shape of the letter to the fondant as a guide).
- Once the fondant plaque has dried for several minutes and can easily be picked up (without distorting the shape), attach to the cake with a bit of buttercream.
- I made tiny, easy buttercream flowers and leaves around the plaque as a finishing touch for additional dimension and color.
More Textured Buttercream Cakes
We have lots more textured buttercream effects for you to try! Here are just a few of our favorite free buttercream cake tutorials- each has a different d
Buttercream Chrysanthemums on Textured Buttercream
Modern Silhouette Design on Textured Buttercream
Knife Textured Buttercream Cake
Beautiful Textured Buttercream with Chalkboard Plaque- Video

Learn how to make a beautiful textured buttercream cake with chalkboard plaque in this free cake decorating video tutorial! This technique is perfect for weddings, showers, birthdays, and more!
Materials
- In the tutorial, our stacked tiers are 8 inch and 6 inch, each on it's own cake cardboard. Top tier has bubble tea straw supports beneath, and each tier is on it's own cake cardboard cut down to size of the cake.
- Black fondant (You won't need much. You can tint your fondant black or use pre-tinted)
- Tylose Powder: Optional. I kneaded a small amount into my fondant.
- Buttercream- Any frosting will do, we used our Fluffy Vanilla Frosting recipe
- Wilton tip 10 for frosting technique
- Spatulas- I used two offset small spatulas--one with a rounded tip, the other with a small tapered tip
- White Coloring Gel- I used Americolor Bright White (for "chalk") + a touch of vodka or lemon extract (Alcohol speeds dry time)
- Small paintbrush for applying monogram
- Monogram template of choice & straight pin (if doing pin-prick method)
- Coloring Gels- I used Americolor Deep Pink (to make light and dark pink), Avocado Green, Lemon Yellow, Orange, Bright White
- Piping Tips for flowers- Wilton 81 (yellow flowers), tip 13, tip 3, tip 4 (I used misc round & star tips....and also no tips at all for some colors) Also, Wilton 10 for piping/texture technique.
Instructions
In the tutorial, my tiers are 8"/6", frosted with our fluffy vanilla buttercream recipe. Use a cake board beneath each tier with supports beneath the top tier as usual.)
For the Textured Buttercream Technique
- Make a vertical straight line impression on the crumb coated 8 inch tier for a guide. (I used my bench scraper to create the line). Trace the vertical line using a Wilton round tip 10. Then, go in with a small rounded spatula and pull the frosting horizontally to the right, creating a vertical row of impressions (similar in some ways to the petal effect technique).
- Repeat this step, piping the next vertical line of buttercream and pulling the frosting horizontally to the right with a spatula, working from bottom to top. Continue this pattern all the way around the sides of the bottom tier.
- Repeat the same pattern on the top tier, but this time, we used a smaller offset spatula with a tapered tip for a different effect.
- Chill both tiers in the freezer for about 15 minutes to firm up the buttercream before stacking the 6 inch tier on top of the 8 inch tier.
For the Fondant Chalkboard Plaque
- Optional: I traced my monogram (Letter B) on a sheet of paper in the size that we needed for the circle of black fondant. You can skip this step if you prefer to freehand, but I used a straight pin to prick holes into the paper, following the shape of the "B". This pinprick method creates lots of little bumps in the paper which can then be pressed into the fondant, leaving behind a guide for us to follow as we paint the letter B with our white coloring gel "paint".
- Mix white coloring gel with a touch of vodka and use a small paintbrush to paint the letter onto the black fondant circle (using the tiny impressions made above as your guide). Allow to dry and repaint/touch up paint as needed.
- Allow the plaque to dry to firm up for several minutes until you can easily pick it up without it stretching. Add buttercream to the back, and add to the cake.
- I made tiny buttercream flowers as a border around the plaque using either small round piping tips (3 or 4) or even just snip the tip off of a disposable piping bag. I made lots of little spirals, dots, and a few little small petals piped through a tip 81.
Notes
In the past, we've tried other methods to create the look of a chalkboard, but using the bright white coloring gel (+ a touch of vodka) is the quickest and easiest!
If you'd like for your chalkboard to have a chalk dusted look, you can apply a light dusting of powdered sugar with a dry brush.
Recommended Products
As an Amazon Associate and member of other affiliate programs, I earn from qualifying purchases.
-
 Satin Ice Black Fondant, Vanilla, 2 pounds
 -
 Americolor Soft Gel Paste Food Color.75-Ounce, Avocado Green
 -
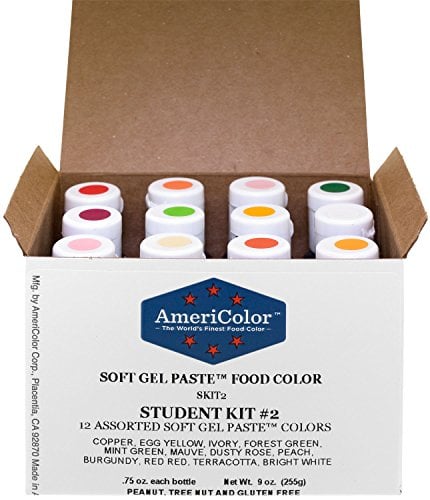 Americolor Coloring Gels Set (Check box for list of colors. Colors are sold individually also.)
 -
 Tapered Offset Spatula
 -
 Wilton Offset Spatula- 9 inch
 -
 Magic Line Pans- 8 inch
 -
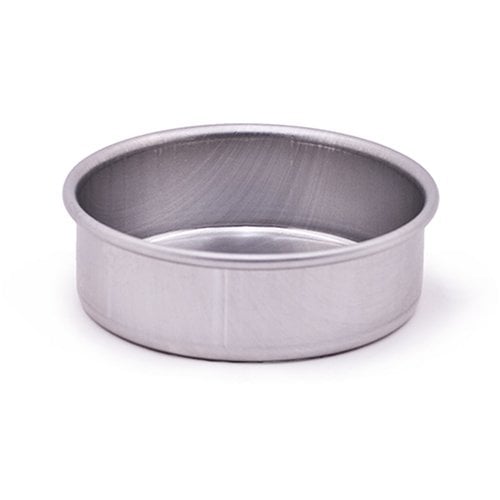 Magic Line Pan- 6 inch x 2 inch
Beautiful! So happy I joined My Cake School!
Thanks Susie!! ;0)
Going to try the icing with spatula on my hubby's birthday cake
Good! I think you'll like it ;0)