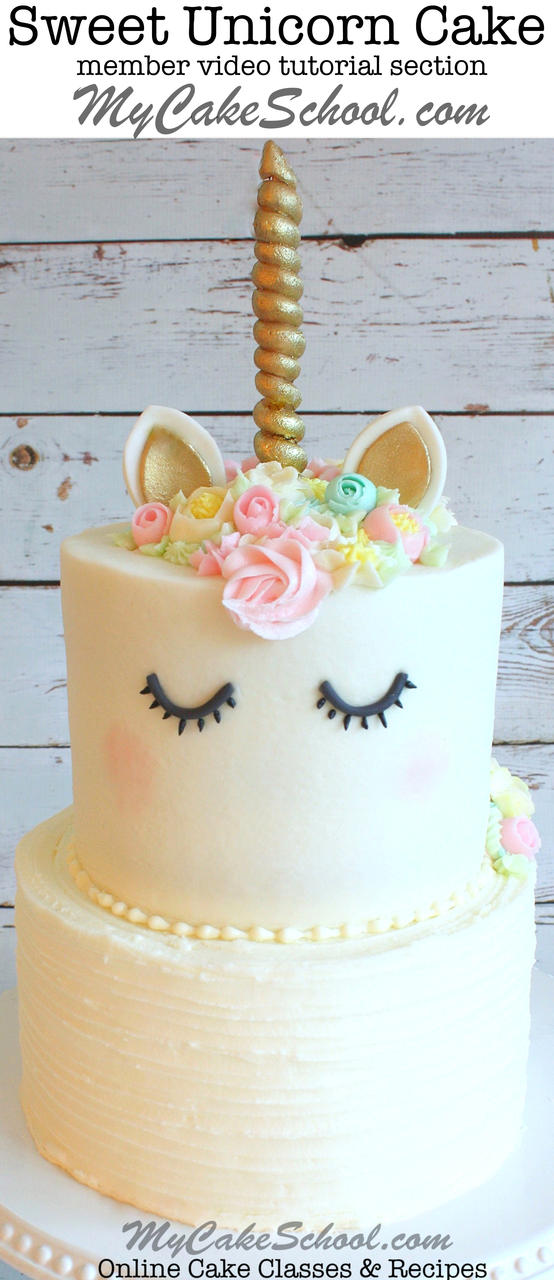
Unicorn Cake Topper- Free Video Tutorial
Today I'm going to show you how to make a super cute and easy Unicorn Cake Topper!

This sweet unicorn will add instant cuteness & magic to your cakes and you will LOVE how easy it is to make.
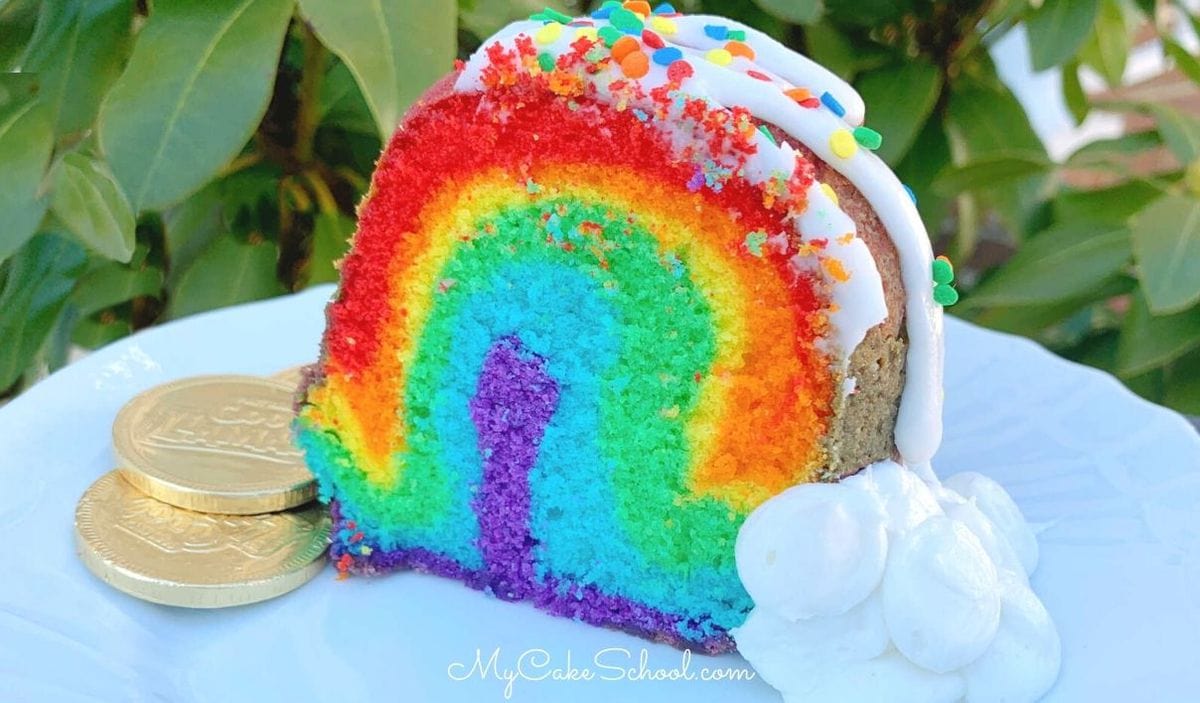
Unicorn and rainbow designs go hand in hand and so today we've baked up some delicious and colorful funfetti cake layers! (Click over for our favorite Funfetti Cake Recipe from scratch!)

Another option would be to use rainbow cake layers, or frost your cake with rainbow buttercream. There are SO many fun options.
We kept the outer frosting of our cake nice and simple, with some textured blue and white buttercream and puffy clouds on top.
(If you'd like some rainbow cake inspiration, checkout our Roundup of Rainbow Cakes, Tutorials, and Ideas!)

We hope that you enjoy the tutorial! Don't miss our unicorn cake topper template beneath the video, as well as a listing of the supplies used. Have fun!
Table of Contents
Materials for Unicorn Cake Topper:
Todays cake is three 8 inch funfetti cake layers, Frosted in our Classic Vanilla Buttercream Frosting.
Gum Paste (or fondant with tylose kneaded into it)
Coloring Gels for red, orange, yellow, mint green, sky blue, violet (we used Americolor brand)
Sharp knife or xacto
Black Food Writer Pen
Piping Gel (or your glue of choice)
Lollipop sticks for anchors
Parchment/waxed paper for lining cookie sheet
Piping Tip: I used a Wilton 10 for the clouds. (You could also just snip the tip off of your piping bag.)
Fondant rolling pin
Pink petal dust (optional) for rosy cheeks
Rainbow Jimmies
Gold Luster Dust (optional- you can also use yellow). We used Rolkem super gold + vodka to create a paint for the horn. Then we dry dusted it with more gold dust for added sparkle).
Notes:
Allow at least 24 hours for your gum paste cut-outs to dry firm.
You should always make two cut-outs when making cake toppers like this one just in case of them breaks.
Spatulas: I used small rounded spatulas for applying my buttercream
We have another free cake decorating tutorial to share with you! This cake from our Unicorn Cake video tutorial is sure to please! ;0)

Enjoy the Tutorial!
If you give this easy Unicorn Cake Topper a try, we would love for you to leave a photo and comment below! Thanks so much for stopping by, we hope that you will come back again soon!
Very cute & Fun! Love it! :-)
Thank you so much for this tutorial! I had never worked with gum paste or fondant before, but I made this cake for my daughter's 4th birthday and I was so proud of it!
Hi Carolyn, We are thrilled that the tutorial helped you!! Your cake looks fabulous, great work! I'm sure your daughter loved it!
I love it, Carolyn!! You did such a great job on the topper, love the rainbow buttercream too! xo
Hi Melisa and Bebe,
This has been on my wish list to make since you put it on the website!
The problem is squeezing, because of my arthritis. Squeezing can cause a flare up.
I have all the materials, I think. The white fondant is unopened, the colors have been unopened small packages that have sat, sadly, in the fridge a few years.
Is there any way I can do the white horse one day and the colors another day, and attach the colors to the horse a third day? If I spread it out, I could do this adorable topper. That way, there wouldn’t be a lot of squeezing and rolling out in one day . I just adore it. There’s a little girl that would love it, too!
Thank so much! Love you both. Love your creativity!!!
Hi Judy,
I'm happy that you'd like to make this! You can definitely space it out as much as you'd like over several days.
I do like to make my stand-up toppers like this with either gum paste or fondant with tylose powder kneaded into it so that it dries nice and firm.
You can microwave the gum paste/fondant in small increments to soften it so that it will be easier for you to work with.
Let us know if you have any questions and thanks so much for the kind words about our site! xoxo
I’m not sure how the pieces will stick together, if they are dry.
Hi Judy, when you layer on the mane and tail pieces, you can attach them with piping gel. If you don't have piping gel, but do have tylose powder, you could just mix a little warm water with tylose powder to create a "glue", or you may even be able to get by with just lightly dampening the fondant pieces that you plan to layer on (this will give them a bit of tackiness). Hope this helps!
AWESOME!!! I am copying all your comments for instructions when i do it. Will post pix!
Hmm, if this works out, that carosel horse topper would be fabulous for the Ventura County Fair!
XOXO
How did you do the blue and white texture on the sides?
Hi Mary, this is the first technique that we show in our video--the buttercream is applied bit by bit with a small rounded spatula (on top of the crumb coated layer of frosting).
I’m fairly new to working with fondant and have always bought pre-colored fondant previously, but it seems wasteful for me to do that for such a small amount of each color. Do you recommend buying white fondant and tinting? If so, is there a special technique to tinting fondant as opposed to standard icing? My son has asked for a my little pony cake for his birthday so I’m hopeful I can pull this off and he’ll be convinced :)