My Cake School

Cake Tutorials & Recipes

  • Facebook
  • Instagram
  • Pinterest
  • Twitter
  • Free Cake Videos
    • The Basics
    • Buttercream Techniques
    • Carved/3D
    • Chocolate Techniques
    • Cupcake, Cake Pop, etc. Methods
    • Gum Paste & Fondant
    • Themes and Occasions
    • See All Videos
  • Free Blog Tutorials
  • Recipes
    • Cakes and Cupcakes
    • Fillings
    • Fondant/Gumpaste
    • Frostings and Glazes
    • Miscellaneous
  • Contact
  • About

Birdhouse Cake Toppers~ A Cake Decorating Blog Tutorial

April 13, 2014 By Melissa Diamond 14 Comments

54 shares
  • Share
  • Tweet


In today’s tutorial, I’m going to show you how to make the most adorable fondant birdhouse cake toppers!  These are the perfect accent for your springtime cakes (or if you are like me and love anything bird-related, they are perfect all year round)!

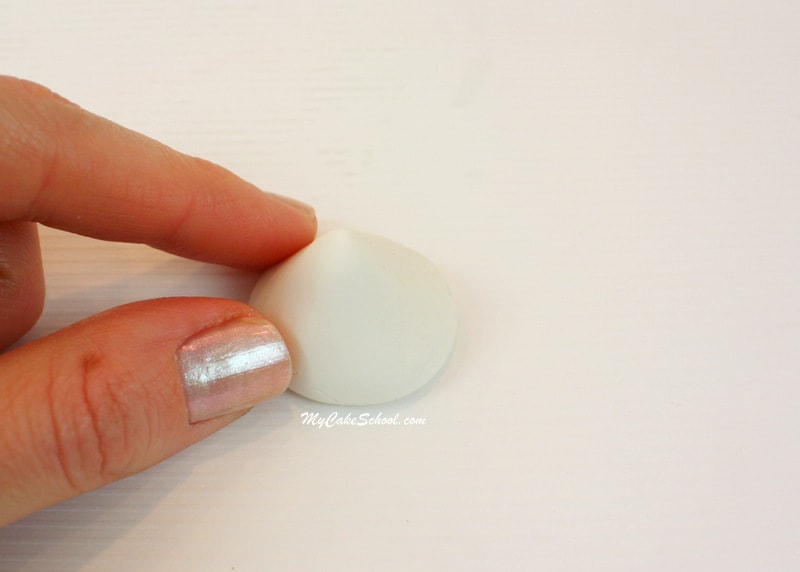
I started with a round ball of fondant approximately 1 inch wide.  If your fondant seems very soft, knead in a little tylose  (or you can use gum paste).  I kept the birdhouses nice & small so that they wouldn’t be overly top-heavy.

I rolled the fondant into a ball until nice and smooth, and then rolled it into more of a cylinder.

Adorable Birdhouse Cake Toppers! Free Cake Tutorial by MyCakeSchool.com.

I flattened both ends…

Adorable Birdhouse Cake Topper Tutorial by MyCakeSchool.com! Free Tutorial! …and then added creases with my knife for an added detail.

Easy and Adorable Birdhouse Cake Topper Tutorial by MyCakeSchool.com!

Next, while the fondant was still soft,  I twisted a long lollipop stick into the bottom of the birdhouse (just far enough to be secure.)

Adorable Birdhouse Cake Topper TUtorial by MyCakeSchool.com!

To form our roof, I used a piece of fondant about half the size of the “body” of the birdhouse & rolled into a ball (approx .5 inches in width.) — Then, I flattened the bottom and shaped into a  wide cone, approximately the width of the cylinder that we made in the previous step.CUTE and easy Birdhouse Cake Topper Tutorial by MyCakeSchool.com! Online cake tutorials, recipes, and more!

I used a toothpick to add lines to our roof, and then added additional pressure at the base of each line to give the edge of the roof a scalloped look. birdhouse6

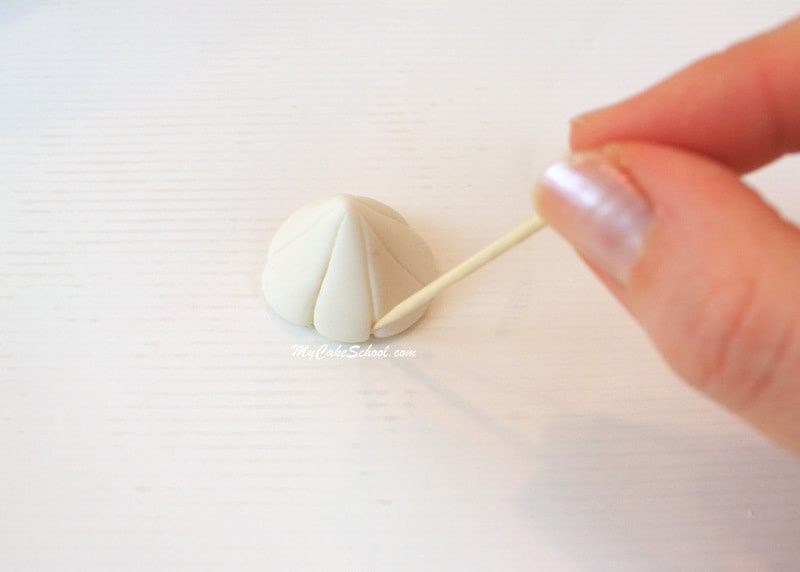
I added the roof and used a bit of piping gel as my glue.  Then, I created a hole with my paintbrush handle.

The Cutest Birdhouse Cake Topper Tutorial by MyCakeSchool.com! Free Tutorial!

The first birdhouse can dry a bit while you work on your next birdhouses.  I usually just poke my stick & birdhouse into a block of syrofoam. If your fondant birdhouse is very soft, and you are afraid that it will slide down the stick, just lay it on a bed of shredded paper towels, pillow filler or your “fluff” of choice.

Now for our next birdhouse…

The basic idea is the same, but this time I trimmed my flattened ball of fondant into a square.

CUTE Birdhouse Cake Toppers! Free Tutorial by MyCakeSchool.com.

I added details with a toothpick, a triangle of fondant for a roof, created the hole & inserted the stick just as before.

Precious Birdhouse Cake Toppers! Free tutorial by MyCakeSchool.com.

My  next birdhouse is a pentagon shape..

Adorable Birdhouse Cake Topper Tutorial by MyCakeSchool.com!

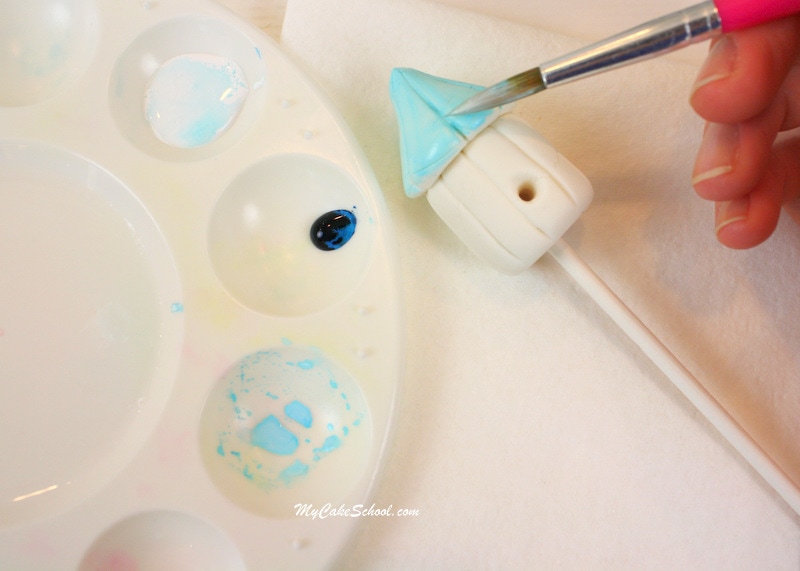
Next, I painted my white birdhouses with a “paint” of coloring gel mixed with a small amount of vodka.  The vodka allows the paint to dry very quickly.  (You can substitute an alcohol based flavoring like lemon extract in place of the vodka.)These Birdhouse Cake Toppers are the CUTEST! So simple to make. Free cake tutorial by MyCakeSchool.com.

Painting is my favorite part!  Design however you’d like.  I used the following colors:  Americolor Electric Green, Deep Pink, Lemon Yellow, Sky Blue, & Bright White.

Birdhouse Cake Topper Tutorial by MyCakeSchool.com! Free step by step tutorial! SO cute and simple!

I used sprinkles & a food coloring pen for added details, & a bit of pixie dust for sparkle.  My wide, flat round sprinkles are Wilton confetti sprinkles.  As an optional step, I used one of these pink sprinkles as a “perch” on my pink birdhouse & secured with piping gel. ;0)

I added a little detail to the edge of our green roof using a bead border of buttercream piped from a Wilton 2 tip.

Adorable Birdhouse Cake Topper Tutorial by My Cake School! Free step by step cake tutorial!

Next, I wrapped a 32 gauge piece of white floral wire (painted with our “paint” of green coloring gel & vodka), around the lollipop stick of our yellow birdhouse.  I spiraled the extra with a paintbrush handle.

Birdhouse Cake Topper Tutorial by MyCakeSchool.com! Free step by step tutorial!

Next, I made our birds!  Teardrop shapes of fondant with fondant beaks & food coloring pen accents.

Adorable Birdhouse Cake Topper Tutorial by MyCakeSchool.com!

Now for the cake decorating!

My cake is an 8″ (3 layer) cake, frosted with a crusting vanilla buttercream.  (Two favorite crusting vanilla buttercream frosting recipes from our Recipes section are: Fluffy Vanilla Buttercream & Classic Vanilla Buttercream.) My frosting is tinted with Americolor Electric Green & Deep Pink.

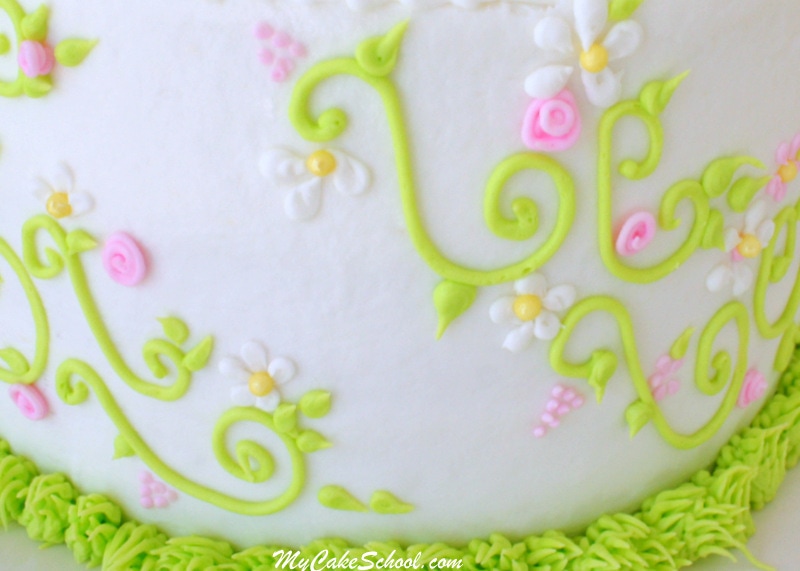
Using a piping bag fitted with a small round tip (Wilton 2), I piped scrollwork around the sides.  If you are not comfortable with scrollwork or would like another design, polka dots or a scattering of piped daisies would work nicely too!

The scrollwork represents vines…

Adorable Birdhouse Cake Topper Tutorial by MyCakeSchool.com! Free step by step cake tutorial!

…then, I added leaves (still with our Wilton tip 2).

Adorable Birdhouse Cake Topper Tutorial by MyCakeSchool.com! Add a little fun and height to your cakes!

Next, I added various simple flowers.  (Daisy centers are added later in the form of yellow sugar pearls.)

I also added a border using my grass tip (#233).

Adorable Birdhouse Cake Topper Tutorial by My Cake School! Free step by step tutorial!

Here is a closeup of our finished scrollwork/floral design.  You can see that the flowers are very simple, but the look is elegant!

21-IMG_4624

I pushed our birdhouses into the top of the cake, added a few birds here and there (& attached a couple to the birdhouses with piping gel.)  Cuteness!!

I also added a small bead border around the top of our cake using a Wilton tip 2.

Adorable Birdhouse Cake Topper Tutorial by MyCakeSchool.com! SO cute and simple! 
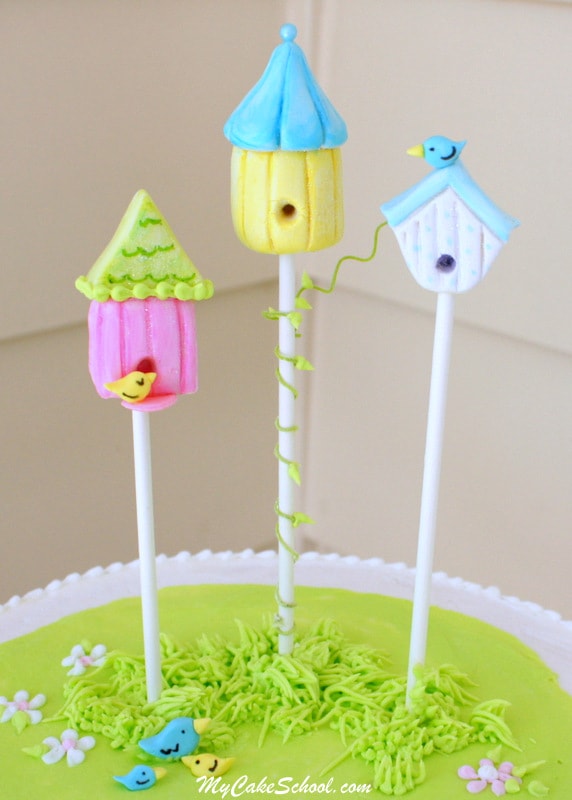
Now, our cake is finished!


The cutest Birdhouse Cake Topper Tutorial by MyCakeSchool.com! Free cake tutorial!


Adorable Birdhouse Cake Topper Tutorial by MyCakeSchool.com! Free step by step tutorial!

I hope that you enjoyed this tutorial!  The birdhouses are so simple & cute, &  no matter if you have one or several, they instantly add a dose of charm & personality!

*I think that it is best to add the birdhouses just before your event, especially if transporting the cake.  Since the toppers are top heavy, it just makes things simpler!

If you give these a try, I hope that you will let us know!  We would love to see.  Thank you for stopping by, and come back again soon! xo

Related posts:

  1. Springtime Bunnies~ A Cake Tutorial
  2. Let’s Hoo Hoo Hula!~ Owl Cake Topper Tutorial
  3. Octopus Cake Tutorial! My Cake School
  4. Nursery Rhyme Cupcakes!
  5. Cookout Cupcakes!~ Free Blog Tutorial

Filed Under: Spring, Summer, Custom Toppers & Figure Modeling, Blog Tutorials, Gum Paste & Fondant Tagged With: cake toppers, birdhouse cake

Comments

  1. Paula M. April 13, 2014 at 12:22 am

    Wow Melissa. This is sweet and cheery! I think even I can make those birdhouses. :-) Your tutorials are so user friendly and easy to follow. Very encouraging to someone who rarely uses fondant. I love all the colors you chose too. I would like to ask you about the “bright white” color. I have never used white as a color. Is this how some decorators get their buttercream so white, even when using butter? Well…I just love your new designs and all the thought you put into them. :-)

    Reply
  2. MsGF April 13, 2014 at 9:49 am

    Very pretty! Very springy.

    Reply
  3. Mom2three April 13, 2014 at 3:36 pm

    Just precious!

    Reply
  4. Freda April 15, 2014 at 8:02 am

    Love the step by step video’s….thank you it helps so much!!

    Reply
  5. Lisa April 18, 2014 at 9:41 am

    You are so incredibly talented. Your ideas are fresh and new and I don’t think I have ever seen a design I didn’t like. I think you might have the best “job” in the whole world! Thanks for sharing your awesomeness!!

    Reply
  6. Naila April 18, 2014 at 2:35 pm

    Very pretty and beautiful

    Reply
  7. stella Nanna April 22, 2014 at 4:32 pm

    it so beautiful and Colourful and u made it easy to learn thx

    Reply
  8. marlene April 24, 2014 at 8:12 am

    The flat round green section on the top of the cake is made from what? Is it fondant or buttercream? Thank you so much.

    Reply
  9. Melissa Diamond April 24, 2014 at 10:05 am

    Thanks everyone for your comments!

    @Marlene– Yes, that is buttercream also. Once the white layer of buttercream was smoothed, I decided to spread on an additional layer of green buttercream on top to represent grass (and then smoothed that also) .

    Reply
  10. Anne Marie ( skipper) May 8, 2014 at 12:04 pm

    Hi Melissa
    I’m working on my scroll work ,but don’t seem to have the right consistency of buttercream . Have you any tips on how to get it right ? Many thanks x

    Reply
  11. BeBe May 8, 2014 at 12:21 pm

    Is it too soft? If so, add a bit more confectioners’ sugar to thicken it up. Also, if you have very warm hands it can soften up the frosting. You can put your piping bag into the refrigerator for 5 minutes or so and let it firm up again.

    Reply
  12. marie, the EpicureanPiranha May 27, 2014 at 7:54 pm

    This cake and little birdhouses and birds are very very sweet! I’m really not into neon colours on pastry, but I even love the colours you’ve chosen! It’s such a cute and cheerful cake, I’m sure it made all your guests smile (and not just the small ones!) :-)

    Thanks for sharing, Melissa!

    Marie from Boucherville, Québec, Canada

    Reply
  13. John Toler June 5, 2017 at 8:55 am

    I love this cake. These small bird houses are really very beautiful. If I make it, I will not eat it but will keep it with me as a decorative element. I will definately try to make it in home.

    Reply
  14. Rajiv Kumar June 21, 2017 at 4:19 am

    I din not know, how to bake cake but with the help of this article I make it successfully. It is super tasty

    Reply

Leave a Reply Cancel reply

Your email address will not be published. Required fields are marked *

  • Lemon Buttermilk Cake {A Scratch Recipe}

    Lemon Buttermilk Cake {A Scratch Recipe}
  • Sweet Balloons Cake

    Sweet Balloons Cake
  • White Chocolate Coconut Cake

    White Chocolate Coconut Cake
  • Striped Buttercream Panels Cake

    Striped Buttercream Panels Cake
  • Lemon Coconut Cake with Lemon Curd Filling

    Lemon Coconut Cake with Lemon Curd Filling
  • Milk Chocolate Cake

    Milk Chocolate Cake
  • Buttercream Tulip Cake

    Buttercream Tulip Cake
  • Flamingo Ruffle Cake- A Cake Decorating Video Tutorial

    Flamingo Ruffle Cake- A Cake Decorating Video Tutorial
  • 60+ of the BEST Cake Recipes for Spring and Summer

    60+ of the BEST Cake Recipes for Spring and Summer
  • Lemon Cake {A Scratch Recipe}

    Lemon Cake {A Scratch Recipe}
Facebook Instagram Pinterest Twitter RSS
  • Free Blog Tutorials
  • Free Cake Videos
  • Recipes
  • Contact
  • About
  • Free Blog Tutorials
  • Free Cake Videos
  • Recipes
  • Contact
  • About

Copyright © 2022 My Cake School. Melissa Diamond. All rights reserved | Terms and Conditions | Privacy Policy