Autumn Cake- Chocolate Leaves!~Blog Tutorial
In today's cake tutorial, I'm going to demonstrate how to make the most beautiful chocolate leaves for your autumn and Thanksgiving gatherings. These delicate chocolate leaves are the perfect finishing touch to any fall dessert!

I absolutely love this time of year, and so to celebrate, I think it's time to get fancy with our fall decorating.
Don't worry, as fancy and impressive as these chocolate leaves are, the process couldn't be simpler! No special decorating tools are required. All that you need are leaves and chocolate candy coating.
Your friends are family are going to be completely amazed by your chocolate and cake decorating skills! The fact that it's a super-easy technique is going to be our little secret! Shhhh.... ;0)

Table of Contents
How to Make Chocolate Leaves for Cakes
Here's what I did....
- First, I gathered up some leaves. Sturdy leaves with prominent veins are the ones to look out for. (I tried some oak and maple leaves and they were too thin). Preferably, you'll want to pick them right off of the bush or tree rather than from the road- ha ha. :0) -
- My favorites were camelia, gardenia, and rose leaves. While we're not going to be eating the leaves, it's a good idea to make sure that your leaves are not toxic. For a good reference, click HERE.
- After selecting some leaves, you'll want to gently wash them with soap and water and pat dry.

- Next it's time to prepare the chocolate! I work with candy coating or candy melts because it simplifies things (no tempering necessary).

- After melting the dark chocolate and white chocolate in the microwave, I mixed a little of each color into our third bowl so that we would have three different shades to work with.

- Next, it's just a matter of brushing on the chocolate. Make sure to flip over your leaves and paint the backside. This way, you will have more detailed veins.
- By the way, if you start with lighter shades of chocolate first and work your way to the deeper shades, you will only need one paint brush (rather than a paint brush for each bowl.)
- I did my painting on a parchment-lined cookie sheet.

- After painting each leaf with chocolate, I moved the leaf slightly to the side so that it would not become stuck to the parchment paper. I predict that you will be neater than I was! I should have moved the painted leaves to a clean sheet :0) !

- Place your cookie sheet in the refrigerator or freezer until the chocolate is firm. (I prefer maybe 5 minutes or so in the freezer). The leaves are much less fragile when the chocolate is chilled and firm.


- My favorite part is peeling away the leaves! Just bend the stems away from the chocolate and pull back.

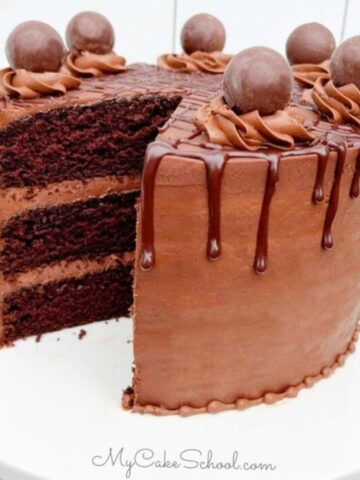
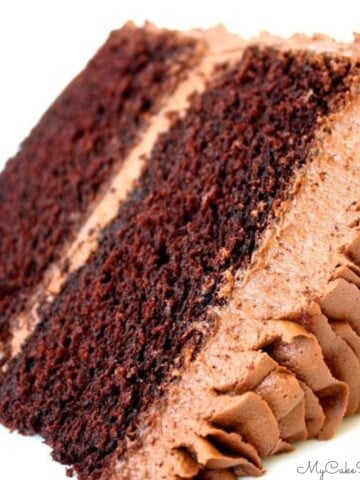
Here's the cake that we're working with today. An 8" chocolate cake with cream cheese filling & ganache frosting. Pretty....but it needs a little personality.

Let the decorating begin! I used a bit of ganache as a glue to keep the leaves in place.

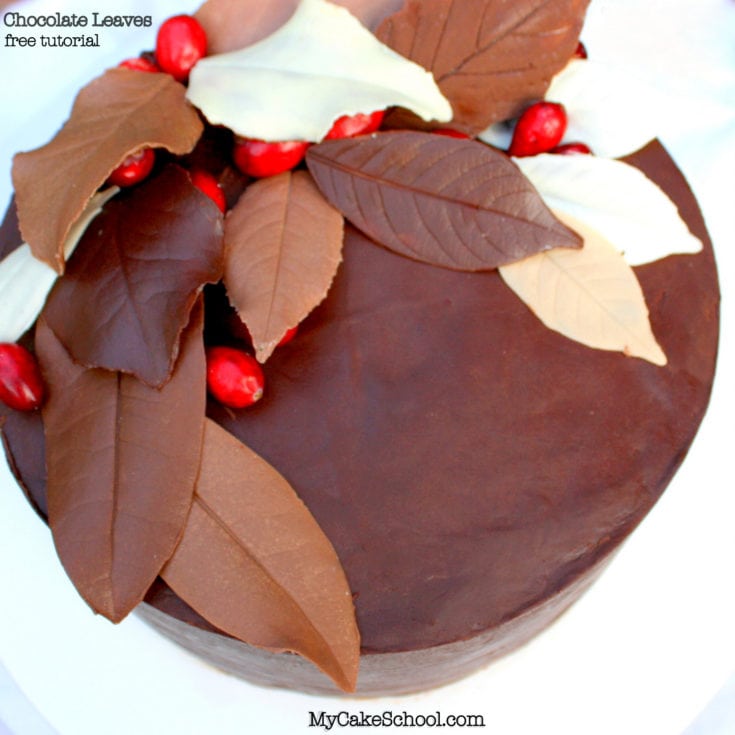
Keep adding leaves until you are happy :0) --I added a few cranberries for color and because they remind me of fall!

Here it is! This cake makes me want to put chocolate leaves on everything! ;0)


I loved making this cake and I hope that you will try it out too! -- By the way, I used a Fudge Cake & ganache recipe from King Arthur Flour--CLICK HERE for the recipe!
Favorite Chocolate Cake Recipes:
Update: Since Making this Tutorial, we have added many Chocolate Cake Recipes to our site! Any of these would be perfect for our Elegant Chocolate Leaves Cake.
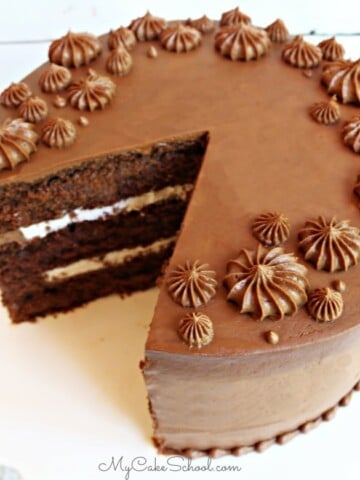
Some of our most popular are our Classic Chocolate Cake, Chocolate Sour Cream Cake, and Chocolate Velvet Cake. (The first two are more rich.)
We have lots of delicious chocolate cake mix recipes as well, including our Chocolate Mousse Cake, Easy Chocolate Sour Cream Cake, and Chocolate Cake from a Mix.
We hope that you enjoy this beautiful (yet surprisingly simple) decorating technique! If you make chocolate leaf cakes or cupcakes, post in the comments below! We would love to see :0)

How to Make Chocolate Leaves!~Blog Tutorial
These elegant chocolate leaves are so easy to make! Perfect for decorating cakes, cupcakes, and desserts!
Materials
- Chocolate candy coating- When I first made this tutorial, I used candy melts. Now, I use candy coating/bark coating (candiquick, etc.). Use your coating of choice.
- Cranberries- optional for decoration
- Parchment Lined Cookie Sheet
Instructions
Gather leaves for the project. Sturdy leaves with prominent veins are best. (I tried some oak and maple leaves and they were too thin). Preferably, you’ll want to pick them right off of the bush.
My favorites were camelia, gardenia, and rose leaves. While we’re not going to be eating the leaves, it’s a good idea to make sure that your leaves are not toxic.
After selecting some leaves, you’ll want to gently wash them with soap and water and pat dry.
Melt the candy coating. (I work with candy coating or candy melts because it simplifies things -no tempering necessary).
After melting the darker chocolate coating and white chocolate coating in the microwave, I mixed a little of each color into our third bowl so that we would have three different shades to work with.
Next, it’s just a matter of brushing on the chocolate. Make sure to flip over your leaves and paint the backside. This way, you will have more detailed veins.
If you start with lighter shades of chocolate first and work your way to the deeper shades, you will only need one paint brush (rather than a paint brush for each bowl.)
I did my painting on a parchment-lined cookie sheet.
After painting each leaf with chocolate, I moved the leaf slightly to the side so that it would not become stuck to the parchment paper.
Place your cookie sheet in the refrigerator or freezer until the chocolate is firm. (I prefer maybe 5 minutes or so in the freezer). The leaves are much less fragile when the chocolate is chilled and firm.
To separate the chocolate from the leaves (once the chocolate is firm), just bend the stems away from the chocolate and pull back. It should come right off.
That's it! Apply the chocolate leaves to your cakes or cupcakes. It's best to handle them when chilled so that they will be less fragile. You can secure or position them as you like with a little buttercream piped beneath.
Notes
Check that your leaves are non-toxic
Sturdy leaves with prominent veins are best
It's best to handle the chocolate leaves when they are chilled so that they will be less fragile.
Hi Grace, That was a great idea, sounds lovely! Thanks for posting !
I’m confused about painting the back / underside side of the leaf. Won’t that make it harder to peel away the leaf?
Hi Judy, once chilled, the chocolate peels away very easily from the leaves. Painting the backside gives us more prominent details- veins, etc.
test