Stained Glass Cake in Buttercream Video
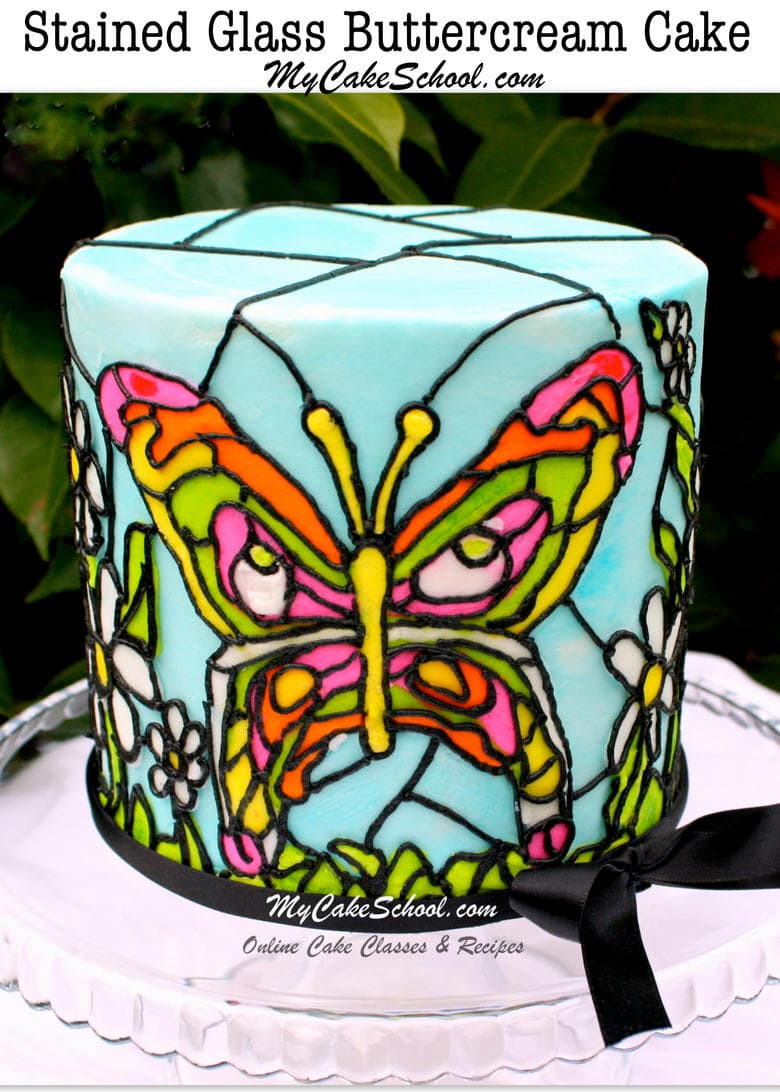
In this video tutorial, you will learn how to create a beautiful stained glass effect in buttercream!
We've seen many beautiful fondant stained glass cakes, but we wanted to try a buttercream version!

Table of Contents
Stained Glass Cake in Buttercream
I found this method of piping stained glass to go much more quickly than the fondant versions that are hand painted.
We used a butterfly theme for our stained glass but you can use this method for any design. It's amazing how outlining a design in black can transform it so quickly & dramatically into "stained glass"!
I hope that you enjoy the video! Make sure to check beneath the video for additional information!
Materials
We started with a 6 inch round, white almond sour cream cake. It was 3 layers and 5 ½ inches tall. The cake is frosted with our Fluffy Vanilla Buttercream recipe (in the recipes section).
-Use any crusting buttercream frosting. (Non-crusting will be a little trickier because it will be harder to smooth.)
-Coloring Gels-- I used Americolor Sky Blue, Electric Green, Deep Pink, Super Black, Lemon Yellow, and Orange. (If you plan to
do any painting, you could also use Bright White)
Piping Tips: Any small round tips will do. I used a Wilton tip 2 or 3 to pipe the colors onto the butterfly.
Ribbon Border
Enjoy the Video!
We hope that you enjoy this buttercream stained glass cake tutorial! If you give it a try, we would love for you to leave a photo and comment below!

simply beautiful
mis i try to mix color to achieve black color for my icing .....but its not successful can you tell me what color can i used to achieve black color .....thanks
Hi Edgardo, we use gel color to achieve black. You will need to use quite a bit of color to get black. When ours was piped onto the cake it had a dark grey look but after a few hours the color darkens and it looks black on the cake. Some bakers like to begin with chocolate frosting and add black color to achieve black. This stained glass needed only a small amount of black frosting for piping, so that made it easier.
Thank you so much I really enjoyed it. Hope to try it to some day.
Hi sent an email but got no reply, I love this class but how do I use a template. I have a drawing with a stained glass effect and I would love to transfer it unto a cake, how do I go about this.also how do I use piping jel in this technique.I eagerly await your reply.thank you
Hi Nkiruka, I'm sorry that we missed you before!
If you'd like to use a template, there are two ways you could do this. You could chill your frosted cake until the frosting is firm, then press the template against the icing, and using a straight pin, make pin pricks along the lines of the template and remove. This will give you a "map" to follow.
Another method would be to do a frozen buttercream transfer. This would work especially well if the stained glass effect will be on the top of the cake. It can be a little trickier on the side of the cake as the frozen buttercream transfer has to follow the curve of the cake. Here is a tutorial on frozen buttercream transfers!
As for piping gel, I have not used piping gel for the stained glass technique. You could either lightly brush/pipe over your stained glass colors with clear piping gel, or you could actually tint your piping gel the desired colors. I hope this helps!
That is really beautiful! Wonderful job!
Thanks Lisa! ;0)
I subscribed to your site just so I could learn this technique. I now have a year's worth of school for what I would have paid for one tutorial elsewhere. And this was awesome! So beautiful. It's my very next project. Thank you for the all the details and tips. I hope I'll remember to come back and post my finished project.
Thank you so much, Marcia! So glad that you joined our site ;0)
Did this for a party at my home. Thanks for the tutorial - everyone now thinks I'm phenomenal!
Marcia, I LOVE it!!! So pretty! xoxo