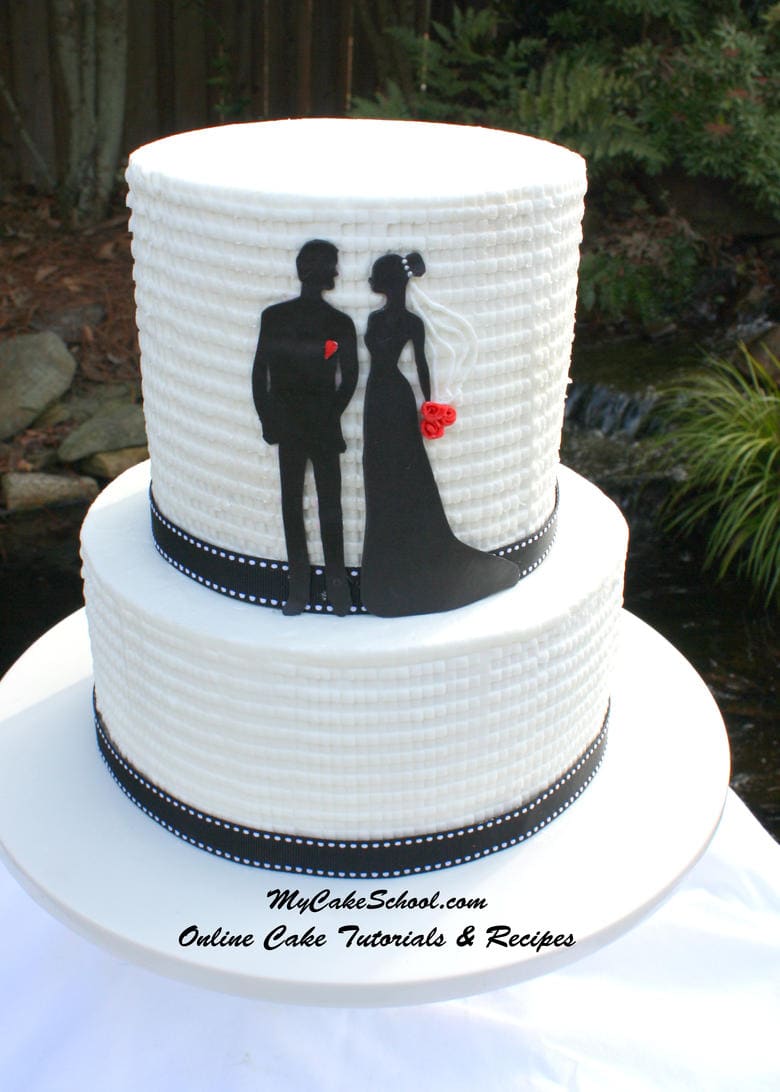
Fondant Silhouette Design & Textured Buttercream~Video!

I love the elegant look of silhouettes on cakes. The wonderful thing about silhouettes is that the design options are endless. The effect is dramatic, yet so simple to achieve. In today's tutorial, I really wanted to create a bride and groom. Actually, the design that I demonstrate would work for a number of occasions~ bridal showers, engagement parties, rehearsal dinners, and even weddings.
Another technique that you will learn in this video is a unique style for textured buttercream! I used a very inexpensive tool to create a pattern in my crusting buttercream that resembles a woven pattern with a modern feel. Again, impressive but totally doable for any skill level!
I hope that you enjoy watching this video as much as I enjoyed making it! If you give this design a try, make sure to leave a photo in the comments!
Table of Contents
Materials
In this tutorial, I'm using 8" and 6" tiers (3 layers each--with the 6 inch layers being fatter)
These are frosted with our High Ratio frosting but any crusting frosting will do!
Black Satin Ice Fondant (pre-colored)
Ateco Cake Comb
Xacto Knife
Black Ribbon (ours was ⅜ inch)
waxed paper-for transferring your fondant design to the cake
Vegetable Shortening-- for lightly greasing the waxed paper and greasing the silhouette
Buttercream or piping gel for additional "glue" for the silhouette
tylose powder (optional--I kneaded a little into my fondant so that I could roll it thinner)
Red Satin Ice Fondant (or red coloring for white fondant)-- This was for our roses
**TEMPLATE for Silhouette Couple
Miscellaneous
Cutting board or cake cardboard to protect your countertops as you cut out your templates!
2 cardboard cake circles & 4-5 bubble tea straws or supports of choice if doing 8"/6" tiers (I used 4)
Notes~
Use the templates that I used as they are, or do some experimenting. You can print off the images and draw on the bride and groom to make changes to hair styles, facial features, bridal gown, arm positions, body size, etc. Then cut out the bride and groom following the lines of any changes made.
I printed my images off on photo paper so that they would be nice and sturdy, but cardstock works well too. Cutting out the templates from photo paper with an xacto knife for me was much more time consuming than actually using the templates to cut out the fondant silhouettes.
You may find invitations or clip art silhouettes online that would work well with your designs. Some of these are free, and others you can make changes to in order to make them uniquely yours.
Have fun with these techniques! I can't wait to see what you all come up with ;0)

I love the fact that its so simple and easy and soooo elegant!!! Great tutorial Melissa & Bebe!!! What size were these cakes again? And what kind of cake is it? Thanks :D
Hi Yaneri, we used 8 inch and 6 inch, each tier being 3 layers high. Our six inch layers were taller than the 8 inch layers. The top tier is 5 1/2 inches tall. We used the White Almond Sour Cream Recipe.
I can't wait to do a cake like this. I have a Bridal Shower in August and was wondering what I was going to do - now I know. Thanks!
Ho great
I thought this tool was to "comb" around the cake like the scraper you often use to smooth the icing
I like this pattern
Once again I have learned something usefull from My Cake School :-)
Thanks everybody! @Cheryl--I'm so glad that you like the design and plan to try it! --@Linda~ You are right, normally this tool would be for combing the cake! Glad that you like this alternate use ;0)!
Beautiful!!
So simple and lovely. I loved the additions of the flowers and veil. They are so delicate, but for a wedding occasion, just perfect!
Beautiful ideas Melissa ! ..I have a wedding cake in Feburary and the bride 'thinks" she might want a Bride n Groom Silhouette...looks like you had this idea just in time for me..if I do use your lesson I will post a photo. You make everything look so easy Melissa...thanks again .
Very beautiful! Elegant and simple!
R
I too love this silhouette pattern. Could some type of topper be used or would this take away the from your silhouette? I need to do a anniversary cake (50th)
This cake is just darling!! Hoping for a good reason to re-create it! Thanks so much for keeping me inspired:)
Do you have the bride amd groom template on website?
If so, how do I find them?