Sugar Egg Cake Tutorial
With Easter just around the corner, we are happy to share our latest video for a Sugar Egg Cake with you!

When I was little, I LOVED my mom's sugar egg collection. There's something so special about sugar eggs with their delicate piping and sweet scenes inside.
We tried to capture that same feeling in today's cake design, and I think we came close ;0) I hope that you enjoy the tutorial!
Table of Contents
Materials for Sugar Egg Cake
We used four 6" round cake layers with two 22g. rice cereal treat squares shaped into the rounded top. (You could use scrap cake if you would rather to create the top, but cereal treats were simpler for us!)
White Chocolate Ganache (simple spreadable recipe--a 3:1 ratio of chocolate to cream. 680g white choc chips to 227g heavy cream) We used Nestle white chocolate chips.
Fluffy Vanilla Buttercream (or your buttercream of choice. I prefer a crusting buttercream so that I can use the Viva paper towel method of smoothing.)
Viva Paper Towels, or a paper towel/napkin that has no quilting (if using the Viva method of smoothing buttercream.)
2 cardboard cake circles- one for the base and another halfway up.
5 bubble tea straws or your supports of choice (4 for the bottom tier, 1 for the top (to support the cereal treat)
Coloring gels- Wilton Rose, Wilton Leaf Green, Americolor Lemon Yellow
Piping Tips: Wilton 3, 21, 104, 125
White Fondant- small amount for bunny (you could also pipe with buttercream if you'd rather)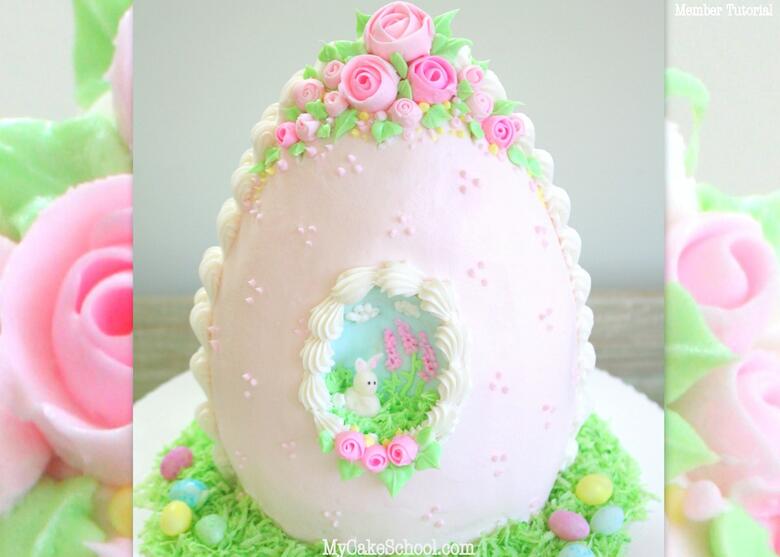
Notes:
As we demonstrate in the video, the cake cardboard that is placed within the cake for support has a piece removed to allow for the carving that will come later for the interior scene of the egg.
After carving away the cake (using our oval cutter as a guide), The opening was approx. 3 inches long, 2.5 inches wide, and 1 inch deep.
This can vary of course in length & width, depending on your desired look, but I wouldn't recommend a depth of much more than 1 inch of cake.
Enjoy the Video!
Thanks so much for stopping by! We hope that you enjoy this Sugar Egg Cake tutorial! If you give it a try, we would love for you to leave a comment and photo below!
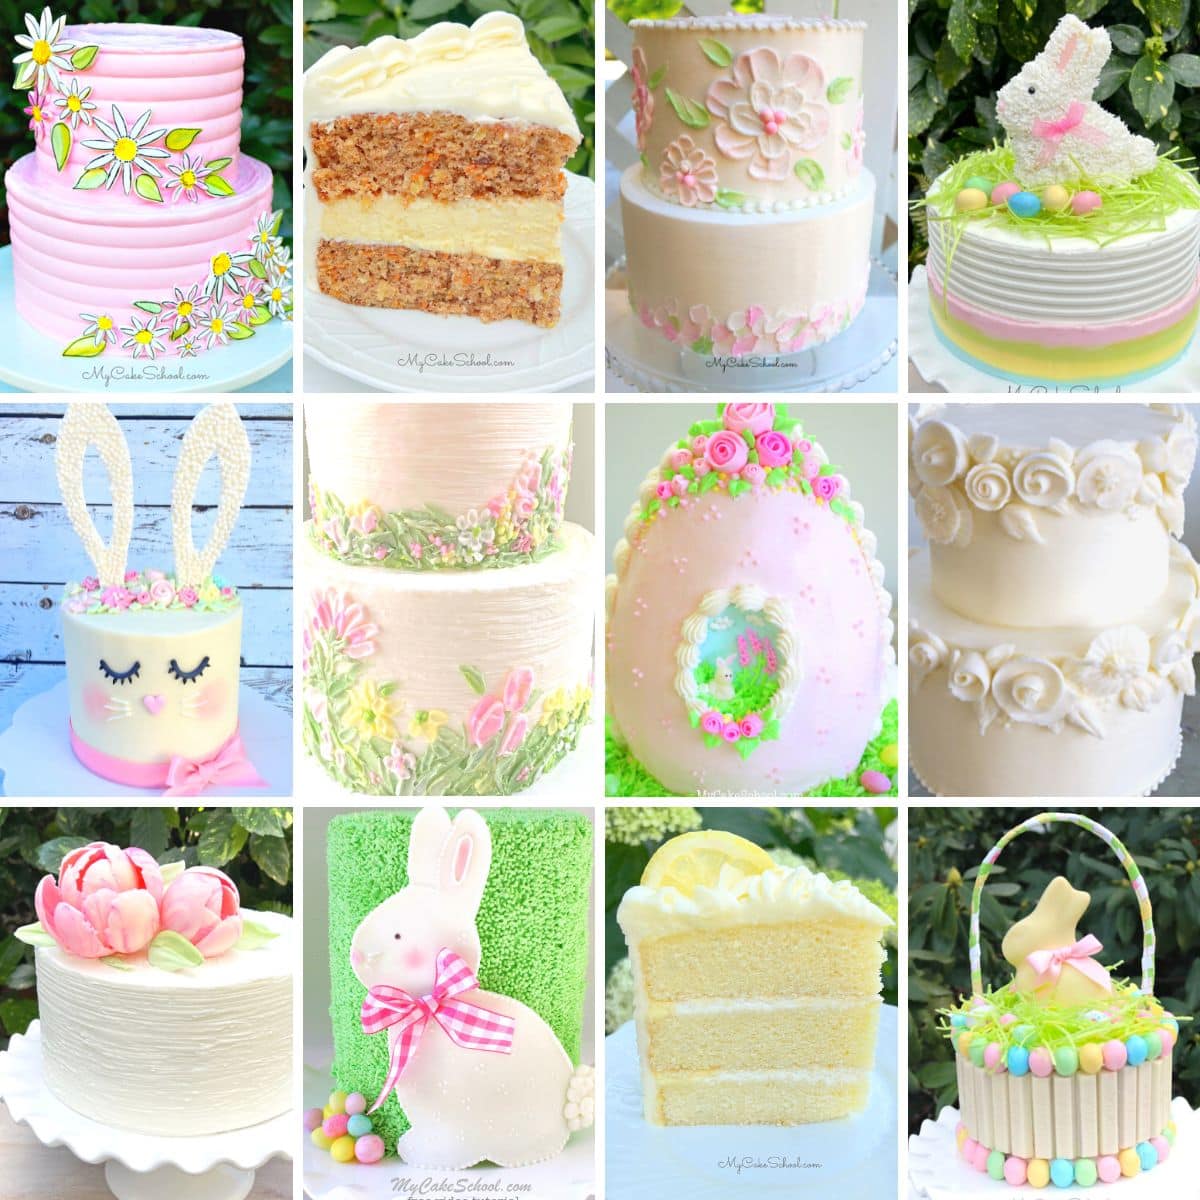
Don't miss our other beautiful Easter Cakes and delicious recipes in our 60+ Easter Cakes roundup! We have so many great cake designs and recipes to share with you!
Hi,
I have a few questions that I'm unclear about.
1. Melissa stated the recipe for White Chocolate Ganache would be listed below the tutorial but I'm not seeing it (or a link.) Am I missing something?
2. What is the purpose of the groove cut in the top piece of the cardboard? I never saw it mentioned again in the video when icing the cake.
3. About how deep is the oval opening in the front? I'm a beginner and would find that info helpful as to make sure I don't cut too far in.
I love this Easter Egg Cake...so pretty and hoping to make it for Easter. Is this a beginner project and is this school (I recently signed up) for beginners? Are the projects labeled as such, beginner...intermediate etc? (oops more than a few questions!) :)
Thanks for all your help!
Hi Gloria- Thanks for letting me know, I've updated the ganache amounts along with the link to our Simple Spreadable Ganache recipe located in our Recipes section.
The cardboard that is within the cake (with bubble tea straws beneath) supports the upper tier, just as with a double barrel cake design. The little notch that we removed allows us to later carve out the small space that becomes the interior of the egg. As we show in the video, you'll want to mark your bottom cake board in some way so that later you will know approximately where to carve out the space for your interior scene.
The interior of the cake after carving our hole is fairly shallow...approx one inch depth. The width and length of the opening can vary depending on the look you're going for/size of your cutter, etc. but ours was an oval approx 3 inches long and 2.5 inches wide.
This cake involves techniques that may be a bit difficult for someone brand new to cake decorating. There are several steps involved. For instance, carving, frosting a cake with a smooth finish, piping, etc. That said, I usually do not label my cake projects as "beginner", "intermediate", etc. because what comes easily for one beginner may be a struggle for another. Some decorators are "Buttercream people"right off the bat, others aren't but can model a fondant figure perfectly on the first try. ;0) - The best place to go for someone new to cake decorating is our Basics section. I would recommend the "How to Make a Cake from Start to Finish", and then our Star Tip & Petal Tip videos, Viva Paper Towel Method of Smoothing, etc. Our Buttercream Techniques section has lots of fun techniques also that are beginner-friendly. The more you practice and try new things, the more you will develop your own style & discover what you excel at. Have fun experimenting and let us know if you have more questions! ;0)
Melissa, Thank you so much for taking the time to respond in depth to my questions. That was all so helpful and I will definitely take your suggestions as to where to start here in the school. Thanks again! ?
Just a couple more questions! ? Did you use 6x2" pans or 6x3"? Your cake layers look tall. What is the overall finished height of the cake if you know.
And what thickness of buttercream should be applied?
Thanks Melissa!
Melissa, I was so excited when I saw this adorable cake and couldn't wait to try it. Because your tutorials are so helpful, it was truly easy to make. I had such fun and can't wait for next Easter!! Thank you for sharing. Here's my finished product.
Nancy you did such a FANTASTIC job!!! I'm so happy that you made it, I know that everyone will love it! xoxo
@Nancy - You did an AWESOME job! Love the flowers and addition of little purple dots. :)
@Melissa - I'm so sorry to have bothered you with more questions. I know you're busy. I'll just apply different thicknesses of icing and see what works best. I'll figure it out! Maybe you mentioned it in the video. I'll go back and check there again.
Not too bad for a beginner! I sure learned a ton. Shape could be better, but overall I'm happy since so many techniques in this was a first for me. Thanks for this beautiful cake Melissa. I'll try to upload a photo. Not sure how to do it yet.
I don't know why it uploaded sideways or how to fix that. Sorry.
Gloria, I'm just now seeing your photo and it is AWESOME! I'm thrilled that you made the cake and you did an excellent job. I'm sorry I missed your question earlier about the thickness but it looks like you did everything perfectly. (I probably apply my frosting about 1/4 inch thick...although it may have been slightly less with this particular cake since it was ganached beforehand.) -
As for the sideways picture, I'll have to experiment a little to see if I can duplicate the issue. Are you uploading from your phone by chance? I'll let you know if I can figure it out (I wish we had a rotate button!) ;0)
Congrats on a fantastic cake!! xoxo
Thanks so much Melissa for the kind words. ? My husbands going to see if he can figure the picture problem out later today. I did upload from my phone to 2 other sites, but it only showed up sideways here. He thinks it photo may have been to big.
I love it. now I will never get any real work done, will just want to watch videos and make cakes.