How to Make a Cake with Zebra Stripes on the Inside!
Today I'm going to demonstrate how to make a cake with zebra stripes on the inside! This is such a fantastic surprise-inside cake and a fun alternative to a traditional chocolate and vanilla marbled cake.
By the way, I did not invent the zebra cake. I'm not sure who did--but if you google zebra cakes, you'll see all kinds of recipes that point to basically the same outcome--very cool looking zebra slices! You'll see that part in just a second.

First, let's talk batter-- You'll most often see chocolate and white zebra cakes, but for a fun twist, you can tint your batter with coloring gels to create all sorts of unique combinations of colorful stripes!
We went the boxed cake route and bought a box of Duncan Hines Devil's Food Cake, and a box of Duncan Hines French Vanilla. We chose these because they don't have pudding in the mix (like Pillsbury & Betty Crocker, which can be a little thick for this project--although I love them for anything else).
We prepared the batter for each cake mix separately and found the batter to be just the right consistency. If the batter is too thick, the effect will be more difficult to achieve. If they batter is very thin, it may spread too quickly.
(*** If you would like to try this cake with a scratch recipe, you can choose your favorite white or yellow cake recipe and then divide it approx. in half-- you can stir approximately 3 tablespoons or so of dutch processed cocoa powder into one of your bowls of batter to create chocolate batter.
Now, let's make a zebra cake!
We started with our two bowls of cake batter....

Then, we poured ¼ cup of vanilla batter into the middle of our 8" pan. It will spread a little bit. Then...

Measure out a ¼ cup of chocolate batter and pour it in the center of your vanilla batter.

Repeat this process, continuing with ¼ cup scoops of alternating flavors, each flavor of batter dropped into the center of the previous circle of batter. The batter is thin enough that it does not take long at all for the batter to spread and push out a little bit.

Continue the process until your pans are approximately ⅔ full. (We had a couple of cups leftover, which we used to make extra cake layers for another time.)
Look how pretty!...

This beautiful striped batter is ready for the oven!

Well...here's where it would have been nice of me to take a picture of the baked layers. They look exactly like the above picture, only...baked. :0)
I assembled my fat two layer cake as I always do...the bottom layer right side up, and the top layer top side down (with buttercream in between). I'm sure that the zebra effect would look pretty no matter how you stack your layers.
After crumb coating my cake with vanilla buttercream, I used a Wilton star tip 21 (one of my faves) to do a reverse shell pattern with my medium consistency buttercream.
I always love a nice reverse shell border, but I now like them even better when piped vertically!
You can see that I staggered mine a bit so that neighboring lines fit nicely together. Is it just me or does my cake look like it's wearing a snuggly buttercream sweater?! (Find out more about reverse shell borders in our tutorial on How to Pipe with a Star Tip!)

Okay, time for the big reveal! (I said a little prayer after all of that piping that the zebra stripes actually would be there when we cut into the cake!)
Whew! It worked! I couldn't be happier with the outcome. I LOVE these zebra print cake layers!

It's always nice to have a hidden surprise inside of the cake! If you haven't tried this method already, make sure to put it on your cake "bucket list". It's so much fun, and looks much more complicated than it actually is, which I love!
*An update~ When this tutorial was first created, the sizes of standard box mixes were larger (around 18.5 oz). Now, they are 16.5 oz. We tested the zebra cake again with the new smaller size and still had great results.
Thanks for stopping by, and I hope that you enjoyed the tutorial!

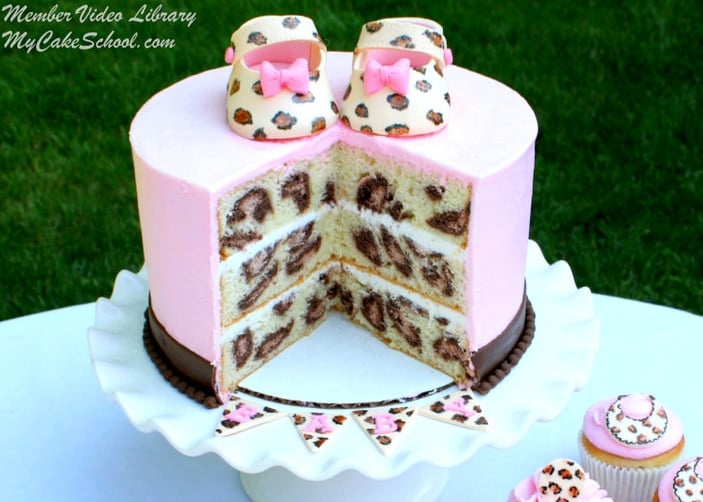
Did you know that we also have a leopard print (on the inside) cake video tutorial? It's one of our favorites! Leopard Print Cake Tutorial
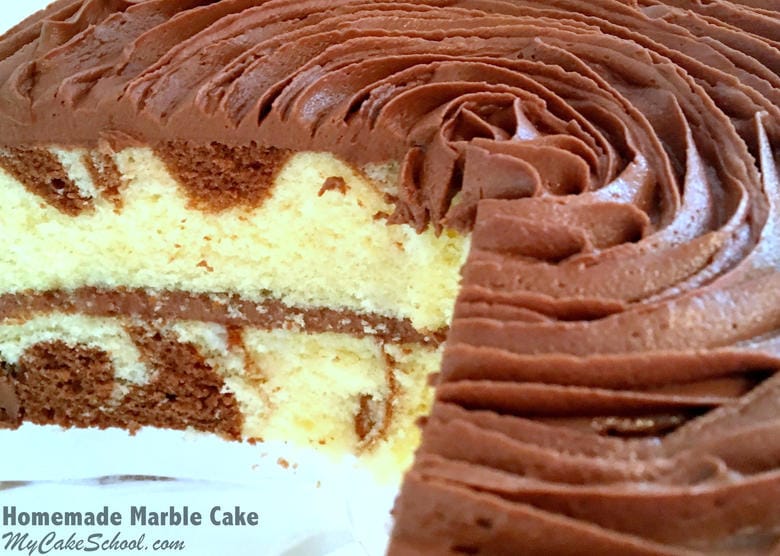
Or if you are just looking for a good old fashioned Marble Cake recipe, we have just the one! It's good to have options!
This is awesome! My sister loves animal prints so I'm hoping to use all your ideas at her next party!
Great tutorial! Thanks for sharing!
How fun! I've never seen a zebra cake before but it looks great! :-)
That is very enlightening! Thanks for sharing!
Put on the "bucket list" thanks for the awesome tutorial :)
I love this idea, how original, and what fun. Can't wait to have a go!!! Thank you. :0)
Wow, this is gorgeous! Definitely adding this to my list of things to try :) Looks so easy - I imagined it would be incredibly difficult to produce a cake looking like this. Thanks for the great & easy to follow tutorial :)
ok Real Housewives of NJ's Teresa Giudice is calling and asking you to make this for her next book! So cute...my daughter looked at this and said, MOM...You HAVE to make that with pink and brown stripes...MOM...you HAVE TOOOOOOOOOOOO.....FUN.
this is awesome! thanks so much for sharing ! i love it !
I love the looks of this cake! Not your typical marble cake - that's for sure. I'll have to try this one on my granddaughter -- with zebra inside and out. She'll have a blast with it!
You have made my day! tyanks for showing this! I have to mak a zebra cak for my nieces birthday and no I can stripe the inside as well.God Bless you!
I love it. I'm going to try it tomorrow.. Thanks for sharing.