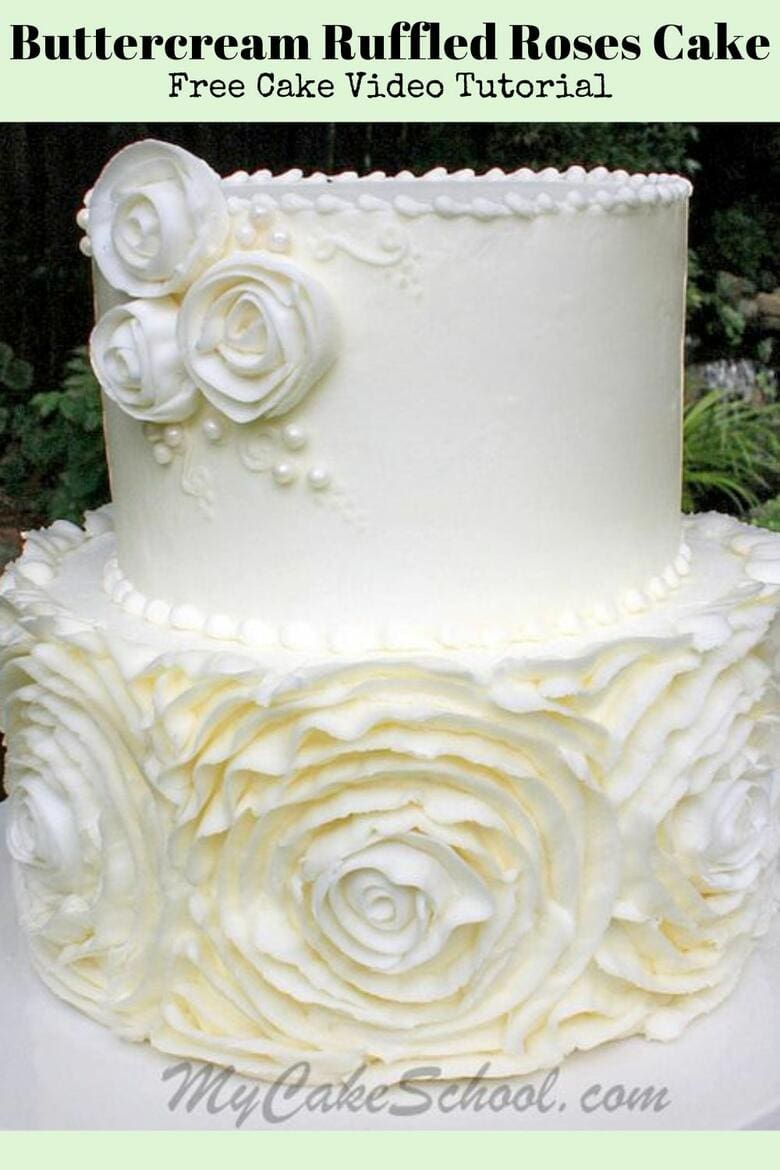
Buttercream Ruffled Roses Cake
I'm excited to share today's Buttercream Ruffled Roses Cake with you for a few reasons... its elegant, it is not nearly as difficult as most would imagine, and it's a technique that I previously thought was only possible in fondant!
Hooray for new buttercream techniques ;0)
Ruffles in all forms continue to be extremely popular in cake decorating, and I love the trend of incorporating large fondant ruffled roses around the sides of cake tiers.
Table of Contents
Fondant Ruffle Roses Option
I made a tutorial a couple of years ago on how to apply a single, large fondant ruffled rose to the side of the cake: Easy Fondant Ruffled Rose Cake But I have to say that I've been inspired by the trend of carrying several ruffled fondant roses all the way around the cake!
We later did an elegant Tiered Ruffled Roses Cake in Fondant as well!
Since I have a soft spot for buttercream & piping, I wanted to try this look in buttercream. I was so HAPPY to find that it is not nearly as difficult as I thought it would be!
Buttercream Ruffle Roses
The buttercream ruffled/ribbon roses that you'll see in my video are very similar to the ones that I have made in past cupcake tutorials, and even in my cascade of buttercream flowers tutorial.
This video just takes the technique one step further...and involves drying the small centers 2 days in advance. (See our note at the bottom of the page for an alternative to drying the centers!)
I hope that you enjoy it!
Materials:
My tiers are 8"/6", (each 4" tall)
I frosted my cake with High Ratio Buttercream Frosting- You could also use our Classic Vanilla or Fluffy Vanilla Buttercream.
Piping Tips Used: Wilton 104 petal tip for the roses, and Wilton 3 small round tip for the borders, and a Wilton 2 tip for scrollwork accents on the top tier.
Rose Nails
Waxed Paper cut into squares
*I used 7 roses around the sides of my cake and so I needed to dry 7 centers, plus another 3 centers for the top tier--for a total of 10 centers. (Dry a few more than you think you'll need.) -
Sugar Pearls- Optional
The usual: You'll need a cake board cut to the size of each tier, your supports of choice (I use bubble tea straws for 2 tiered cakes), and your cake base/pedestal
Freezing Option for Centers
***In a time crunch? If you are unable to dry your centers in advance, you can instead freeze the centers for 15-20 minutes or until firm.
Place on the cake and proceed as usual! The centers may have a bit of condensation as they warm to room temperature, but the shine will evaporate. This is a great time saver and a technique that I also use in our Buttercream Floral Wreath Cake Video Tutorial!
Enjoy the Video
Thanks so much for stopping by, we hope that you enjoy this elegant buttercream ruffled rose technique- it really is a lot of fun and we love the look! Keep this design in mind for birthdays, bridal showers, and even weddings!
The bottom tier would be beautiful in pink also- anything goes! ;0) Have fun with it!
I looove this
Hello, love the video and excited to do this cake this weekend. Unfortunately, I could not locate the high ratio shortening until today. Is there any way I can prepare the flowers to harden just a little quicker than (2) days. (I live in Arizona, don't know if that will help).
Thank you very much.
I absolutely love this video. Thanks so much Malissa, you are seriously talented.
Hi Melissa and Bebe: I made the cake and it was awesome! Have had cake orders now in 2 and 3 tiers and orders in lovely shades of mauve, green and pale peach. It is such an elegant cake. Took me awhile to get the hang of it but it was absolutely gorgeous when finished!!!!! By the time I finished the second one and turned the cake I was stunned how beautiful it looked. Freezing the centers worked beautifully. The cake was transported and all was great. Keep up with these new ideas. So far this one is a real hit!!!!!! Thank you so much. Sandy
Hi! If I used your crusting buttercream to make these ruffled roses, any chance that they will collapse in like 75-78 degree weather during transport in a car? Only a 30" drive here in southern California towards its destination.
Hi. I made this cake for my nieces bridal shower tomorrow and the roses keep falling off causing the piping to all fall off as well. Help!
Hi Debbie-- I'm sorry that this is happening! I don't understand why your dried centers aren't sticking to the cake for you. Just a medium consistency frosting should be strong enough to hold them unless the center is a bit on the heavy side? Since the shower is tomorrow I'm not sure if you will have time to dry more centers. However, as a Plan B, you could skip the dried centers and do a small "rose swirl" in the center using a 2D tip. Just pipe in the center and circle around once to give you something similar. Or you could just pipe little individual petals with a 104 tip to close in the center. Let us know how it goes!
Thanks Melissa. I used your crusting buttercream for the ruffle roses. Was that a mistake?
Hi Debbie, no that wasn't a mistake-- it should have been fine! How are things going?
The buttercream is so dry, it just keeps falling off.
Thanks for the tutorial. I used it to make a wedding cake this weekend and it came out great! I used my "kids" buttercream that does not crust at all. It's all butter, no shorting. I froze the centers and put them on a very cold cake with a bit of fresh buttercream. It also helped to pipe on a Very cold cake so the piping gets somewhat cold and sticks better. I also used a bigger rose tip #127 and then used the smaller rose tip to do some touch ups. Lastly, if you are messing up the flower when your area gets tight, put it in the freezer so you don't damage the ruffle next door. Hope that helps someone else using all butter!
It says video not found :(