My Cake School

Cake Tutorials & Recipes

  • Facebook
  • Instagram
  • Pinterest
  • RSS
  • Twitter
Login
  • home
  • Videos
    • The Basics
    • Buttercream Techniques
    • Carved/3D
    • Chocolate Techniques
    • Cupcake, Cake Pop, etc. Methods
    • Gum Paste & Fondant
    • Themes and Occasions
    • See All Videos
  • Shop
    • Miscellaneous Cake Decorating Supplies
    • Kitchen Appliances
    • Chocolate and Candy Making
    • Fondant and Gum Paste
    • Piping Tips
    • Molds, Mats, Embossers, and Cutters
    • Cookbooks
    • Dusts and Sprays
    • Pantry Items
    • Bakeware and Tools
    • Sprinkles and Candy
  • Free Tutorials
  • forums
  • recipes
    • Cakes and Cupcakes
    • Fillings
    • Fondant/Gumpaste
    • Frostings and Glazes
    • Miscellaneous
  • contact
  • join

Valentine Cake with Love Birds~ A Cake Decorating Blog Tutorial!

January 12, 2013 By Melissa D. 54 Comments

163 shares
  • Share
  • Tweet

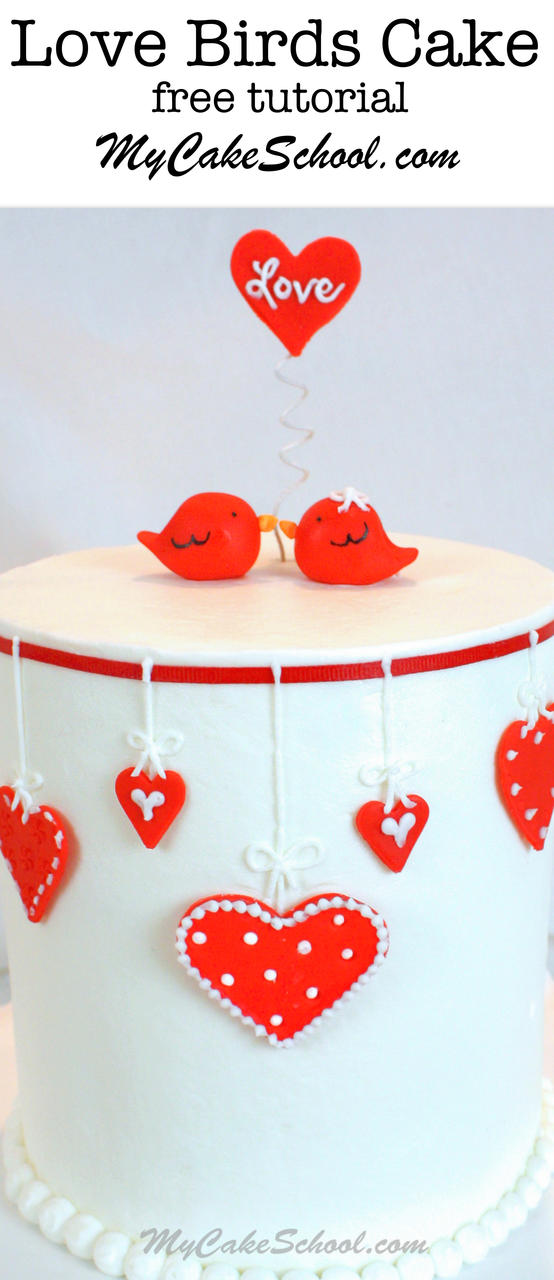
The cutest Love Birds themed Valentine's Day Cake Tutorial by My Cake School!


Hi everybody!

Today we made our first Valentine’s cake tutorial of the season with an adorable Love Birds theme . I love this time of year–the cute designs that come with Valentine’s Day planning are always the perfect cure for my post-Christmas blahs. We’re about a month away–that’s not too early, is it? I think not–I say it’s time to make some love birds!

First…a word about Materials—

My cake is four fat 6 inch white cake layers, frosted with a crusting vanilla buttercream (use whatever you’d like).  I used a basic double barrel construction (dowels and cake board halfway up) because the cake was a little over 7 inches tall.
I used pre-colored red fondant for the birds and hearts
Black food coloring pen for the birds’ eyes and wings although you could use a small paintbrush to apply your coloring
A little orange tinted fondant for the beak (frosting would be fine too!)
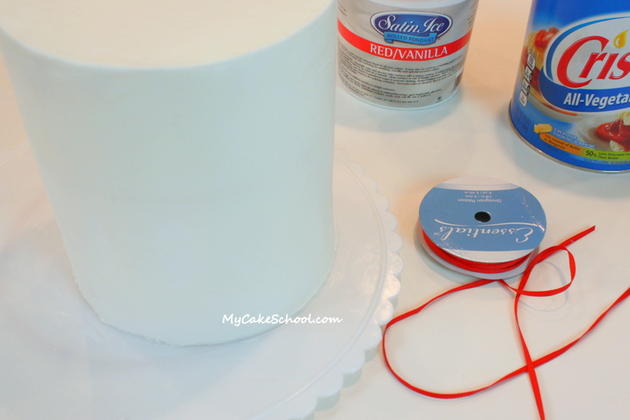
Thin red ribbon
Vegetable Shortening (to grease the ribbon with)
Wilton Tip 2 (for piping the strings for the hearts and dots, etc.)
Wilton Tip 10 (for pipng the ball border around the base)

20 gauge floral wire (or any gauge that is firm enough to hold up the fondant heart sign)

Cake board for the cake to rest on, and pedestal or cake base

Here’s what we did…

Sweet Love Birds Valentine's Day Cake! Free Tutorial by MyCakeSchool.com!

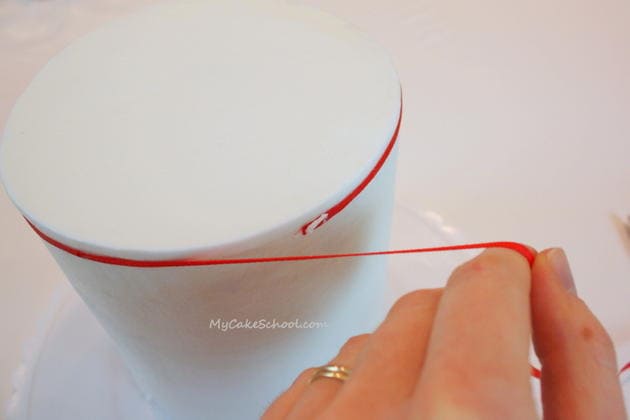
First,  I rubbed a thin red ribbon with vegetable shortening.  Sometimes ribbon develops grease spots if it sits on buttercream without any sort of backing or barrier.  One fix for this is to evenly discolor the ribbon in advance with vegetable shortening.  It only slightly darkened our shade of red.
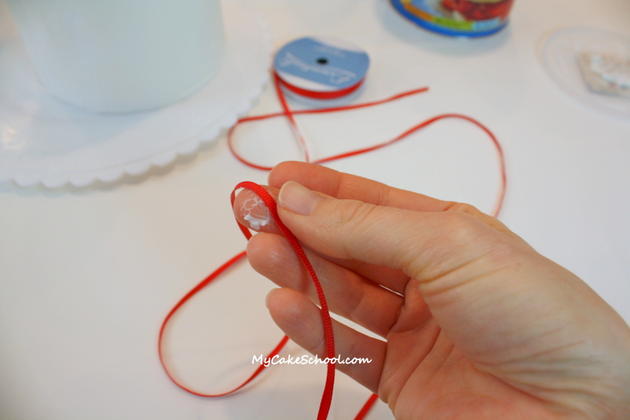
Sweet Love Birds Valentine's Day Cake! Free Tutorial by MyCakeSchool.com!

The light coating of shortening on the ribbon also helps it to adhere to our crusted buttercream frosting, although I added a dot here and there of frosting for extra insurance.
 

Sweet Love Birds Valentine's Day Cake! Free Tutorial by MyCakeSchool.com!

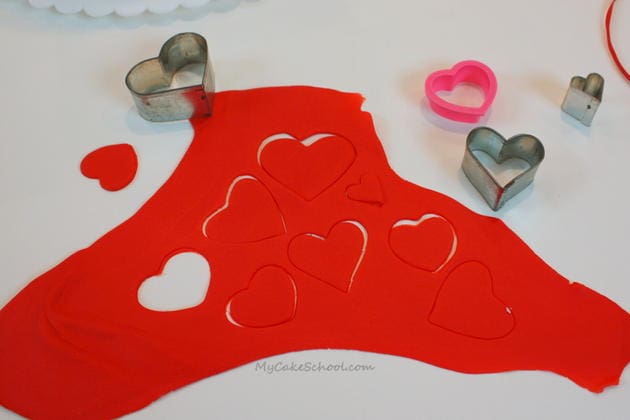
Next, I rolled out my red fondant and cut out various heart shapes. If you don’t have a cutter, you can create a template with cardstock or freehand it.
Sweet Love Birds Valentine's Day Cake! Free Tutorial by MyCakeSchool.com!

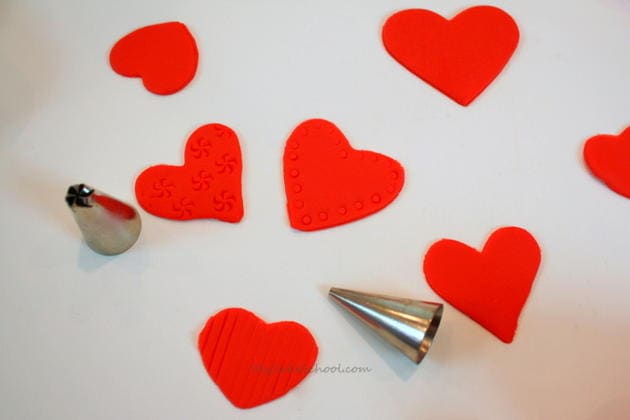
I created impressions in some of my hearts with various piping tips!
 

Sweet Love Birds Valentine's Day Cake! Free Tutorial by MyCakeSchool.com!

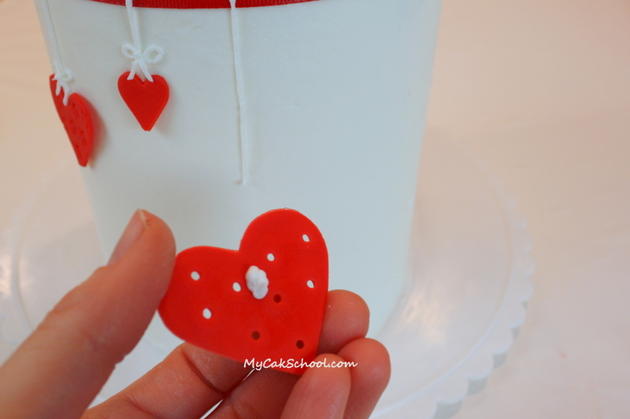
Using a small round piping tip (I used a Wilton Tip 2), I piped strings of buttercream from the ribbon to the position on the cake where I wanted to glue my hearts.  (My hearts dried for about 30 minutes or so–they were still soft but firm enough to handle easily without stretching.)  Then, I attached the hearts to the cake with a dot of fresh buttercream.
 

Sweet Love Birds Valentine's Day Cake! Free Tutorial by MyCakeSchool.com!

I piped little bows of buttercream and then added polka dots, bead borders, and other embellishments to the hearts.  (I initially punched holes into one of my hearts with my tip 2…but wound up polka dotting over them because the cake beneath the heart didn’t show through as much as I had expected.)
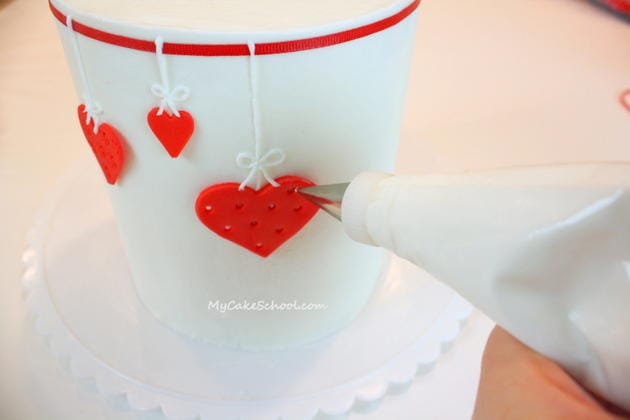
The sweetest Valentine's Day Cake Tutorial by MyCakeSchool.com!

Now for the fun part~ Let’s make some love birds!  First, I took some red fondant and rolled it into a ball.
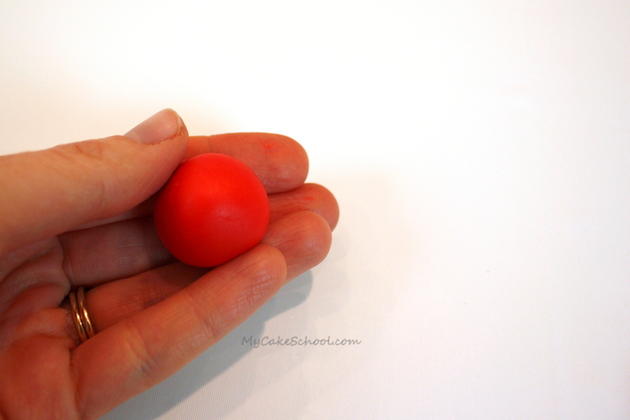
Sweet Love Birds Valentine's Day Cake! Free Tutorial by MyCakeSchool.com!

I pinched and slightly curled one end of the ball to form the tail.
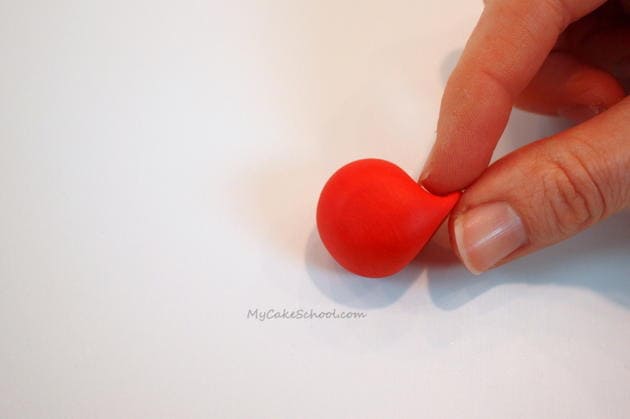
Sweet Love Birds Valentine's Day Cake! Free Tutorial by MyCakeSchool.com!

I drew on eyes and wings with my Americolor food coloring pen, and added a fondant beak.  (An icing beak would be fine too!)  Then, I made another one.  (If you have little ones, they will love modeling the birds!)
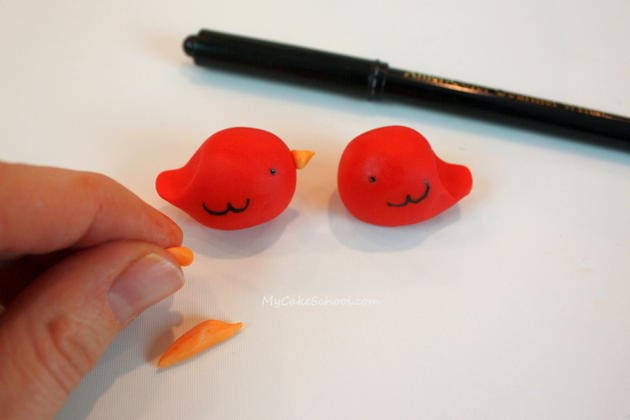
Sweet Love Birds Valentine's Day Cake! Free Tutorial by MyCakeSchool.com!

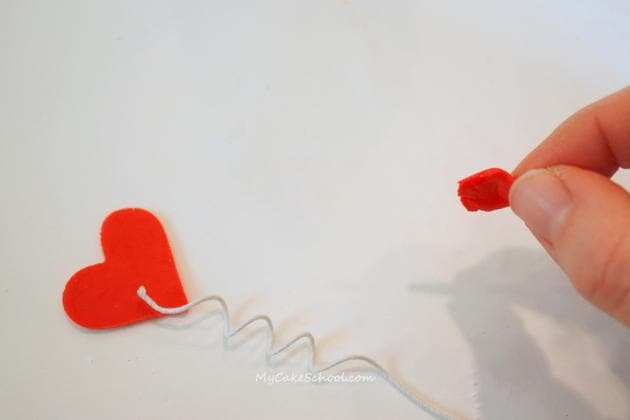
Finally, a little heart sign.  I used one of our hearts that had firmed up from earlier for this.  I wrapped my 20 gauge floral wire around a small paintbrush handle to coil it, and then attached it to the back of the heart with some slightly dampened fondant.  After it had dried and was secure (about 15 minutes later), I piped “love” across the front in buttercream with a Wilton tip 2.
Sweet Love Birds Valentine's Day Cake! Free Tutorial by MyCakeSchool.com!


Finally, I gave one of our birds a little buttercream bow — I wonder how a bird ties a bow?  ;0)–


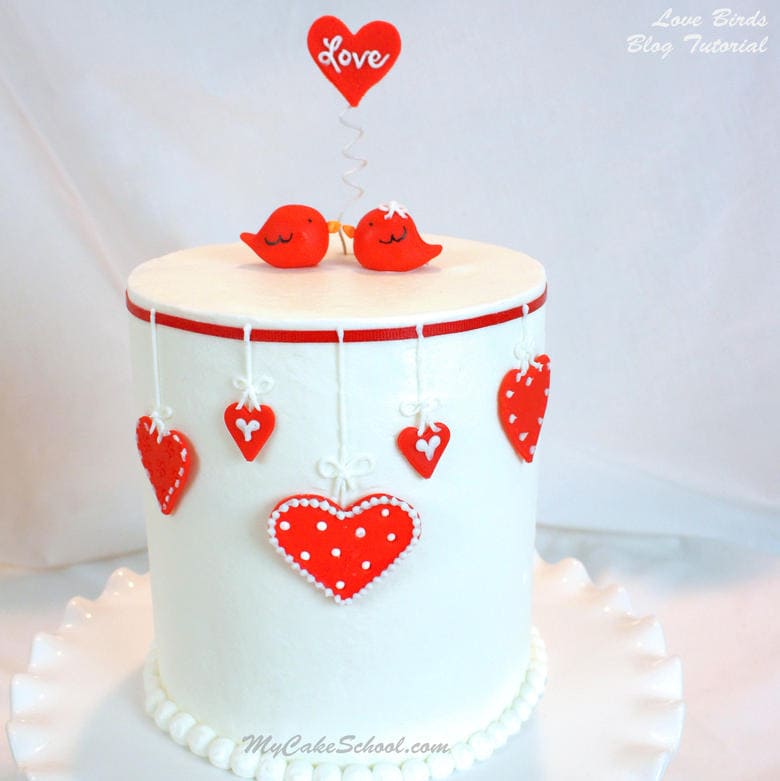
And now…our sweet little cake is finished~

Sweet Love Birds Valentine's Day Cake! Free Tutorial by MyCakeSchool.com!ay,


Thanks for stopping by!  Hope you enjoyed it ;0) —


Related posts:

  1. Lots of Love!~ A Valentine’s Cake Tutorial
  2. Christmas and Winter Cupcake Blog & Video Tutorial
  3. Simple Heart Cake Topper~ Blog Tutorial
  4. Christmas Tree of Buttons~Cake Blog Tutorial
  5. New Year’s Eve Cake ~ A Blog Tutorial!

Filed Under: Blog Tutorials, Seasonal & Holiday, Winter Tagged With: Birds, Love, Valentines Day

« Modern Silhouette Design & Textured Buttercream~Video!
Roller Method of Smoothing Buttercream~ Video »

Comments

  1. Conchi January 12, 2013 at 7:21 am

    Precioso, muy bonito, que altura tiene la tarta madre. Saludos desde España.

    Reply
  2. trish January 12, 2013 at 10:36 am

    SQUEAL!!!! Ok, that is the cutest. Those little birdies melt my heart – Valentines is a FAVORITE holiday of mine for sure. These are on the MUST DO list that is for sure! Thanks for filling my morning with so much CUTENESS!

    Reply
  3. Anniejoe January 12, 2013 at 11:18 am

    Darling as usual!!!

    Reply
  4. ola January 12, 2013 at 12:08 pm

    nice idea i like it

    Reply
  5. Sue {munchkin munchies} January 12, 2013 at 12:10 pm

    Love the lovebirds! Such a CUTE cake! Thanks for the tutorial!

    Reply
  6. Ruth Cropper January 12, 2013 at 5:28 pm

    This is such a cute idea. Thank you for sharing!

    Reply
  7. Tus Dulces Ideas Ivettet January 12, 2013 at 6:29 pm

    Beautifull, love it!

    Reply
  8. Vivian Beede January 12, 2013 at 6:44 pm

    Nice work !!! Cute !!! :)

    Reply
  9. The Partiologist January 12, 2013 at 7:17 pm

    This love bird cake is the cutest and the added hearts around the cake are darling!

    Reply
  10. Ansa Hogan January 12, 2013 at 8:07 pm

    Very cute….I love the birds!

    Reply
  11. Melissa Diamond January 12, 2013 at 8:23 pm

    Thank you so much for your comments!!! ;0)

    Reply
  12. Anita Barron January 12, 2013 at 10:34 pm

    This is too cute; the little love birds make the cake. Can’t wait to try it on my family.

    Reply
  13. Marcia Sedola January 12, 2013 at 10:55 pm

    Love, Love and Love.

    Reply
  14. FATTY LLACA January 13, 2013 at 12:02 am

    ME ENCANTA!!!! QUE COSAS TAN LINDAS HACES.

    Reply
  15. MARJORIE D. January 13, 2013 at 3:29 am

    this is too cute good job!

    Reply
  16. Annette January 13, 2013 at 4:34 am

    I love it! What a fantastic idea, so cute, thank you for sharing :-)

    Reply
  17. franca choice January 13, 2013 at 9:00 am

    Wow! I I love the ‘love birds’ & how the heart shapes were placed! splendid!!!

    Reply
  18. Manal El Deeb January 13, 2013 at 9:01 am

    Very pretty and soooo cute, I love it.

    Reply
  19. Gracie January 13, 2013 at 9:26 am

    Too cute!!! Can’t wait to try this one
    What do you mean by fat round
    layers?? How tall is your cake?

    Reply
  20. Jan Carmichael January 13, 2013 at 10:36 am

    This is absolutely adorable and looks like such fun to do! Love it!

    Reply
  21. Paula January 13, 2013 at 2:21 pm

    What a sweet cake for Valentine’s Day.

    Reply
  22. Monica January 13, 2013 at 3:37 pm

    So nice and simple. As someone said (I am not sure if it was Coco Chanel) “Less is more”. Congratulations for you lovely work.

    Reply
  23. Lucia Brown January 13, 2013 at 4:31 pm

    I love it!!! Your talent is amazing.

    Reply
  24. Marie, the EpicureanPiranha January 13, 2013 at 4:32 pm

    Adorable V-day cake, Melissa! Thank you for the tips and inspiration ♥

    ~ Marie, the EpicureanPiranha

    Reply
  25. one428 January 13, 2013 at 7:03 pm

    This is such a sweet cake!!! The birds are adorable…will have to try this one!

    Reply
  26. terri driscoll January 13, 2013 at 9:34 pm

    Great idea for a fun Valentines day. The birds are a great touch:)

    Reply
  27. Gloria January 14, 2013 at 6:44 am

    What a beautiful work!!!…. delicate and elegant… thanks for share it ♥

    Reply
  28. Terri Lynn in TN January 14, 2013 at 10:26 am

    This cake is beyond adorable! Is this is 3 layer, 6″ round? Do you have to dowel it because it is so tall? Just can’t get over how cute this is! This one is on my to-do list. :0)

    Reply
  29. Melissa Diamond January 14, 2013 at 11:15 am

    Ugg, I’m sorry! My instructions should say that I used four layers, not three! I’m going to change it now. This is a tall cake– it wound up being a little over 7 inches tall. Since nobody wants a slice that big…and because it was a little taller than it was wide, I used a basic double barrel cake construction. Two layers, inserted dowels, cardboard cake circle, and then another two layers. I didn’t hammer a long sharpened dowel through the layers and into the cake base but if I had to travel with it, I would have, just to be on the safe side.

    Reply
  30. Candy January 14, 2013 at 12:03 pm

    This is just toooooooo cute, I love it!

    Reply
  31. Kacy January 14, 2013 at 12:40 pm

    Seriously! Your blogs bring me so much joy! So adorable! Thanks for sharing!

    Reply
  32. TerriLynn_TN January 14, 2013 at 1:45 pm

    Thanks, Melissa. I haven’t attempted a double-barrel before…but this cake is too cute not to try!

    Reply
  33. Melissa Diamond January 14, 2013 at 2:00 pm

    Hi TerriLynn– This cake would be every bit as cute in the 3 fat 6″ layers that I mistakenly said it was in the beginning ;0) — I’m so used to doing that size cake that I automatically typed it! Whatever size cake that you choose, it will be adorable!!

    Reply
  34. Melissa Diamond January 14, 2013 at 2:01 pm

    Thank you all so much for your comments!! xoxoxo

    Reply
  35. Claudia Smith January 14, 2013 at 4:36 pm

    Love it!, What is the tip number that looks like star or pin wheel something like that?… Thank you….

    Reply
  36. BeBe January 14, 2013 at 8:10 pm

    Hi Claudia, it is a Wilton tip 106

    Reply
  37. Party Patisserie (Debbie) January 14, 2013 at 10:09 pm

    So adorable Melissa! Always love your ideas:)

    Reply
  38. Michelle January 15, 2013 at 9:30 am

    Thanks Melissa I will def be giving this one a go.

    Reply
  39. Leslie January 15, 2013 at 2:22 pm

    That has got to be the most precious thing I’ve seen.

    Reply
  40. Makememycake January 16, 2013 at 10:12 am

    Very nice cake, simple, elegant and sooo cute. Good idea for the valentines day upcoming!!!

    Reply
  41. Makememycake January 16, 2013 at 10:13 am

    I love this cake, simple and elegant!!! great idea!!

    Reply
  42. mahalia thomas January 17, 2013 at 8:27 am

    This is amazing i cant wait to make this :)

    question what else could we use other the vegetable shortening I can’t find it anywhere in perth(Australia)

    Reply
  43. Kathleen Richardson January 17, 2013 at 3:34 pm

    That is so adorable. Your directions are wonderful, because they simplify everything enough that almost anyone could do this. Thank you!

    Reply
  44. Kathryn Russell January 18, 2013 at 11:40 pm

    Kathryn’s Crafty Cakes loves it!!! Super cute!

    Reply
  45. Cindy Johnson February 13, 2013 at 3:47 pm

    I just adore this sweet cake. I am making it this weekend for my daughter’s bridal shower. Will use pink instead of red and a pretty green ribbon. Can’t wait to see the finished cake.

    I am so thankful for you and your wonderful tutorials. I’ve been doing cakes for about a year and have learned so much from your site!

    Reply
  46. yasmina Morales February 13, 2013 at 7:27 pm

    Lovely, as usual!!!

    XXX

    Reply
  47. Pam January 2, 2014 at 9:43 am

    Thank you so much for a great tutorial. I am always so delighted at the cake community and all it’s sharing.

    Reply
  48. Diana Calderon January 2, 2014 at 11:49 am

    So adorable!!! Thank you for sharing.

    Reply
  49. Yuka Quantrille January 24, 2014 at 7:31 am

    Hi Melissa! This s so adorable, thank you for sharing. One question, the floral wire went directly in the cake or is in the straw?

    Thanks!

    Reply
  50. ososanya olufunke January 24, 2014 at 5:35 pm

    very neat work,i will try it too.

    Reply
  51. Carolyn January 26, 2014 at 5:53 pm

    Very creative and cute, as always! Love your tutorials and videos!

    Reply
  52. Azza Riad January 30, 2014 at 5:07 am

    Thank you Mellisa for sharing this creative tutorial I really loved it , will try it and feed you back .
    Thank you very much

    Reply
  53. sukaina January 21, 2015 at 6:25 pm

    How many lb of fondant did u use to cover the cake

    Reply
  54. BeBe January 21, 2015 at 7:50 pm

    Hi Sukaina, Two pounds of fondant will be enough to cover this cake. We use the Wilton Fondant Guide, here is a link http://www.wilton.com/decorating/fondant/fondant-amounts-to-cover-cakes.cfm Our double barrel cake was four, six inch layers with a cake board and dowels…..it was approximately 7 inches high.

    Reply

Leave a Reply Cancel reply

Your email address will not be published. Required fields are marked *

You can click here to Subscribe without commenting

Add a picture

Melissa Diamond Meet MelissaWelcome! We'd love for you to check out our free cake tutorials & recipes, or join our site for online access to hundreds of videos and more!

Read More

The Perfect Gift

  • Lemon Buttermilk Cake {A Scratch Recipe}

    Lemon Buttermilk Cake {A Scratch Recipe}
  • Sweet Balloons Cake

    Sweet Balloons Cake
  • White Chocolate Coconut Cake

    White Chocolate Coconut Cake
  • Striped Buttercream Panels Cake

    Striped Buttercream Panels Cake
  • Lemon Coconut Cake with Lemon Curd Filling

    Lemon Coconut Cake with Lemon Curd Filling
  • Milk Chocolate Cake

    Milk Chocolate Cake
  • Buttercream Tulip Cake

    Buttercream Tulip Cake
  • Flamingo Ruffle Cake- A Cake Decorating Video Tutorial

    Flamingo Ruffle Cake- A Cake Decorating Video Tutorial
  • 50+ of the BEST Cake Recipes for Spring and Summer

    50+ of the BEST Cake Recipes for Spring and Summer
  • Lemon Cake {A Scratch Recipe}

    Lemon Cake {A Scratch Recipe}
Facebook Instagram Pinterest Twitter RSS
Login
Melissa Diamond Meet MelissaWelcome! We'd love for you to check out our free cake tutorials & recipes, or join our site for online access to hundreds of videos and more!

Read More

Your Favorites

  • Your favorites will be here.
  • home
  • free tutorials
  • videos
  • recipes
  • contact
  • join
  • login
  • home
  • free tutorials
  • videos
  • recipes
  • contact
  • join
  • login

Copyright © 2022 My Cake School. Melissa Diamond. All rights reserved | Terms and Conditions | Privacy Policy