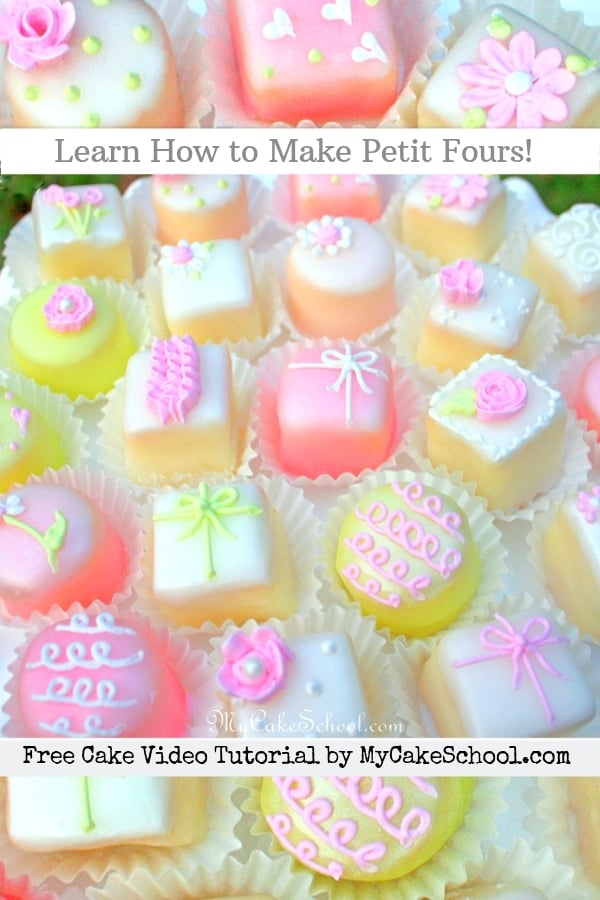
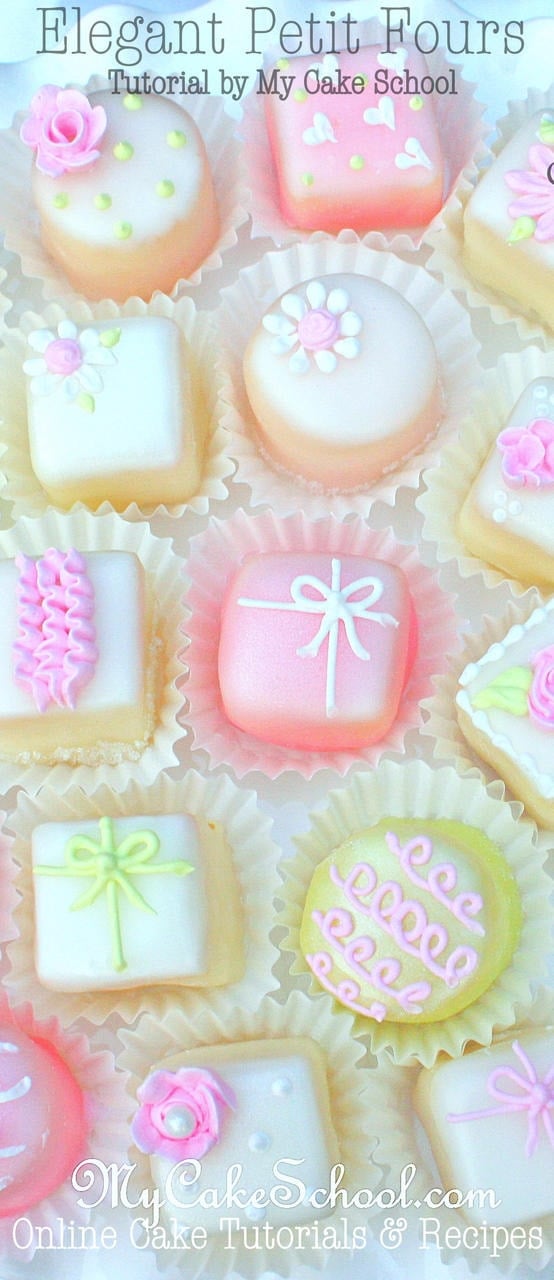
Hi everyone, today I’m going to show you how to make petit fours! I really wasn’t sure if this day would ever come, because until very recently, my petit fours always seemed to fall short. We’re happy to share a much simpler way to make these tiny cakes!
The Challenge of Making Petit Fours
Before I had an easy method for making petit fours (which I share in the video), they were NOT fun for me to make. Who would guess that such tiny little cakes could be so difficult?
Either they were too bumpy, or they weren’t uniform when they were sliced, or they fell apart when they were glazed, the kitchen was a disaster afterwards… the list goes on!
So, whether you’ve never attempted petit fours, or if you’ve tried and sworn them off a long time ago, I hope that you will watch this video and give these little cakes a try! ;0)
The Perfect Petit Four Icing
There are two petit four icings that I like. One, which was already in the recipes section (and that I discuss in our video on glazing cupcakes) is called King Arthur Flour Poured Fondant.
I really love the flavor of this recipe, which includes a little white chocolate.
However, in today’s video, I tried another commonly used petit four glaze recipe, and it has become our FAVORITE. This is the one that we’ll refer to in the Recipes section as Classic Petit Four Glaze.
It is very similar to a Martha Stewart recipe that we found online, but also very similar to many other glaze recipes. (Not sure who to credit for this one).
Anyway, this traditional glaze is even whiter than the King Arthur Flour Poured Fondant recipe, and for us, it coated a little more smoothly and was a little whiter in color. It does dry firmer though.
So, it comes down to personal preference (as I say so often!) ;0) — I did really like this “traditional” recipe a lot…the key is not to make your icing too thick. Otherwise, you will have a very firm “sugar shell” to bite thorough (which some may like…others may find too sweet.) We kept our icing thin.
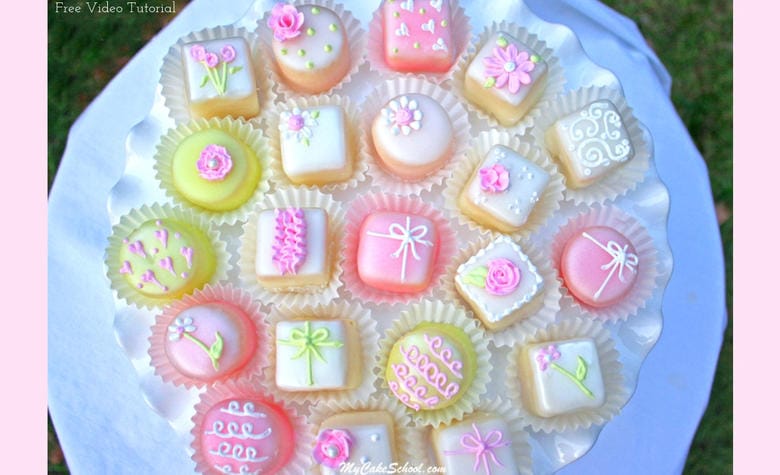
What Kind of Cake to Use for Petit Fours
The other important factor in successful petit fours is your cake! We used a pound cake recipe that we really like, and we will put in our recipes section.
You want to use a dense cake which can be easily cut without creating a ragged edge. You also want to work with frozen cake, so that you will eliminate almost all crumbs and the cakes will not be fragile.
These two tips alone are going to make petit fours so much easier!
How to Prepare the Petit Fours for Glazing
In the video, we demonstrate a few methods of coating the petit four squares which I like, and also how to fill your cakes with a filling if you would like that extra layer of flavor.
While some people make petit fours with a thinly rolled layer of marzipan just beneath the icing, we chose to use a thin layer of buttercream.
Our Easy setup for Glazing Petit Fours
With a little trial and error, we rigged up a funny setup for seamless petit four glazing, but it works SO well!
Basically, we needed to figure out an easy way to remove the petit fours from the skewer in a way that would allow the excess glaze to drip away from the cakes rather than pool around the bottom, and we also wanted an easy way to remove the cakes from the skewer without touching them!
As you’ll see in the video, elevating our cooling racks was the key to making this all work! Hooray! I’ll never make petit fours another way.
Materials:
11×15 inch pan (This is what we used for the height that we liked, however any pan or even a jelly roll pan would work well.)
Buttercream- We used a thin layer of our “fluffy vanilla” recipe. Any frosting will do! Rolled marzipan or fondant are alternatives to the frosting beneath the petit four glaze.
Royal Icing (for piped decorations)
Mini Liners (optional, but they do give a nice finishing touch)
Skewer (I used a wooden skewer which I snapped to make shorter)
Cooling rack
Colors: Your colors of choice. I chose Americolor Deep Pink & Americolor Electric Green
Super Pear Dust (or PME or Wilton pearl spray) –Optional for adding a little shimmer
Paint Brush (if dusting your petit fours with pearl dust)
Piping Tips: I used a Wilton Tip 2 for my lines, scrolls, dots, hearts & daisies, A Wilton 59 petal tip for ruffles or any small petal tip will do, Wilton 102 (or any small petal tip) for roses.
Sugar Pearls- Optional for decoration or centers
Clear Sanding sugar- Optional. I demonstrate using sanding sugar on edges of petit fours
Sugar/Tylose glue- Optional “glue” used when demonstrating how to decorate the bottom edge
Candy Thermometer- Optional. You could also just eyeball it. My icing was approximately 115 degrees F…but I show what the desired consistency looks like in the video.
Metal bowl that will fit over a pot of simmering water–This is ideal and makes life easier than having to keep rewarming the icing in the microwave when it becomes too thick & cool.
Tools: Sharp knife for scoring and cutting squares, Ruler for measuring, Round cutter (or desired shapes) if you’d like to have variety. My round cutter was 1 1/4 inches wide and 1 1/2 inch tall.
Cake Board- optional but is helpful if splitting your layers.
Long knife for leveling or splitting layers. (You may opt not to split your layers. I demonstrate both ways.)
Preserves/Jam/Desired filling or frosting if you would like to fill your petit fours.
Additional Notes on our Petit Four Tutorial
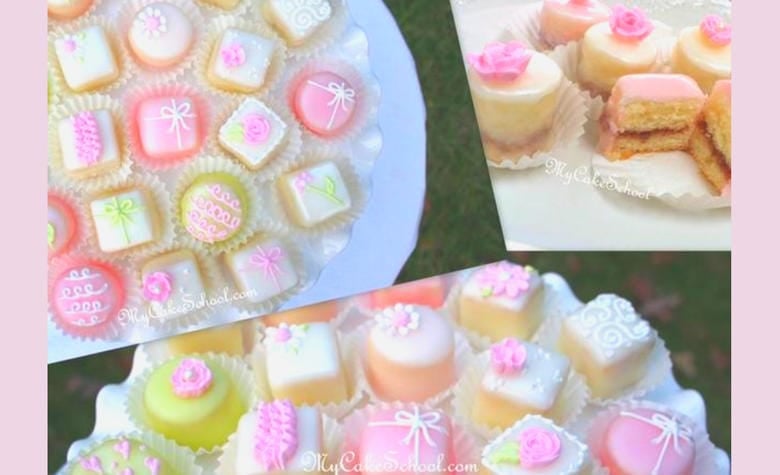
- After filming our video, we decided to go back and add one more demonstration of the process splitting of the cake layer to add preserves/jam.
- Many petit fours are layered in this way, and it is nice to have an extra layer of flavor! This does add another degree of difficulty though.
- I love the way the solid cake squares came out also, so don’t feel pressure to do this step! If you do add a layer of raspberry as we did for some of our cakes, just be aware that you will be able to see the pink stripe through the glaze. This doesn’t ruin the effect at all for me, in fact, it adds a little interest. But, I wanted you to be aware.
- If you don’t like the visible stripe of filling, you could individually cut into each petit four square and pipe a dot of raspberry in the center, so that it doesn’t reach the edges.
This would take a lot longer though. The other option is a thicker glaze, which would add a lot of sweetness and a thick shell to your petit four (which is not my preference). Or finally, you could just go with a filling that is lighter in color! ;0)
- Something else that I noticed is that the white frosting layer showed through ever so slightly with the petit fours that were coated with pink and green glaze.
The remedy for this if it bothers you is to frost your petit fours with tinted frosting before glazing. Again, this did not bother me but I wanted to point it out.
- Frozen cake is really key in successfully cutting, dipping, or coating your cakes! Remember to chill/freeze your cakes after frosting them so that the frosting will not melt or slide when dipped!
Please let me know if you have any questions! Good luck with your petit fours! I’d love to hear how they come out!
Ive always felt intimidated of making petit fours, which is why Ive never made them.I just didnt think I could get them to look that perfect and smooth. I really like the the tip that you gave using a wooden skewer. After watching this video, I think Im going to give it a try.
Thanks for making it look a little easier. Ill let you know how it goes!
Ansa
Awesome! Like Ansa, I have been intimidated of making petit fours, but now I think I can do it! These are officially on my to-do list. The skewer tip is great. Thanks for such wonderful instruction, Melissa (and BeBe!) :0)
Thank you Terri & Ansa!! You can do this! ;0) xo
Very pretty..thank you for this tutorial. I can’t wait to try these :-D
Gorgeous as usual! :) Love them! Happy thanks giving!!!
Awesomeness as always….thanks for showing us the way…..will be doing some chrimbo style ones for festive season ahead ‘me thinks!
Beautiful! Thank you for doing this tutorial :) I was just wondering how long I can store petit fours.
I can’t wait to try these for Christmas gifts
I’m glad I watched this tutorial, I think I will try them for my nieces upcoming 4th ballerina birthday party! Melissa, you explain things really very well. Thanks.
Good morning, thank you very much for having a problem running the modern videos it does not work I please help what can I do. Sorry for the inconvenience
I really like them but they are a bit messy to make. But I like the skewer method better as there is less wastage and less mess. I tried making them once and thought i’ll never do them again but now I want to give them a try as they look so cute. Thanks for the lovely video!
Add me to the “intimidated” list. lol Maybe I’ll try these for Christmas! Thanx so much. =)
Thank u so much have made these a few times and had the same problems u mentioned. Canot wait to try with poundcake recipe. What is
A good, fair price to charge for petition fours in the south??? Does anyone have an opinion. Thanks!!
OMG I need to proofread…using a new tablet.
I have had so many requests for petite fours but I just did not feel confident. My first attempts were a time consuming mess. Thank you for the tutorial. I am going to play with them this week. Hopefully I can start saying yes to requests
Do you think you may do a Christmas version?
I so needed this video back in May for the wedding I did. The bride wanted petit fours made with brownies. I also swore I would never do them ever again. I’ve learned so much from this video and it makes me want to do them again. Thanks so much…
Just in time – I plan to make these for the holidays!! They are so very pretty!
Thank you so Much for this tutorial!! You guys are the greatest! I am going to give these a try ! Question, to make these up in advance, can they be frozen? If so, for how long? Happy Holidays!
Oh my! You make this look so easy! I can’t wait to try it. Thank you for the great video!!
How do you charge these types of orders? I have no idea..:( I will try these technique definately..
Love the tutorial again! Clever idea for icing the bite size cakes. Will try it soon. Thanks again to you and Bebe.
You make it look so simple. Definitely am going to give it a go
SOOOO excited to try these!!!! You make it look so easy. Thanks for another great tutorial <3
These are amazing! I never knew what kind of cake it was, could you use any cake or does it always have to be pound cake?
Well I had a go and tried quite a few methods for coating with no great favourite. Your stand idea is the best out of all that I had tried. I couldn,t stand the waste of icing so had a tray underneath to catch the drips which I melted back into the warm fondant. My only complaint which is weird from a sugar addict is that they are ridiculously sweet. I guess that is why they are petite and just a mouthful.lol
Just beautiful, You make it looks so easy; but I do want to try this for the holidays
Hi Melissa, for some reason I can’t see the video are you making adjustment? I have tried on 2 different web browsers Google chrome and internet explorer I also tried a different computer, but no success. I finally thought I would write to you and ask if you were working on it. Can’t wait to see it. Please let me know either way.
I absolutely love this tutorial!!!! How long would you recommend the cake be left in the freezer?
I have looked for a way to make these succesfully and be able to offer them as a dessert in my cake decorating business. Thank you for giving your tips and recipe. It worked perfectly and was so easy!! After posting my first attempt of the finished product, I received an order. I no longer dread making Petit Fours!
Can u melt chocolte to coat these
Thanks so much for your comments–we missed a few! Our e-mail notifications of new comments haven’t been coming through it seems. @Ellen–I’m so happy that you’ve tried them already with good results!! —
@Ria~ I haven’t tried but I would think that you could use something similar to the cake ball/cake pop coating if you’d prefer it!
@Noreen–I’m glad that you like it! I agree, the coating is sweet which is why I like to keep it thin. The King Arthur Flour poured fondant is a little less sweet–you may like to try it!
@Natalie–It doesn’t have to be pound cake…but it does need to be dense (and frozen!). I’ve had some ugly, ugly petit four failures in the past when I used cakes that were just too fluffy. You can’t get a clean cut. When I demonstrate torting the layer, that is actually the White Almond Sour Cream cake recipe. Pound cake is my favorite though.
@Ronneice– You can freeze the cake as long as you’d like…but at least until it is nice and firm enough to handle without worry of crumbs or tearing, etc.
@Dena–We haven’t frozen the petit fours (I wish we had thought of that)–but my guess would be that they would freeze just fine! We’ll have to test it and update everyone on that question.
If anyone is still having trouble with viewing, send us an e-mail to info@mycakeschool.com. I think everyone should be back on track now… I know there was an iphone update that threw things off for some people at around the time that this video was posted. Let us know if you need help!!
Sooooo excited! I made these for a work event and got rave reviews (pics in the member’s photo gallery!). Thanks again for the great tutorial!
Christmas petit fours!! Kathleen, they are gorgeous!!!
I had a week of making them with a great cake etc but no success with the glazing. I youtubed a few methods and gave them all a go with no luck but joy of joy I took what I learned from the mistakes and successful aspects like Melissa,s skewer and stand idea and devised a method which not only gave complete and smooth coverage but also allowed me to half the glaze recipe and have very little waste. Tip 1 If a sponge style cake crumb coat, 2 make your glaze in half the amount in a wide open microwave jug as you need a handle to tilt the jug, 3 mix your glaze to a thickness of pouring cream. When you warm it for 30 secs at 50 percent it gets more fluid. Like Melissa skewer your cake and then dip a side into glaze and using a finger that is also holding the skewer flip over to the next side and so on. The top automatically gets coated and then lift away and let drain using a finger to support it. Then release as per Melissa’s tutorial. I did not let it drain over my jug to avoid crumbs. Give this ago my results were flawless and so good that I did not get to take photo,s.
Forgot to mention after 3 or4 drippings I would re microwave the glaze for 20 secs.
Have you ever considered using the Wilton bite size brownie pan to bake these in so that you wouldn’t have to do all of the measuring and cutting? I have to make some next week and I was thinking the bite size brownie pan might make this a little easier. Also, I had seen somewhere else, I don’t remember where, that if you coat the petit fours with white chocolate ganache first, it helps with the problem of opaqueness. I was just wondering what your opinion is. Also, I love your website. Your video tutorials and recipes are awesome.
Hi Tabitha! Yes, I actually have wondered about that but haven’t tried it. Let us know what you think if you give it a try! Cutting the sheet cakes goes by quickly though as long as you have a ruler that is about the width that you’d like for your petit fours to be. Also, if you’re worried about being able to see through the icing to the cake, the petit fours baked individually in the brownie bite pans may come out a little browner on the sides in comparison (but I’ve never used the brownie bite pan and so I could be wrong on this!)
About the chocolate ganache– I’m not sure but I wonder if you would find the ganache in addition to the sweet petit four icing that we used to be too sweet. But even more, having to double dip takes twice as long.
Being able to see through the cake around the sides used to worry me a lot more than it does now. After making A LOT of petit fours and trying out different methods and icings, I realized that I’m okay with being able to see a little bit of cake through the icing ;0) — I think that your customers/friends will feel the same! They really do look elegant whether or not the icing is a little transparent.
Let us know how everything goes, and thanks for your nice words about our site!
I just dipped my second portion of petit fours using Melissa’s dipping method. Yesterday, I used the CrumbBoss’s method of filling a pastry bag and piping it over.
Comparing the two methods using Melissa’s glaze, Melissa’s dipping method produced a petit four with a much thinner coat of glaze. While the CB method was faster, the glaze was much thicker and less palatable.
I also found that if you let your little cakes defrost, it is much harder to twirl them on the stick for an even coating, as they tend to not want to cooperate, so be sure to keep the extras frozen while dipping a small batch.
I also added a teaspoon of popcorn salt to today’s batch of glaze to help cut the sweetness. I haven’t yet tasted them, but I’m sure that is also going to help with the sweetness factor.
I will be sure to post pics of the two methods I used, you can definitely tell the difference!
Hi “Spooky”! Thanks for taking the time to write up your results from experimenting! This is always very helpful for anyone wanting to try out a method or recipe. Thanks for posting your photos too–just saw them in the gallery. I agree– the thicker the icing, the better the coverage but the more sweet the outcome. So, I decided that for me, a thinner glaze is the way to go.
I’m not sure if I mentioned it in the video but when we poured icing over the cakes using the cooling rack, the icing is thicker on top since we couldn’t tap it off or angle it. Sounds similar to your findings on the method of using a pastry bag.
Also, the cooler the icing, the thicker it became and so even with the “skewer method”, you can have a thick shell if the icing isn’t warm enough. Totally agree with needing to pull out a few cakes at a time from the freezer. The process is so much easier when working with frozen cake!
Just watched the video..was intimidated to even attempt, but you make it look pretty uncomplicated. I am definately going to give them a try. Thanks Melissa!
Thanks Paula! When you try it, let me know how it goes! I was so happy to finally be able to make pretty ones–this method is very simple as long as the cakes are frozen and the icing is nice and thin ;0)
I think if I follow your very easy to understand instructions, I may be OK. :-) You are an excellent teacher and I appreciate your reiteration of instructions. And yes, your petit fours are very, very pretty. :-). I will definately let you know how they turn out.
Hi Melissa..I do have a quick question. I want to try making these and I do have a jelly roll pan that is 11×15. However, it is only 1″tall. I know in your video you said that your pound cake was about 1 1/2″ tall. So..do I need to get a deeper pan or will it rise evenly (I will use 2 flower nails), and with a little leveling still be about the height of yours? Thank you. :-)
Hi Paula–Yes, you will be fine to use your jelly roll pan–I think that 1 inch height (plus icing) will be a good size to work with. Let us know how it goes!
OMG thanks for showing that I been wanting to learn how to make them now I know thanks you. That was great
Thanks Maria! So glad to hear it! :0)
We are holding a baby shower for a crisis pregnancy center in February and I am looking forward to making a variety of petits fours in pink and blue. This is the most instructional and easy-to-follow blog I’ve seen on making them. Thanks so much! Just a thought, I know I have 100 recipes in various cake books and on-line, but you might want to share a link for a royal icing as part of the tutorial. I didn’t see one. But your tutorials are wonderful and I can’t wait to explore every one.
Just realized I had another question from the video. You mentioned using two flower nails to make the cake even. I’ve never heard of this. Do you place the nails in the pan before you pour the batter in or after. And do they ever give you trouble coming out? I’ve only just joined the blog, so the method may already have been mentioned on your site somewhere and I just haven’t come across it yet. But I would like to know more about it. Thanks so much!
Hi Becky–Thanks! –Here is a link to our Royal Icing recipe :0) I need to change where the recipe appears–it’s in the Misc. section of our Recipes section right now which may be why you couldn’t find it.
https://www.mycakeschool.com/recipes/royal-icing-2/
As for the rose nails, you can just grease and flour them just as you would a pan so that the cake doesn’t stick to it. You put it upside down in the center of your pan, and then pour in the batter. When the cake is baked, and you flip your cake out of the pan, the nails can easily be pulled right out.
We use one or two nails for all of our cakes that are 10 inches or more (round or square) –and in our sheet cakes to help distribute the heat for even baking!
Good luck with your petit fours! I’m so glad that you found the tutorial helpful.
I’m in a bit of a pinch and was wondering if you think store bought frozen pound cake would work?
Hi Sarah–Yes, it will! You’ll still want to freeze the cake to control the crumbs as we do in the tutorial! ;0)
Hi Melissa
Thanks for this wonderful tutorial! . . . . . i feel am now confident to try out this one! . . . . one favour though, i hope you can teach us to cover small round or square cakes usually found in some wedding cakes. instead of cupcakes, small round or square cakes are made to go with the big cake. will greatly appreciate
your reply.
regards
Ofelia
Sera posible agregar un poco de cocoa para darle sabor a chocolate?
How long does it take for the icing to set on the petit fours after you have poured or dipped them?
Hello Melissa! I just signed up for membership today and this was the first video I watched in completion. I have to say this was just one of the most informative and helpful video I have watched in a long time! I am truly convinced that I can make petit fours as my first attempt many years ago was a bust! I am happy I made the decision to become a member. I will try this real soon!
I just watched this video and I can not wait to try making them this weekend !!!
Petit Fours is something I have tried to do but they didn’t turn out right because of one important step I apparently didn’t do and that is to freeze the cake. I learn something new everyday . Thanks.
Awesome!!!!! Can’t wait to try these. Can you please advise how far in advance you could make them? Is a week to far ahead of time? Thank you for yet another inspiring video!
Hi Angela, even though the petit fours are covered with a glaze and this helps to seal the cake keeping it fresh, I think a week would be too far ahead of time. Three days would probably be my limit.
thank you for the reply. Wish me luck :0)
I just love this video and you seem to make this look so easy. I will give these a try in a couple of weeks for a party.After you have decorated them can they stay at room temperature or do they have to be rerigerated again. Also did you use the pound cake recipe in your section?
Hi Anita, we did use the pound cake recipe from the recipe section. It was baked in a 11 x 15 pan with two rose nails. We trimmed off the crusty top that pound cakes have and trimmed the sides also because the brown color would show would show through the glaze.
The petit fours can stay at room temperature.
excuse my ignorance but what do you mean by – used two rose nails – in the post above. i must say i just cooked the pound cake – what a brilliant and yummy cake! now to try the petit fours
Hi Angela, when we bake in a pan larger than 9 inches we usually use a rose nail or two. In the post you referred to, the pan size was ll x 15. The rose nail helps to distribute the heat for even baking. Here is a link to a short tutorial on this.
http://www.thatreallyfrostsme.com/2010/11/baking-cakes-with-flower-nail.html
Thank you so much for that. I haven’t heard of this but it does make sense. Not a well known thing here in Australia. I will watch the video. Thank you ! Thank you!! One last question – sorry…. once the petit fours are made, would you suggest placing in the fridge or in a carboard box? I really appreciate your help (and your quick responses!)
Hi Angela, I would place in a cardboard box. The glaze helps to preserve the freshness but we like to have then eaten by the third day.
one more question-do you wrap the cake before freezing?Or do you put your thin layer of buttercream and just set in the freezer until frozen?
Hi Anita, we did not wrap the cake, we put in the freezer approximately 2 hrs. until it was quite firm so we could cut the cake and produce very few crumbs and get a nice clean cut
I’m making some Petit Fours tomorrow for a baby shower…and you’ve sold me on this method! It is a ‘rainbow baby’ baby shower, so I am thinking to either go with white and have rainbow decorations….
Sounds really cute!
Whitener makes things opaque–would adding a bit of whitener with extra color to overcome for a deeper tint (of pink, for instance), work for those who don’t want the icing/filling/browned edge of cake show through? I’ve never done petit fours, and am downloading the video right now to watch when it finishes…
Once, when I was coloring strawberry filling to be “spaghetti sauce,” it just wasn’t coming together how I wanted until I remembered that, and as soon as I added a bit of whitener, it looked like spaghetti sauce instead of jam!
Hi Elizabeth, I don’t know for sure but it sounds like a good idea. Let us know if you are happy with the result, if you give the whitener a try.
Hello and thank you so much for the recipe and the tutorial my husband is absolutely thrilled I was able to make them from the first trial!
but I have some questions…
first of all my cake was torn when I tried to take out from the pan-I used the pound cake recipe-maybe I didn’t let it cool enough?
and the other problem was with the glaze. I used the one you recommended. After I had to reheat it 2 times it started thickening more than desirable so the last ones had a very thick glaze..should I add more water or corn syrup?
thanks again!
Hi Thomais, we let our cake cool about 15 minutes before turning out. If your pan was greased, floured and also had waxed paper in the bottom that was greased and floured it should turn out with no problem. If heating your glaze over simmering water does not thin it enough you could add hot water a small amount at a time until it is the consistency you want. We are happy that you gave the recipe a try and had success.
Thank you so much for this video. Ive been wanting to try these and always been a little bit intimidated lol. I know whats on my weekend list :)
Great! This method, cake, and icing combination makes them so much easier! ;0) –Have fun experimenting!
I am unable to open the video. Is there another link I can use to get this video?
Hi Angela, I have made an adjustment, can you see the video now?
Wow! I just watched your video and I love the skewer method! Brilliant! Thanks for sharing!
Thank you Jeanne!
Hi Melissa thank you so much for this tutorial. So looking forward now to making these. I have 50 to make next weekend for an 18th Birthday High Tea so will let you know how I go! Feeling inspired!!
So glad to hear it, Karenina! Good luck!
Melissa I am planning my daughters babyshower and I was wondering if I can make these ahead of time with icing and store them in the freezer her shower is September 27 have you had anyone who have tried this before and how did it work any help or suggestions will be much appreciated! We are wanted to do these as favors
Thanks
Beverly
Hi Beverly, We have not frozen our petit fours, I wish we had thought to do that after making the video. My thought is that it would be fine to freeze them. To freeze, place in an air tight container and then wrap in aluminum foil. My only concern would be that the colors of the piped decorations on top would bleed slightly when thawing, though I don’t think they would. You could freeze them, let them thaw completely the day before the party and pipe on the final decoration then. You could do a trial run using a small bought pound cake( such as Sara Lee small frozen pound cake) and half the glaze recipe just to do a few
that are complete with final decorations ……just for testing purposes. Good Luck
As usual, fantastic video!! Have you thought about Halloween petit fours? Weird grey, black or red icing and creepy decor? Using chocolate cake? Thanks!!!
In regards to successful freezing, do you think that completing the process all the way to cutting the cakes into squares (including the light coat of butter cream on top) and placing them in an airtight container with parchment in between layers would work? Then removing them when needed to dip and decorate. How long do you think they’d stay fresh in the freezer? To me it sounds like the problems occurs with the glaze upon freezing so why not eliminate that step until need be?
Also, I forgot to post….I’m sure it would be ok to decorate the top with butter cream flowers instead? I don’t care for royal!
Hi Melissa, been meaning to message you to tell you how my petit fours turned out. They were amazing and were relatively easy to do thanks to you and Bebe!
They were a big hit and froze well too for the birthday girl to have some at a later date. BTW the work station idea worked also worked a treat and made things so much easier. Will definitely do them again. Thanks X
Karenina, I’m so happy to hear it! Thanks for the feedback!
Thank you for helping . I have had so many problems trying to do petit fours. I just need to slow down and get it right. This is a great demo. Thanks bunches!
Wow! I love your skewer method. So smart!
Thanks Terry & Mama K! ;0)
Hello Melissa, i wanted to try to make the petit fours but i want to know how long do you think these guys gonna last. I have a retirement party on a friday and wanted to bake the cake on the weekend. Do the dipping on a wednesday night and decorating them on a thursday night. Present them on the following day. What would you suggest for me to do. Or should i really do it the day before? Thank you!
Hi Ann, Petit fours are very small so drying out is a concern. I think if you bake, wrap and freeze your cake on a Friday, you can cut and dip on Wednesday. Remember to keep your cut petit fours in the freezer, taking out only a few at a time when you are covering with petite four glaze. Since you are not serving until two days later, I would keep them in an airtight container in the refrigerator until you are ready to decorate on Thursday night. Remove from refrigerator and let them come to room temperature before you decorate. Good luck, I hope all goes smoothly.
my cake is in the oven.. the batter was half eaten before hand .. I saw in one of the petit four videos that you inserted 2 wilton metal rose tips for even baking.. i jammed 2 tips in after it was baking for about 10 minutes in a panic because i forgot them.. can you please explain this step to me.. i’m guessing the middle of my cake my be toast now because i cant imagine getting the tips out without tearing the cake up.. oops
Hi Brandy- I’m sorry that I didn’t see this sooner, your cake is probably finished by now. The rose nails help to distribute the heat evenly, and will give you a more level outcome. With petit fours, the batter is not quite as deep in the pan and so it may not be quite as essential to have the nails in, but we still do it anyway.
The rule of thumb that we follow is that we use a greased and floured rose nail or two for any cake 10″ or greater, and for sheet cakes. You just place a rose nail or two (depending on the size of your cake) into the pan, pointed end up, before adding your batter. Even the way that you did this, I’m sure that it will be fine!
With shallow cakes like petit fours, you will flip the cake out onto your cake cardboard and of course the nails are going to hit the board first but they will pop right out. For thicker cake layers, you just pull them out after flipping them onto the board. They will not tear though the cake because after flipping, the flat end of the nail is up and you just pull it right out. Hope this makes sense!!
I enjoyed the video, thank you. After you scored the cake I wish you would have shown how you cut them.
Thanks Carol- Once the frosted cake layer has been chilled and everything has firmed up, cutting the squares is much easier. This past December, we made some cute Christmas Petit Fours and we show a bit more of the cutting process if you’d like to see! In that video, I’m using a much longer knife—but if you don’t have one, any sharp knife will work well on the chilled cake and frosting!
Here’s a link to the other petit four video (I begin cutting at around the 2:00 mark):
https://www.mycakeschool.com/video-tutorials/christmas-decorating-tutorial/
Hope this helps!
I watched the Christmas petit four video, thank you that really helped!
Great, I’m glad to hear it!
Hi Melissa – in June 2014 I was making some of these for the first time. After watching your tutorial it gave me confidence to tackle this project. I completely forgot to send you a pic to show you what mine looked like. The cakes turned out great and was a big hit.
These look perfect, Karenina! Thanks for sharing! xoxo
Thank you – very inspiring :)
I have some petits fours to make for my friends birthday – I’m not so scared anymore! Will send you a picture when they are done.
Great! We would love to see them!
thank you so much for this video. My niece has requested petit fours for her wedding cake. This has helped me immensely! How do I figure out how many petit fours to make. Im assuming most people will take more than one.
@CakesOnTheLane- Hello! I’m so glad that you found the video helpful! Hmmm….that’s a good question. Will there be other desserts there?
I feel like most people wouldn’t take more than three…maybe 2 if there are other sweets. I just did a quick google search to see if I could find other opinions on this and found a reddit post on petit four servings- I hope this helps!
https://www.reddit.com/r/weddingplanning/comments/4qmoyi/serving_size_for_petit_fours/?st=j5aedxmm&sh=2bcb665d
Thank you, Melissa! That is very helpful. —Kathy
Hi Melissa, How far in advance do you think the petit fours will store for? And how would you store them.
Hi Amber, Without a perishable filling store in an airtight container, depending on the decoration you can stack with a piece of parchment paper in between layers. Even though the glaze helps with keeping them fresh, they are very small so for best results we think they should be eaten by the third day. If your petit fours have a perishable filling, they must be refrigerated but some refrigerators have more humidity than others, and can cause the glaze to become soft and colors to run. Keep them air tight but store in refrigerator only a short time.
This is the easy way?… Ouch
@T- Haha, yes, after trying way too many methods and glazes, etc., this is by far the easiest way to go! Having the baking racks elevated so that you can slide the skewered cakes off makes all the difference ;0)
Can’t wait to try this!
Iโve been making petit fours for over 30 years, and I loved seeing the different methods for pouring and seeing your adorable decorating tips . Well done, and thanks so much (from another Southerner โค๏ธ)!
Thank you Carolyn, I’m so happy to hear it! Thanks so much for your comment!
I wish I had seen this video before last Saturday!! It would have saved my sanity!! I failed at making my petit fores and it was really disheartening. I didn’t ever want to make them again! However, watching the video was really inspiring. I want to try again real quick!! When I do, I will post a picture. Thank you so much for this video!
Hi Crystal! Thanks so much for your comment, I think that you’ll find this method much easier! (I had quite a few petit four fails years ago before using this method!) ;0)
Question! I am planning on making these for my sisters 40th. I dont want to buy a new pan though. Any other sizes that would work? Or if i did a jelly roll pan, would i divide batter into 2 of those and then that way i would have a bottom and top (since i am doing a rasp filling)??
Hi Aubrey, If you have a pan close to the 11×15 size pan that would be good. You could use a jelly roll pan however I am not sure about dividing the batter into 2 of those. I worry about how the small amount of batter would bake up……..would the bottom become too brown? You might consider injecting raspberry filling, using a piping tip into the center of a single layer petit four before adding the glaze. Allow more time than you think you will need because making petit fours is a time consuming process, though we do love the look of them.
Great video. Thanks
Can you freeze them after completed?
Hi Jackie, I am sorry but we have never tried freezing them, so I am not sure about the condensation or if the glaze would crack. If you try freezing, I would not freeze for very long because the tiny cakes could dry out.
To avoid seeing the raspberry preserves you could pipe the edge with white icing then put raspberry in center. This would cover the edge so the white icing shows rather than the red.
Hi there,
I have tried petit fours many times they always taste good but don’t look that great !
I tried your method and although it still needs a little work I was very happy – thank you !!
Hi Mary Anne, Your petit fours look absolutely perfect. I am very happy to know that Melissa’s method was helpful. Thank you for posting.
I enjoyed the video. Itโs been 15+ yrs since the only time I ever made them. They turned out cute, but I hated the process, so much. I had a good friend recently ask me to make some. I canโt refuse her, so I said yes. I feel more at ease about it now. However, Iโve never used royal icing before. Can I just use butter cream for the decorations?
Hi BJ, Thank you for your nice comments. You are right, making petit fours is a rather long process. That is why bakers charge so much for them. We have always used royal icing for the decoration because it drys hard. Once the glaze is dry, I think it would be fine to use a crusting buttercream for the decorations. You will need to transport them without stacking. Hope all goes smoothly.
First time making these. I found your video extremely helpful. The pound cake was delicious.
Hi April, Your petit fours look wonderful! Thanks so much for your nice comment and for posting your photo!
Hi there ! – I have to make petit fours for a wedding – I have made some little flowers out of plastic icing – will that be ok ? Can I add them the night before or will they go soggy ? (They have to be transported 1st in the morning). Thank you ! Regards
Mary-Anne
Hi Mary-Anne, I don’t see why you couldn’t go ahead and place the fondant flowers on the petit fours– the coating on the petit fours will be dry and so you shouldn’t have issues with the fondant absorbing too much moisture.
Hi Melissa, your tutorial is so comprehensive and informative. Simple methods and suggestions provide a successful process to master these petit beauties. Thank you so much for sharing.
Thanks so much for the advice – they came out beautifully !!
See the pic (and the cake also) !
So beautiful! Thanks for sharing!! xoxo
@Phyllis- Thank you so much for your kind words! I’m glad that you enjoyed it! xo
This is a great method! I made them a few years ago and they turned out fabulous.
However I can’t remember:
How do you keep crumbs from mixing in with that top coat of buttercream?
Hi Sally, these look great! If crumbs are an issue, you may prefer to frost the cake when it is frozen to minimize the crumbs, or you could crumb coat the top of the cake with a very thin layer to catch the crumbs, chill in the freezer until firm (15 minutes or so), and then frost with the next layer of frosting.
Hi Melissa, Iโve made these a few times and they did turn out great. I watched your video a few times, which was extremely helpful. I wanted to re-watch the video to refresh my memory, but canโt seem to find the link for it. Is it still available? Thank you
Hi Joanne! Love those!
The video is still on this post, I wonder if it just loading slowly for you? It is playing for me. Let me know if you continue to have trouble!
Thank you, Melissa! Iโm not sure what the problem was but the link is definitely there and I was able to watch it. ๐๐ฉ๐ปโ๐ณ
Great!! xo