Ridged Buttercream Technique-Video
In this quick tutorial, I'm going to show one of the easiest ways to frost your cakes, using a ridged buttercream technique!
This style of textured buttercream is perfect for any skill level of cake decorating, and has a lovely rustic feel.
Whether you are frosting cakes for a birthday cake, wedding cake, baby shower, or just because- keep this quick and easy method in mind!
Today's short video is an updated tutorial that we first created in 2012- and we still use it all the time!
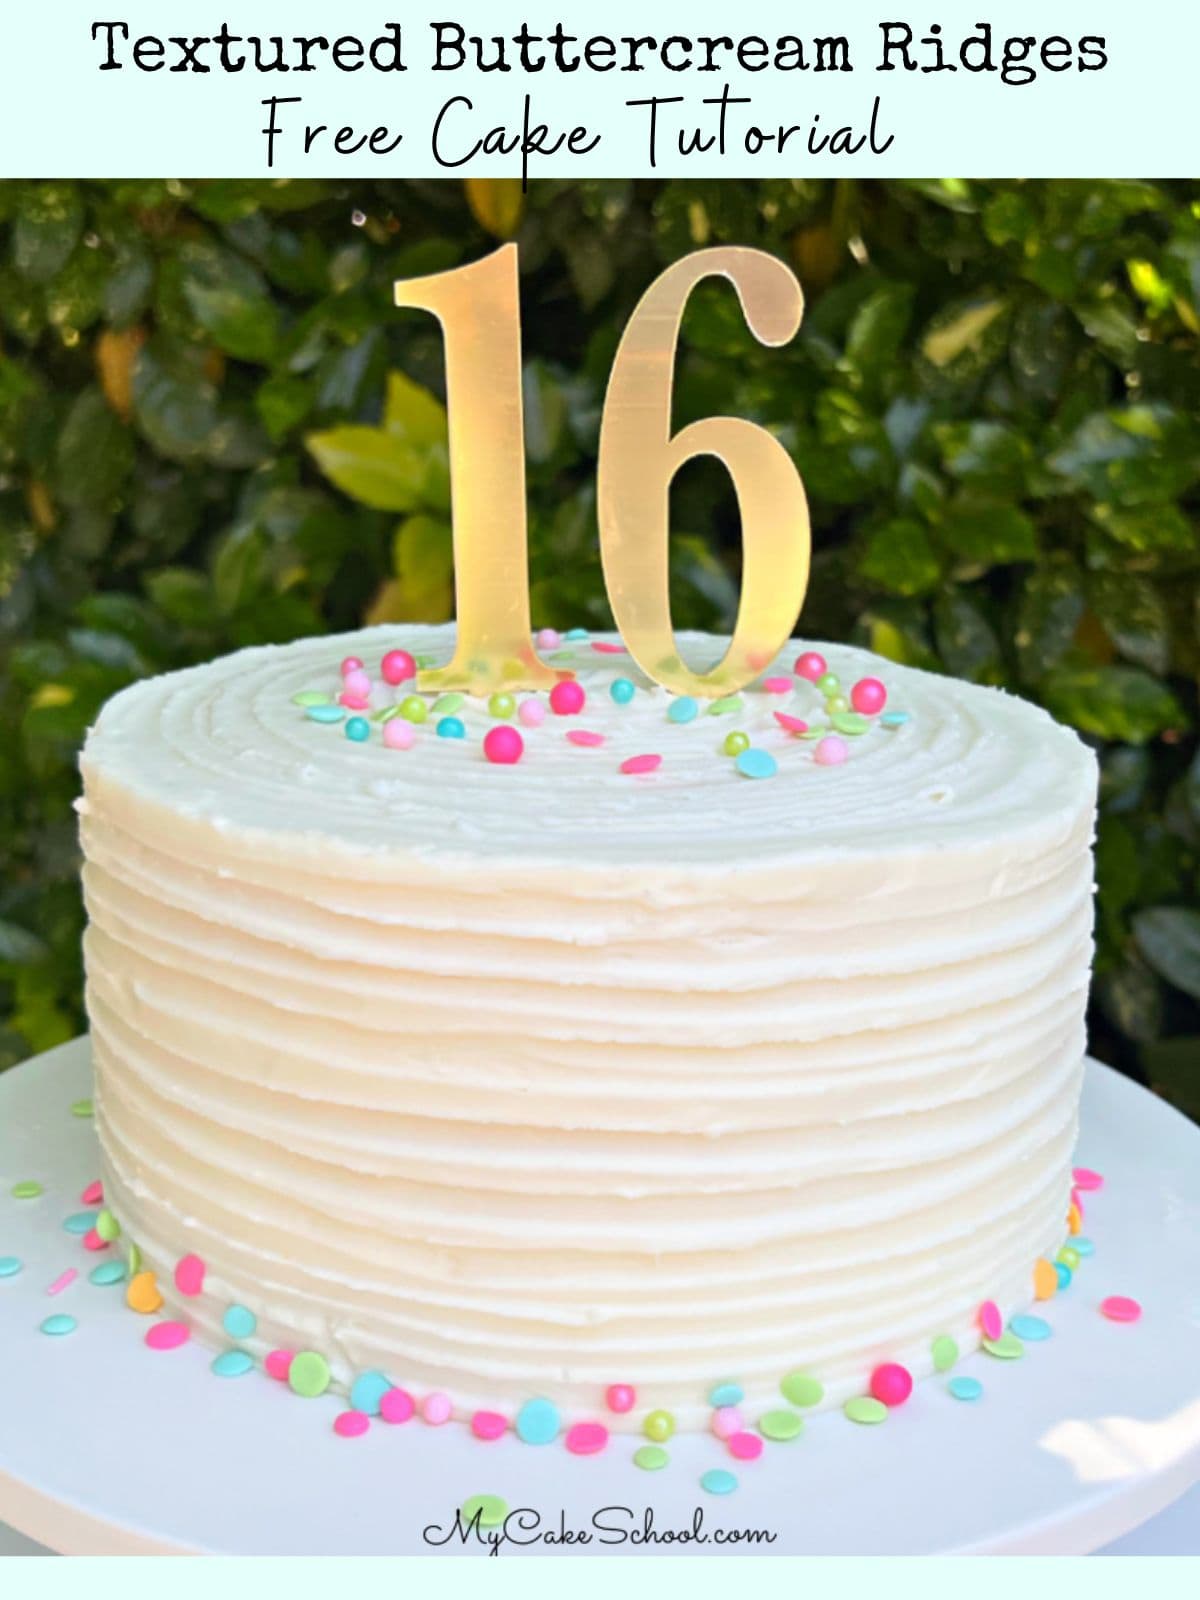
Frost a Cake with Textured Buttercream Ridges
This quick and easy frosting method can be completed in minutes! It has a professional, elegant feel yet is so easy. We hope that you enjoy it!
- First, fill and crumb coat the cake as usual, with a thin layer of frosting. You can use any frosting that you like for this method.
- Next, chill the cake in the freezer for 10-15 minutes (or longer in the refrigerator) to firm up the crumb coated layer of frosting. This is an optional step, but I find it helpful to firm everything up before moving to the next step.
- Next, frost the cake with the second (final layer of frosting). Smooth over the frosting with an offset spatula or bench scraper to even out the frosting. We will be texturing it and so it doesn't have to be perfectly smooth.
- Place the cake on a turntable. Using the tip of an offset spatula, apply pressure into the frosting while rotating the cake. With each rotation, move the spatula slightly higher, until you have reached the top edge of the cake.
- Decorate the top of the cake however you like! We created a spiral design, starting in the top center and spiraling out with an offset spatula while rotating on the turntable.
- We finished things off with a number cake topper and colorful sprinkles!
Hi Caryn, thanks! Yes it would work just fine with cream cheese frosting!
thank you! this is fun!