Winter Wonderland of White Chocolate Trees- Blog Tutorial
Today I'm going to share a gorgeous Winter Wonderland Cake of White Chocolate Trees! This surprisingly simple cake tutorial has been one of our most popular for Christmas and winter gatherings!
One of my favorite decorating mediums for creative accents is candy coating (aka candy melts, compound chocolate, chocolate bark, etc.). There is no tempering required--just microwave, pipe your designs, pop in the fridge or freezer to speed set, and you're done!
Let me show you how I made some beautiful Christmas trees today. This design is also perfect for "winter wonderland" themes all through the season.
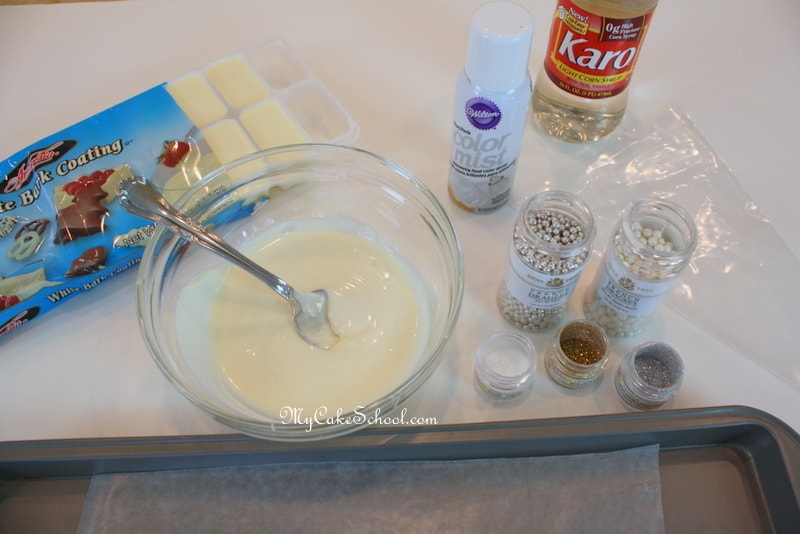
Here are the basic materials that I used~
Candy coating (Today I used Ambrosia brand white candy coating which is at my local grocery store.)
Various dragees/sprinkles/hologram twinkle dust
Lollipop sticks
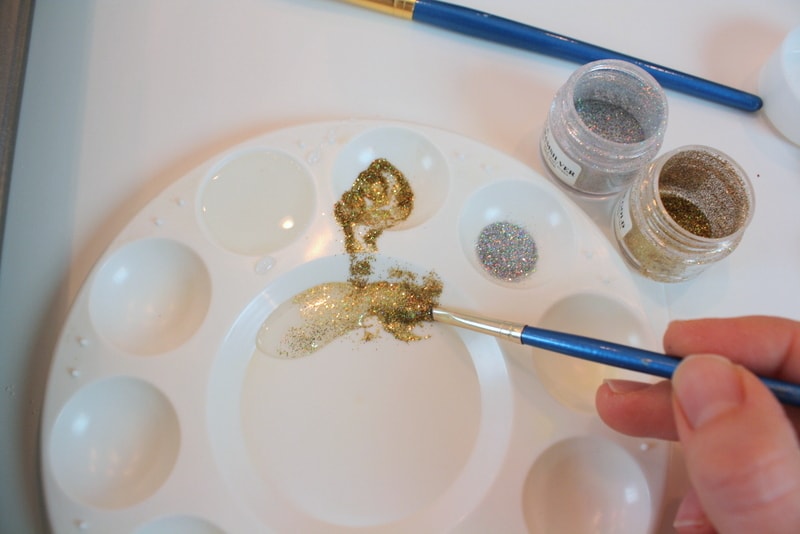
"Glue" My glue was light corn syrup today, but I also like basic tylose glue (aka sugar glue), or piping gel.
Pearl dust or Pearl Spray (Wilton and PME make pearl spray)
Waxed paper or parchment paper lined cookie sheet.....and you'll need a frosted yet empty, lonely cake ;0)
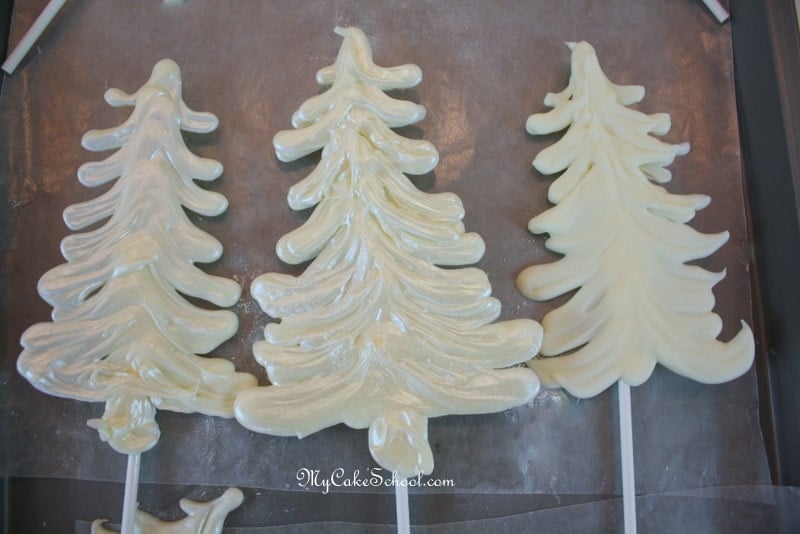
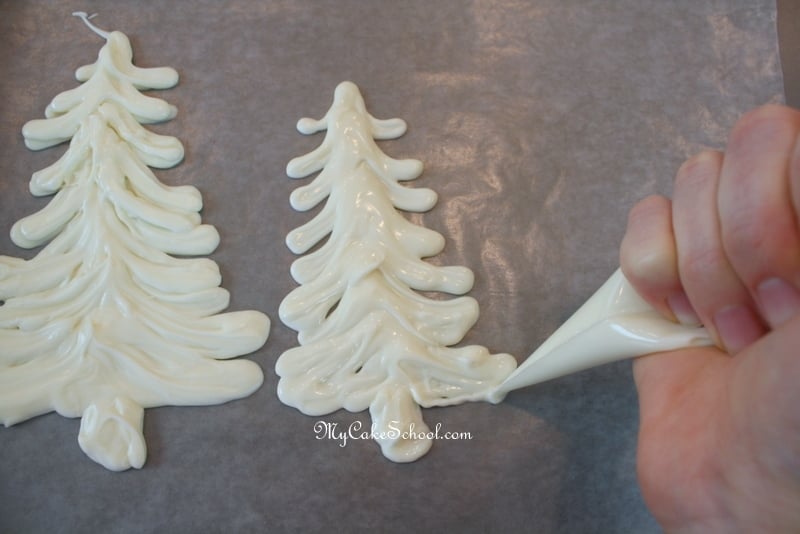
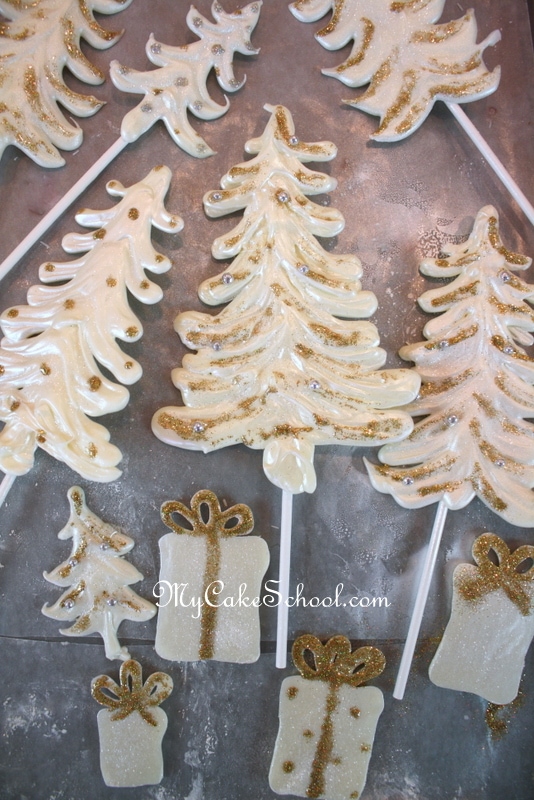
I like to freehand but if you'd prefer to use a template, you can slide one beneath the waxed paper and trace. **Make sure to pipe your trees fairly thick. Mine are pretty lumpy and bumpy. If they are thin, they will break more easily.
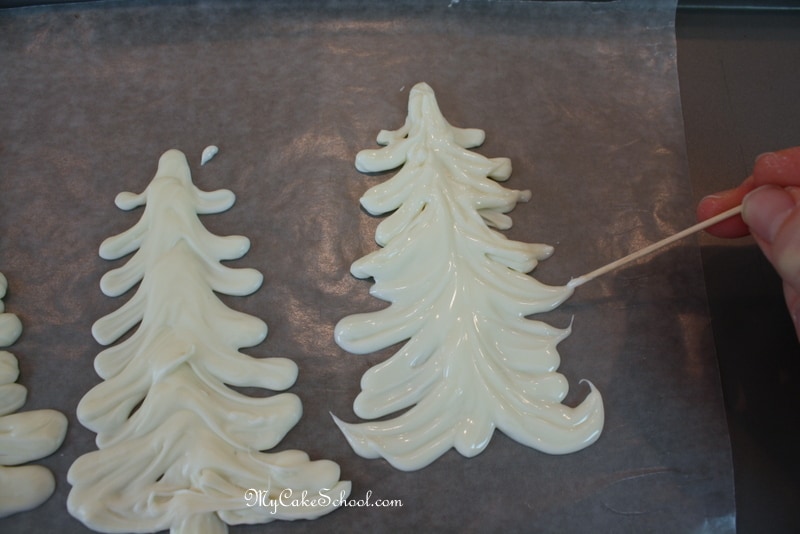
Some of my tree branches have a rounded look, but for others, I used a toothpick to drag out the tips of the branches into a point.
I piped some presents too! Then, into the freezer--the whole tray, for about 10 mintues. Once firm, they're ready for the next step.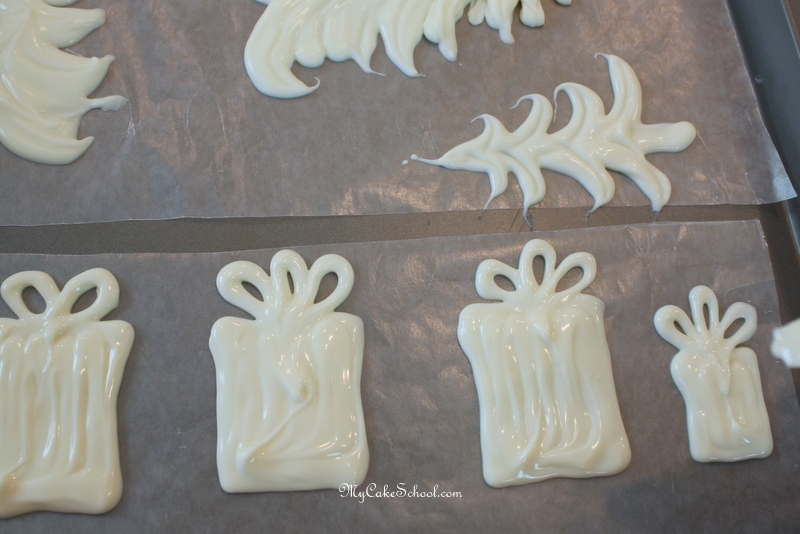
Back into the freezer they go for about 10 more minutes. (You don't have to freeze or chill the chocolate to set...it will set up at room temperature also, but it will take longer & the trees will be a little more fragile when handling.)
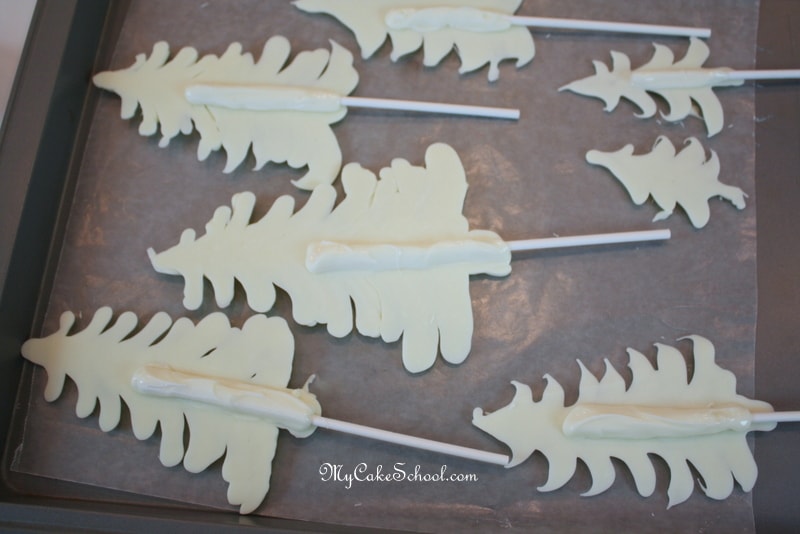
Now, for decorating...my favorite part~
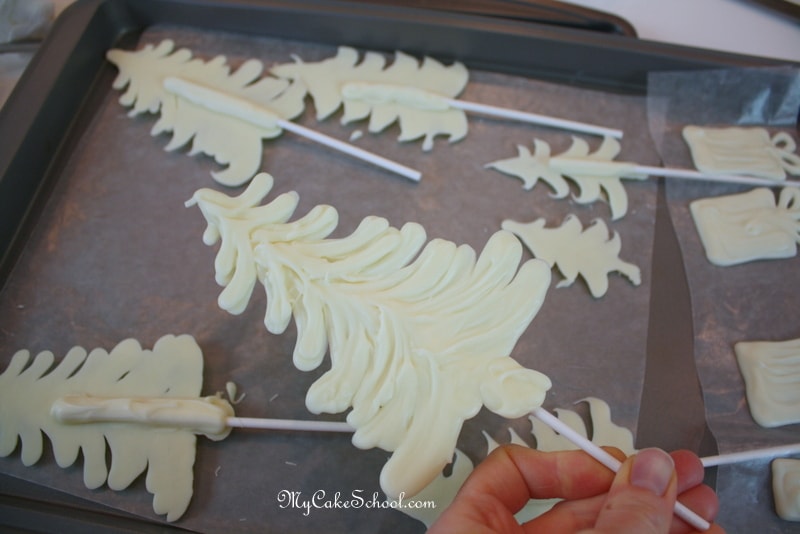
The corn syrup took several minutes--probably a good 15 minutes or so to dry. If I had mixed in a little vodka, it would have dried more quickly. It's fun to experiment though. Piping gel would have worked well too--and so would "sugar glue".
One quick word about the Disco/Twinkle dusts & dragees~ I prefer to use my "bling factor" accents on decorations that aren't going to be eaten. I
f you suspect that your partygoers will devour the forest along with the cake, I would use sprinkles, sanding sugar, candies, etc. instead (And pearl spray is fine!)
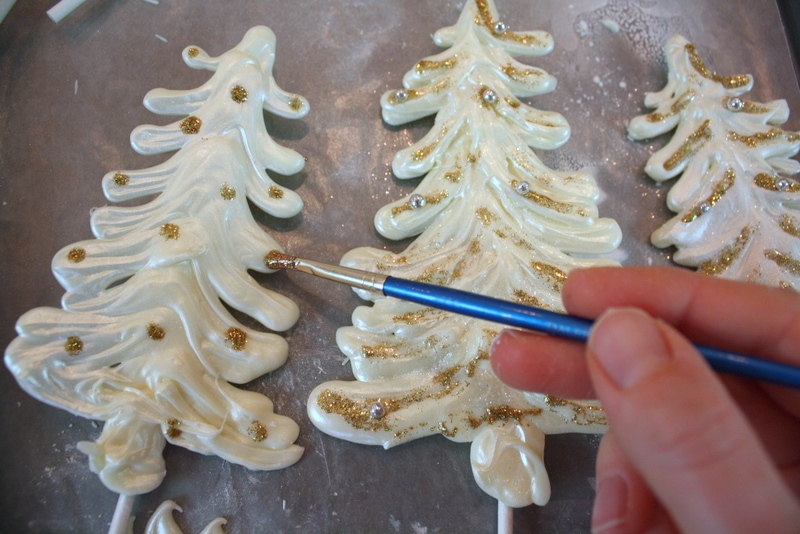
I love the sparkle! I added some silver dragees. I pressed them into the light corn syrup "paint" I had just brushed on, but sugar glue or piping gel would dry a little more quickly.
You know what would have been even better? To have dropped on my dragees just after piping the chocolate trees, before the chocolate had a chance to set. Next time, that's what I'll do.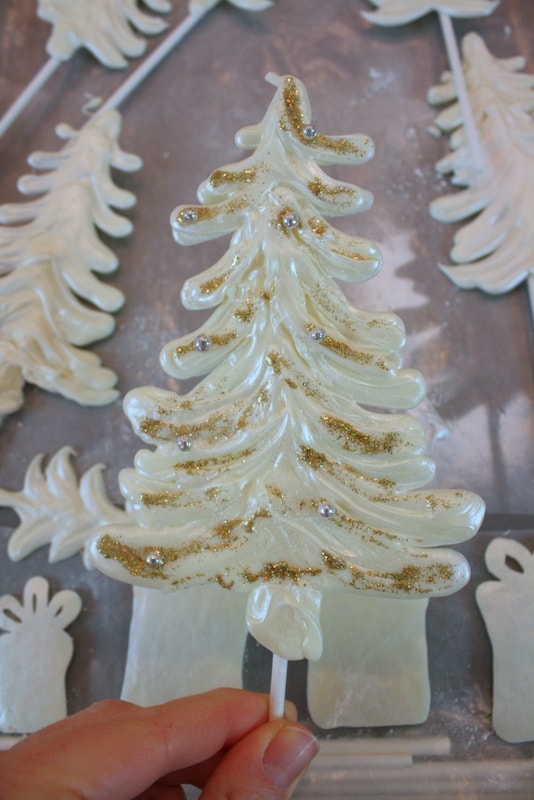
I decorated the presents using the same method (only I wanted the smooth side of the gifts to be the front). These would be fine to leave at room temperature or a cool place in your house until you need them. I still like to pop the cookie sheet with decorations into the freezer for just a few minutes before placing the decorations onto the cake.
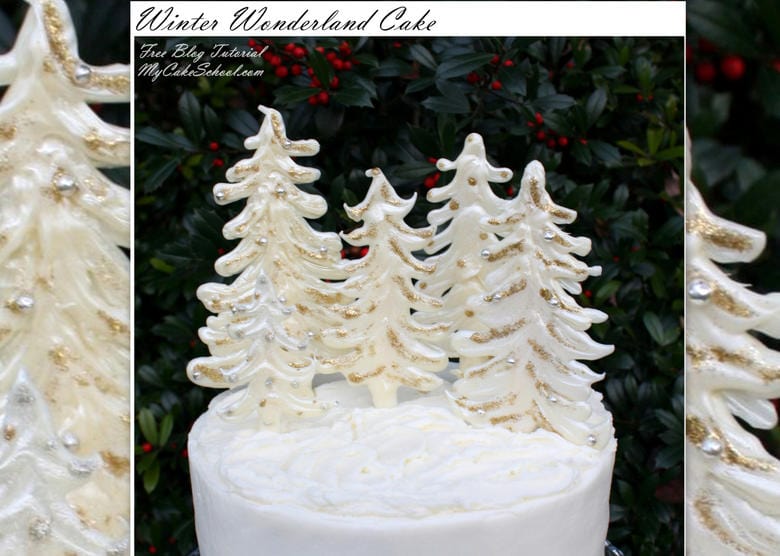
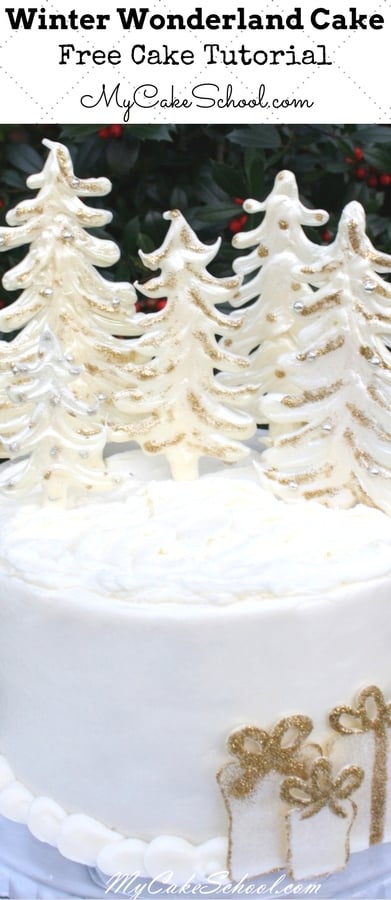
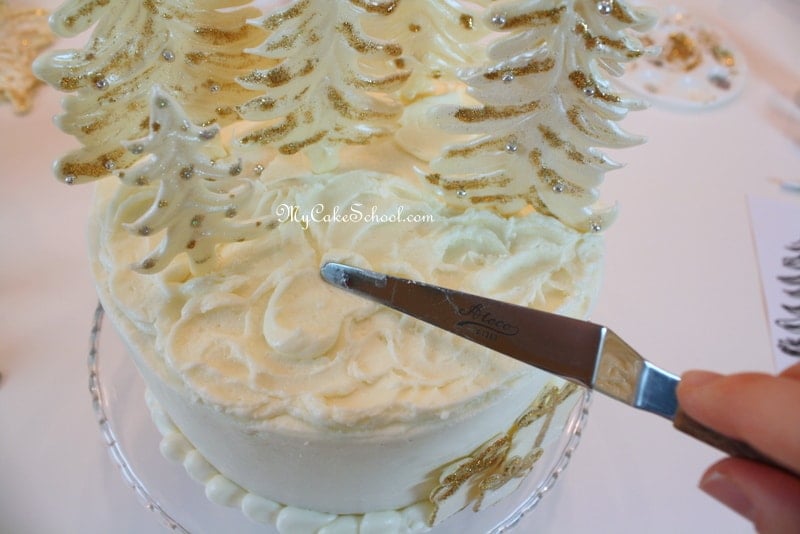
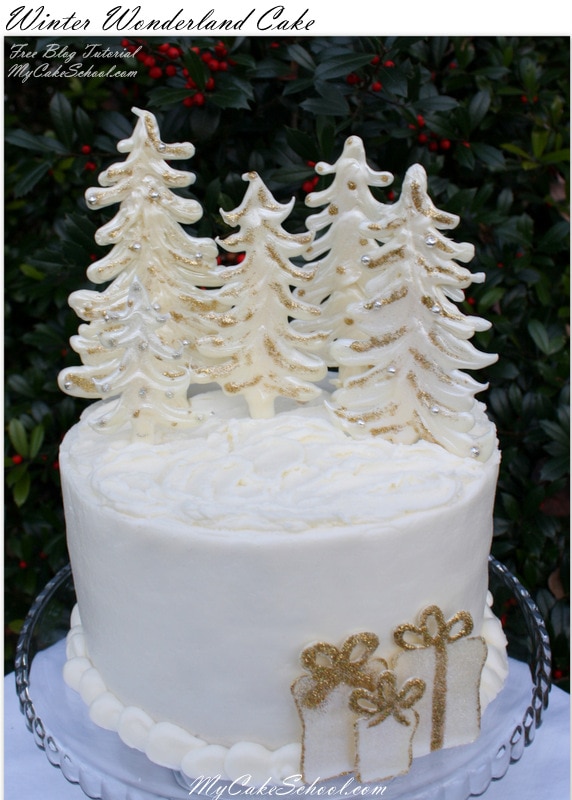
I placed the trees into our 8" round cake which was frosted with vanilla buttercream. I attached the presents to the front side of the cake with a little buttercream. The snowy bottom border was piped from a Wilton tip 12 (medium round tip), in no particular pattern. The frosting on top was applied with just a swirly motion of the spatula.
And here we are!
Thanks for stopping by, I hope you learned something new! If you've never tried working with candy coating for decorations, this is the perfect time to start. Have fun with with it!
It would be so easy to use the same method but with much more color--you could even use green candy coating for green trees. Enjoy making winter wonderlands of your own, and I hope you'll share your creations with us!
Make sure to check out our full collection of tried and true frosting and cake recipes in our Recipes Section!
You can find more beautiful cakes and ideas in our Winter and Christmas Roundup of Cakes, Recipes, Tutorials, and Ideas!
*We create very similar chocolate trees (but green) in our Red Truck Cake Topper-free video tutorial also if you'd like to see a video of this simple process!
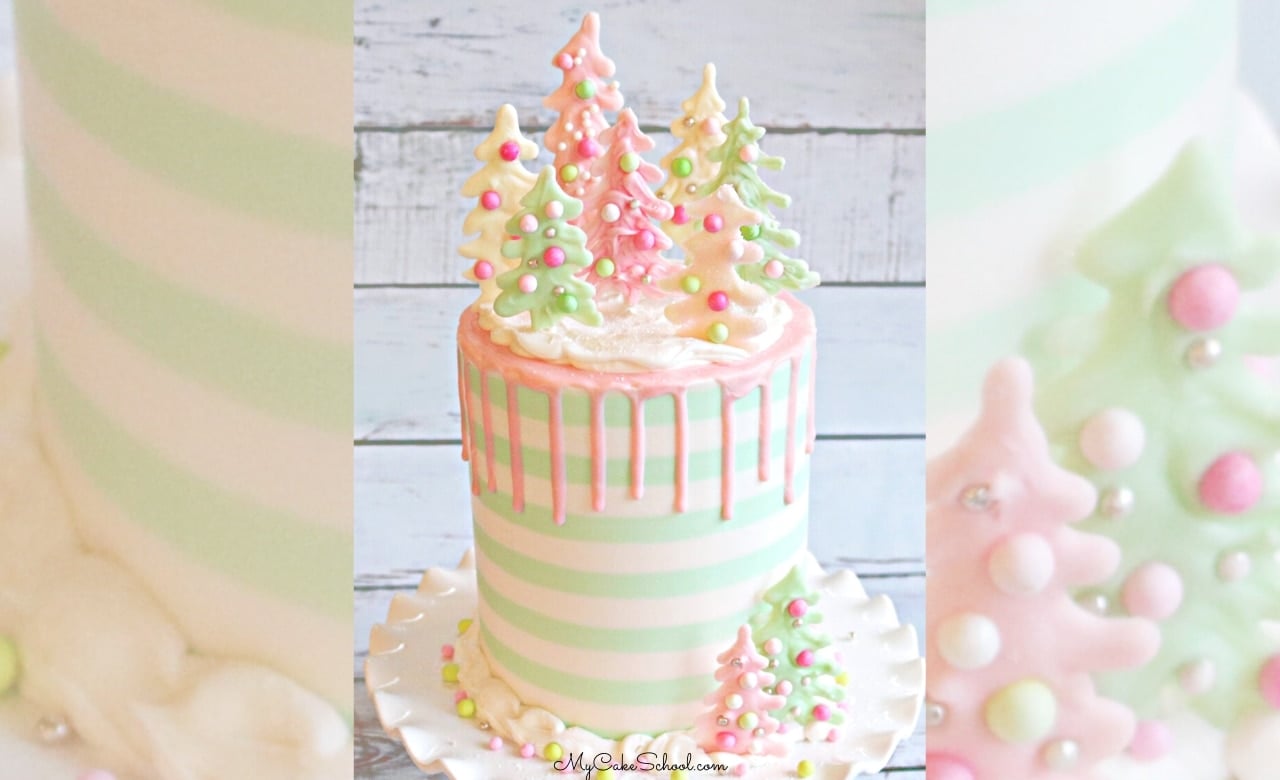
We also have a similar variation of this design in pastels in our member section! Pastel Christmas Cake

I just took a look and you did a great job, I'm happy you gave the trees a try, thanks for posting!
I love you! Brilliant, this is just what I need. Thank you for being so selfless, posting and sharing your skill and knowledge!
This was fun and easy to make. Unfortunately I made my presents too large for the cake, so I quickly made some in royal icing and put them on the plate.
I made peppermint frosting for the snow and the filling inside of a dark chocolate cake, vanilla buttercream on the outside. It was wonderful, everyone loved it. I'll post a picture on the member gallery. As usual, thank you!
Thank you so much!!
@paintmycake, I'm glad that you made it, your cake sounds delicious! ;0)
I just finished my trees and even though they aren't as beautiful as yours, they are so cute! I decorate a buche de noel cake a little different every year and these are perfect to stick in the log.Love your site. All the cakes are terrific. You ladies are good!Thank you and Merry Christmas!
Thanks for the tutorial what a fast easy way to decorate a cake. My grandson can make this with me.
Just gorgeous, Thank you for the Tutorial of the Xmas trees and also the Xmas truck just amazing I will be trying the truck soon.
Thank You!