Happy 2014! New Year's Blog Tutorial
Hi everyone! I'm sorry, I'm down to the wire on this one. ;0)
Today, I'm going to share my easy New Year's Cake with you, which is carved from a simple one layer 9x13 sheet cake. (If you need more servings, make a two layer sheet or go larger...this is an easy design to change up!)
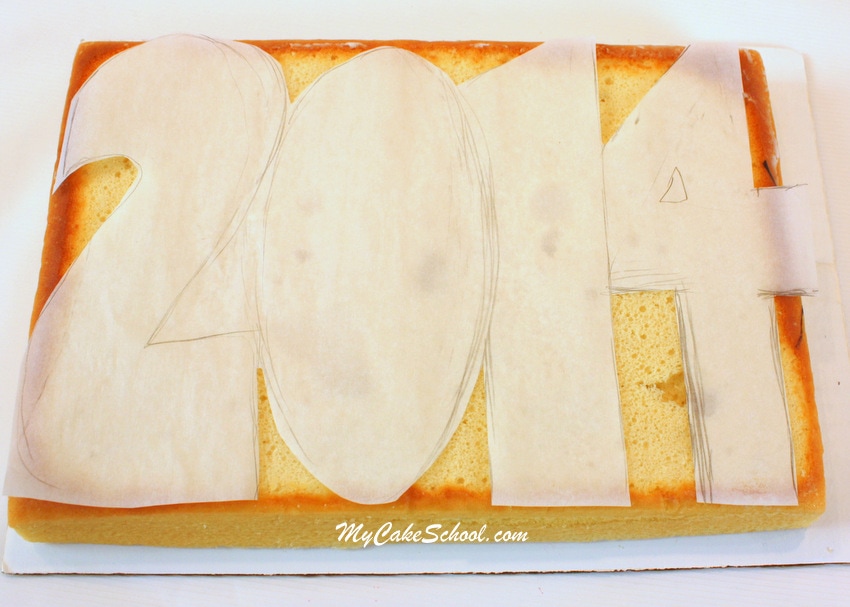
First, I created a template by tearing off a sheet of parchment paper the size of my cake. I played around with the size of the numbers until the spacing was right, and cut it out.
This is what I used as my carving guide. I'm going to link to my template to save you a few minutes. This is a two part template. Just print, cut out, and lay on the cake!: PART 1-New Year Cake and PART 2-New Year Cake.
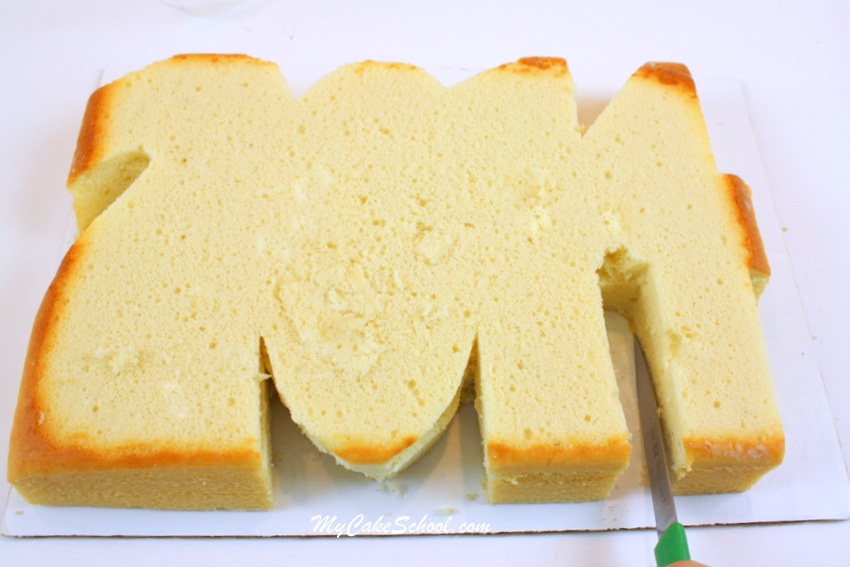
I used a doctored cake mix for this to increase the density a bit. Denser cakes stand up best to carving. Use whatever recipe you'd like. We used our White Almond Sour Cream Cake (Cake Mix). I also like to freeze my cakes before carving to reduce the number of crumbs. This is optional, but it helps!
I frosted my cake with a coat of vanilla buttercream.
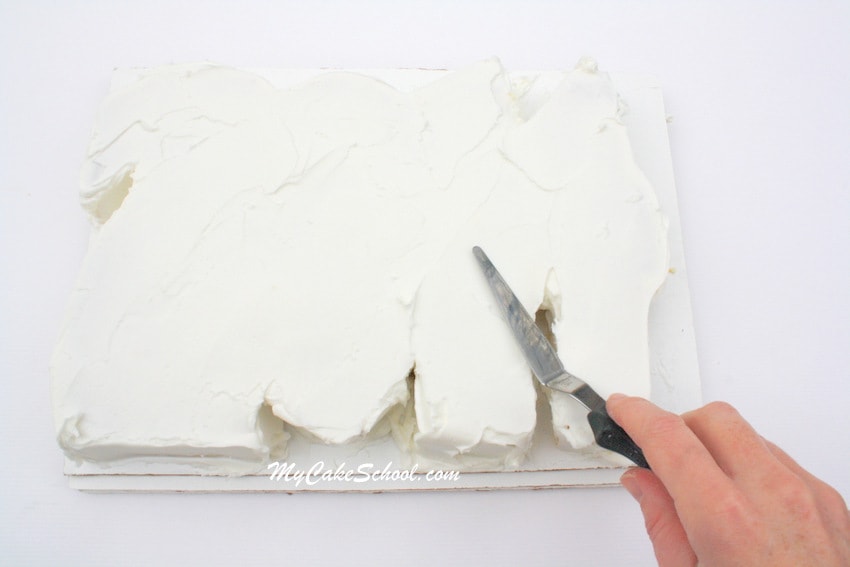
I often use the "Viva" method for smoothing but I was out of Viva paper towels! So, I used my next favorite method for smoothing--the hot knife method. I chilled my frosted cake just until the icing was firm, and then smoothed over it with a very hot spatula...adding fresh icing here and there.
You can see above that I have a cardboard cake board beneath my cake. All of my cakes have a cake board so that I can easily move them to their their base or platter later. With this cake, I used an xacto knife to cut the board down to the size of the cake. I didn't bother cutting away the narrow space between the "1" and "4", but aside from that it was easy to follow the lines of the cake.
I used a toothpick to define our numbers...we'll use these lines as a guide in a few minutes. (By the way, I moved my cake to a cake base which is two stacked cake boards covered with a black plastic tablecloth.)

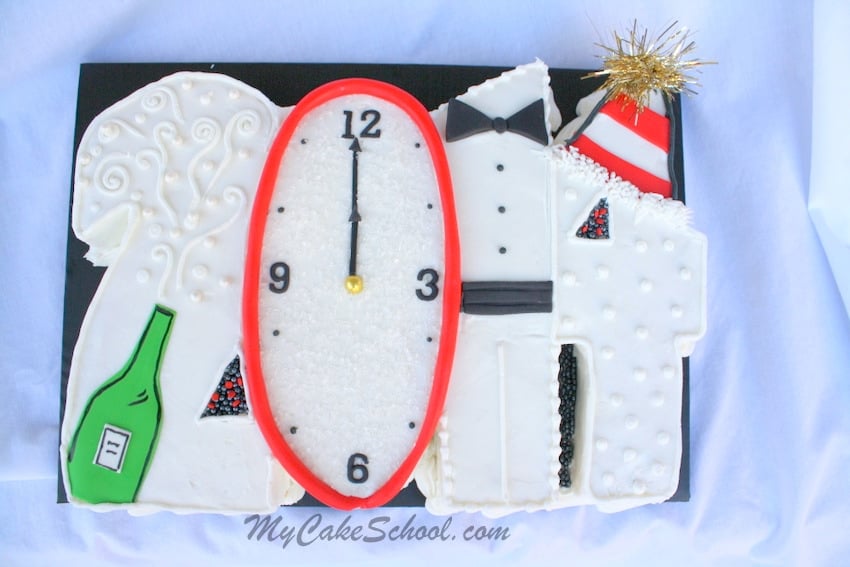
I filled in a few holes (in the "4" and "2") with black sugar pearls to define them. I also rolled a long snake of (pre-colored) red Satin Ice fondant to outline what will soon become a clock on top of our "0".
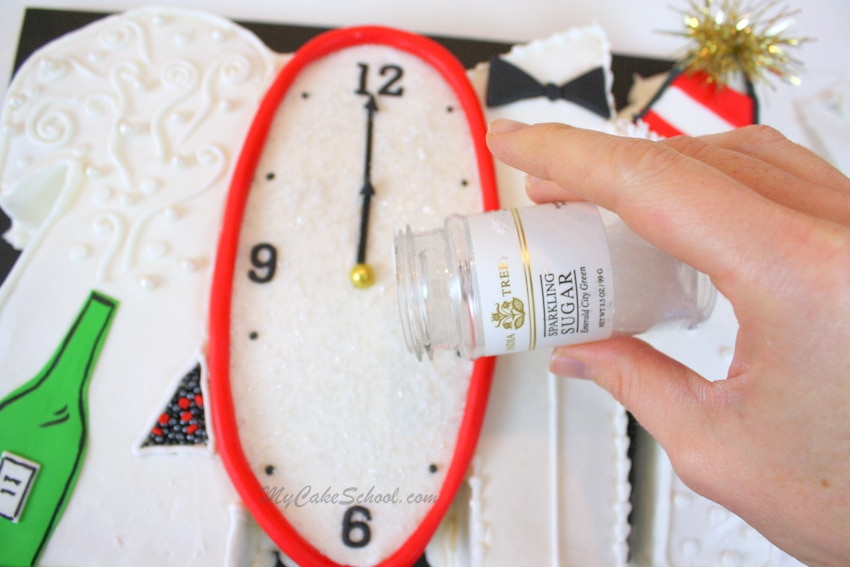
I use a few fondant accents on this cake but all could be easily substituted with buttercream piping. I placed a gold dragee in the center of our clock. We'll add fondant numbers and hands later!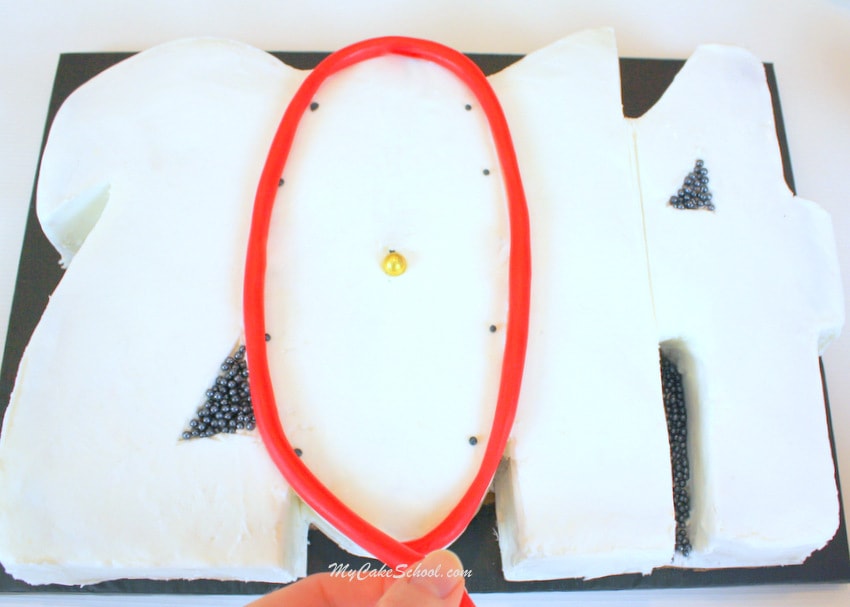
Below, you can see that our "1" is wearing a tuxedo (fondant bow tie with buttercream buttons). Our "4" has a party hat with red fondant stripes and buttercream fringe which was piped with a grass piping tip. 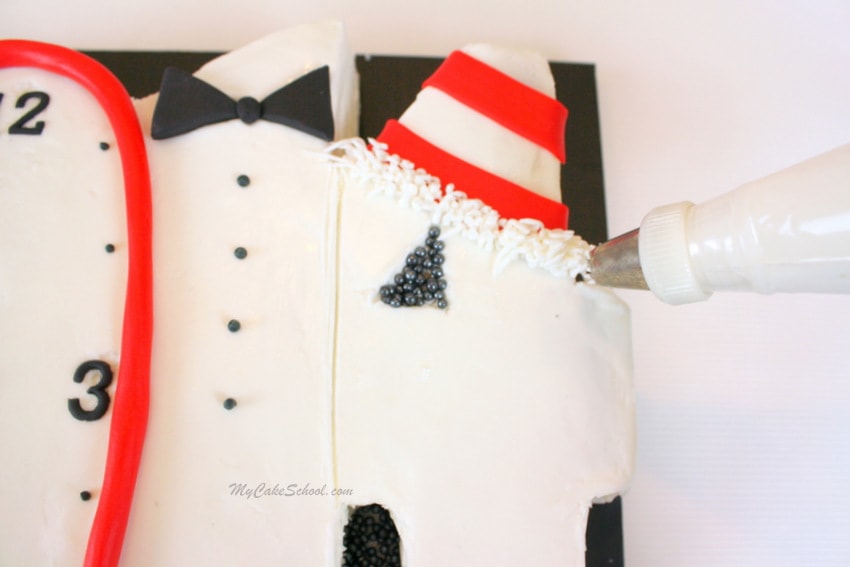
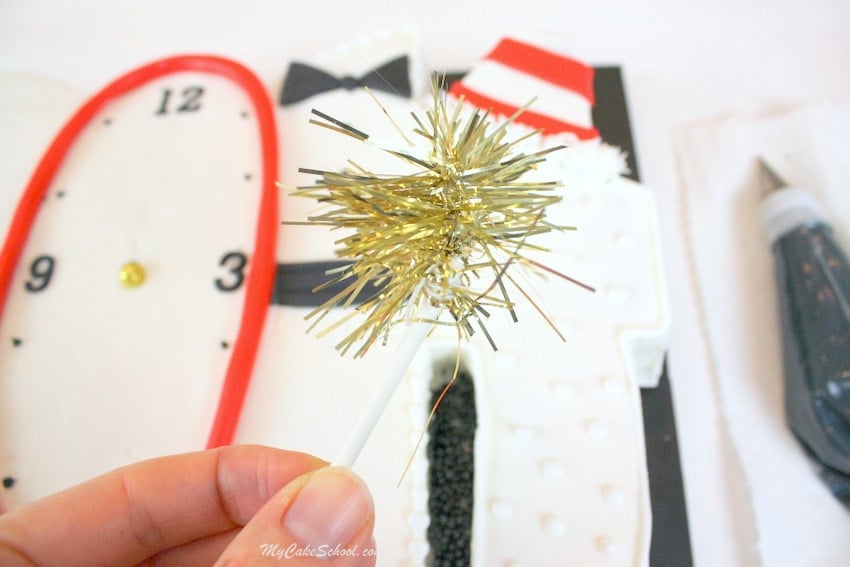
More accents-- I attached a piece of tinsel around a lollipop stick with a piece of floral wire. I pushed the stick into the cake as an anchor, and this will give our party hat a fun gold pom pom on top.
Alternatives could be buttercream piped with a grass tip, or you could fringe a narrow strip of paper and wrap it around the tip of a lollipop stick for a similar look ;0)
You can also see more of the clock below. The numbers are fondant, cut with tappit cutters, and our "1" now is wearing a cummerbund (which is just a rectangle of black fondant with a couple of horizontal impressions made with my knife)
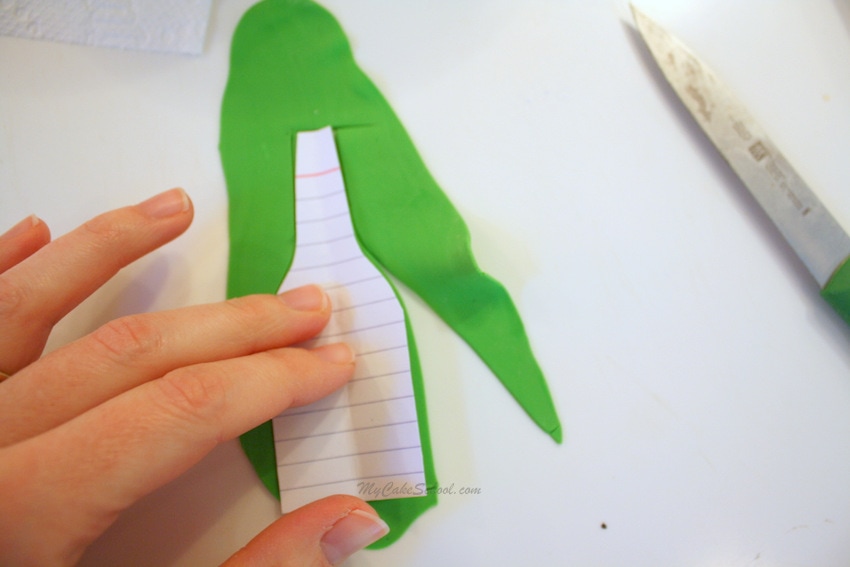
We are almost finished!! Our "2" is very boring up until now. I made a champagne template placed on top of my fondant (tinted Wilton leaf green). I let it set up for a few minutes until I could pick it up easily without worry of distorting. I used a food coloring pen to outline it, and gave it a fondant label. Then I placed the bottle on my "2", and piped swirls of buttercream with a Wilton tip 2.
I added a few sugar pearls to my swirls on my "2", and then as a final touch, added the clock's hands (thin pieces of fondant) and sparkling sugar all over. We are finished!!
Finally, I used a Wilton tip 2 to outline my numbers, and for fun I piped a vertical line on the bottom half of my "1" for the look of white pants ;0) Then, I used a Wilton tip 21 to create a shell border around the bottom.
Ready to see the final cake? Looks like a party! ;0)
I hope that you enjoyed this little tutorial. There are so many variations that you could apply to make this cake your own, so have fun with it!
Thanks for stopping by, and best wishes for a happy, healthy 2014!! xoxo
I LOVE THIS!!! We are moving soon so I haven't been able to bake/decorate at all for Christmas or New Year's and I would love to try this....It's so cute!!!!
This is so adorable....I love how you divide it up ....great showcase...tfs
Soooo pretty. I'm new to this site so please bear with me. Do you have recipes for "doctoring" cake mixes? Resources for where to get templates for make the numbers? Are there recipes for the buttercreams? Do you usually make suggestions of what to you that will hold up or be easy to pipe? How about fondant? Do you buy yours or make yours? If so any suggestions? Thank you!!!!
Brilliant,thank you for sharing.
Hi Azi, Yes, on the site we have "doctored" cake recipes and also recipes for buttercream. We most often make our fondant.....when we buy we use Satin Ice.
AMAZING!!!!!