How to Make a Pumpkin Cake Topper
We're excited to share a beautiful, easy pumpkin cake topper tutorial with you!
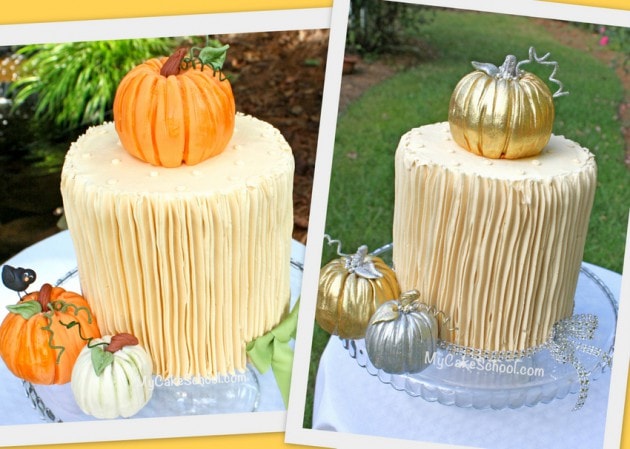
Today, we're going to show you two different takes on a pumpkin themed cake---one very natural look, and one more glamorous look.

After this tutorial, you'll be all set to decorate for every occasion from fall birthdays and showers to elegant fall weddings!

Table of Contents
How to Make Fondant Pumpkin cake toppers for Fall Cakes!
A quick word about our cake-- I crumb coated a double barrel six inch cake with Vanilla Buttercream tinted with Americolor Ivory Coloring Gel.
I then used my 2D (large star) piping tip to pipe vertical ridges. I love this look and even more, I love that it just took me 3 minutes to make my way around ;0)

Our Pumpkins (and many of our cake toppers) start with Rice Krispies Treats!
Now, let's talk PUMPKINS!
No surprise that I started with one of my favorite staples for my cake toppers--Rice Krispies Treats! This is allows me to quickly create a stable form for our decorations without having to use a lot of fondant or gum paste. It also holds it's shape perfectly from the start.
To give you an idea of how many rice cereal treats you'll need, it took five (22g) bars to create my largest pumpkin.

I'm just going to demonstrate one of my pumpkins, since the same techniques apply to all of them. I mashed and compressed the cereal treats into a ball.

Then, I used my little rolling pin to create a depression on top. By the way, keep in mind that pumpkins come in all different shapes and sizes...so, don't feel confined to my method here. ;0)

Next, I rolled out my fondant (which was tinted with Americolor Orange coloring gel) to approximately ⅛- ¼ inch thickness.
I lightly rubbed over my rice cereal treat with a little shortening so that the fondant would adhere a little better. The thickness of your fondant will determine how deeply you can create impressions in your pumpkin for added detail.

Next, cover your cereal treat and trim away the excess.

Next, my favorite part! Adding impressions makes all the difference. I used a small paintbrush handle to create lines in the pumpkin all the way around. I used a rocking motion rather than dragging the handle across the fondant.

Further into the process-- You can see how the depression that I created in the top of the cereal treat earlier gives our pumpkin a nice shape.
The thick impressions were made with the small paintbrush handle, and the thinner & lighter impressions were made with a toothpick.

I used brown fondant (scored with a toothpick) to create our stem. I glued it onto our pumpkin with a little piping gel (dampening with water would be fine too).

I also used some green floral wire to create our pumpkin vines. Just wrap around a paintbrush handle and slide off to create the coiled look.

Here, you can see that I painted a few green accents onto the smaller ivory pumpkin that I made. I used a paint created from Americolor Avacado Green coloring gel mixed with a small amount of vodka. (Lemon extract is a good substitute for vodka if you don't have any on hand)
I also painted a few strokes of orange here and there onto our orange pumpkins...but this is a completely optional step... I just like to paint ;0)

I also formed a few basic leaves by hand from fondant tinted with Americolor Avocado Green.

To make things fun, I decided to have a little black bird perched on one of the pumpkins. I used a piece of bent floral wire for the legs (and anchored it into the pumpkin).

Then, I formed the other bird parts with black fondant. We're talking VERY simple bird shapes.
I used the floral wire to create a little hole in the bottom of the body of the bird, so that later it will fit properly. The eyes are fondant with a little black coloring gel pen, and the beak is a small piece of fondant.
Since the bird is very small, it dried quickly--After 30 minutes, I felt comfortable with assembling the bird (piping gel was my glue) and pressing onto the wire legs.

I drew on his little birdie toes with my black food coloring pen ;0)

Now, our cake is finished!

I hope that you enjoyed this little pumpkin cake topper tutorial! I think that this cake would be perfect for fall gatherings..and the pumpkins are so much fun to make! You could even make them into jack-o-lanterns for Halloween cakes.
How to Make Elegant Gold Pumpkin Cake Toppers for your Cakes
This SHOULD be the end of the tutorial...but my curiosity got the best of me as I wondered how we could dress up our pumpkins a bit. For fun, I decided to give them an EXTREME makeover!!
I happen to have some silver and gold highlighter dust that I wanted an excuse to break out--I love their metallic sheen. So, if you'd like to see the glammed up version of this cake, let's keep going!~~~
After taking the photo above of our finished fall cake, we removed the stems & leaves and started painting. I am using gold highlighter dust here (and silver dust on our smaller pumpkin as well as a few accents.) --
**I LOVE the super shiny metallic look that highlighter gives us, but the big tradeoff is that highlighter dust is not edible and should not come into contact with your cake. So, if you glamorize your pumpkins, just be mindful of this & don't paint the parts of the pumpkins that will touch the cake...or at least, have a little barrier (Waxed paper, etc.).
I painted our pumpkin with a paint created from gold highlighter mixed with a touch of vodka. After painting the pumpkin, I allowed it to dry before brushing over it with dry gold highlighter and a dry paintbrush. I thought it would be nice to still have some orange showing through...but in the end we decided to go all the way!
 MyCakeSchool.com")
Look at our pumpkin now! I brushed the top with a little piping gel and sprinkled on some silver dragees. We painted our stems, leaves, and vines with highlighter as well, and accented with silver hologram dust (which I love and don't get to use nearly as much as I'd like to!) ;0)

Our silver pumpkin has gold accents and our gold pumpkins have silver accents. I have some ribbon that I bought from Michael's that is covered with rhinestones. It made the perfect bling border for our dressed up pumpkin cake! I secured with a little buttercream in back.

Are you ready for our shiny, new version? Here it is!

I love how this one came out too. I think that a few tiers of cake accented with beautiful silver and gold pumpkins would make a lovely and unique autumn wedding cake. I hope that you'll find inspiration in one or both of these designs and try them out for yourself!
 pumpkin cake toppers!")

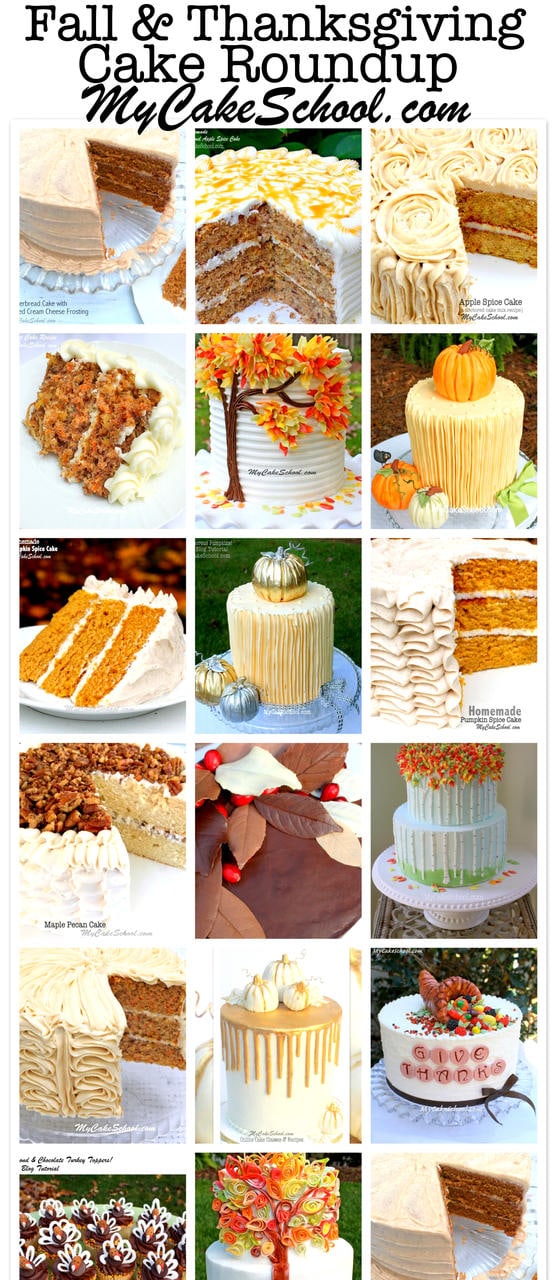
Fall Cake Recipes and Cake Decorating Ideas
Interested in even more fall cake designs and recipes? Don't miss our roundup of favorites! Here are just a few of them, but if you click over to our roundup, you will find many more!
Fall & Thanksgiving Roundup of the BEST Cakes, Tutorials, and Ideas!
How to Make a Pumpkin Cake Topper- Free Tutorial

Learn how to make beautiful pumpkins for your fall cakes!
Materials
- (For this cake, I decorated a 6 inch double barrel cake, frosted by piping vertical lines all the way around with a 2D piping tip for a ridged effect. The cake is frosted with our classic vanilla buttercream)
- Rice Cereal Treats- I used pre-made 22 g. bars. One large pumpkin took 5 bars. Adjust to your liking and for the number of pumpkins you will make.
- Vegetable Shortening
- Fondant
- Coloring gels: Americolor Orange, Ivory, Avocado Green, black (for bird)
- Black food coloring pen for bird's eyes- optional
- Silver Dragees
- Gold and/or silver luster dust/highlighter dust/edible paint of choice (*many highlighters are not food safe. Make sure that you check the label and plan accordingly)
- Paper covered floral wire (for vines)
- Decorative ribbon for border
- Small brush(es)/toothpick for creating lines
- vodka/lemon extract to mix with colors for paint
- Food safe glitter/sparkle of choice for dressed-up pumpkins (optional)
- tylose powder (optional) -You can knead this into the fondant for faster drying
- Piping Tip: We used a 2D for outer frosting
- Piping gel- (optional) edible glue
- Fondant rolling pin
- Miscellaneous: Disposable piping bags, small angled spatula, cake board (optional), cake base/pedestal of choice
Instructions
- Push cereal treats together and try to compress them to strengthen and smooth the shape. I like to make a small depression on top also.
- Lightly coat with vegetable shortening
- Roll out fondant in desired colors (you can knead in a little tylose powder for faster drying). Roll fondant to ⅛- ¼ inches.
- Cover shaped cereal treat with fondant, use small paintbrush handle and/or toothpick to create lines in the pumpkin(s)
- Add stem with a little piping gel or very lightly dampen the fondant to make it tacky.
- Mix a little coloring gel with vodka to create a "paint" for adding more color to pumpkins (optional)
- Coil floral wire around paintbrush handle and slide ooff for pumpkin vine. Paint green or your color of choice (with coloring gel + vodka).
- Add pumpkin leaves (shaped by hand or with cutter)
- Crow- optional. Create shapes with black fondant, allow to set up. Push floral wire legs into pumpkin as shown in photo. Add crow's body.
- If making fancy pumpkins, paint pumpkins with gold or silver luster dust mixed with a little vodka and paint over pumpkin. Once dry, dust over again with luster dust using a dry brush. Add disco dust, glitter, silver dragees if you like. Paint vines with gold or silver paint also.
Thanks for stopping by! If you make pumpkin cake toppers from this tutorial, we'd love for you to post them in the comments below!
Hi Aasha, We did not add anything to the Rice Krispie Treat bars. They are easily pressed together very tightly to form a ball.