Raspberry Velvet Cake
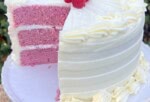
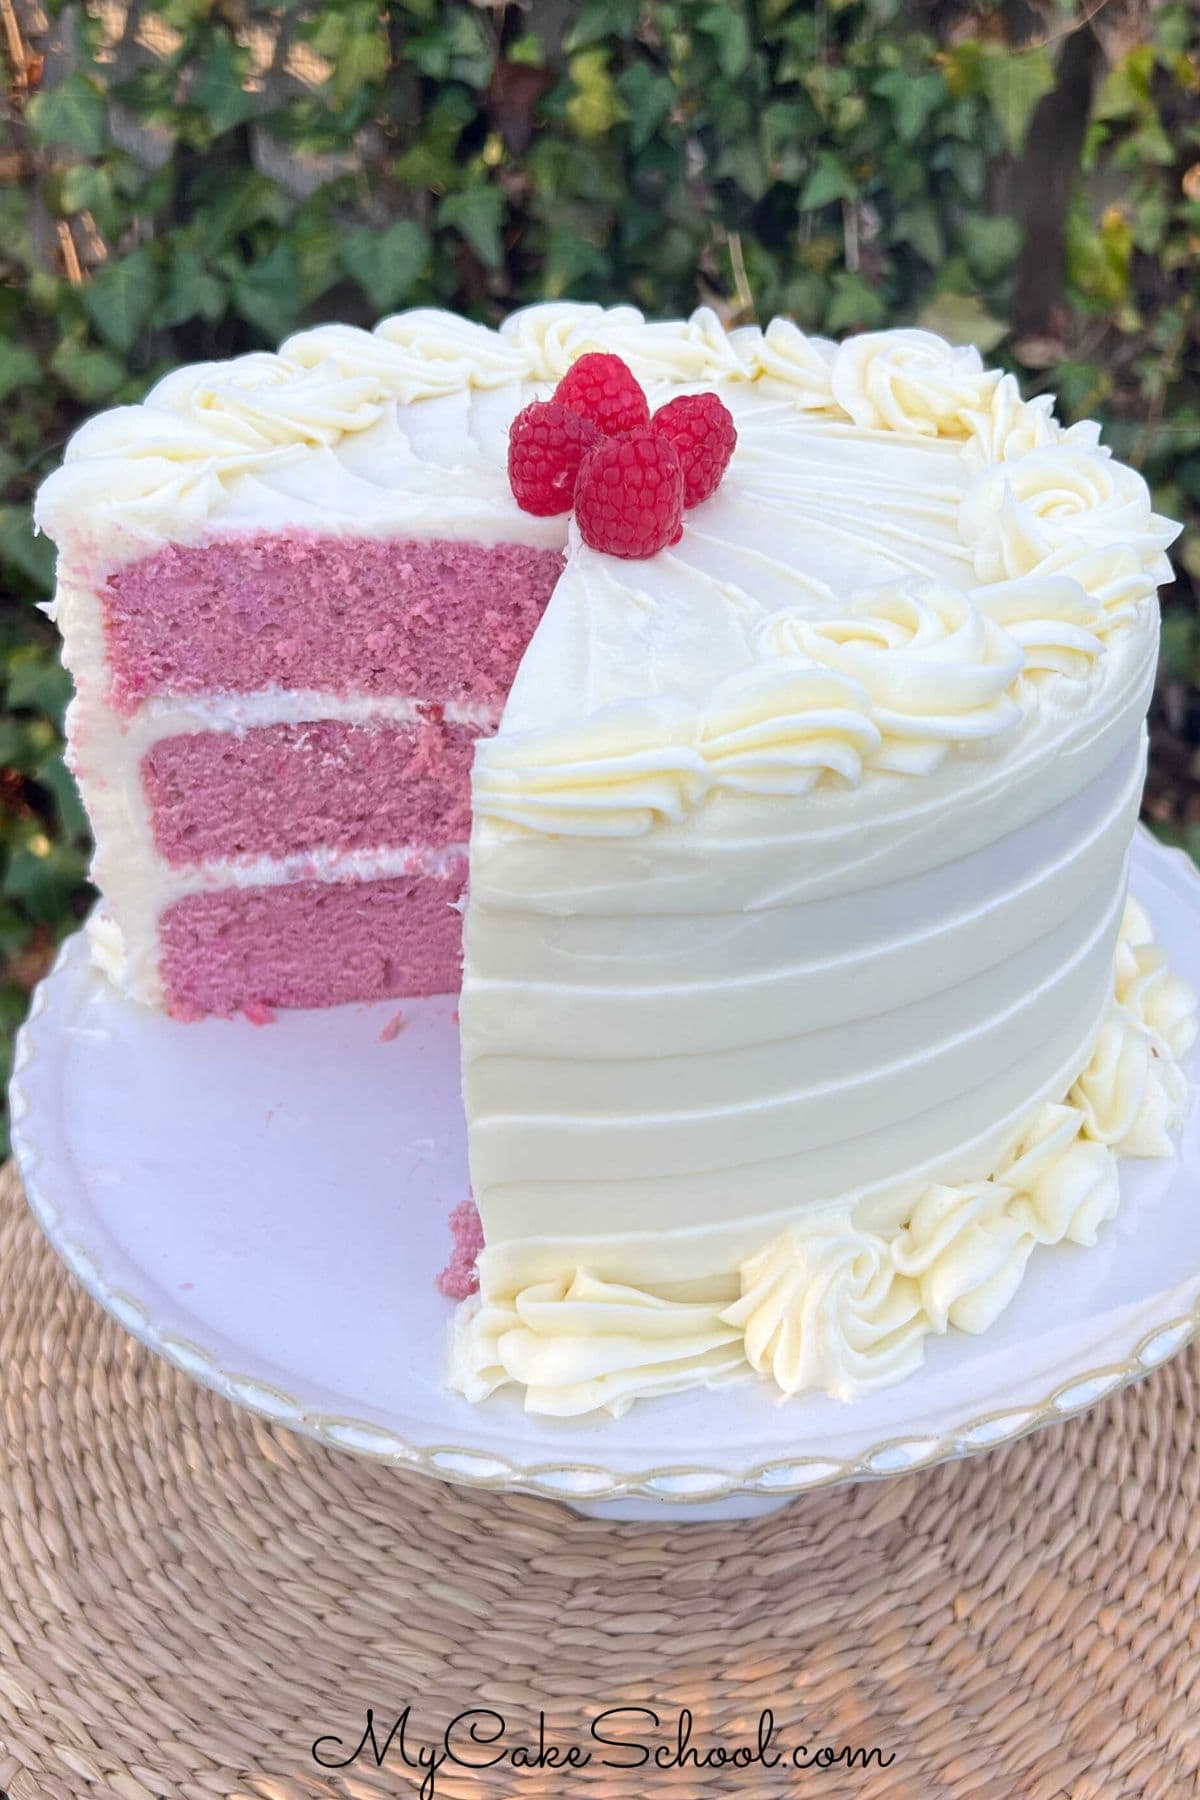
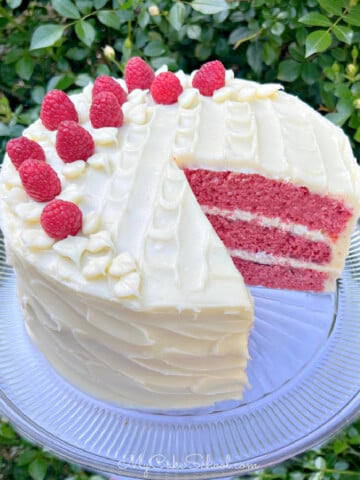
We're excited to share this moist homemade Raspberry Velvet Cake with you! Soft Raspberry Velvet layers are filled with whipped cream and raspberries, and frosted with cream cheese frosting. This is such a flavorful recipe, and perfect for spring and summer celebrations.
We've made many "velvet cakes" over the years! These cakes are named for their velvety soft texture, and they often (on our site at least) contain a block of cream cheese as a secret ingredient. It adds richness and a tender crumb. Some of our favorites have been white velvet cake, vanilla velvet cake, white chocolate velvet cake, coconut velvet cake, and lemon velvet cake, just to name a few!
Table of Contents
Key Ingredients
Raspberries (we used frozen) which we reduced over heat
- Unsalted Butter (we add the salt separately)
- Cream Cheese adds richness and creates a soft texture
- Sugar
- Eggs
- Buttermilk's acidity makes the crumb extra tender
- Vegetable Oil
- Baking Soda , Baking Powder, and Salt
- Pink/Red coloring gel (optional)
*Not included in this list: our whipped cream & raspberries filling, and cream cheese frosting.
How to Make Raspberry Velvet Cake
- We recommend making the raspberry reduction first as it takes some time (although not difficult) and needs to cool. You could even do this step the night before and refrigerate.
This step involves blending the raspberries in a blender, straining the seeds out, and heating the seedless puree in a saucepan to reduce. The benefit is that you get more flavor without all of the extra liquid.
- This cake is similar to many of our cakes that call for cream cheese in the batter. After mixing the room temperature butter until smooth, we added in the room temperature cream cheese and mixed to combine.
- Then, we added in the sugar, mixing for a few minutes until lightened and fluffy. **We also used a bit of pink coloring gel to brighten up the batter, you can start with a small amount and then increase if needed in the next steps.
- We then added in our eggs, one at a time, and alternated between adding our dry ingredients and wet ingredients. Mix *just until combined* so the batter isn't over-mixed.
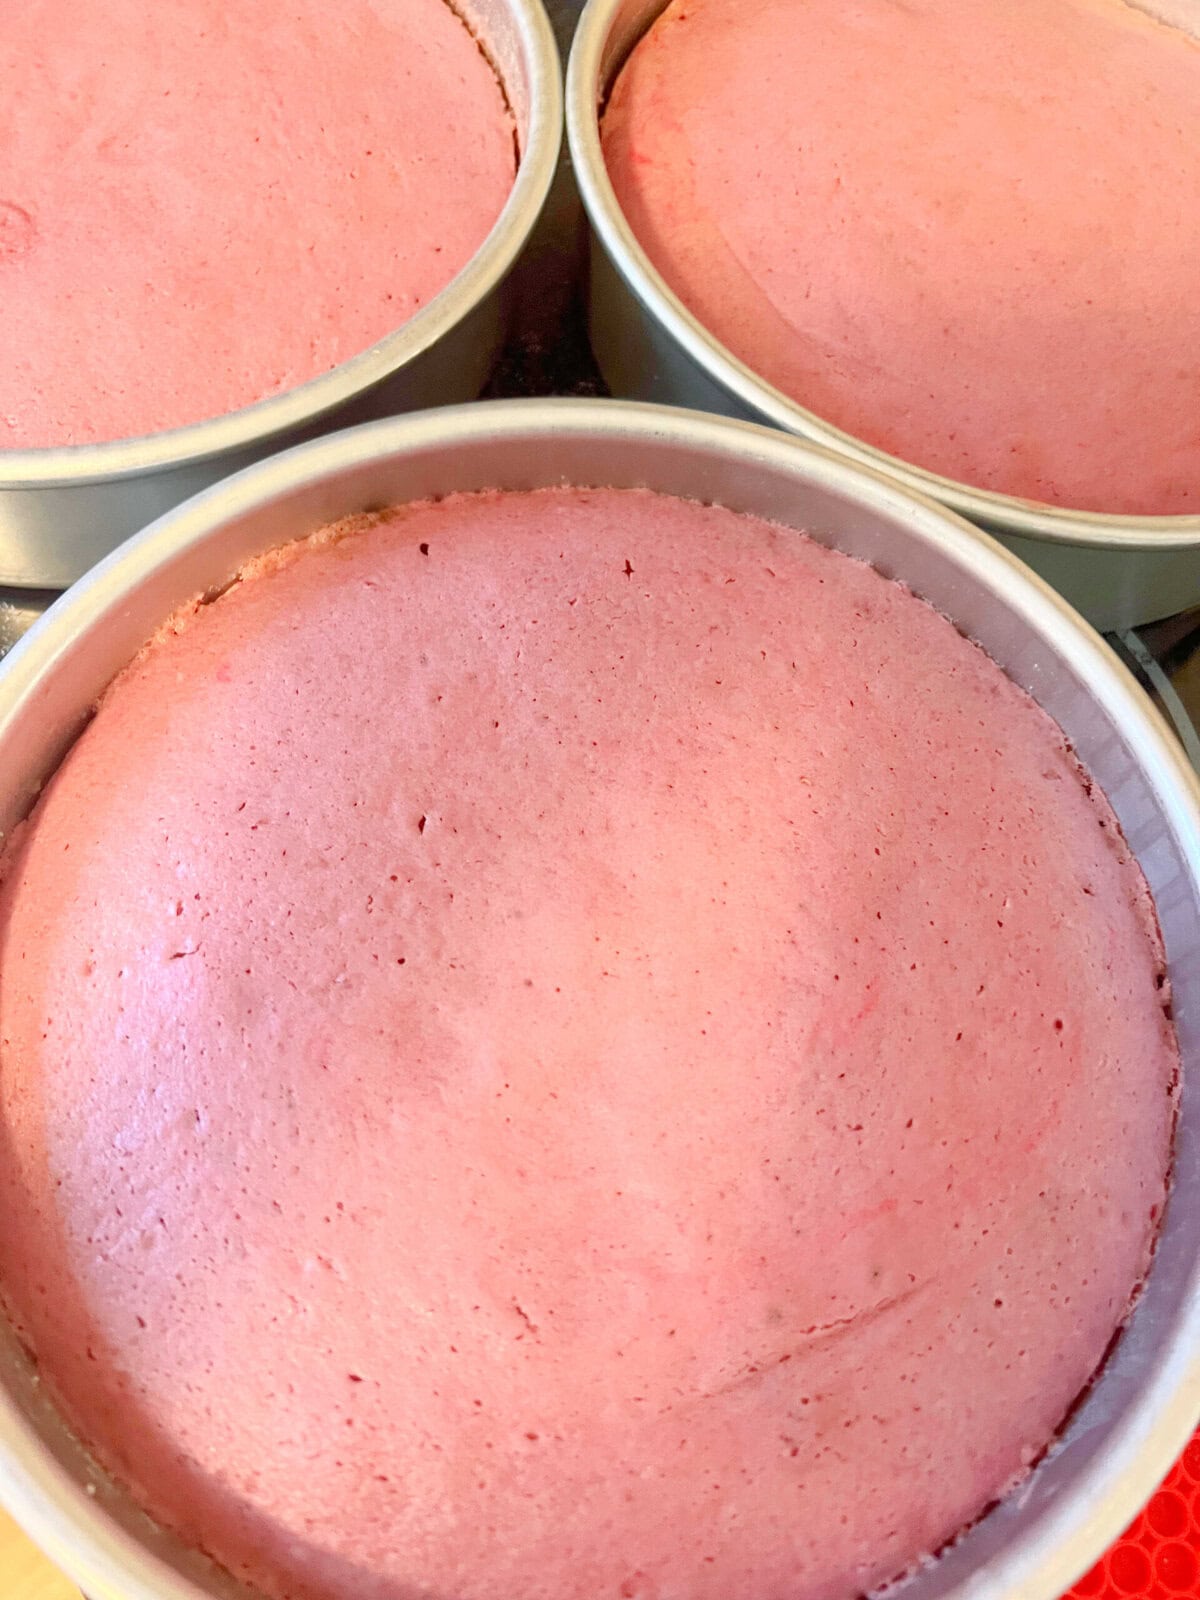
- Bake at 325 F for about 25-28 minutes or until a toothpick comes out clean or with just a few crumbs attached.
Allow the finished cake layers to cool on a cooling rack for 5 minutes before turning out. Cool the layers completely before assembling the cake. (You can even wrap and freeze the layers for up to three months!)
Assembling the Raspberry Velvet Cake
There are many fillings & frostings that would be great with raspberry cake layers, from cream cheese frostings to buttercream frostings, lemon or coconut frostings, or even chocolate or white chocolate frostings.
Today, we whipped up some simple whipped cream, created a glaze for the cake layers using seedless raspberry jam, and made a quick and delicious cream cheese frosting.
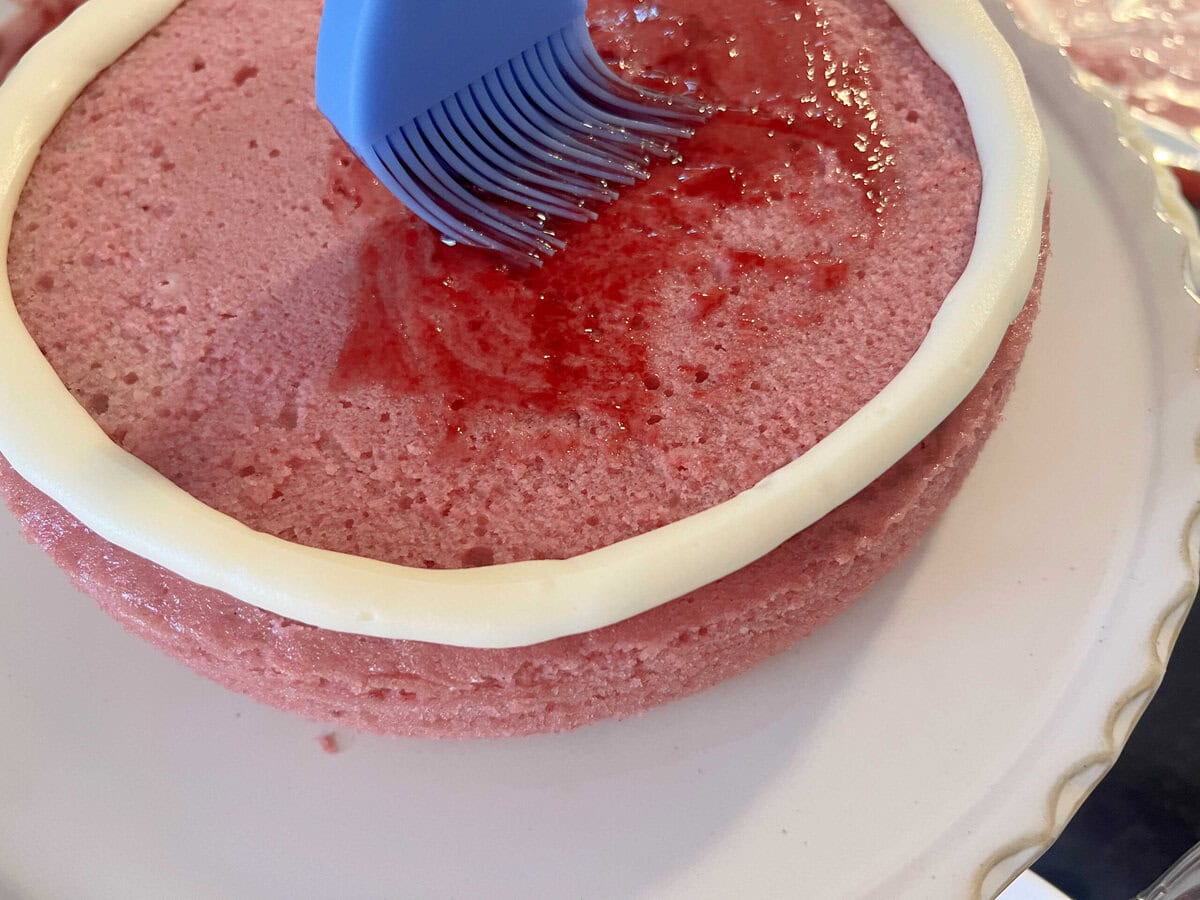
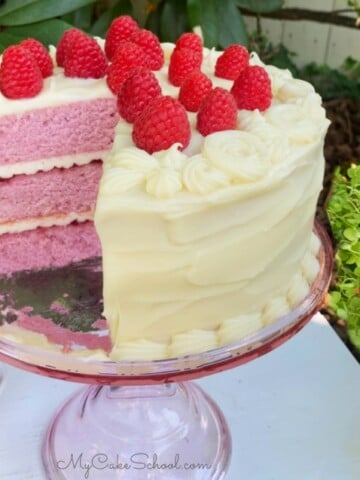
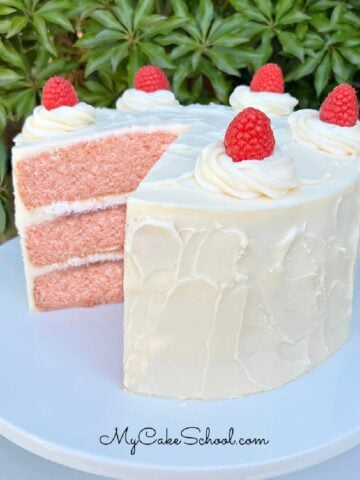
We placed the first cooled cake layer on a cake pedestal. Then, we piped a dam using a disposable piping bag with the tip snipped away, about ½ inch from the edge. We brushed on our raspberry jam "glaze" (jam thinned with a bit of hot water), and filled it with whipped cream and fresh raspberries.
We repeated these steps for the next cake layer, and topped with the final layer. We filled in the gaps between the layers with more cream cheese frosting (we like to use the same piping bag that we used for the dam for this step).
Then, we crumb coated the cake with a thin layer of cream cheese frosting. At this point, it is a good idea to chill the cake for about 15 minutes in the freezer to firm things up (or longer in the refrigerator). This just makes is easier to apply the final coat of frosting.
Apply the final coat of frosting with an offset spatula, smooth with a bench scraper or spatula, and decorate however you like!
We used a cake comb to create stripes as we rotated the cake on a turntable. Then, we added a chunky border of shells and rosettes using a 1M piping tip. We topped with a few fresh raspberries!

More Cakes with Raspberries
We have made many cakes with raspberries over the years! Some of our favorites are our Raspberry Layer Cake, Almond Raspberry Swirl Cake, Lemon Raspberry Swirl Cake, and White Chocolate Raspberry Cake just to name a few!
Have you made this? We would LOVE for you to leave a ⭐️ rating as well as a comment and photo below! We really appreciate your feedback!

Raspberry Velvet Cake
Ingredients
- 8 oz (226g) cream cheese, room temperature (we used one 8 oz package, full fat.)
- ¾ cups (168g) unsalted butter, room temperature (or close to room temp) **Equivalent to 1 ½ sticks. (shouldn't be overly soft)
- 2 cups (400g) sugar
- 4 eggs room temperature
- 3 cups (342g) cake flour See notes if substitution is needed.
- 2 teaspoons (8g) baking powder
- ½ teaspoon (3g) baking soda
- ½ teaspoon (3g) salt
- ¾ cup (182g) buttermilk (See Notes for substitution)
- ¼ cup (54g) vegetable oil (We use canola oil)
- 1 teaspoon (4g) vanilla extract
- ¾ cup Reduced Raspberry Puree (We started with one 10 oz bag frozen raspberries. We blended them in a blender with a little water, then pushed through a strainer to remove the seeds. Then reduced to ¾ cup.)
- 2 Tablespoons Raspberry Seedless Jam (optional)
- Pink Coloring Gel/Food Coloring (optional, but without coloring the cake is closer to a pale purple)
Whipped Cream Filling
- 1 cup (240g) heavy cream
- ¼ (29g) cup powdered sugar
- 1 (4g) teaspoon vanilla extract
- sliced fresh raspberries (optional) We sprinkled a few between cake layers and also used a few whole berries on top of the finished cake.
- Seedless Raspberry Jam for glazing layers (optional)
Cream Cheese Frosting
- 2 sticks (226g) unsalted butter, slightly softened
- 16 oz cream cheese softened (452g)
- 2 teaspoons vanilla extract (8g)
- ½ teaspoon salt (2g)
- 6 cups confectioners sugar (690g) (Adjust amount up or down to your liking)
Instructions
Raspberry Reduction
- Use a blender to liquify/puree raspberries (approx 10 oz) to make about 1 ¼ cups puree. You may need to add 2-3 Tablespoons water to help things along. We used frozen raspberries, partially thawed.
- Place a fine mesh strainer over a bowl, and using the back side of a spoon or a rubber spatula, pour the puree into the strainer and press/stir the puree through it to remove the seeds.) Remember to scrape the other side of the strainer as well for any remaining seedless puree.
- Pour into a saucepan and heat over medium heat. (We also added 2 Tablespoons Seedless Raspberry Jam for an extra boost of raspberry flavor & a little sweetness-optional).
- Heat to a gentle simmer (rather than a rapid boil), reduce to low-medium as needed. It will thicken and reduce. Stir occasionally. We are reducing the puree to ¾ cup. After about 15 minutes of simmering, it should have reduced to close to ¾ cup, just pour into a heat-proof measuring cup to the ¾ cup mark. If it is under ¾ cup, you can add a bit more water to supplement. If it is way above ¾ cup, simmer a bit longer. **It is fine to do this step the day before if you'd like and refrigerate. The purpose of reducing is to give you the flavor of 10 oz raspberries without adding so much liquid to the recipe.
For the Cake Layers
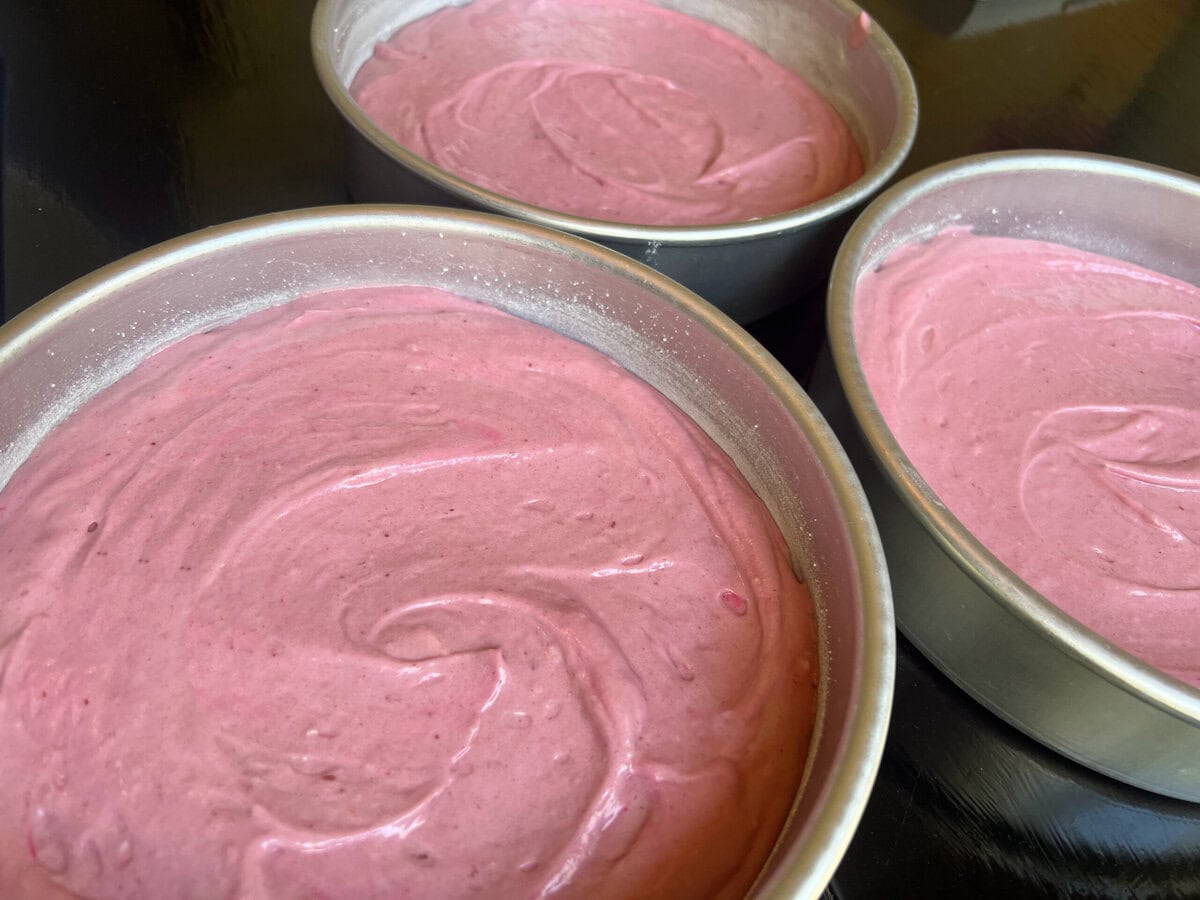
- Preheat the oven to 325 degrees F. Grease and flour three 8 inch cake pans. We like to line the bottom of our cake pans with circles of parchment paper. *You could also bake this in two 9 inch pans and add a few more minutes to the bake time.
- Dry Ingredients: In a medium bowl, whisk the flour, baking powder, baking soda, and salt for 30 seconds and set aside.
- Wet Ingredients: In another bowl or measuring cup, add the buttermilk, vegetable oil, vanilla, and ¾ cup cooled (cool or slightly warm), reduced raspberries. Set aside.
- In the bowl of your mixer, add the butter and mix on medium speed until smooth. Then, add the room temperature cream cheese, mixing until smooth.
- Gradually add the sugar and mix at medium speed for 2-3 minutes, it will become fluffier. If you'd like to add pink coloring, you can do that at any time. Start with less than you think you'll need. You can always increase the amount of coloring gel after adding the raspberry mixture.
- Mixing on low speed, add the eggs one at a time, mixing to incorporate after each addition.
- With the mixer on low speed, alternately add the flour mixture and the buttermilk/raspberry mixture, beginning and ending with the flour mixture (We did 3 additions of the dry mixture, 2 additions of wet).
- Divide the batter between the three prepared 8 inch cake pans.
- Bake at 325 degrees F for 25-28 minutes or until a toothpick inserted into the center comes out clean or with just a few crumbs attached, adjust time as needed.)
- Once done, remove from oven and let cool for 5-10 minutes in the pans on a wire rack before turning out.
- This recipe makes 7 ½ cups of batter.
For the Whipped Cream Filling
- Chill the mixing bowl and beaters/ whisk attachment in the freezer for 10 minutes.
- Pour the whipping cream, powdered sugar and vanilla extract into the chilled mixing bowl, begin beating on low speed gradually increasing to medium high speed.
- The cream begins to thicken and stiff peaks form- be careful not to overmix. This happens fairly quickly! At "stiff peak" stage, peaks form and hold their shape when beaters are lifted. This is when it's ready.
For the Cream Cheese Frosting
- Add the softened butter to the bowl of your mixer. Beat on low to medium speed until the butter is smooth.
- Cut the softened cream cheese into pieces and add to the butter, along with the salt, mixing at low to medium speed until incorporated. If you are using a hand mixer you may need to soften the cream cheese a bit more.
- Add the vanilla. Gradually add the powdered sugar mixing on low speed until blended.
- Increase mixing speed slightly, mixing until cream and well combined. Be careful not to overmix.
- This frosting will pipe best if used while still chilled. You can make it in advance, refrigerate and when ready to use, let it soften slightly (do not microwave) and remix.
Assembling the Cake
- We lightly glazed our cake layers with seedless raspberry jam. This is optional. To do this, we placed a scoop (about ¼ cup) of seedless jam into a bowl and added about 1 Tablespoon of hot water to it to create a glaze. Add a bit more water if you want a thinner consistency.
- Place the first cooled raspberry velvet cake layer on the cake base or pedestal. Pipe a dam of frosting about ¼ inch from the edge, using a disposable piping bag with the tip snipped away. (If you don't have piping bags for a dam, you'll just want to keep the filling about ½ inch away from the edge of the layers).
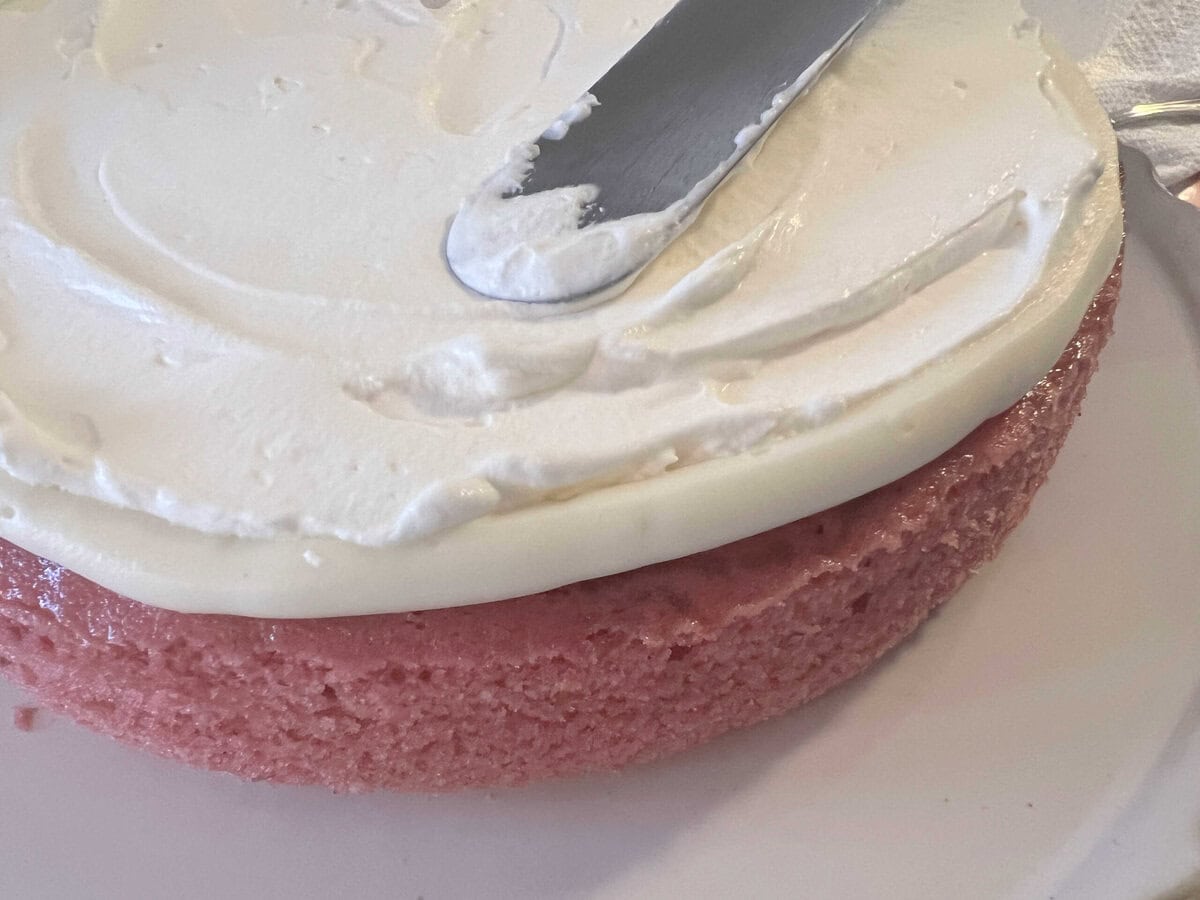
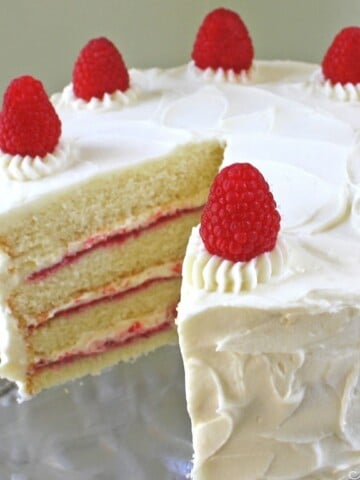
- Spread the raspberry jam/glaze over the top of the layer within the dam. Then add a layer of whipped cream. Top with sliced fresh raspberries if you'd like. We just sliced up a few berries for this step. Adjust the amount of berries to your liking, or skip them altogether.
- Top with the next cake layer and repeat. Then top with the last cake layer. Fill in any remaining gaps between layers with frosting.
- Crumb coat the cake with a thin layer of frosting. Chill in the freezer for 10-15 minutes (or longer in the refrigerator) to firm things up. This makes it easier to frost the cake.
- Apply second coat of frosting, smooth with bench scraper or spatula. Decorate to your liking. I used a cake comb to create stripes around the sides, and used a 1M piping tip to create a top and bottom border. We decorated with a few fresh berries.
- The cake should be stored in the refrigerator in an airtight container or under a cake dome, etc.
- ***Remove the cake from the refrigerator 2-3 hours before serving so that it has plenty of time to warm and soften. Cakes containing butter firm up when chilled and so they need time so soften before serving.
Delicious! :-) Looks and sounds incredible! :-) Thanks ladies.
Thanks MsGF!! ;0)
Can I make cupcakes with this recipe? Looks beautiful and delicious. Thank you!
Hi Ellie! Yes, you can, but usually our "velvet cakes" that contain cream cheese bake up a bit smaller and without domes. They will still be good though ;0)
Hi ladies! I have made a number of your cakes, and I'm in awe of your baking acumen! A neighbor has made a request for a lemon raspberry cake. How would this cake work with a lemon buttercream frosting and perhaps a lemon curd filling? What other ideas would you have, please? Thank you so much! :-)