Gluten Free Vanilla Cake
If you are in search of a great Gluten Free Vanilla Cake, you are going to love this recipe!
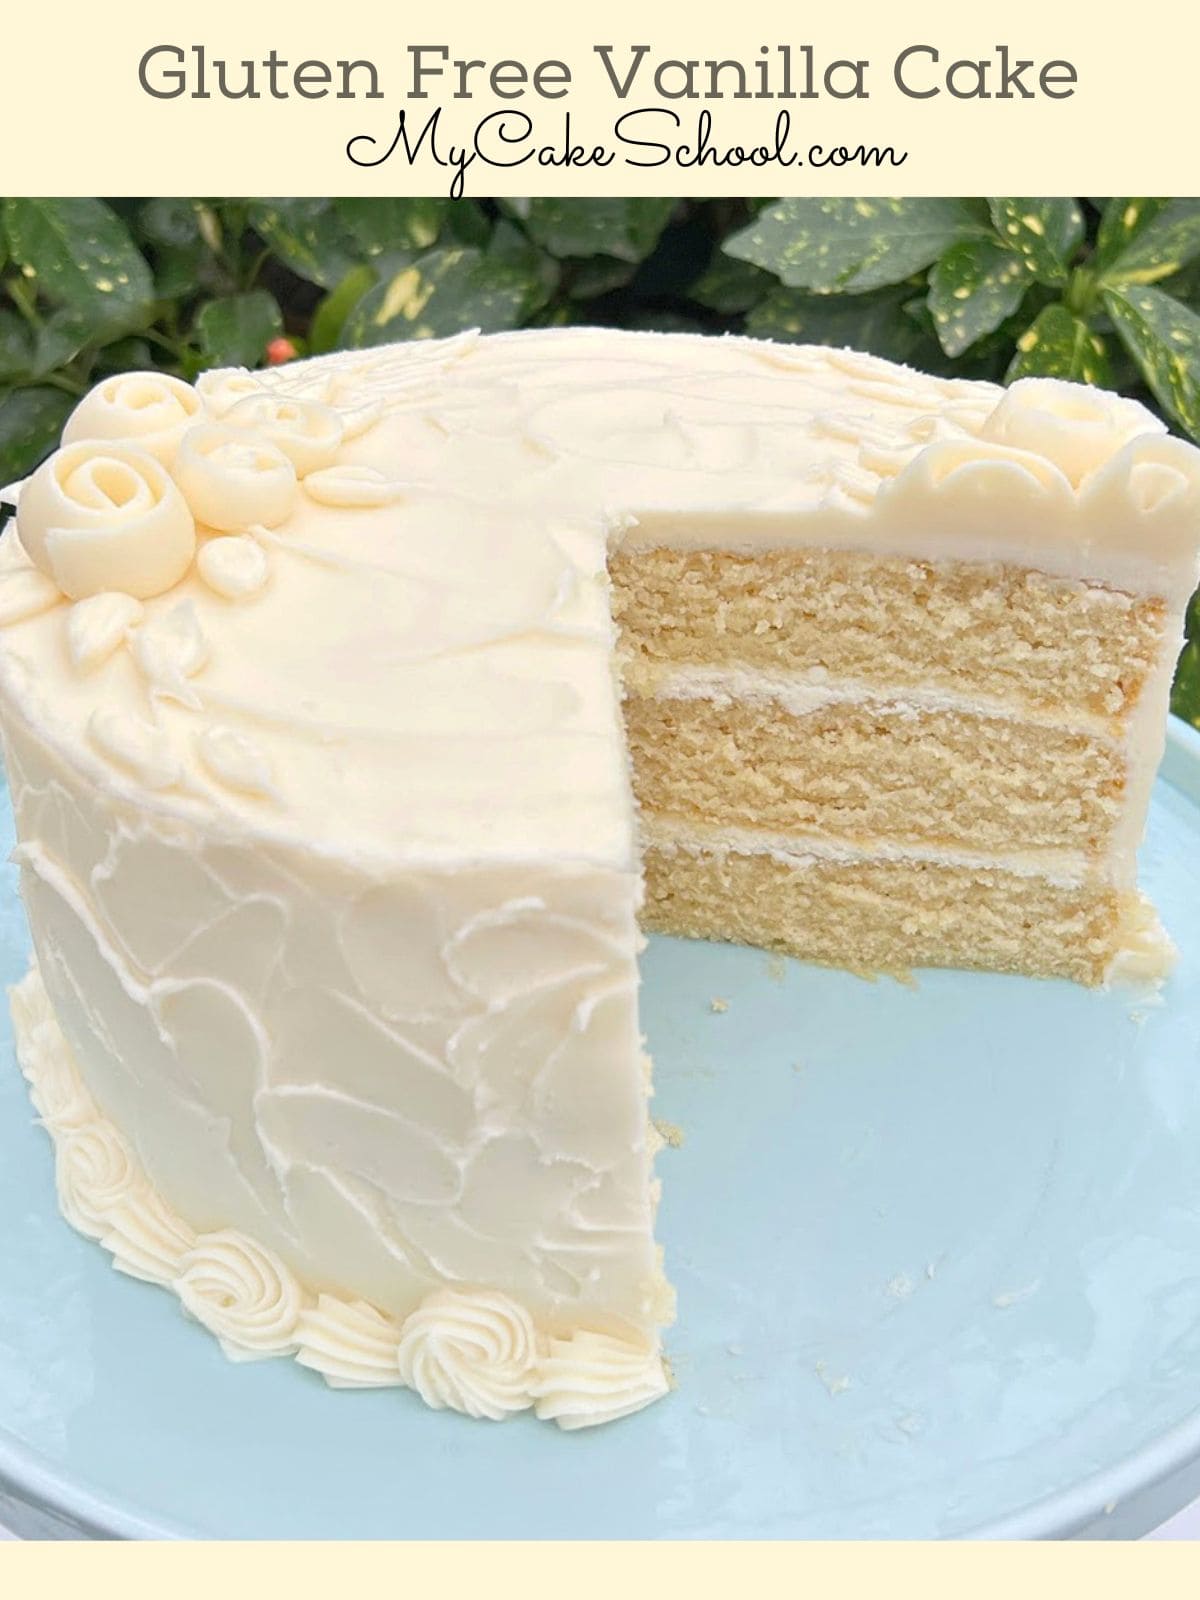
Over the years, we have received requests for gluten free cake recipes and we are happy to say that we now have our first--a simple vanilla layer cake.
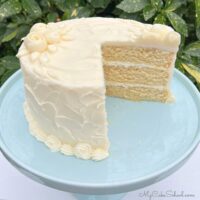
The texture of this delicious cake is soft and incredibly moist. Today, we've paired it with our favorite vanilla buttercream, but this cake is very versatile. It would taste amazing with fruit fillings, cream fillings and more.
Table of Contents
How to Make Gluten Free Vanilla Cake
Today's cake is based on our Vanilla Buttermilk Cake recipe. It is one of our favorites!
We kept things very simple and swapped out our usual flour for Measure for Measure Gluten Free Flour (King Arthur Flour).
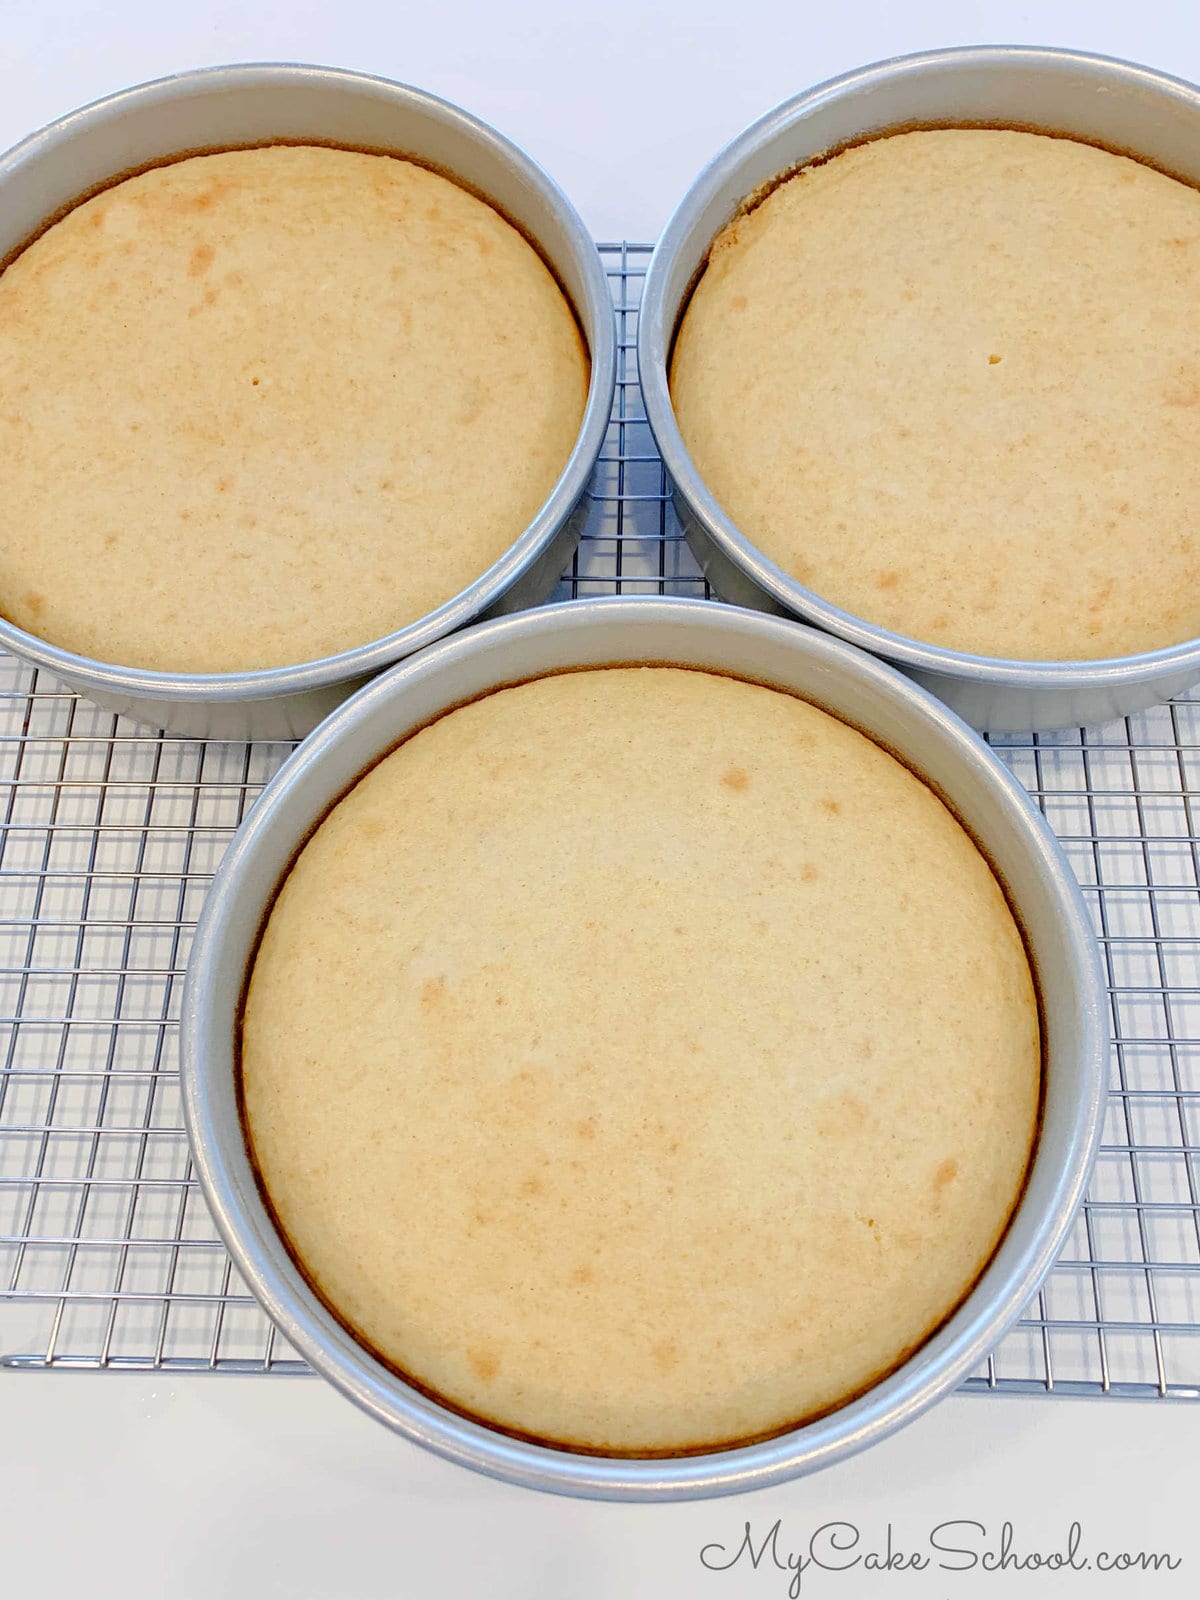
The flavor of the cake is not identical to the original, and the color is slightly darker, but it is delicious, and the crumb is heavenly! We are really happy with it.
You can find the full, printable recipe card further down in this post. Here is a quick rundown of our steps:
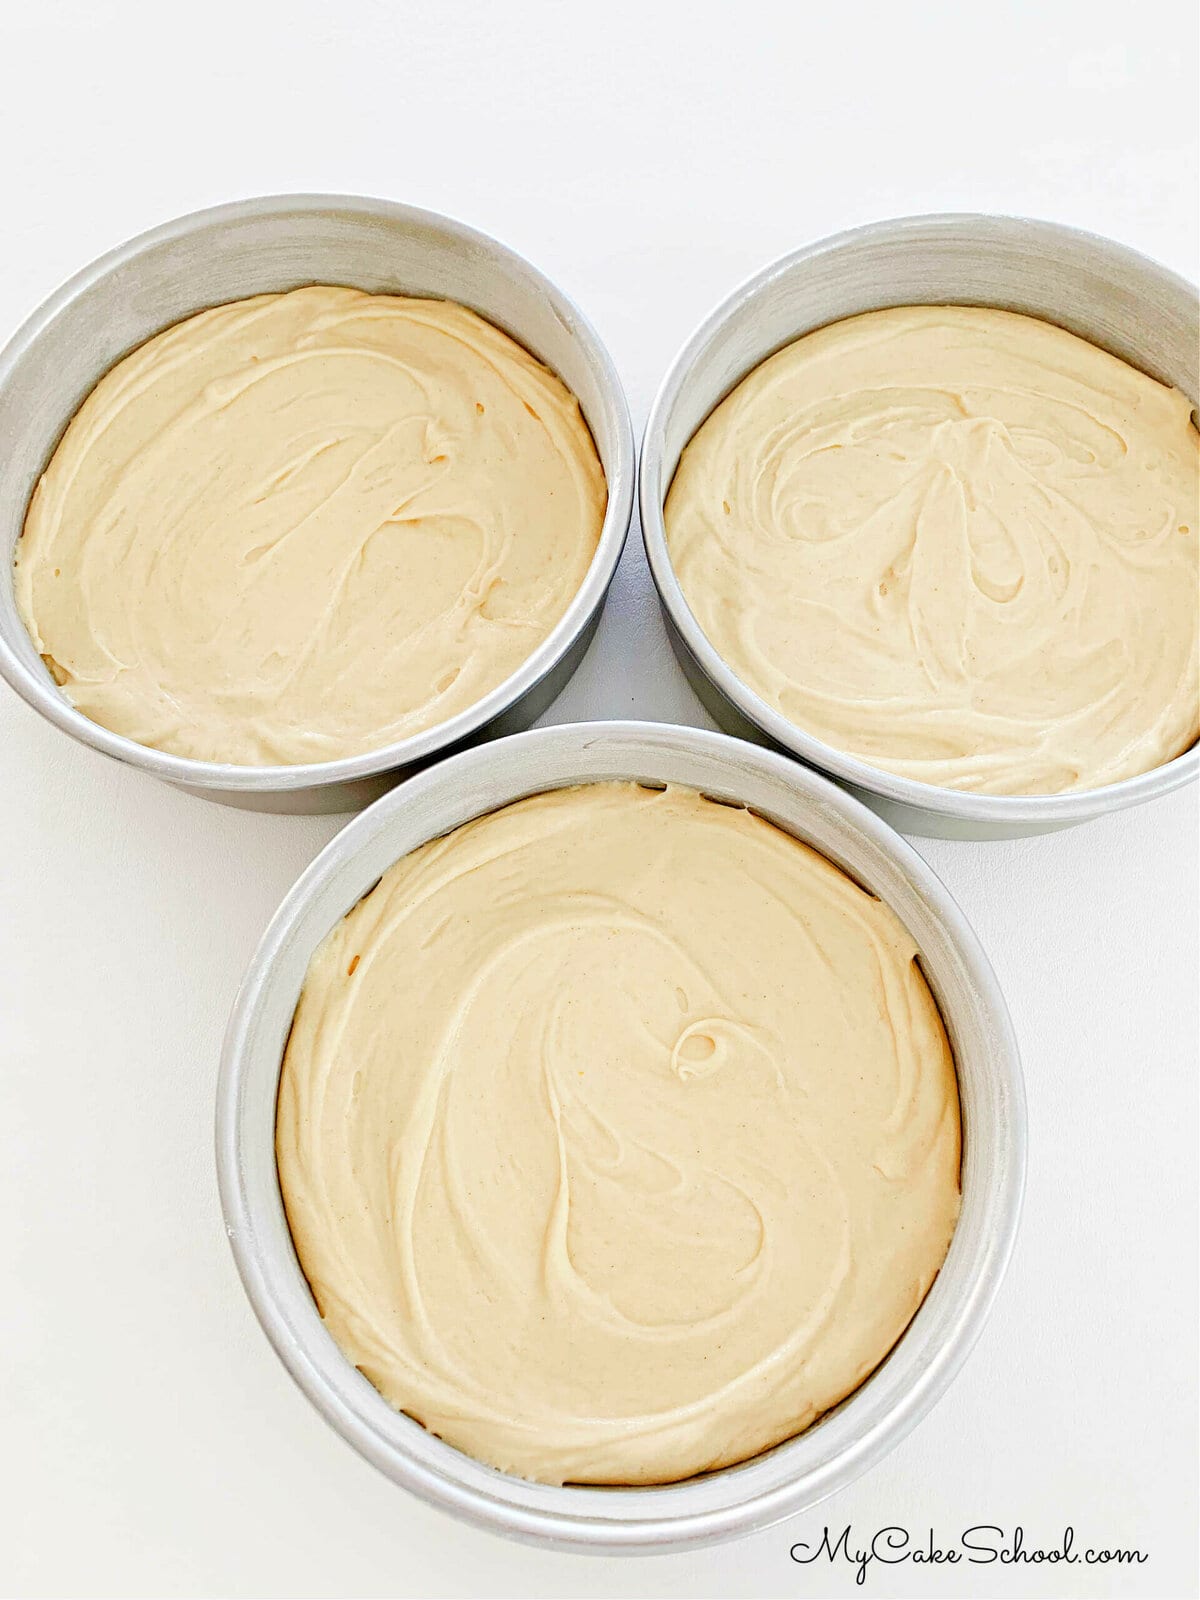
- Preparation: Preheat the oven to 350 degrees, grease and flour three 8×2 inch round pans.
- Flour Mixture: In a medium bowl, whisk the gluten free flour, baking powder, baking soda and salt for 30 seconds. Set aside.
- Buttermilk Mixture: In another bowl, add the buttermilk, vegetable oil and vanilla extract. Set aside.
- Butter and Sugar: In the bowl of your mixer, add the butter and mix at medium speed until smooth. Gradually add the sugar and continue to mix on medium speed for 3 to 5 minutes until lightened in color and fluffy.
- Eggs: Add the eggs one at a time mixing until the yellow of the yolk is blended.
- Dry and Wet Ingredients: With the mixer on low speed, alternately add the flour mixture and buttermilk mixture, beginning and ending with the dry ingredients (3 additions of dry ingredients and 2 of liquid). After the last addition, mix just until combined. Be careful not to over-mix.
- Divide the vanilla cake batter between the three prepared cake pans.
- Time to Bake! Bake at 350 degrees for 25-30 minutes or until a toothpick inserted in the center comes out clean or with just few crumbs attached. Let cool 10 minutes and turn out.
For the Vanilla Buttercream
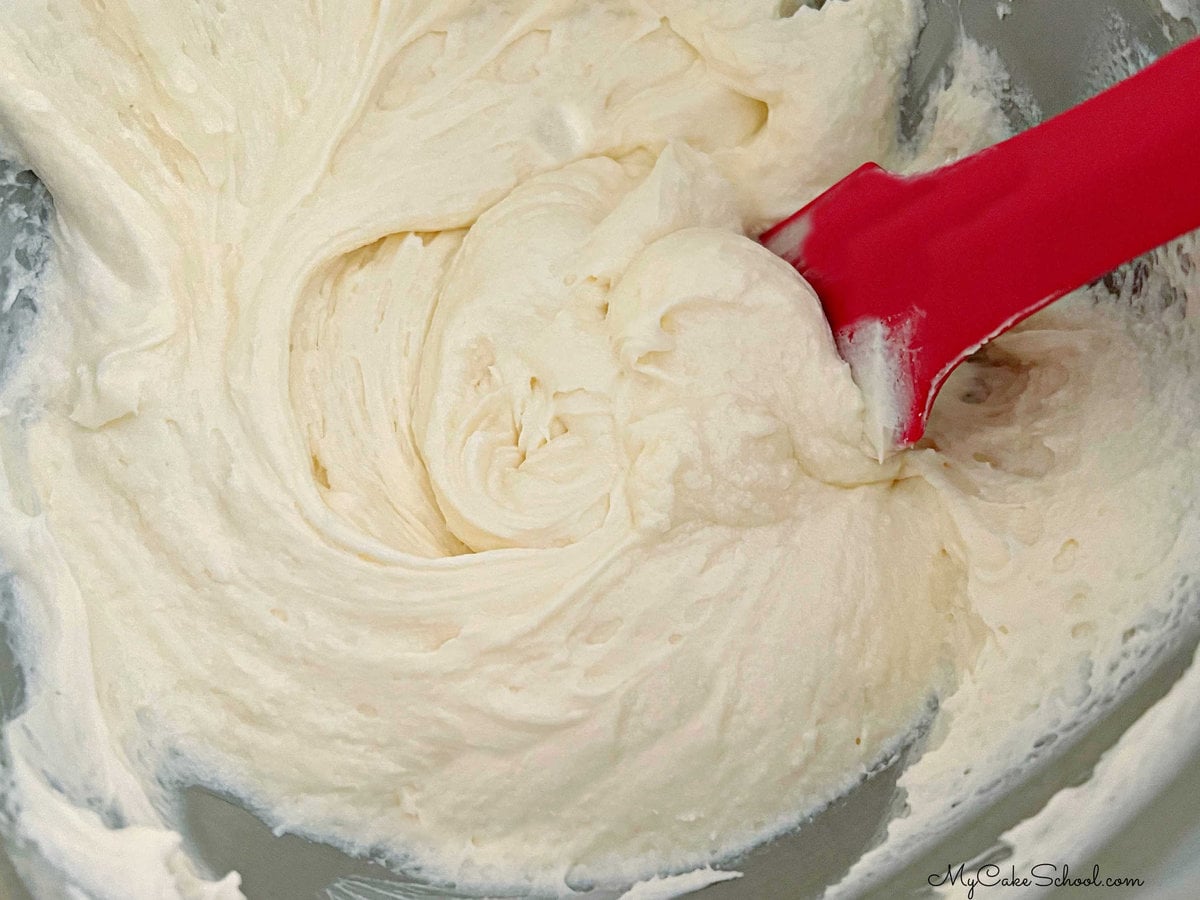
We kept things very simple today and paired our cake with vanilla buttercream frosting.
This is our classic vanilla buttercream recipe, which is a combination of butter, confectioners sugar, vanilla extract, a splash of milk and a pinch of salt.
The resulting frosting is creamy, delicious, and perfectly pipeable!
Assembling the Cake
- To decorate the cake, place the first cake layer on the cake pedestal. Spread with a layer of vanilla buttercream, top with the second cake layer and repeat.
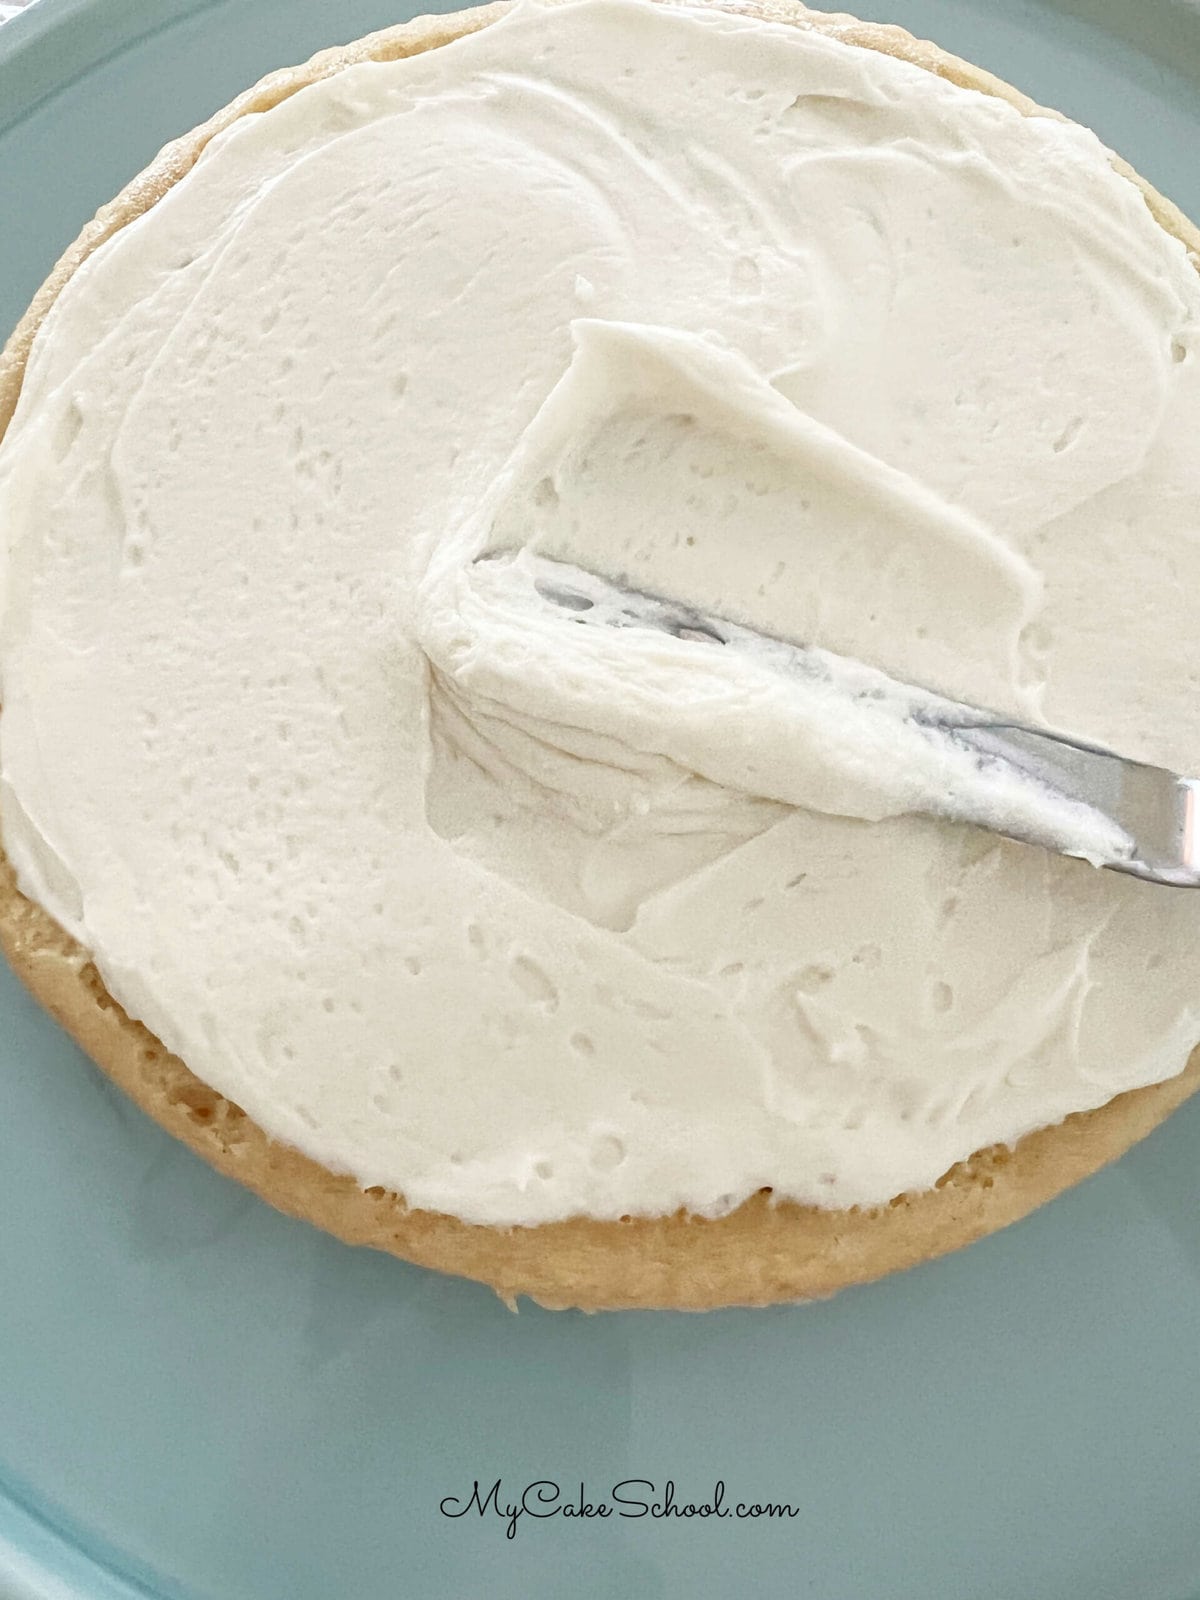
- Next, add the third cake layer and fill in any gaps between the layers. Frost the cake with a thin layer of buttercream.
- At this point, I like to chill the cake in the freezer for 15 minutes (or longer in the refrigerator) before applying the final coat of frosting. It is easier to decorate the cake if it is nice and firm from chilling.
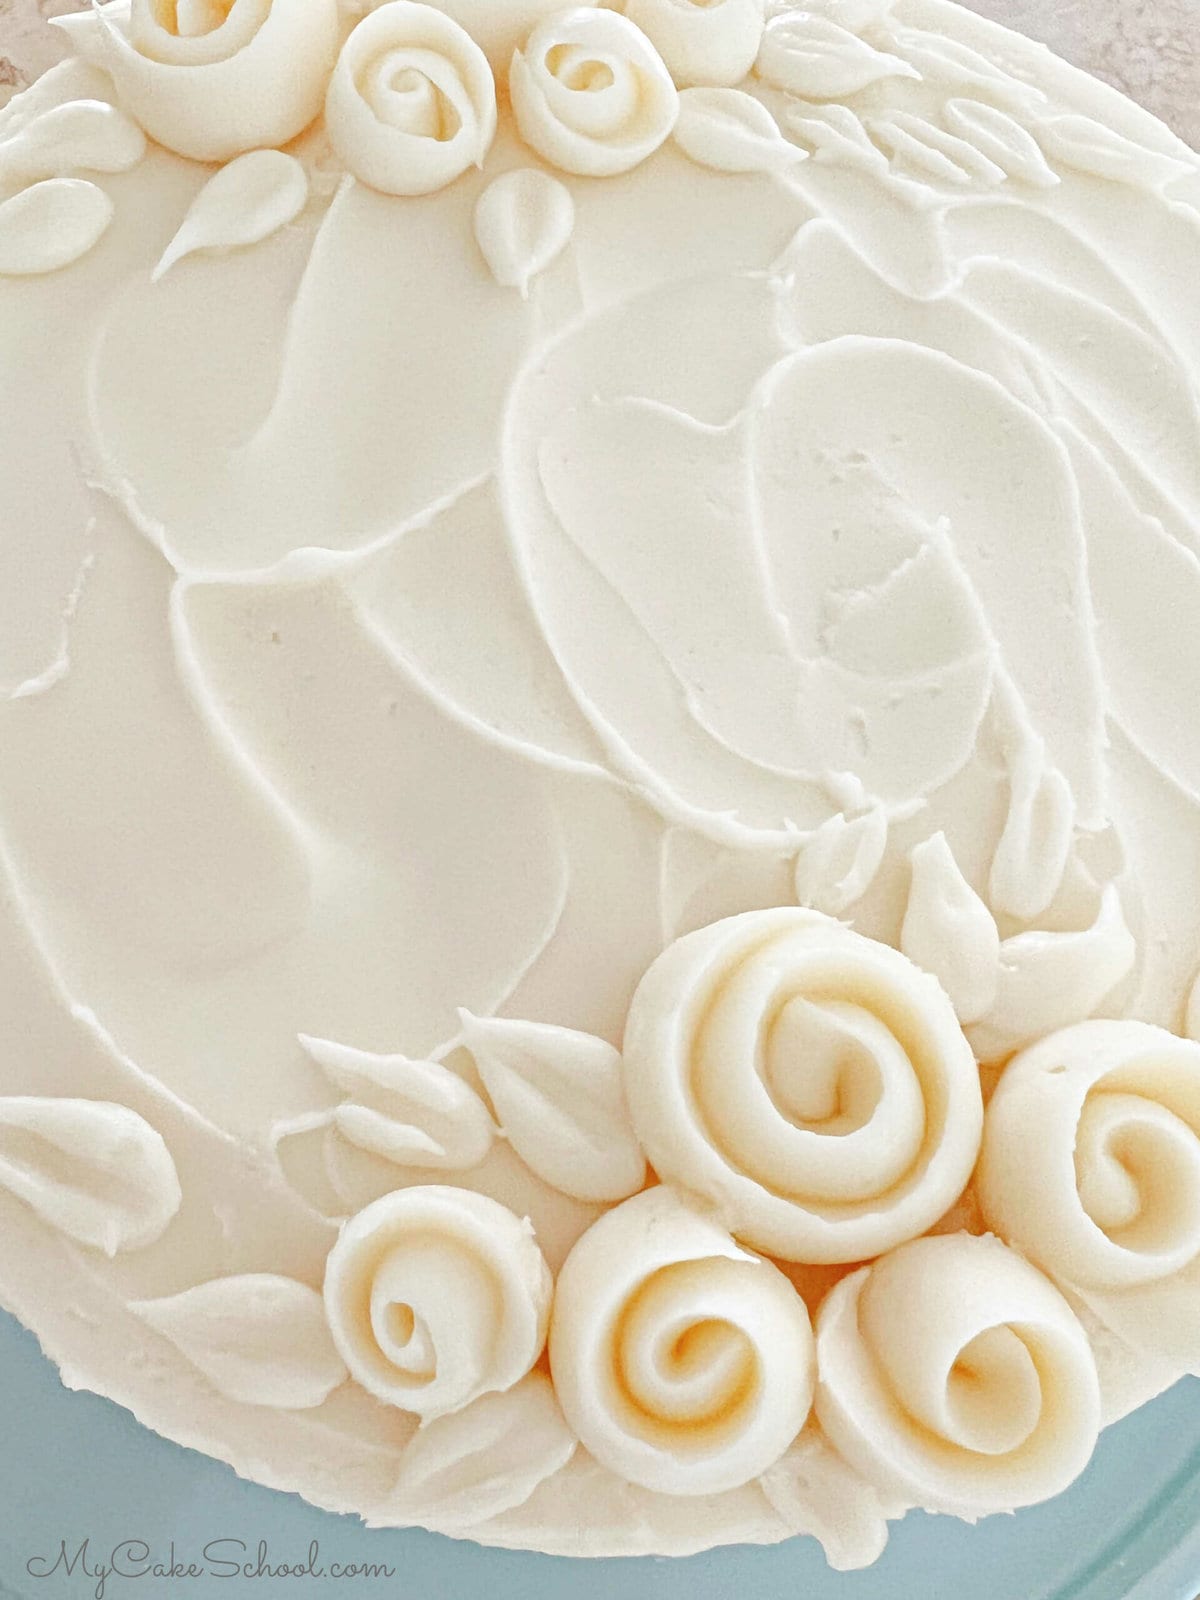
Decorating the Cake
- I added texture to the buttercream around the top and sides of the cake.
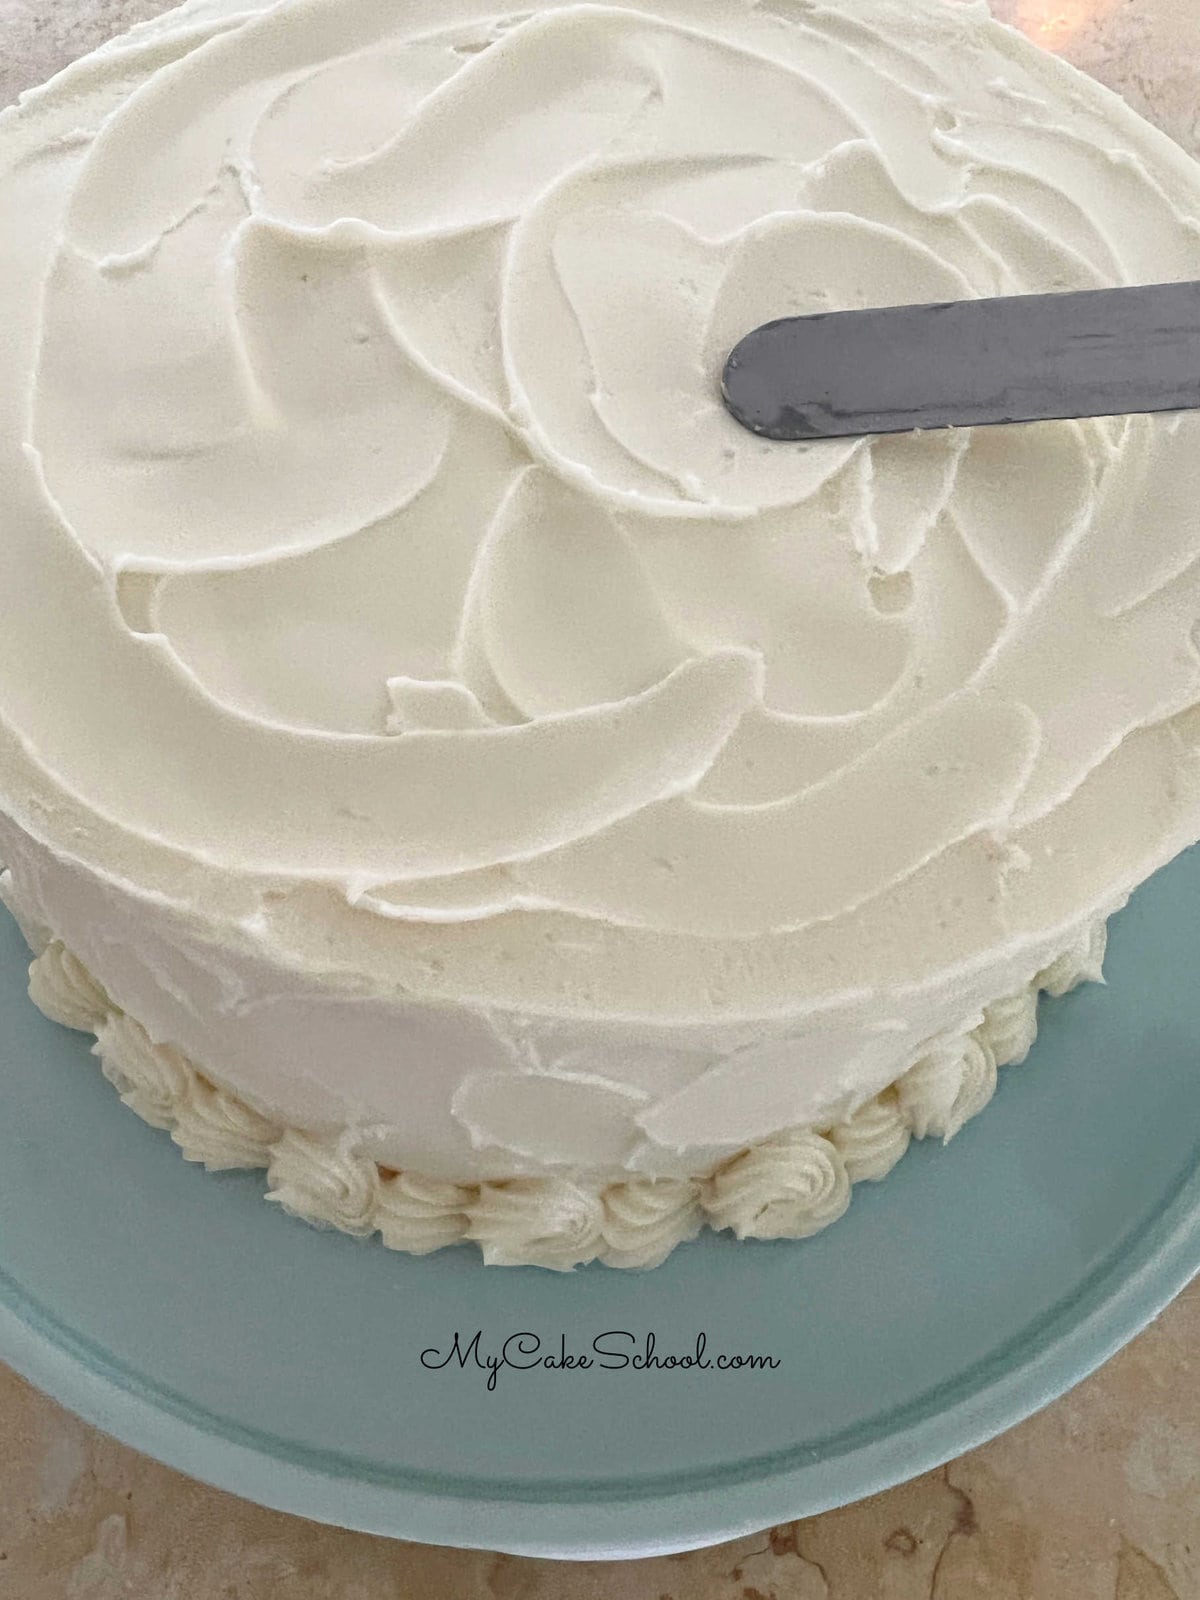
- Then, using a small offset spatula, I applied a simple shell and rosette border around the base using a star tip 21.
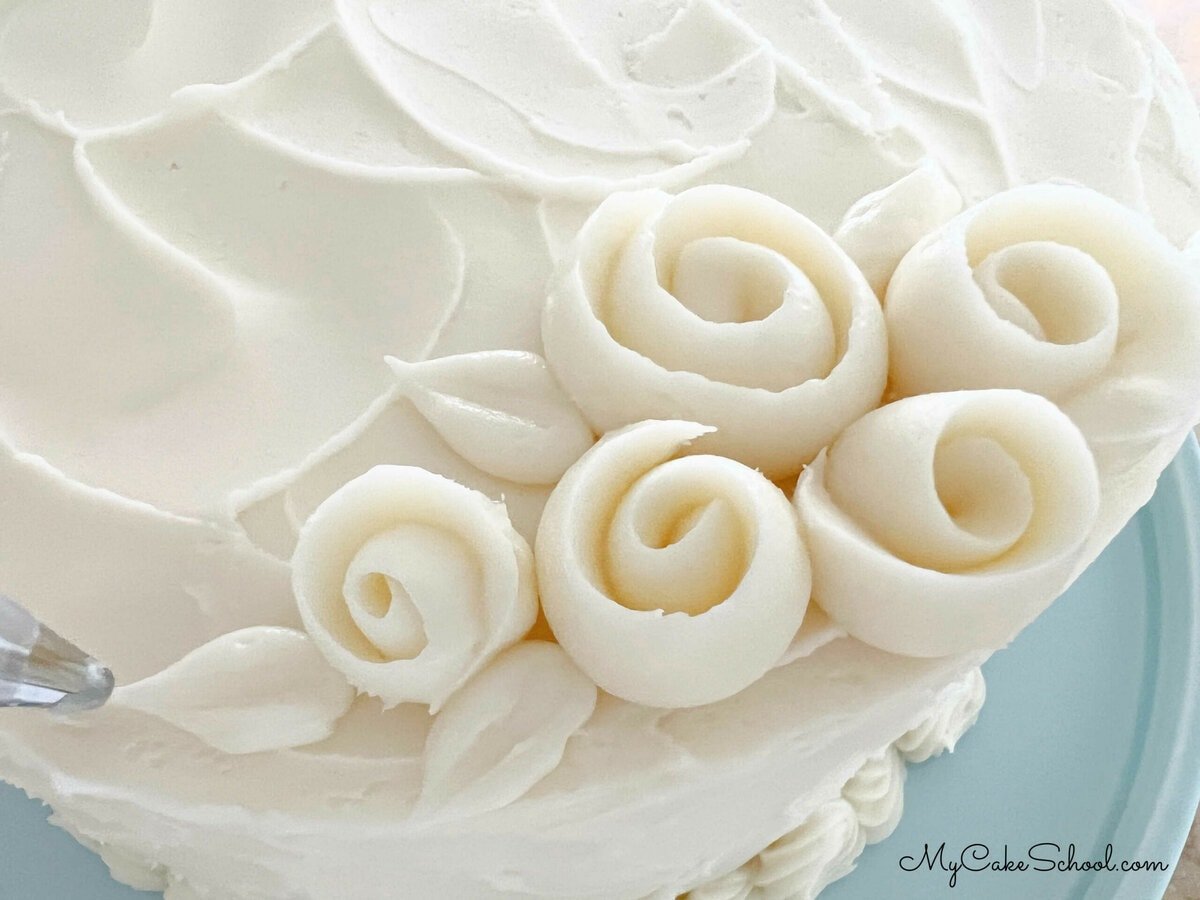
- I decided to make buttercream ribbon roses using a piping tip 125 for the larger buttercream roses and a tip 104 for the smaller ones.
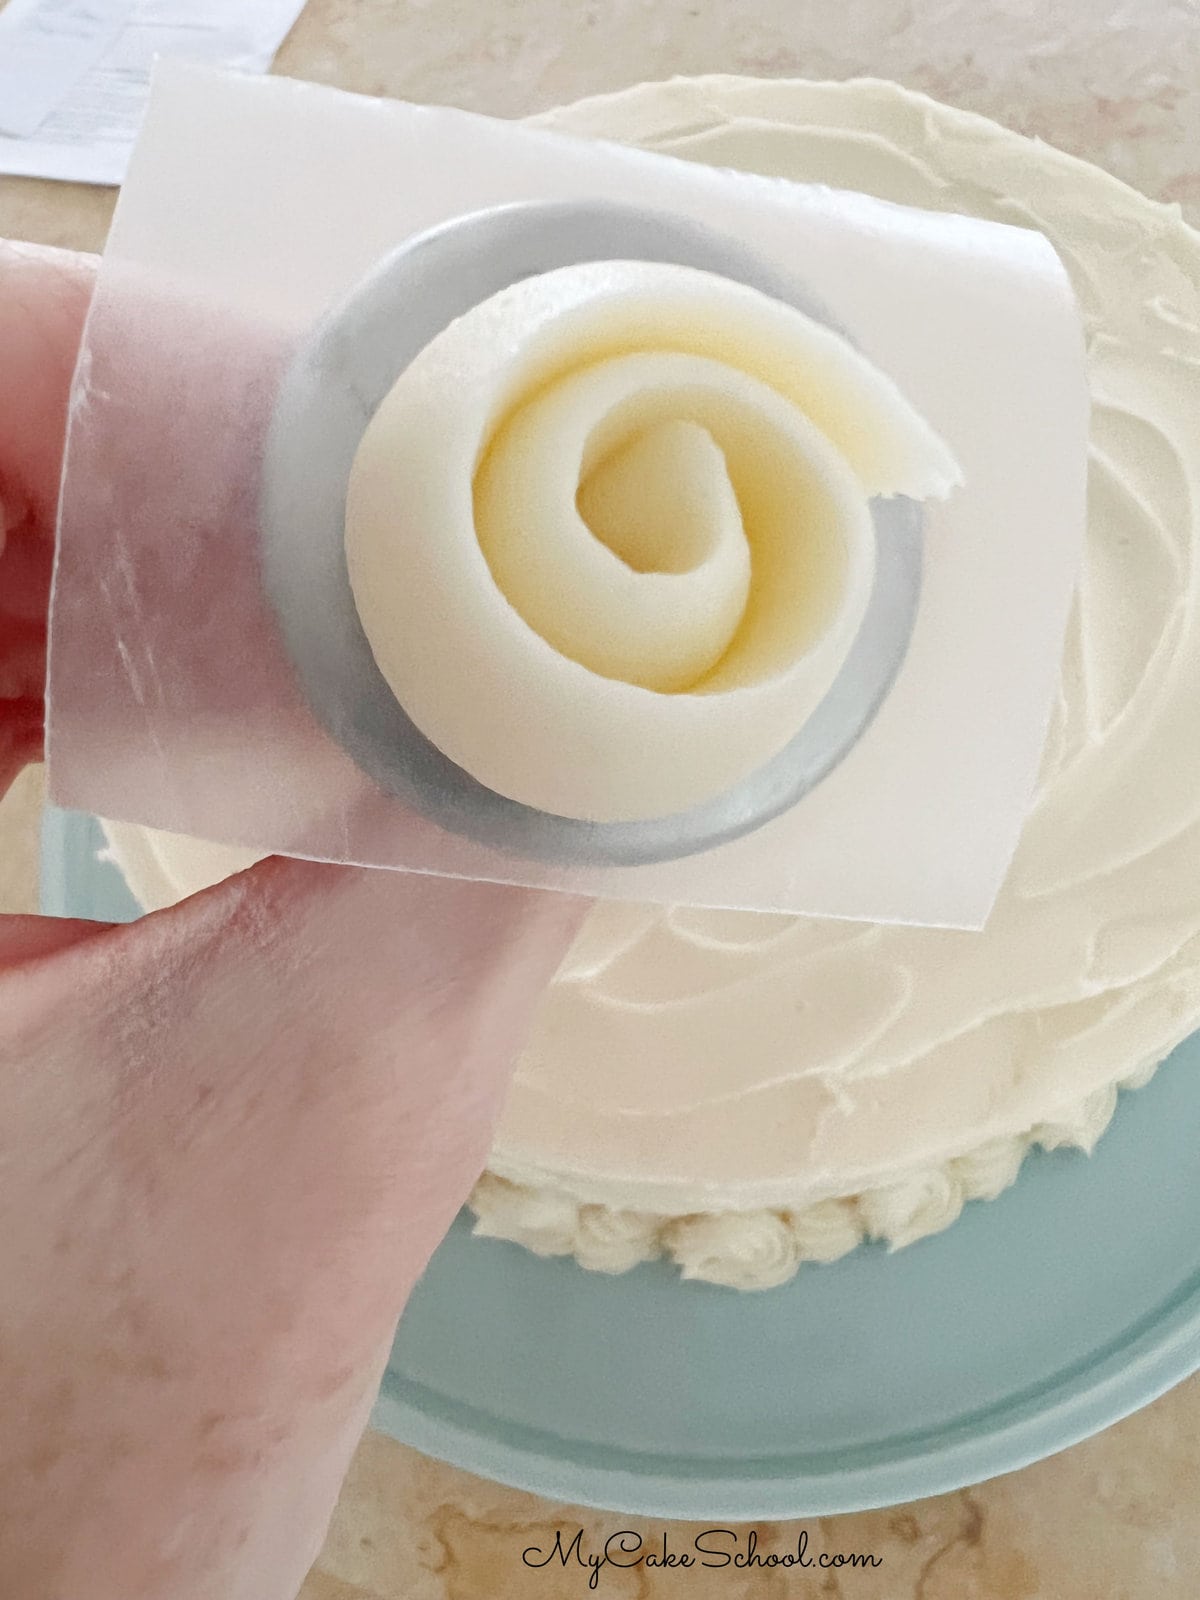
- While rotating a rose nail, I piped the roses onto a square of wax paper.
- Then, chilled the roses in the freezer for 15 minutes, peeled from the wax paper and placed onto the cake! I added a few leaves here and there with a 104 tip.
- You can find a tutorial here: How to Make Ribbon Roses
Enjoy the Recipe!
Thanks so much for stopping by, we hope that you enjoy the recipe. If you try it, please leave a comment and photo below!
Gluten Free Vanilla Cake
Equipment
Ingredients
- 1 ½ sticks (170g) unsalted butter, softened. (Holds its shape but dents when pressed.) 170g unsalted butter, softened ( holds it shape but dents when pressed)
- 2 cups (400g) sugar
- 4 large eggs, room temperature (If in a hurry, place eggs in a warm bowl of water for five minutes.)
- 3 cups (360g) Measure for Measure Gluten Free Flour (We used King Arthur brand)
- 2 teaspoons (8g) baking powder
- ½ teaspoon (3g) baking soda
- ½ teaspoon (3g) salt
- 1 ¼ cups (296g) buttermilk (If you do not have buttermilk, see substitution below.)
- ¼ cup (54g) vegetable oil
- 3 teaspoons (12g) vanilla extract
For the Vanilla Buttercream
- 3 sticks (339g) unsalted butter, softened
- 8 cups (820g) conectioners sugar
- 3 teaspoons (12g) vanilla extract
- ½ cup (120g) milk (add slowly and adjust if needed to desired consistency)
- 1 teaspoon (6g) salt
Instructions
- Preheat the oven to 350 degrees, grease and flour three 8×2 inch round pans.
- In a medium bowl, whisk the gluten free flour, baking powder, baking soda and salt for 30 seconds. Set aside
- In another bowl, add the buttermilk, vegetable oil and vanilla extract. Set aside..
- In the bowl of your mixer, add the butter and mix at medium speed until smooth. Gradually add the sugar and continue to mix on medium speed for 3 to 5 minutes until lightened in color and fluffy.
- Add the eggs one at a time mixing until the yellow of the yolk is blended.
- With the mixer on low speed, alternately add the flour mixture and buttermilk mixture, beginning and ending with the dry ingredients (3 additions of dry ingredients and 2 of liquid). After the last addition, mix just until combined. Be careful not to over-mix.
- Divide the cake batter between the three prepared cake pans.
- Bake at 350 degrees for 25-30 minutes or until a toothpick inserted in the center comes out clean or with just few crumbs attached. Let cool 10 minutes and turn out.
- For the Vanilla Buttercream
- Cream the (slightly softened) butter until smooth. Blend in the vanilla.
- Add half of the powdered sugar and most of the milk. Beat at medium speed until the powdered sugar is incorporated.
- Add remaining powdered sugar and milk and mix at medium speed another 3 to 4 minutes scraping the sides of the bowl occasionally. I slow down the mixer to very slow. (#2 on the Kitchenaid) for 1 to 2 minutes. This will help eliminate air pockets in the buttercream. The texture will become very smooth.
- This recipe can be doubled or halved.
- Yields approximately 4 ½ cups of frosting. Enough to frost a two layer 8 or 9 inch cake.
- Can be frozen in air tight container for at least three months . Thaw on countertop.
- If your buttercream is too thin, add more sugar. If the consistency is too thick, add a bit more milk.
Notes
Loved This Recipe?!
This cake came out amazing! My only comment is that mine came out a lot more yellow than white. I would like a white cake, but my guess is that I’m using farm fresh eggs, and the yolks are very dark. I might actually go buy some eggs from the store just to see the difference.
Hi Lauren, I'm so glad to hear it!
My cake isn't white either- it may look a little lighter in the photo. You are right that if your egg yolks have a deeper color, the cake will be slightly more yellow. But farm-fresh eggs are good thing, I would just go with it! :0) Even some brands of butter are more yellow than others. Thanks for your feedback!
I made this for a party to celebrate a friend becoming a U.S. citizen. Multiple people at the party commented on how moist and tasty the cake was. I find the trick to making moist cakes is to weigh the ingredients and use an instant read thermometer. Cakes are done between 202°F and 210°F depending on the type of cake. 210°F is the standard. I also do the normal checks for doneness.