Royal Icing Snowflakes for Cakes and Cupcakes
Today I'm going to demonstrate how to make beautiful royal icing snowflakes!

Table of Contents
Here's a quick tutorial on how to make snowflakes
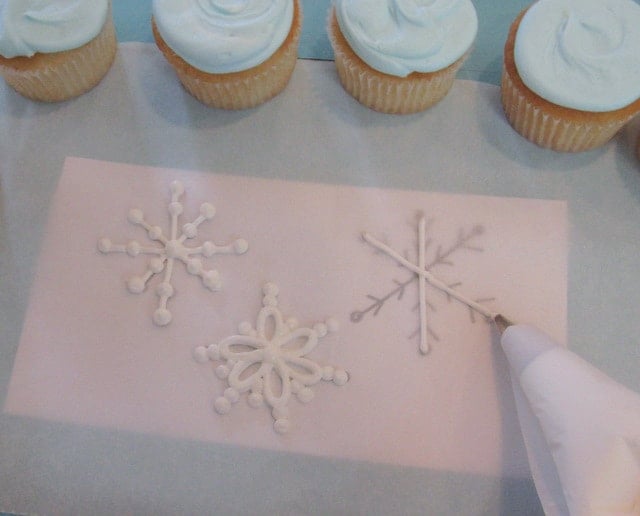
As you can see, I like start with some sort of template---you can either draw some templates of your own, or print off some snowflake clip art. If you are feeling really adventurous, you can freehand them!
By the way, did you know that snowflakes have 6 points? I didn't know that when I made mine. So, if you want to be technical about it, just keep that in mind lol (Someone messaged me with this info, haha) ;0)
Once you have made your template, just slide it under a piece of parchment paper. Parchment really is better than waxed paper for royal icing decorations. It breathes better.
Next....we trace!
Make a batch of royal icing and thicken it with powdered sugar until you have reached a medium consistency (it needs to be able to hold it's shape, but not so thick that it is difficult to pipe with)-- I like to use a Wilton small round tip 3 or 4.
Word to the wise---Trace over your snow flakes a couple of times. This will make them stronger.
Aren't they pretty? I like piping dots onto the snowflakes for added texture and cuteness :0)
After about 24 hours or so, your royal icing snowflakes will be nice and dry. Once dry, they will not stick to the parchment at all. Simply (carefully) pick them up!
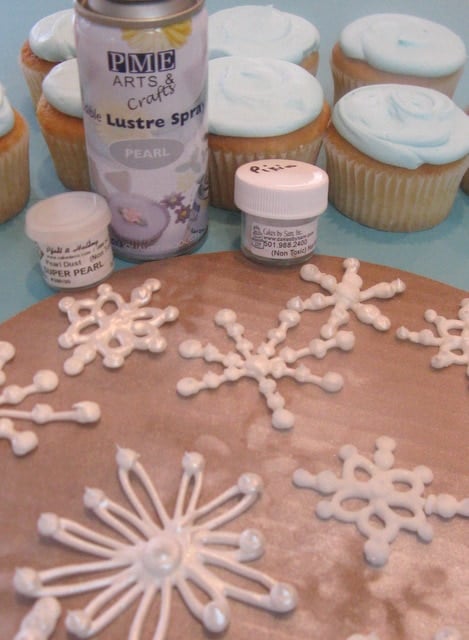
My favorite part of the snowflakes is pearlizing them and adding a little sparkle. This is an optional step--they are pretty as they are..but I love to dress them up a bit!
If you don't own an airbrush, the next best thing is using the PME pearl spray (or a similar product).
If you don't have this, the next best thing is brushing on some CK Super Pearl pearl dust with a dry brush. Instantly beautiful!
Candy Coating Alternative
*In a rush? You can also create snowflakes using white candy coating/bark coating. Pipe them onto a wax paper lined cookie sheet.
Then, chill them for a few minutes to firm up. Applying to the cake or cupcakes so that they will be less fragile and easier to handle.
"Glue " them onto buttercream cakes with a dot of buttercream, or fondant cakes with a little melted candy coating.
I recommend using royal icing decorations on fondant or a crusting buttercream.
Royal icing and moisture don't get along so well, so don't use with a whipped cream or non-crusting icing unless you are serving right away.
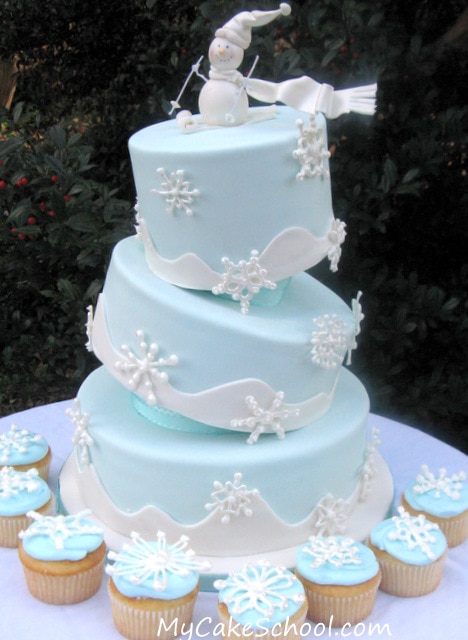
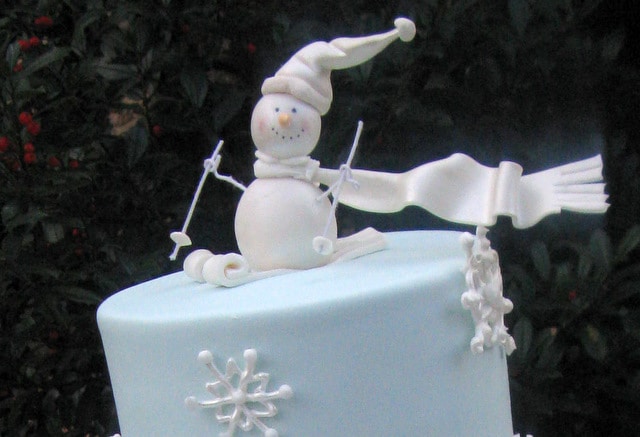
I attached the snowflakes to my tilted cake using just a little bit of royal icing as my glue. It adheres almost immediately.
I frosted these cupcakes and then let them sit for just a few minutes in order for them to crust. Then, I added our sweet snowflakes! Love them!
That's all for now, I hope you'll make some snowflakes for your sweets very soon!


Hi would these be stiff enough to stand on a cupcake thanks
will try this! thanks!
Hi Sharin, yes the snowflakes would stand on a cupcake. If you are planning to insert them into buttercream, the royal icing will soften so I would not put them on until just before serving.
I use melting chocolates to make my snowflakes and they turn out beautifully every time. Just another idea.
Beautiful
I've got snowflake cutters. I was thinking of cutting them out of fondant and then place them onto a wedding cake. Will they stick to swiss meringue buttercream cake though?
Hello, they would stick to the cake but they may soften and absorb some of the moisture from the non-crusting frosting. This may still be okay unless they will be standing up on top of the cake in which case softening could cause them to fall over. I would just do a little test run first and spread a glass with the frosting and place snowflakes onto it. Good luck!