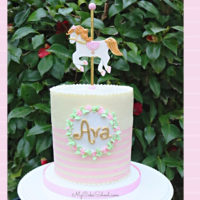
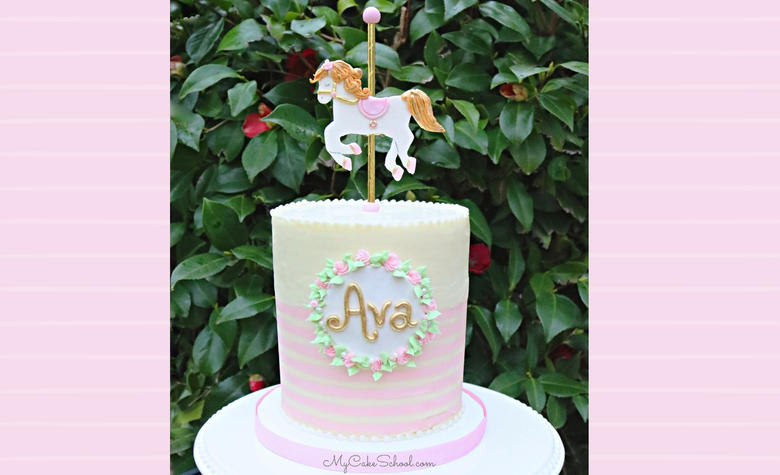
Carousel Horse Cake Topper- A Cake Video Tutorial
In today's cake tutorial, I'm going to show you how to make a sweet carousel horse cake topper!
This would be such a cute theme for a little girl's birthday or baby shower cake. In addition, I'll demonstrate how to create buttercream stripes halfway up the cake, as well as a cute plaque with a floral wreath.

I decided to go into a little more detail about our double barrel cake today and so our video is slightly longer than usual. For this reason, I've split the tutorial into two parts, of about 15 minutes each.
In Part 1 of the video tutorial, you will learn how to make the carousel cake topper, and we begin to build our double barrel cake.
in Part 2 of the video tutorial, we finish assembling the layers, frost our cake with a striped buttercream pattern, create a name plaque, and place the topper!
Table of Contents
Enjoy the Video!
We loved creating this sweet cake! Whether you use one of these cake decorating techniques or many, we hope that you find something that you would love to try.
If you do recreate the cake design (or carousel horse cake topper) we would love for you to leave a comment and photo below!
Carousel Horse Cake Topper- A Cake Decorating Video
Ingredients
- We decorated a double barrel 6 inch cake see additional notes below
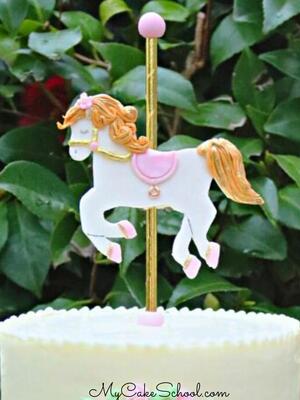
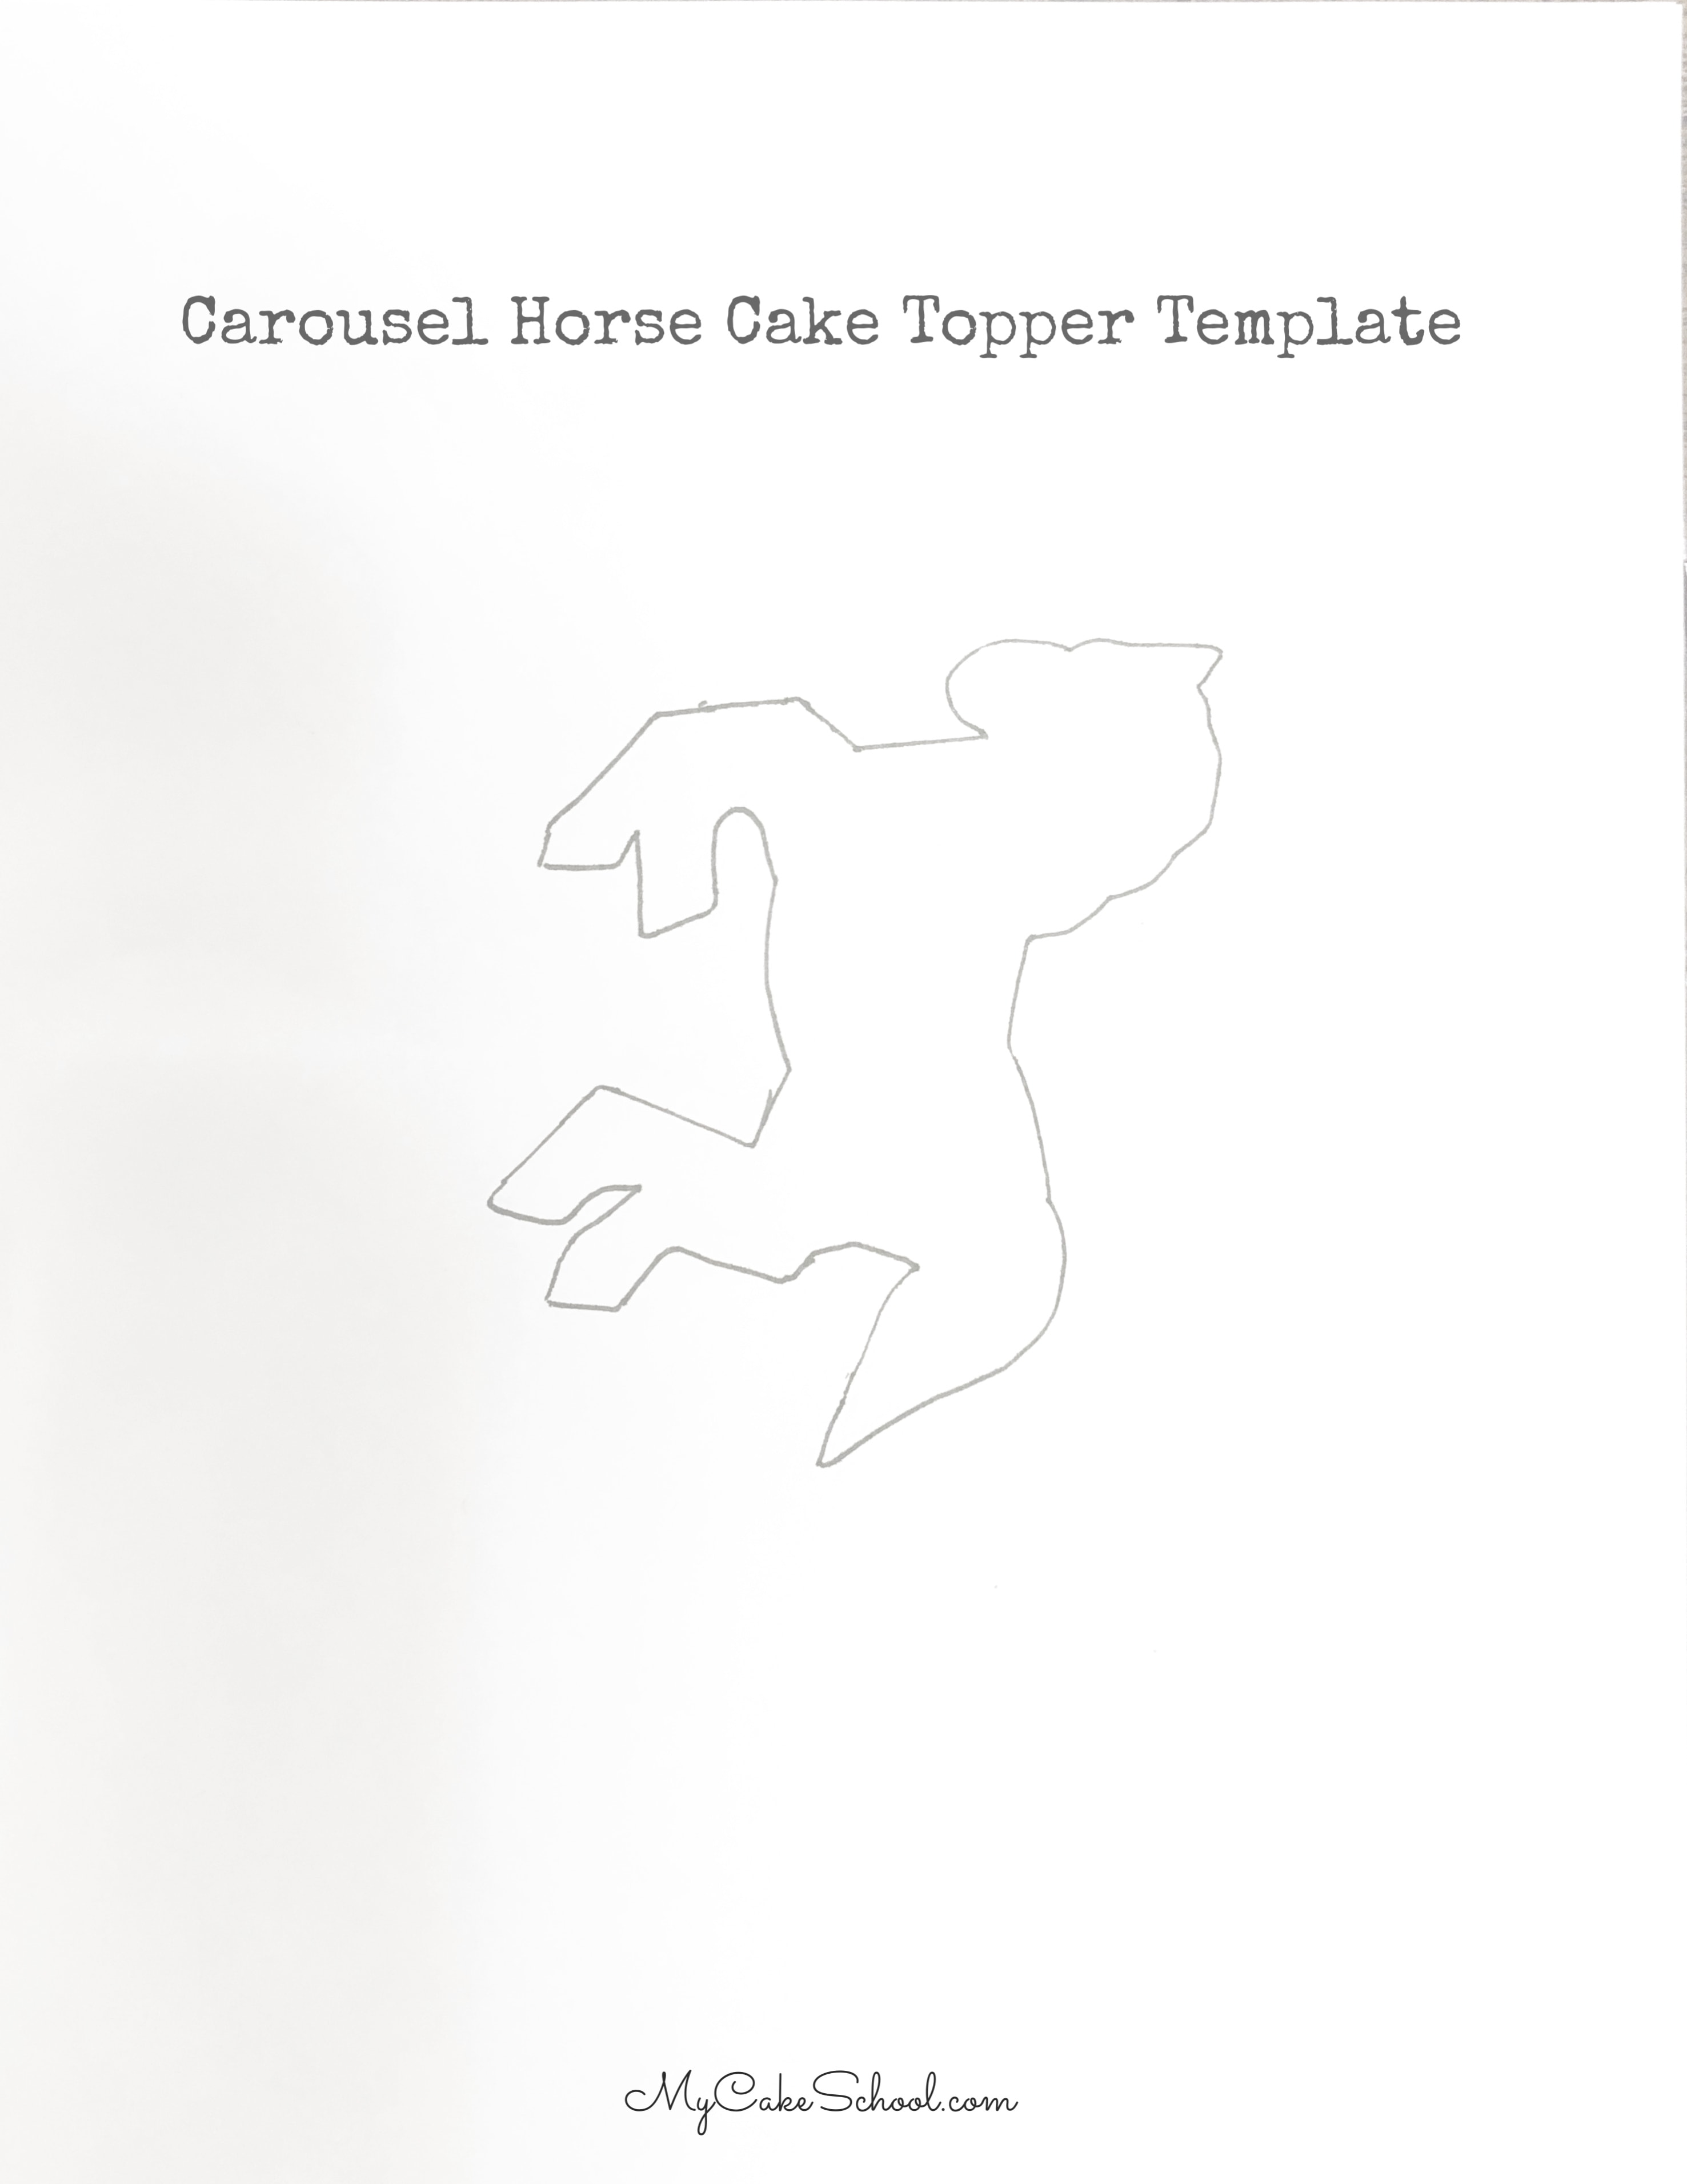
- Template of Carousel Horse
- Gum Paste preferred - or you can knead tylose powder into fondant to make it stronger.
- Decorative Straws/Lollipop Stick for carousel horse. We used a gold straw.
- Bamboo stick/long dowel that will fit inside of straw.
- Piping Tips: We used a star tip 16 for rosettes tip 3 for borders, Tip 10 for stripes, 352 for leaves
- Gold Luster Dust + Vodka or Everclear or Lemon Extract for Paint
- Coloring Gels: Americolor Warm Brown (Avocado Green + Leaf Green) for leaves, Deep Pink, Ivory
- Cake Comb for stripes- preferably with fairly thick grooves.
- Melted Candy Melts glue
- Piping gel
- Buttercream Frosting- We used 2 batches of our Classic Vanilla Buttercream recipe
- Extruder- We extruder our letters using our Makins Ultimate Clay Extruder
- Miscellaneous: disposable piping bags small paint brushes, cake cardboards (Four 8 inch boards for cake base, two 6 inch boards for bottom and middle of cake)
Instructions
- For the Cake
- Crumb coat cake, chill, apply thicker coat as per video, comb, chill until firm. Add stripes, fill top half with white buttercream, smooth over with hot bench scraper while rotating on turntable.
- Chill and touch up as needed, move to cake base while buttercream is still firm. Our cake base was four stacked 8 inch cake boards, wrapped with plastic tablecloth.
- Hammer through sharpened wooden dowel if you would like additional stability (especially helpful if transporting a tall double barrel cake).
- For the Carousel Horse Cake Topper
- Two days in advance, cut out two gum paste horses using the template. (you'll only need one, the other is in just in case of breakage)
- Once dry, add other details like mane & tail, eye, hooves, etc.
- Once dry, flip over onto bed of shredded paper towels or pillow fluffy and attach straw to back with gum paste strip. Dry for at least an hour.
- Place bamboo stick into top of cake, slide carousel horse straw on top of it to place the topper.
- For the Name Plaque
- This can be done in advance, or it can be applied to the cake while still soft.
- Use a 3 inch circle cutter (or your size of choice) to cut out gum paste rolled to about ⅛ inch thickeness.
- Use extruder to create rope which is used to spell name.
- Attach letters by lightly dampening with water or piping gel.
- Paint name with gold paint created by combining a small amount of vodka with gold luster dust.
- Once name is dry and secure, add plaque to the cake with buttercream.
Video
Notes
Double Barrel Cake Review:
Our Double Barrel Cake is 4 layers tall (approx 7 inches after settling). To make our double barrel cake, we stacked and filled two layers of cake on a cake board cut down to size. We inserted 4 bubble tea straws. Frosted the top, applied another cake cardboard cut down to size and another two cake layers (filled). We wrapped with plastic wrap, added a weight (stacked cake pans), and allowed to settle for a few hours at room temp and then overnight in the refrigerator. The next day, we frosted the cake, moved to cake base, and added the sharpened center dowel. Gum Paste: When it comes to gum paste pieces, especially with cake toppers that need to stand on their own, I recommend drying a couple of days in advance as dry times can vary depending on weather, brand of gum paste, etc. If you do not have gum paste, tylose powder can be kneaded into fondant to firm it up. You'll notice a change in elasticity as you knead it. (I've done this successfully with Satin Ice fondant-- a softer fondant may not yield the same results and so do a test run if you are unsure.)Template of Carousel Horse
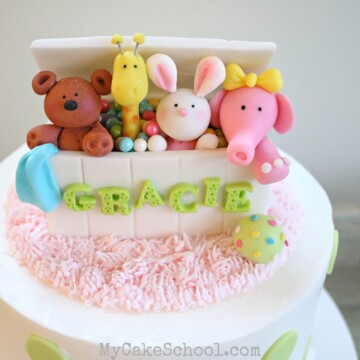
*Any of our cakes would be great for this cake design, including yellow cake from scratch, marble cake, homemade strawberry cake, and many more!Loved This Recipe?!
Instructions
For the Cake
- Crumb coat cake, chill, apply thicker coat as per video, comb, chill until firm. Add stripes, fill top half with white buttercream, smooth over with hot bench scraper while rotating on turntable.
- Chill and touch up as needed, move to cake base while buttercream is still firm. Our cake base was four stacked 8 inch cake boards, wrapped with plastic tablecloth.
- Hammer through sharpened wooden dowel if you would like additional stability (especially helpful if transporting a tall double barrel cake).
For the Carousel Horse Cake Topper
- Two days in advance, cut out two gum paste horses using the template. (you'll only need one, the other is in just in case of breakage)
- Once dry, add other details like mane & tail, eye, hooves, etc.
- Once dry, flip over onto bed of shredded paper towels or pillow fluffy and attach straw to back with gum paste strip. Dry for at least an hour.
- Finally, place bamboo stick into top of cake, slide carousel horse straw on top of it to place the topper.
For the Name Plaque
Name plaques are the perfect, simple way to personalize your cakes! We decided to decorate the front of the cake with a homemade plaque.
- This can be done in advance, or it can be applied to the cake while still soft.
- Use a 3 inch circle cutter (or your size of choice) to cut out gum paste rolled to about ⅛ inch thickeness.
- Use extruder to create rope which is used to spell name.
- Attach letters by lightly dampening with water or piping gel.
- Paint name with gold paint created by combining a small amount of vodka with gold luster dust.
- Once name is dry and secure, add plaque to the cake with buttercream.
Just beautiful! I love it! Hope I get to use it :-)
Awesome!