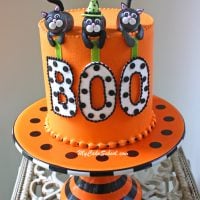
Black Cat Halloween Cake
In this cake decorating video, we are going to show you how to make an adorable Black Cat Halloween Cake!
You will learn how to model cute fondant cats as part of this fun and festive Halloween party cake design. We hope that you enjoy it!

Table of Contents
Materials for Black Cat Cake:
Here is a quick review of what you will need for today's black cat cake!
This cake is a double barrel 6 inch cake- 4 cake layers. (This is 4 cake layers with cardboard cake circle halfway up, with dowels beneath for support. We used 4 bubble tea straws cut to the height of the bottom two stacked layers. You can find more info on double barrel cakes in our video tutorial.)
Fluffy Vanilla Buttercream (our Classic Vanilla Buttercream is a great choice also). *If not using a crusting buttercream, apply your gum paste pieces as close to the event time as possible so that they do not become too soft.)
Templates for BOO Letters
Black Gum Paste/Fondant for cats (We used pre-colored black fondant with a little tylose kneaded into it).
Fondant for BOO letters (I kneaded a little tylose powder into it)
Coloring Gel: Americolor Orange, Electric Green, Deep Pink, Super Black
Toothpick/floral wire for anchor both heads and tails
Piping Gel (or your food safe adhesive of choice)
Black Food Coloring Pen for eyes & hat (You could also cut out small dots of black fondant with a small round piping tip.)
Piping Tips: We used Wilton 10, 12, and 3
Miscellaneous: Piping bags, turntable (optional but helpful in frosting the cake), Bench Scraper (optional, helpful for frosting the cake), small paint brushes for applying piping gel

Notes for the Black Cat Cake:
*Make the cats however large or small seems right for your cake. For me, each cat had a 10 g. head and 20g. body (plus small amounts for the ears and paws).
Eyes were cut from a piping tip 10..."cheeks" were cut from a tip 12.
Adding Tylose to Fondant
As mentioned in the video, I used pre-colored black fondant with tylose kneaded into it. This allows the cats to firm up more quickly than they would if I had only used straight fondant.
I add the tylose powder bit by bit (rather than actually measuring the tylose). You'll notice that the fondant becomes a bit more elastic and takes on the feel of gum paste as you knead in the tylose. The cats are not edible, however they could be if you'd like to work with straight fondant.
Dry Times
If working with straight fondant, the dry time is longer. To be on the safe side, dry the heads and bodies individually for a couple of days before piecing them together (although you'll need to make the holes for the head and tail anchor while the body is still soft.)
Anchoring the Figures
Also, if you think the toppers may be eaten by your customers/guests, you can try anchoring the heads & tails to the bodies with melted candy melts or bits of fondant made sticky by kneading a couple of drops of water into it.
You'll want to avoid using toothpicks if you're afraid someone may try to eat the toppers!
Smoothing the Buttercream
For this cake, I crumb coated and frosted my cake on a turntable as usual, removing the excess with a bench scraper while rotating.
After the frosting had crusted (10-15 min), I smoothed over it with a Viva Paper Towel for an extra smooth finish. Our Hot Knife Method is a popular option too. If you prefer textured buttercream, a ridged buttercream effect is so simple and pretty!
More Modeled Animals!
We have more gum paste and fondant animal tutorials to share with you! You can find them in our Recipes & Tutorials Section, but here are a few favorites below!:
For the cat lovers, learn how to make more cat cake toppers in our Cat & Yarn birthday cake! We also have a really fun Jungle Cake , Noah's Ark Cake , and Dinosaur Birthday Cake!
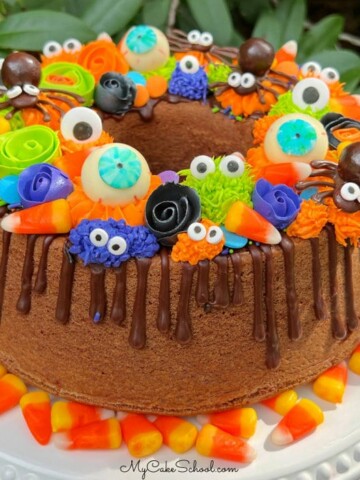
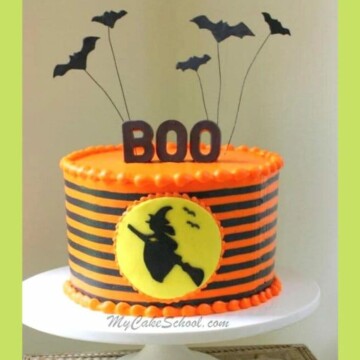
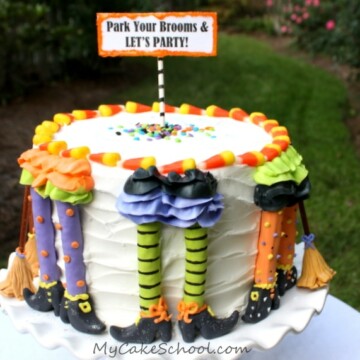
More Halloween Cakes
We also have so many more favorite Halloween Cake Designs to share with you! Everything from witchy cakes to monster cakes, pumpkin cakes and more! You can check them all out in our Halloween Cake section!
Cake Recipes
You can use any of our cake recipes for this design! Some of our favorites are our Chocolate Cake from Scratch, White Velvet Cake, Vanilla Buttermilk Cake, and Almond Cake!
Find our full collection of go-to Cake Recipes, which includes cake recipes from scratch as swell as cake mix recipes!
Have you made this? We would LOVE for you to leave a ⭐️ rating as well as a comment and photo below! We really appreciate your feedback!
Black Cat Halloween Cake
Ingredients
- This cake is a double barrel 6 inch cake- 4 cake layers. However any size cake will do! (See notes)
- Fluffy Vanilla Buttercream our Classic Vanilla Buttercream is a great choice also. *If not using a crusting buttercream, apply your gum paste pieces as close to the event time as possible so that they do not become too soft.)
- Templates for BOO Letters
- Black Gum Paste/Fondant for cats We used pre-colored black fondant with a little tylose kneaded into it.
- Fondant for BOO letters I kneaded a little tylose powder into it
- Coloring Gel: Americolor Orange Electric Green, Deep Pink, Super Black
- Toothpick/floral wire for anchor both heads and tails
- Piping Gel or your food safe adhesive of choice
- Black Food Coloring Pen for eyes & hat You could also cut out small dots of black fondant with a small round piping tip.
- Piping Tips: We used Wilton 10 12, and 3
Miscellaneous
- Piping bags, turntable, bench scraper, small paint brushes (for applying piping gel.)
Instructions
For the Decorations
- Make the cat toppers at least a 1-2 days in advance since the tails. We like to knead tylose powder into our gum paste so that they will dry more quickly. The "BOO" letters can be made at this time as well.
- It is best to create the body parts separately and allow time to dry before assembling. There is less worry of sagging.
For the Cake
- Once the cake layers have cooled, fill and frost as usual. If making a tall double barrel cake as we did, fill and stack the bottom two 6 inch cake layers. Push in 4 supports (we use bubble tea straws), spaced out, cut to the height of these stacked layers. Place a cake cardboard on top (trimmed down to size), and then stack on the next two filled 6 inch layers, so that you have one tall four layer cake.
- Fill in any gaps between layers, and frost the cake with a thin crumb coat. If needed, you can then chill the cake at this point for 10-15 minutes in the freezer to firm things up. Then, add the next layer of frosting and smooth with a bench scraper (or smooth to your desired amount of smoothness.)
Video
Notes
Loved This Recipe?!
We hope that you enjoy this Halloween Black Cat Cake! It was so much fun to make! If you give it a try, we would love for you to leave a comment and photo below
Holy cow now that is stinkin cute! Love it! Great design! :-)
So cute!!! I love it!
Thanks MsGF & Jennifer!! So glad that you like it! xo
This is adorable. Love everything about it. Question where did you get that adorable cake plate. Love love love it
Hi Donna, Thank you for your nice comment about the cake!! We bought the cake stand at Sur la Table a few years ago, I don't know if it is still available. Hope you can find it.
Hi Donna this cake is adorable and I will attempt to make it. Quick question how was the green hat made for the cat?
Hi Karen! Glad that you are making it! I talk a little about the hat at the 10:25 mark. It's basically two different pieces-- a flat circle cut out for the brim, and then a candy kiss- shaped fondant top (just roll a ball of fondant and shape into the teardrop shape, and flatten on the bottom by just pressing it on the counter). Then glue the two pieces together by either lightly dampening or brushing with piping gel or tylose glue. ;0)