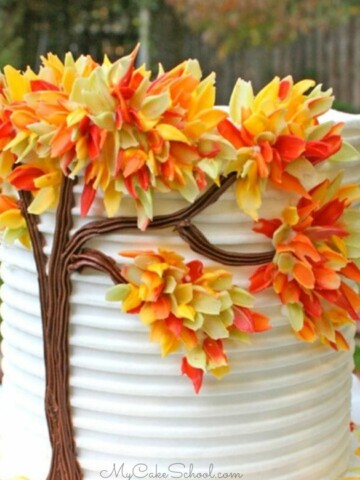
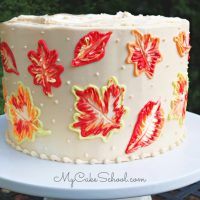
Autumn Leaves Brush Embroidery Cake
In today's fall cake tutorial, we'll show you how to create a beautiful Autumn Leaves Brush Embroidery Cake with colorful buttercream. I love this simple yet beautiful technique which can be transferred to all sorts of cake designs.
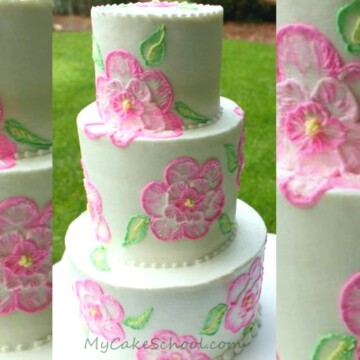
(We have a floral brush embroidery cake tutorial as well if you would like to see!)

Table of Contents
How to Make Brush Embroidery Autumn Leaves
- I frosted the 8 inch cake tier with ivory tinted buttercream and smoothed around the sides as usual with a metal bench scraper.
- Next, I chilled the cake for 20 minutes to make the base coat of frosting nice and firm.
- I then created impressions in the chilled frosting using leaf cookie cutters around the sides of the cake. (Doing this with chilled frosting will give you a cleaner impression).
- Using a buttercream-filled piping bag fitted with a small round tip 4, I outlined the leaf shapes with buttercream. Next, I piped contrasting colors next to the previously piped outline(s).
- Using a small dampened paintbrush, I pulled the piped buttercream towards the center of each leaf. I kept the outer outline mostly intact so that the marbling of the colors was more inside of the leaves but this is up to you!
- You can create a line down the center of the leaves as an optional step.
- The look of your brush embroidery will vary greatly depending on the size of brush that you use, how closely you create your strokes, and the length of the strokes you make. Have fun experimenting!

A few tips!
Remember that whenever you are working with buttercream, the freezer is your friend! If at any time your base coat of frosting becomes too soft, you can firm it in the freezer again (15-20 minutes) as needed.
This will have more control over the texture of your brush embroidery that you are layering on.
It is a good idea to practice on a sheet of wax or parchment paper before decorating your cake! You can experiment with different size brushes, the colors that you would like to use, and also get a feel for the consistency of your buttercream.
Favorite Fall Cake Recipes
Every fall, we crave all of the fall flavors-- pumpkin spice, caramel, apple, gingerbread, and more! Any of these would be perfect for today's fall cake.
Some of our favorites are Pumpkin Spice Cake, Sweet Potato Cake, Homemade Carrot Cake, and Apple Spice Cake from Cake Mix.
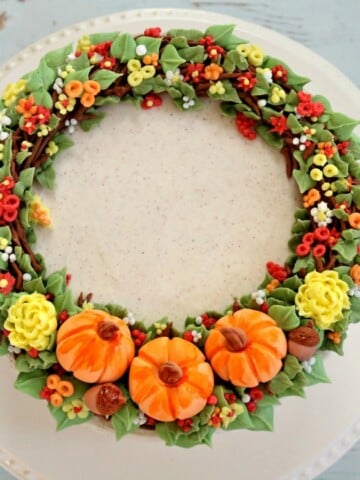
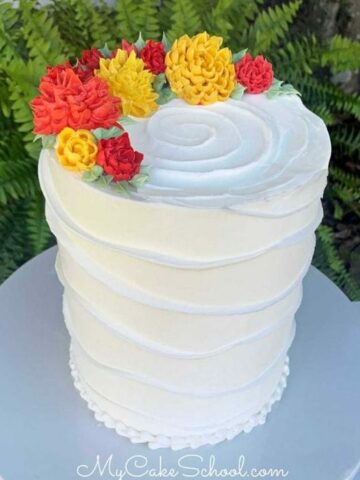
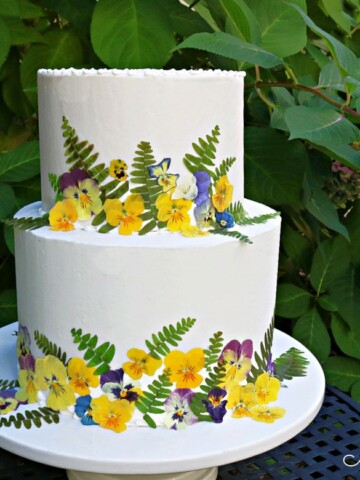
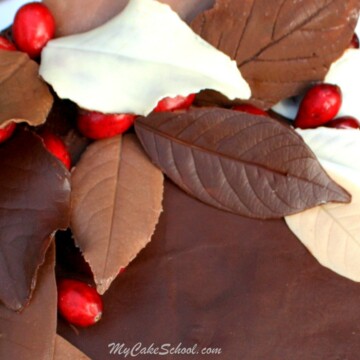
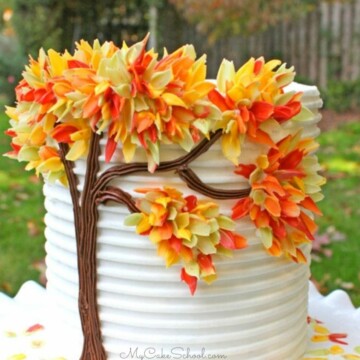
Here are a few more favorite fall cake designs!
Brush Embroidery FAQs
Autumn Leaves Brush Embroidery Cake-Free Tutorial
Equipment
Ingredients
- Cake of Choice (We used an 8 inch cake frosted with our Classic Vanilla Buttercream Frosting tinted ivory as well as red, orange and yellow for the leaves.)
- Leaf cookie cutters We made impressions after freezing our frosted cake tier for about 20 minutes
- Coloring Gels: We used Americolor Ivory Super Red, Orange, Lemon Yellow
- Piping tips: Round tip 4 or similar size round tip
- Small paintbrush es of choice
- Miscellaneous: We used disposable piping bags a small offset spatula, small paintbrush, couplers (so that you can swap out piping tips as needed). When frosting the smooth finish on my cakes, I like to use a turntable and smooth the frosting using a bench scraper.
Instructions
- After frosting the cake with the base coat of frosting, chill in the freezer for 20 minutes (or more in if refrigerating) until the frosting has firmed up.
- Create impressions in the chilled, firm frosting using leaf cookie cutters. (Doing this with chilled frosting will give you a cleaner impression).
- Using a small round piping tip, (tip 3 or 4), outline the shapes with buttercream. Next, go in and pipe your contrasting colors next to the previously piped outline(s).
- Using a small dampened paintbrush, pull the piped buttercream towards the center of each leaf. I kept the outer outline of the leaf mostly intact.
- That's it! You can experiment with the length of your brush strokes as well as thin brushes vs. flat, slightly wider brushes, etc.
- It is a good idea to practice on a sheet of wax or parchment paper!
- If at any time your base coat of frosting becomes too soft, you can firm it in the freezer again (15-20 minutes) as needed so that you will have more control over the texture of your brush embroidery that you are layering on.
Beautiful! Love the great Fall Colours! Fabulous as always :-)
I think this is lovely and I want to try it. It is spring, almost summer here in Australia so could you give me an idea of which colours would work for a spring cake? Thank you.
Could you tell me what size the cookie cutters were?
Hi Deborah, Our cake is a 3 layer 8 inch round cake that is 5 inches high. The cookie cutters are 2x2 1/4 inches and 1 1/4 x 1 1/2 . Melissa also added some smaller leaves without using a cutter. The cutters are rather small to have more leaves on the cake but it would also look good using larger cutters.
BeBe thank you for your response. I love all of Melissa's designs, and have had so much success with them. Is there a trick on how to make my picture smaller or do i need to just play with it?