David Austin Rose & Contemporary Basketweave in Buttercream- Video
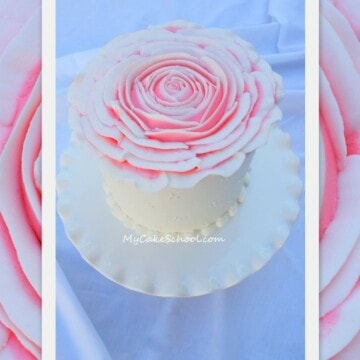
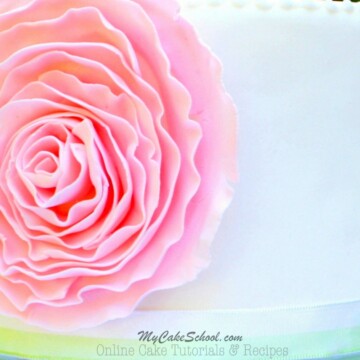
Hi everyone, I am in love with the techniques from today's video tutorial! David Austin Roses, with their full shape & dramatic ruffled interior petals are one of my favorite varieties of flower.
A year or so ago, I had no idea what a David Austin rose was ;0) - However, thanks to their increase in popularity (at least in the cake decorating world), I have seen these roses incorporated into the most gorgeous cake designs.
I have been trying to figure out how to best create these in buttercream for a good while now, as most cakes that I've seen use the real flowers or gum paste versions. I think we've come up with a really beautiful buttercream version for you!

The other technique in this video is a contemporary version of the buttercream basketweave. This has a more sleek and modern feel to it, and as an added bonus, it goes a bit more quickly! With this technique, we are relying partially on our tapered spatula to create the woven pattern, which really makes for a unique look. I hope that you enjoy it!
Part One:: Learn to create a quick and elegant Contemporary Buttercream Basketweave
Part Two: Learn to create beautiful buttercream David Austin Roses!
Materials:
In this tutorial, we are using 8 inch and 6 inch tiers (which each stand approx 4 inches tall). We have frosted them with our "Fluffy Vanilla Buttercream" recipe from the recipes section. The tiers are stacked as usual with cardboard cake circles beneath each tier, and 4 bubble tea straws (or your supports of choice) beneath the top tier.
Vanilla Buttercream (we used our "Fluffy Vanilla" recipe)
Small tapered spatula for basketweave (or small rounded spatula for a different look!)
Piping tips: Tip 21 for basketweave, Tip 3 for bead border For Roses: Tip 104, Tip 61 (see notes below),352 for leaves
Rose Nail with stiff paper circles to attach, waxed paper squares
Colors: We used a combination of Americolor Soft Pink & Wilton Rose, also Americolor Avocado Green for leaves
Sugar Pearls (optional) we used to accent our scrollwork
Misc: Cookie Sheet or tray for drying/freezing flowers, waxed paper or parchment
*Notes
Remember that while we used both the Wilton 104 tip and Ateco 61 tip to make our roses, we also demonstrated that you can make a beautiful rose with the 104 tip only (if you are having trouble finding the 61 locally).
I piped my flowers on the rose nail because I found it difficult to pipe this type of rose directly onto the cake. The drawback is that the roses need to be dried or firmed up before applying to the cake. Drying is probably my favorite method (1-2 days) if time allows. However, in the video we demonstrate that freezing them (*just until firm) for 5-10 minutes is another good option..especially when you are short on time.
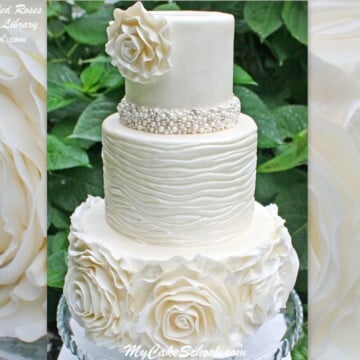
These are heavy flowers and because of their size, I consider them more of a decoration than something that would be eaten (although someone with a huge sweet tooth may prove me wrong!) ;0) - Also because of their size & weight, I would not recommend these for the front of a cake....I don't think that they would stay in place.
** Re: The Contemporary Basketweave..... Remember that using a small rounded spatula also gives a great effect. Also, I found it helpful to chill the crumb coated cake just until firm before starting the process (optional).


So elegant and pretty!
Thank you Anusha! xo
This is beautiful! Is there a reason you piped vertically? I would think that piping the lines horizontally and scraping the sections downward would make the process go faster, or would it be harder to pipe such long, straight lines?
Hi Debbie! I'm glad that you like the technique. For me, it's easier to pipe the vertical lines as they are shorter & easier keep uniform--it's the same with the traditional basketweave piping also.
You could experiment with both ways though and see which you prefer! ;0)
Got it. Makes perfect sense. Thanks so much. I’m going to use this technique soon as it is absolutely stunning!